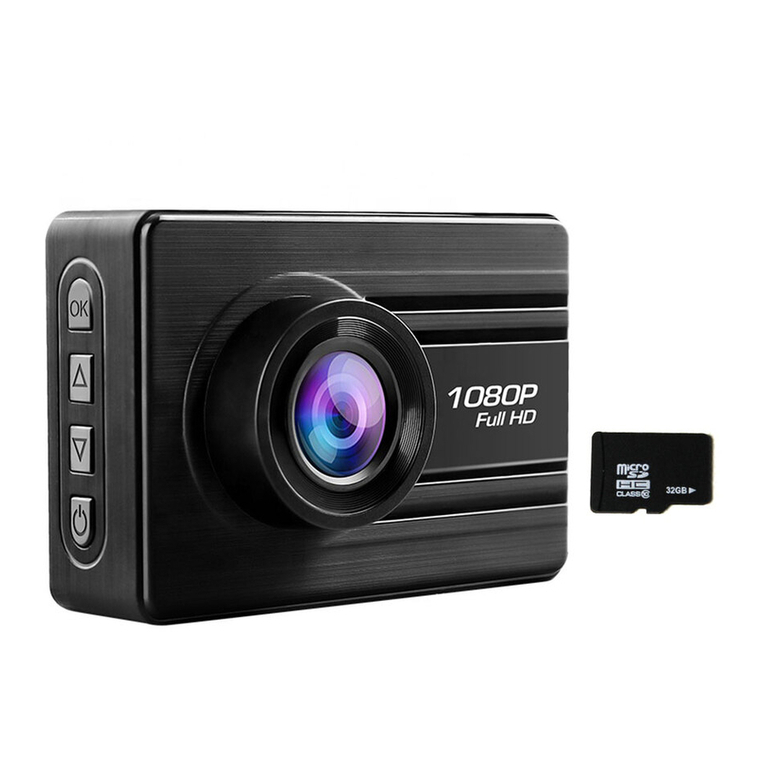
Elinz DCA12 User manual

DCA12 Dash Camera User Manual
This product combines wide dynamic digital industry leading camera, no leakage of footage, seamless circular camera, ultra wide-
angle shooting, with display real-time playback, it uses Novatek 966558 Chipset. This chipset integrates cutting-edge technologies,
including 4x FHD video decoding technology, intelligence power performance scaling system, HD multi-screen display processing It
provides a high definition video compression and a smooth imaging.
This manual will detail how to install, operate, product parameter and matters needing attention. Please read carefully and keep it safely after
usage. Please note that the specification in this user manual may subject to update without prior notice. Please always refer to the actual
product for updated specification.
Copyright infringement / privacy notice
Please note that this product is for personal use only, its method of use and image recorded shall not infringe international copyright / privacy
laws.
Accessories check
The following standard list and selection. If there are any missing or damaged items, please contact your dealer immediately.
Windscreen Suction Mount Car charger USB Cable User Manual
Standard Accessories included

Key Functions
No.
Name
Operating instructions
1
TF card slot
TF memory card slot, please install in the correct direction prompt;
2
Up key
Under Menu options, press to navigate on the function keys; Under standby or video mode, press
to digital zoom;
3
Menu key
Continuous short press this key can navigate in the settings menu
4
Down key
Under Menu options, press to navigate on the function keys; Under standby or video mode, press
to digital zoom out;
5
Confirm key /
OK
Short press OK to stop or start recording/ In Photo mode, short press OK to take photos/ Act as confirm
key in Menu mode. PS: Press OK to stop recording before able to access other mode

6
Mode key
Press M to switch between Video / Photo / Playback mode
7
Lock key
When recording, if you want to protect the current video from being covered, short press Lock key to
start emergency locking function, then on the top of the screen, will appear a lock file icon which
indicates that the current video is saved as a special file that cannot be recycled or covered by another
video
8
Power button
Long press to power on / off; short press to on
9
3.0 inch LCD
screen
3.0 inch LCD screen
10
Speaker
Speaker
11
Front camera
Front camera
12
HDMI Output
HD output port, used to connect high-definition display devices
13
Bracket slot
Bracket slot
14
USB
Connect the car charger to supply power to the dash camera
15
Microphone
For recording audio
16
Reset button
System restart reset button

Installation instruction:
1. Turn off your vehicle engine.
2. Insert the TF card into the recorder slot. Please make sure to insert the SD card in the correct direction.
[Note] Please use the high-speed TF card (Class10 above), capacity of not less than 8GB. TF card can support up to 64GB.
[Note] Please use the device to format the memory card if it is new.
3. The recorder is fixed to the front windshield of the car.
4. The car charger into the car cigarette lighter.
5. Extension cable charging the recorder's USB connector and car charger is connected.
[Note] Reduces charging extension cord wiring can be laid along the edge of the windshield.
6. Adjust the lens position to ensure that the lens levels with the ground.
7. Start the engine and check if the machine has been installed correctly.
[Note] When the machine is properly installed, the system indicator lights will work; the machine starts to enter the recording state and
the recording indicator light flashes. Remember to check if the display screen is normal. If not, please contact us.
The device will turn on/off automatically according to the car power. When the engine starts, the device will turn on and start recording
automatically, and when the engine stops the device will save the recordings and turn off automatically in 15 seconds. The device can be
manually turned on / off by long pressing button.
Attention:
Use the original factory standard charger.
Do not privately dismantle the machine to remain the validity of warranty.
If modification of power line required, please engage a professional installer.
Note: When the equipment in the recording state, do not remove or insert the memory card to avoid damage of the memory
card.

Installation of wiring diagram suggested below.
Initial logger settings
Set the date and time:
1. You need to press the OK button to pause the recording to enter into other modes.
2. And then press the button twice, by pressing or to select the date / time, then press the OK button to enter the setting
3. Or by pressing the buttons to adjust the value, press the OK button to enter another field. Until the completion date and time
settings, press @ exit.
Note: The wiring of the car charger can be hidden by installing according to the picture above.

Recorder Recording Operations
1, When the car engine is started, the device is automatically turned on and start recording. When the engine stalled,
then it will automatically stop recording. Or press the OK button to manually stop recording.
2. Other types of camera: Press the OK button, then start recording; press the OK button again, then stop recording.
3. Emergency camera
Recorder camera operator
1. Press the M key to switch to the camera mode, camera icon in the upper left corner of the screen display.
2. Press the OK button to take pictures, take pictures of the screen flashes once to indicate camera complete.
Note: Some vehicles powered car charger interface is often when the engine stalled, the power supply will continue to work.
If you encounter such a situation, take the following steps: Open the manual way off / off the device, or unplug the car charger
from a car cigarette lighter port.
Note: ⑴Video will be recorded in 1, 3, 5 minutes video cycle, please select your preference in Menu settings>Loop recording.
⑵The videos will be saved in the camera memory card, if the memory card is full, the oldest file is automatically overwritten
on memory card.
⑶Emergency or for gravity sensing camera , video cannot be automatically overwritten, you need to manually delete .
Note: If you start a gravity sensor, and detects a collision, the device will automatically lock the current record video and will
not be overwritten.

Video / photo playback operations
1. In the camera mode, you need to press the OK button to stop recording.
2. Press the M key to switch to the playback mode, the upper left corner of the screen to display the playback icon.
3. Press key up or down to select the file.
4. Press the OK button to play the selected video file; short press again to pause playback.
Menu setting operation
1. If you are recording, need to press the OK button to stop recording.
2. Short press once to bring up the setup menu, twice on the menu page.
3. By a short press or key, you can cycle up and down to select items in each set.
4. Select the settings you want to change, press the OK button to enter the changes through short.
5. After setting short key to exit standby mode.
Special features:
1. Gravity sensor function
When the gravity acceleration starts, the machine will automatically save the video when the accident occurred and it files will
not be deleted.
Gravity sensor can be adjusted in the menu high - medium - low, medium factory default.
2. File locking feature
The imaging process, the Lock key is pressed, the machine will not delete the current video and saved as a file.

3. Parking monitoring function
When you open the parking monitoring in the off state, if the car has a slight vibration, the recorder will automatically start recording for
20 sec and shut down.
[Note] This feature requires hardware support.
4. Motion detection function;
If the motion detection after a short press OK to start recording 10 seconds, the camera will automatically switches to standby mode
motion detection, on the upper left corner of the screen there is a flashing yellow dots, when an object is detected moving, the recorder
start recording, the yellow flashing light spot becomes red spot ; motion detection start time of 10-30 seconds after the end of the motion
detection it will automatically enters standby mode, the upper left corner of the screen to switch to the yellow dot flashes; when once
again detects moving objects , the camera function starts again.
5. USB mode
Connect the USB cable to the computer, tachograph will automatically eject the USB menu will appear the following options:
1) Memory
In this mode, the video file can be accessed, or photo files.
2) Camera
Select this mode will bring up the USB video device, it can be real-time network camera or video chat as a PC camera.
6. The Battery Indicator
Battery level indicator, refer to the diagram:
Fully charged Lower power Low Battery Empty Battery
After switching on the car power, the red charging indicator lights up in charge of the process, the whole charging time is approximately 180
minutes, the red charging indicator light will automatically turn off after charging is completed.

7. Reset
If during use, if the device is showing abnormalities or crash situation, you can press the RESET button to reset the machine operating
system shell through the whole touch with tiny needle.
Display interface icons
1、 :Camera icon indicates camera mode;
:Camera icon indicates camera mode
:Playback icon, indicating the playback mode
2、:Flashing red indicates that the device is recording; yellow dot blinking motion detection device in standby
Note: This equipment is to follow cars with state of long working hours, for the built-in battery, shutdown to save the file. Finite
length solid battery life in daily use, please link to the vehicle power supply.

3、 :Gravity sensor icon
After opening the gravity sensing this icon will be displayed on the screen; indicates the recording process, when the external
shock exceeds the set value, the current camera video will be locked, and deleted files cannot be saved as a non- covering
4、 :Lock icon is displayed, the loop recording mode, if open lock function, the video files don't be cover. When the G-sensor gravity
sensor starts, the key icon will appear on the screen indicates the current video is locked video.
5、00:15:30 :White font - memory cards remaining recording time / red font - current segment recording time;
After inserting a memory card, the camera displays standby time remaining space of the memory card, display white font; imaging process,
the camera displays the current time- segmented in red font.
6、 :Cycle time imaging segment icon representing the cycle time of 1,3,5 minute imaging;
Menu options are: - - - Off
7、 :Wide dynamic icon on the left side of the screen is the display icons, indicating that the features is activated. Recommendations
often open.
WDR shows an image will automatically adjust the brightness of the scene based on the value of the site is particularly bright and
specially in dark area, so that the dark areas can see clearly. Wide dynamic range is the ratio of the image can distinguish between the
brightest luminance signals values can distinguish between the darkest light signal values.
8、 :EV exposure compensation icon indicates the currently selected exposure parameters;
9、 :Motion detection icon; on the left side of the screen displays the icon, indicating that the feature is activated.
10、 :Recording function Open icon
:Recording function Close icon
Open the Settings menu and synchronized recording function on or off this icon appears, indicating the current recording function on or

off; camera during the short press the Menu key, you can quickly open and close the record
11、AAAAAA:License plate display icon
After opening the license plate in the menu, the display will show the license plate icon, you can edit the owner of the license plate
number;
12、1080FHD:Video resolution icons; displays the currently selected video resolution;
13、 :Parking guard icon; display icons for parking guard function turned on;
14、 :Memory card icon is displayed
After inserting the memory card icon is displayed
15、 :Battery level icon; shows the current charge;
16、00:00:01 :Time display shows the current standard time; before using it for initial setup;
17、2014/01/01 :Date display, showing the current standard dates before using it for initial setup;
Settings Menu
Options
Explanation
Available options
Resolution
Set the video resolution
1296P、1080FHD 、720P、WVGA 、VGA
Loop recording
When setting up each video file length
1 minute, 3 minutes, 5 minutes, turn off, if you choose to
close the case, the card will not automatically cycle full
coverage.
WDR
Wide Dynamic automatic adjustment of light
On, Off , the proposed full-time open
Exposure
Compensation
Underexposed, dim the screen, you need to fill light
+0.0、-1/3、-2/3、-10、-4/3、-5/3、-2.0、+2.0、
+5/3、+4/3、+10+2/3、+1/3
Motion Detection
In standby mode, when the screen has moved to the
On, Off

detection of automatic video
Recording Audio
Recording function is turned on or off
On, Off
Date Label
Camera video watermark date
On, Off
Parking guard
After parking stall , body if you receive external
vibration generated by the tachograph will open
camera
On, Off
Gravity sensor
Collision generated video never be covered
High , medium, low , off
Date / Time
Date and Time
You can set the year, month, day, hour, minute, second
Automatic shutdown
No automatic shutdown operating state
30 seconds, one minute, off
Beep
During operation, the key is with sound
On, Off
Language Settings
Language operating menu
Traditional, Simplified Chinese, Russian, Japanese,
French, Italian, German, Spanish, English, Korean
Light frequency
Lights flicker frequency
50HZ、60HZ,
Night Lights
Fill light in the dark state by IR
On, Off
License Plate
Vehicles can enter grades, displayed on the video
file
A00000
Format
You can delete memory card data above
SD
The default setting
Restore factory settings
Cancel, OK
Screen Saver
Recorder automatically turns off the display work
On, Off

Product Specifications:
Product Name
DCA12
Division date
Support
Product Features
Extremely wide angle of 170 degrees, 1296P
Full HD
Vector Media
Built-in memory (total amount:
1024MB)
G-sensor
Built-in (under the car accident case of
emergency save, not to be deleted)
Camera mode
1200M
LCD screen size
3.0 -inch high-definition LCD screen
Photo format
JPEG
Shot
A + grade high-resolution 170 -degree ultra-
wide-angle lens
Memory Card
TF (maximum support 64GB)
Language
Russian, English, Chinese, Chinese
(Traditional), Korean, Japanese, etc.
Microphone
Support
File Format
MOV
Built-in stereo
Support
Video Resolution
1728* 1296P ,1920*1080P ,1280*720P
IR
Support
Video format
H.264, Audio: AAC
Video Format
PAL/NTSC
Color effects
Standard
Current Frequency
50HZ/60HZ
Continuous Loop
recording
Seamless loop recording, no leakage seconds
USB
1:USB-Disk
2:PC-Camera
Truck switch Machine
Support auto ignition on, turn off shutdown
Power
5V 1A
Motion detection
Support
Battery
Built-in 180mAh

Instruction to use:
• For Best Result in using Dash Camera, we definitely recommend to keep it plug-in into the car cigarette charger. This will allow you to use
or record for a longer period of time. Dash Camera uses a lot of battery due to G Sensor system of the camera.
• To watch recorded video clips, please remove SD card from Dash Camera and connect it to your computer or laptop. This will allow you to
watch all videos recorded.
• Please peel off the protective film on the screen before use.
Dash cam is not recording properly, please check:
1. Format the SD card and try again.
2. Change to another SD card and try again.
3. Reset to factory settings under menu.
Under normal operating conditions, please refer to the solutions.
Unable to boot:
Check the recorder and car charger if properly connected, if you manually turned on, check the battery level if it is too low needs recharging.
Press RESET button to restore to factory settings.
When the camera automatically stops recording, or do not cycle the camera:
Due to the huge high-definition video data, it is possible because the memory card reader could not keep pace. Please use the high-speed
TF card, such as Class10 high-speed card.
If the loop recording is not working, it is also possible that gravity sensor is open, the files on memory card are all locked. Close the gravity
sensor setting, and the format the memory card.
Each time the camera settings cycle is not the same:
Check if motion detection function is on, because the camera motion detection state length of time, depending on the screen if there is no
movement.
Common Troubleshooting:

Video recorded is unclear:
Please clean the lens before shooting the surface, keep the lens clean.
Bad video effect:
Camera and lightning conditions will affect the video quality, adjust the position of the dash cam for best result.
Images have streaks interference:
This is due to the wrong setting “light frequency" produced under the fluorescent lights, the domestic flat rate "50HZ" when the machine briefly
press the "RESET" the reset button to restore restart.
For any inquires, issue or comments concerning our products, feel free to contact us at 1300 881 773,
Table of contents
Other Elinz Dashcam manuals
