Elinz DC2KWIFI User manual

www.elinz.com.au / sales@elinz.com.au / 1300 881 773
This product uses a high-performance Hisilicon HI3556V200 chipset that
supports high definition videos, dynamic images seamlessly. Support real full
HD video 2K resolution for the front camera that can shoot 2560 pixels
horizontally and 1440 pixels vertically at 30 frames per seconds and 1080p
rear camera. Capture more details with 170° Ultra wide-angle front camera
capturing the license plates, road signs more clearly and monitors all
directions reducing the blind spots.
View dashboard camera recordings and manage car dash camera settings on
your iOS and Android devices with built-in WIFI. By using the RoadCam App,
you can download your recorded full HD quality videos directly to your
smartphone and share these on social media easily with friends and family. This
new Elinz dash camera is equipped with a built-in supercapacitor, which is much
more durable and safer than normal battery
Please read this manual carefully before using. We hope that our products can
meet your needs and provide a long-term service to you.
DC2KWIFI
USER MANUAL

www.elinz.com.au / sales@elinz.com.au / 1300 881 773
Disclaimer:
1. Please read the set-up and usage instructions carefully before operation.
2. You should not set/install this dash camera at a place that would obstruct or
reduce a driver’s view. Make sure your usage complies with pertinent vehicle
codes of your state, province, territory or country.
3. You should post the required notices of recordation to occupants inside the
vehicle, if voices or other information/signal pertaining to in-vehicle activities
will be recorded.
4. You should not change the dash cam’s setting or mode of operation when the
vehicle is in motion.
5. You should not leave the dash cam in a visible spot when no one is inside the
vehicle, to avoid attracting break-ins to steal the unit or other property.
6. You should avoid extended exposure of the dash cam to direct sunlight or
extreme temperatures (either high or low temperature) which tend to degrade
or damage the unit and its normal functionality.
7. You should examine, check and verify the dash cam at least every 6 months,
including the memory card, to ensure the video reception and recording are
working properly. For each use, you should verify that the dash cam unit, the
visible lights and the audible sounds are working normally. If there are signs of
non-operation or malfunction, you should immediately seek to replace the
product and check to see if the product is covered under any applicable
warranty.
8. The dash cam unit may have additional functionality, such as transmission
and recordation of audible or other identification information. If you have
privacy concerns about these functions, make sure you follow the instruction to
disable these functions.
9. You should use the dash cam unit in the way it is intended. You should not
use the dash cam unit in a way that would be illegal or that tends to physically
damage the unit, or tend to cause danger to the safe operation of the vehicle
or the occupants.
10.THIS DEVICE SHOULD NOT BE ADJUSTED BY THE DRIVER WHILE DRIVING.

www.elinz.com.au / sales@elinz.com.au / 1300 881 773
Product management:
• Do not expose the product to direct sunlight or intense light. The lens or
internal circuitry may fail otherwise
• Do not apply excessive force when pressing the buttons. Doing so may
damage the buttons
• Do not use chemical cleaners or solvents to clean the product. Doing so may
damage plastic components of the product. Clean the product using a clean,
soft, and dry fabric.
• Do not disassemble the product or subject the product to impact. Doing so
may damage the product. Unauthorized disassembly of the product voids the
product warranty
• Handle with care. If you drop, mishandle, or expose the product to external
shocks, it may cause damage and/or result in the malfunction of the product.
• Do not attempt to insert foreign objects into the device
• Avoid excessive humidity and do not allow any water to enter the product.
Electronic components inside the product may fail if exposed to humidity or
water.
• Use the product at a temperature between 14°F and 140°F (-10°C to 60°C)
and store the product at a temperature between -4°F and 158°F (-20°C to
70°C). The product may not function as designed and some permanent physical
damages may result if it is operated or stored out of the specified temperature
ranges. Such damages are not covered by the warranty
• This device is intended to be used inside the vehicle only. Install this device
in a location where it has unobstructed view of the road but does not interfere
with the driver's view. Please check your local and regional law before mounting
to windshield.

www.elinz.com.au / sales@elinz.com.au / 1300 881 773
Product Overview
1. Rear Camera interface
6. Front Lens
11. Mode Key
2. Car Charger interface
7. Speaker
12. Up Key
3. Bracket Hole
8. Microphone
13. OK/Power Key
4. Reset
9. Card Slot
14. Down Key
5. LED Light
10. 4.0 Inch Screen
15. Menu Key
www.elinz.com.au / sales@elinz.com.au / 1300 881 773
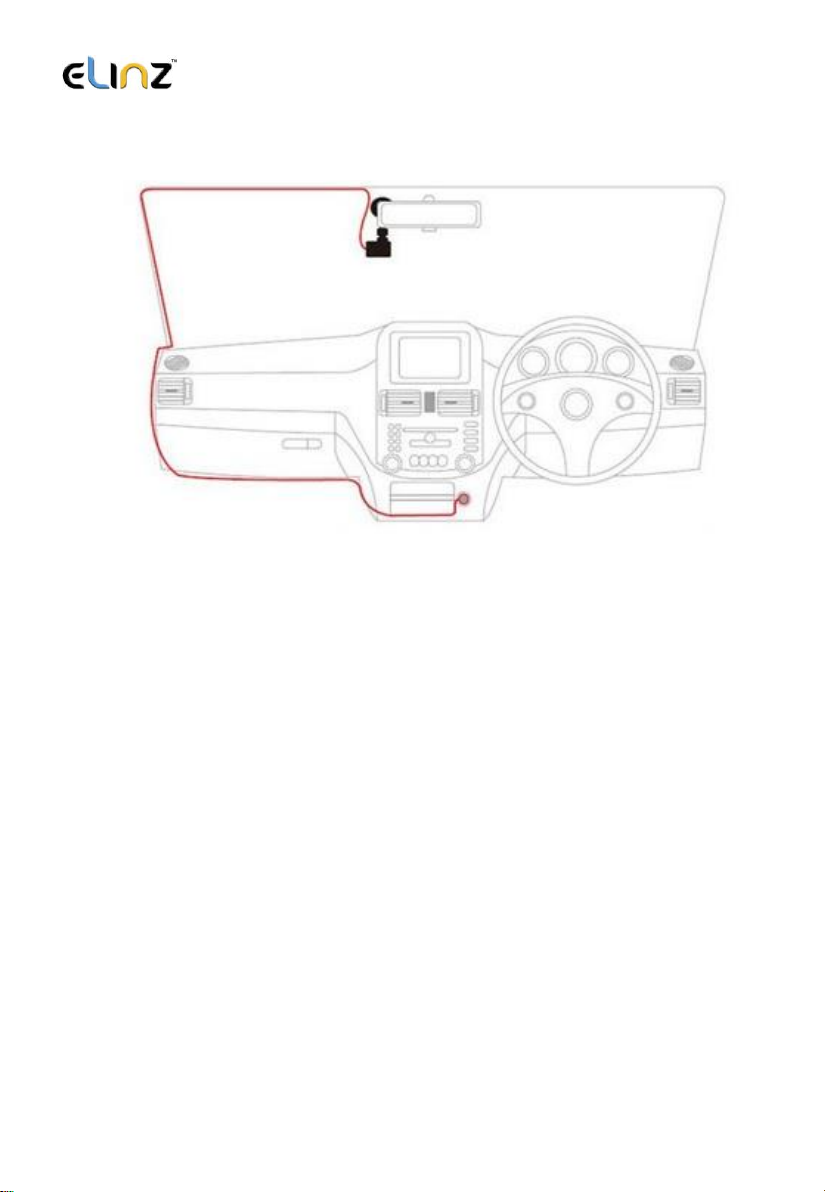
Installation Diagram
I
nstallation of wiring diagram suggested below.
Installation Guide
1. Turn off your vehicle engine.
2. Insert the TF card into the recorder slot.
[Note] Please use the high-speed TF card (Class10 above), capacity of not
less than 8G. TF card can support up to 32GB.
3. The recorder is fixed to the front windshield of the car.
4. The car charger into the car cigarette lighter.
5. Extension cable charging the recorder's USB connector and car charger
is connected.
[Note] Reduces charging extension cord wiring can be laid along the edge
of the windshield.
6. The rear camera is installed in the rear of the vehicle. Pay attention to
the direction of installation. Wiring can be laid along the vehicle roof. After

www.elinz.com.au / sales@elinz.com.au / 1300 881 773
the installation is complete you will plug into the recorder rear camera
interface.
7. Adjust the lens position to ensure that the lens levels with the ground.
8. Start the engine and check if the machine has been installed correctly.
[Note] When the machine is properly installed, the system indicator lights
will work; the machine starts to enter the recording state and the
recording indicator light flashes. Remember to check if the display screen
is normal. If not, please contact us.
WiFi Connection Instructions
The Roadcam App lets you control your camera remotely using a smartphone
or tablet. Features include full camera control, live preview, photo playback and
sharing of select content and more.
Steps to install APP on smart phone
A. Android system mobile phone
1. Open the "Google Play Store" search "Roadcam"
Or scan the QR Code to download and install.
B. IOS system Apple phone
1. Open the "Apple App Store" search "Roadcam"
Or scan the QR Code to download and install.

www.elinz.com.au / sales@elinz.com.au / 1300 881 773
1. Enter the system setting to choose the WIFI, turn it on, the WIFI name and
WIFI password will show on the camera screen.
2. In your smartphone’s WiFi settings, connect to the camera WIFI name, Enter
the Password.
3. Open the Roadcam on your smartphone.
4. The app will automatically start recording once the WiFi is connected
successfully.
5. Press the red ‘Video Recorder button’ on the APP to stop recording, the APP
will automatically switch to Playback mode, you can playback the video from
‘Loop mode’ or ‘Emergency’.
1) Short press the video to edit the video,
2) Long press the video to download it to your cell phone or delete it.
6. Press the ‘Record’ on the APP to stop recording, then short press the
‘Camera’ to switch to photo mode.
Short press the ‘Picture’ to playback the photos, long press the photo to
download it to your cell phone or delete it.
7. On the APP settings, you also can change the camera setting.
8. Short press the ‘OK’ key on the camera to disconnect the WiFi and then
press the ‘UP’ or ‘Down’ key to ‘Refresh’ or turn off the WiFi.
www.elinz.com.au / sales@elinz.com.au / 1300 881 773
Icons and Functions
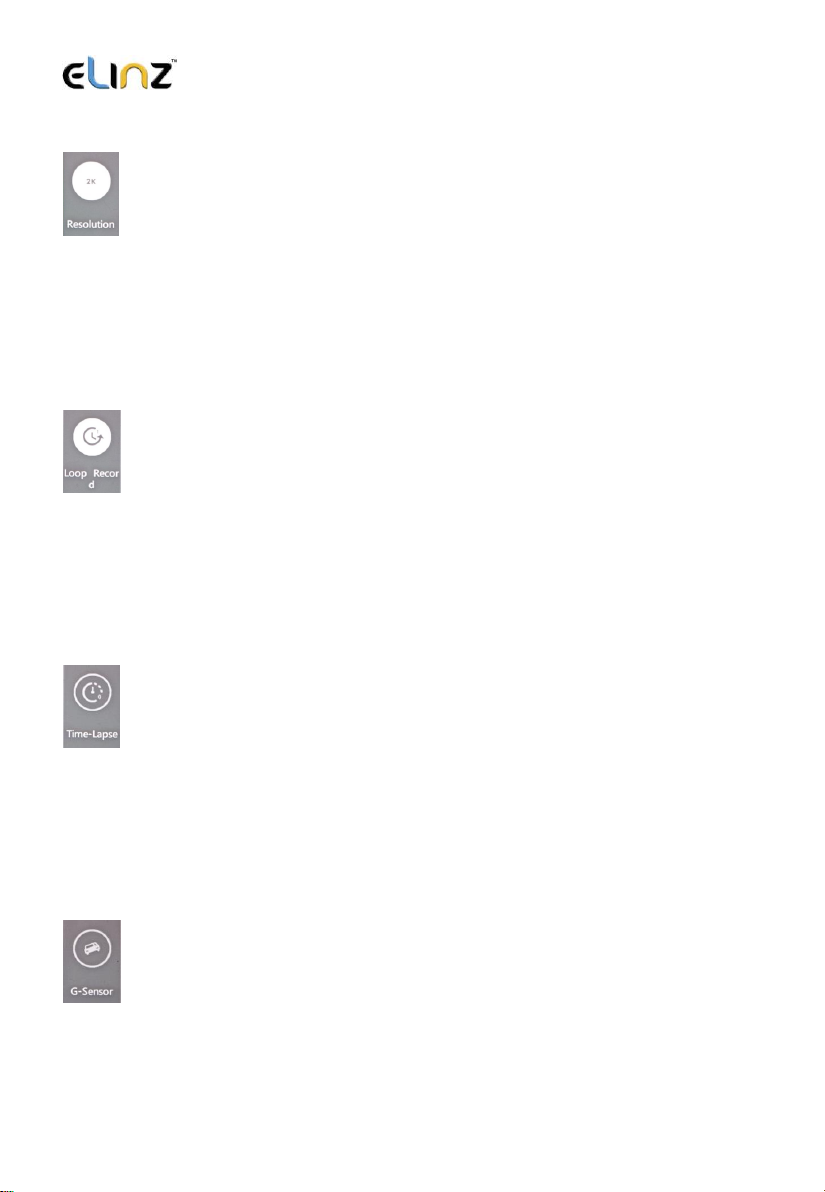
Video Resolution
Select the video resolution on your camera. Resolution is the height of the
video in pixels. Higher resolution video settings require more memory card
space than lower resolution settings. 2K+1080P, 1080P+2K
Default Setting: 2K+1080P
Loop Record
Select duration of recording length for the individual video files, the camera
will fill the SD Card and then loop back to the beginning, overwriting the
saved files (unless protected)
Default Setting: 1 Minutes
Time Lapse
off/1S/2S/3S; It is a shooting technology that can compress and shorten the
longer of video recording. To a certain extent, it can monitor and protect
the car all day and save the recorder memory storage.
Note: only can be used while use ACC cable.
G-sensor
Turn Off or adjust the sensitivity (Low/Middle/High) of the G-Sensor to
defect forces which will automatically protect the current recording in event
of a collision. Default Setting: Off

www.elinz.com.au / sales@elinz.com.au / 1300 881 773
Parking Guard
Off/Low/Middle/High. When you open the parking guard in the off state, if
the car has a slight vibration, the recorder will automatically start recording
Default Setting: Off
Video Encode
H.264/H.265; choose the video encode, relating with the recorded files size,
H.265 save TF card storage RAM.
Default setting: H.264
Frequency
You can set 50Hz/60Hz. This function works if has flashing or ripple on the
video screen light, it will eliminate it.
Default setting: 60Hz
License
The camera has an option to program your car's license plate number into
it, and have that display as an 'overlay' on the recorded video.
www.elinz.com.au / sales@elinz.com.au / 1300 881 773
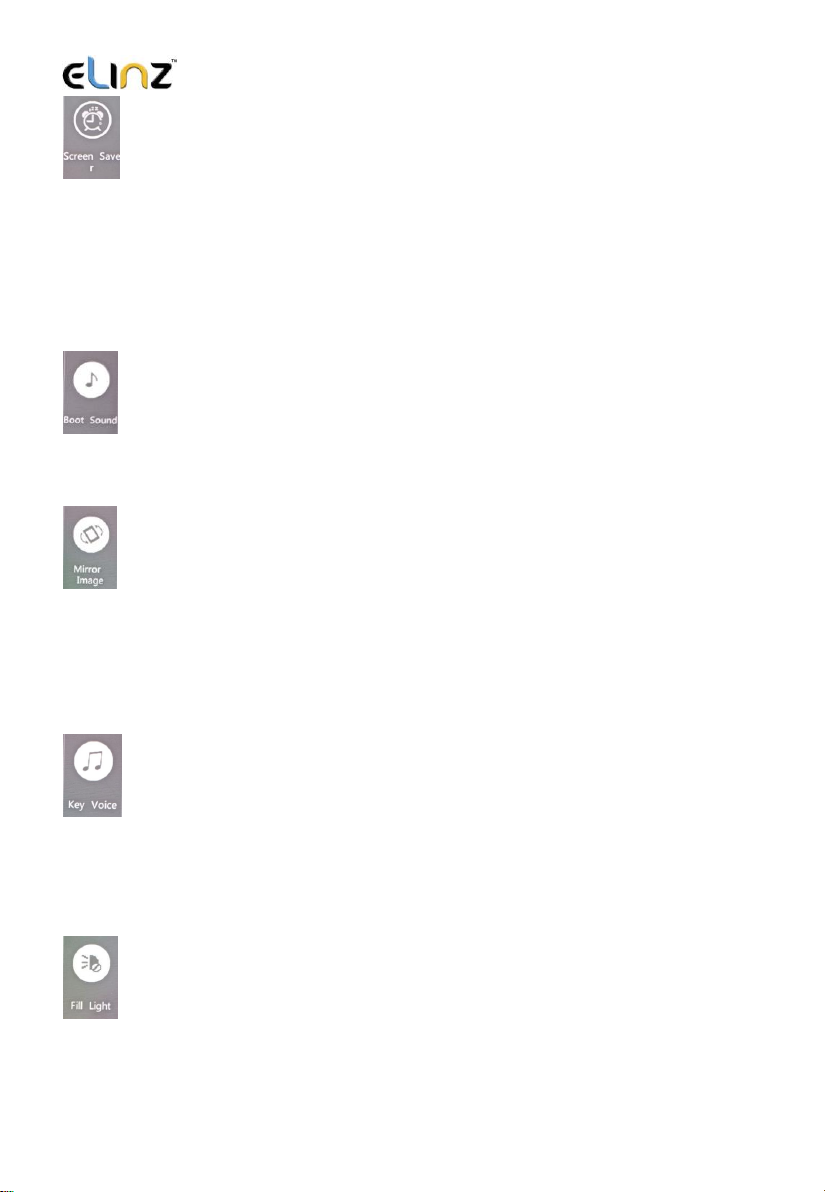
Screen Saver
Turn on the screen saver function, shut down the screen after a period of
inactivity, with options of Off/1 Minute/3 Minutes. Press any button to re-
activate the display.
Default Setting: Off
Boot sound
Turn on/off the Boot sound, Screen opening voice on/off
Mirror Image
Turn on to mirror the image of rear camera so that the image on the screen
matches that of your rear-view mirror when reversing.
Default Setting: Off
Key Voice
Turn on/off the Key Voice, key button operation voice on/off
Default Setting: On
Fill Light
Turn ON/OFF/AUTO fill light, LED light will on/off/auto
Default Setting: Off

www.elinz.com.au / sales@elinz.com.au / 1300 881 773
WDR (Wide Dynamic Range)
Adopt internationally advanced double (long & short) exposure techniques,
reformat video images to be optimal. Images is commonly overexposed in the
strong sunshine, and hardly to be taken in the dim light conditions, WDR
capability gets the issue resolved. Turn this function on/off under menu
settings.
Exposure
Now, the dash cam comes standard set to a +0.0 exposure, which is
essentially baseline. This level of exposure will account for every day lighting
scenarios, bright days, darker days, etc. The exposure and aperture both
determine how much light is being allowed into the lens of the camera. So, on
a regular, mild day, the standard factory setting will do just fine.
The only time you want to adjust your exposure is when there is too little
light, or too much light in any given location. If it is dark outside, and your
footage is coming out too dark, you can simply ramp up the exposure, and
your camera will maximize the amount of light it absorbs. This trick will ensure
that your night vision comes out clearer. Exposure can be adjusted under
menu settings.
1. Power key
Function 1:Switch function
1. In the off state, press the power /OK button and hold for 3 seconds
for the machine to start working automatically.
2. In the on state, press the power / OK button and hold for 3 seconds,
the unit automatically shuts down and keep video files and user
settings switch.
2. MODE key
Function 1:Mode key
Press OK to pause the video recording, short press the Mode key, the camera
photograph/playback/video can be switched with each other. In camera
mode, press OK to take photo. In playback mode, short press Menu to delete

www.elinz.com.au / sales@elinz.com.au / 1300 881 773
or protect the file, press UP and Down to select the video/ photo for
playback, short press OK to playback video. In video mode, press OK to start
recording.
Function 2:Emergency locking function
When recording, if you want to protect the current video from being
covered, short press mode key to start emergency locking function, then
on the upper left corner of the screen, will appear a lock file icon which
indicates that the current video is saved as a special file that cannot be
recycled or covered by another video.
3. Up Key
Function 1:Page Up
Press to use the scroll function in the menu settings and playback modes.
Function 2:Camera switching function
When the reversing camera is connected to the dash cam, dual cameras
display will automatically show on the screen. Under recording mode,
short press 【Up】 button to switch between 4 types of display mode:
Front camera only, Rear camera only, Picture in picture, split screen display
Function 3:Zoom In
Under camera mode, short press the Up button for the lens to zoom in.
Function 4:Rewind
In recovery mode, press the up key to rewind
4. OK key
Function 1:Enable / Disable recording function
In the video mode, press the Ok key to start recording and short press the
Ok key again to stop recording.
Function 2:Take photo

www.elinz.com.au / sales@elinz.com.au / 1300 881 773
In camera mode, press the Ok key once to take a picture
Function 3:File playback
In the file explorer mode, press the Ok key to play video
Function 4:Confirm
Press OK to pause the video recording, press the Menu key to enter the
menu mode, press the up/down keys to navigate, press the Ok key to
determine
5. Down key
Function 1:Page down function
In the menu settings and playback mode for the next page function
Function 2:Close Recording
In the video mode, press [Down] key to turn off the audio recording
function, the screen above the microphone icon becomes ban, indicating
it had closed the audio recording function. Press again to turn on the audio
recording. The audio recording icon will be displayed.
Function 3:Fast forward
In Playback mode, press [Down] key to fast forward
6. MENU key
Function 1:Video menu
Press OK to pause the video recording, press the [Menu key] to enter the
main menu function setting table. Press the [up/down] key to select the
option to be set. Press [OK] to confirm. After setting, press the Menu key
until you exit the menu setup function. (Menu setting methods are the
same as in the video mode, camera mode and playback mode)
Function 2:Open Led light, Long Press [Menu key] to turn on Led light,
long-press [Menu key] to turn off Led light again
www.elinz.com.au / sales@elinz.com.au / 1300 881 773
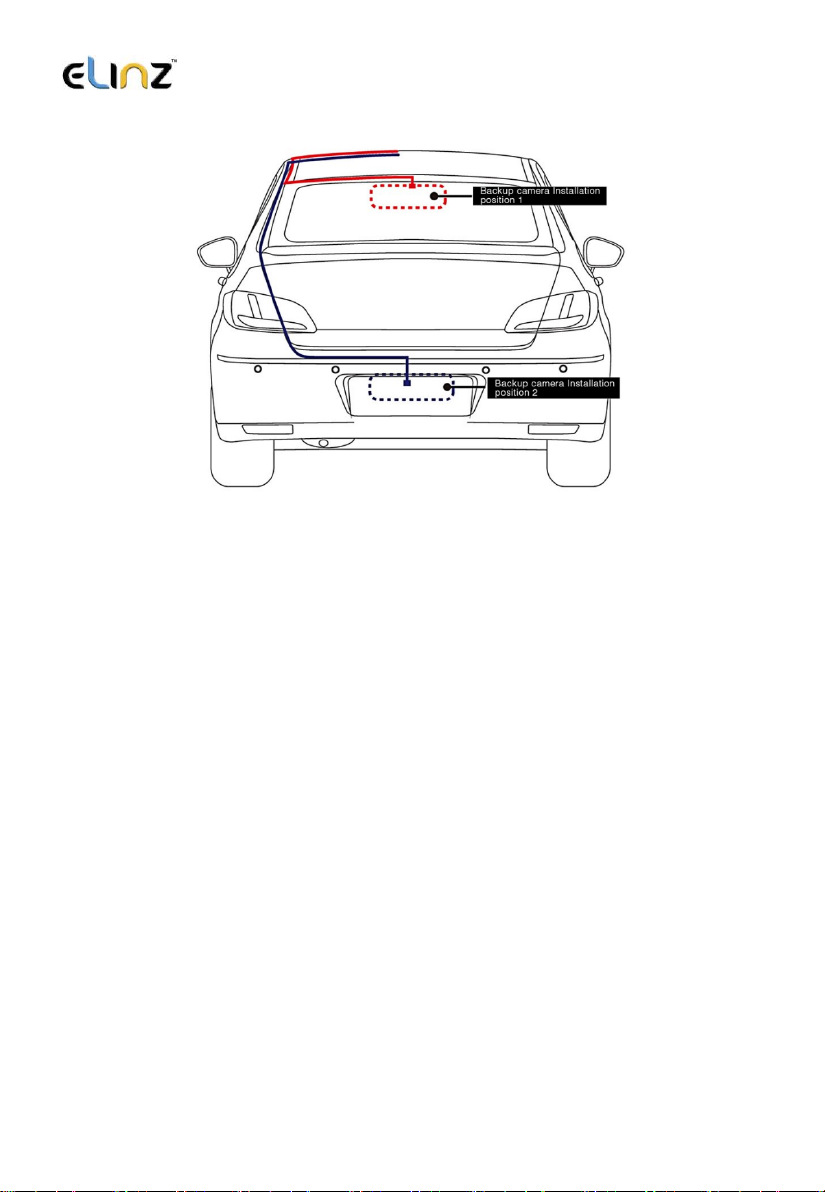
Reversing camera installation
1. Connect the reversing camera to the car number plate and adjust the
angle of the lens.
2. Connect the red wire to the positive of the reversing light (the reversing
image will show on the screen automatically when the car is on
reverse).
3. Connect the black wire to the negative of the reversing light.
4. Connect the video cable to the “Reversing camera input” of the dash
cam (this will feed the video image from the camera to the dash cam,
and also provide power to the camera when the car is on forward gear).
5. In the reverse image state, use the [Up] / [Down] keys to adjust the
position of the reference line. After that, the adjustment will be
saved.

www.elinz.com.au / sales@elinz.com.au / 1300 881 773
Features
1. Use automatic recording function
Start the car engine. The recorder automatically starts to open the
recording function, the charge indicator lights and video light is blinking.
After switching off the engine, the recorder automatically saves the
contents of the recorded video and shut down. Recorded video segment
is stored in the TF card. When the memory is full, the recorder will
overwrite the earlier recorded image.
Note:
a. Recording time cycle can be selected in the menu settings ranges from
1 minute / 2 minutes / 3 minutes / 5 minutes / 10 minutes / OFF.
b. Front, rear camera and video camera are recorded separately to the
"MOVIE" and "PHOTO" folder.
2. Use manual recording functions
Press the [OK] key, the recorder automatically starts. Video recording
indicator lights up and blinks. To shut down the power button press [OK]
for 3 seconds, the recorder will automatically save the record again and
shut down.
3. Take photo function
Press OK to pause the video recording, short press the [Mode] button to
enter the camera mode. The upper left corner of the display is converted
to a camera. Press [OK] to take pictures. To switch back to recording mode,
press the [Mode] key twice.
4. Motion detection function
Press OK to pause the video recording, press [MENU] key to enter menu
selection mode to turn on motion detection. When the lens senses a
moving object, the state of the machine will change into camera and when
the lens does not detect any moving objects for 30 seconds, the system
will stop recording. To exit the motion detection mode, long press on the
turn button for 3 seconds to exit the motion detection mode.

www.elinz.com.au / sales@elinz.com.au / 1300 881 773
5. G-sensor function
The unit features an impact sensor (G-sensor). If a serious vehicle collision,
the recorder will lock the first 10 seconds, and 20 seconds after the
accident occurred and save it as a special image, the monitor will display
a lock icon in the lower left. Locked images will not be overwritten.
【prompt】
a. Locked video file name will show “EVE”.
b. G sensor can be turned on under Menu [G-sensor], you can select the
desired G sensor sensitivity High, Medium, Low or Off, according to the
actual need. The higher the sensitivity, the more videos will be locked and
will not be erased during loop recording, therefore, we suggest you to
select Medium sensitivity.
Alternatively, Press Mode while the video is recording to lock the files.
6. A key lock function
The machine has a key lock feature that will retain an image without being
locked loop overwritten. In the video mode, short press down, the
recorder will lock the first 10 seconds, and 20 seconds after the accident
occurred and save it as a special image.
7. Date and time settings
Press OK to pause the video recording, short press [Menu] key to enter the
system setup menu, press the down arrow key [Up] / [Down] keys to move
the cursor to set the date options. Press [MODE] to enter the menu
settings.
[Note]
In order to efficiently record the date and time of the traffic accidents
forensics before using the machine, please set the correct date and time.
8. A mute button function
In working condition, short press the [Down] key, the screen changes to
prohibit the bottom left of the microphone icon, indicating that audio

www.elinz.com.au / sales@elinz.com.au / 1300 881 773
recording has been turned off. The recorder only records the image
without a sound. Short press the [Down] button below the microphone
and the screen changes to the record icon to indicate resume recording.
[Note] settings are saved automatically, without having to re-boot after
the mute function.
9. U-disk mode
The recorder is connected via a data line computer USB port. The screen
displays the disk and camera, the two selectable modes. Press up key [Up]
/ [Down] keys to select the Disk option. Then press [OK] to enter the U disk
mode.
10. Shooting File Playback
In Boot state, short press [MODE] key to switch to playback mode. Press
the [Up] / [Down] keys to find the file you want to play back and press [OK]
to play. To exit playback mode, short press [MODE] key.
11. Parking Monitor
When you open the parking monitoring in the off state, if the car has a
slight vibration, the recorder will automatically start recording for 30 sec
and shut down.
[Note] This feature requires hardware support.
12. WDR (Wide Dynamic Range)
Adopt internationally advanced double (long & short) exposure techniques,
reformat video images to be optimal. Images is commonly overexposed in the
strong sunshine, and hardly to be taken in the dim light conditions, WDR
capability gets the issue resolved. Turn this function on/off under menu
settings.
13. Exposure
Now, the dash cam comes standard set to a +0.0 exposure, which is
essentially baseline. This level of exposure will account for every day lighting

www.elinz.com.au / sales@elinz.com.au / 1300 881 773
scenarios, bright days, darker days, etc. The exposure and aperture both
determine how much light is being allowed into the lens of the camera. So, on
a regular, mild day, the standard factory setting will do just fine.
The only time you want to adjust your exposure is when there is too little
light, or too much light in any given location. If it is dark outside, and your
footage is coming out too dark, you can simply ramp up the exposure, and
your camera will maximize the amount of light it absorbs. This trick will ensure
that your night vision comes out clearer. Exposure can be adjusted under
menu settings.
14. Screen saver
The screen will turn off by itself after 1min, 3mins or 5mins if this is turned on,
but the dash cam is still recording at the background. If you do not want the
screen to turn off by itself, please select OFF.
15. Rear camera mirroring
Enable rear camera video recording, turn on/off under menu settings.

www.elinz.com.au / sales@elinz.com.au / 1300 881 773
Product Specifications
Display
4.0-inch IPS Screen 960*540
Front camera
Chipset: Hisilicon HI3556V200 Sensor: Sony IMX335
Rear camera
AHD 1080P rear camera
Visual angle
170 degrees
Minimum illumination
1Lux
Video mode
Loop video / Motion detection
Video format
MP4
Video coding mode
H.265
Video resolution
2560 x 1440p, 1920 x 1080p, 1440 x 1080p
Camera Photo Resolution
5000 x 3750, 4032 x 3024, 3648 x 2736, 3264 x 2448,
2592 x 1944
Video Output
N/A
Seamless video
Yes
Boot automatic recording
Supported
Gravity Sensing
When car crash, it will emergency save videos, not to
be deleted
Manual lock
Video, short press mode key, to lock the current file,
not deleted
Languages
English, French, Spanish, Portuguese, German,
Italian, Chinese, Russian, Japanese, Korean, Thai
Video Cyclic Record time
Off / 1 min / 2mins / 3mins /5mins /10mins
Sound recording
Built in microphone, recording can be selected to
close / open
Version number
Display product model, software version and update
time
Night Vision
2 white light lamps
Memory card
TF Card
Memory card capacity
8GB--64GB
USB interface
USB2.0 Mini5Pin
Operating system
Windows 2000, XP Windows, Windows 7, etc.
Battery
Super Capacitor
Power waste
Double recorded video MAH 500-700
Power Supply
Vehicle mounted power 5V/2A
Storage temperature
-10 C ~ 70 C
Operating temperature
-10 C ~ 60 C

www.elinz.com.au / sales@elinz.com.au / 1300 881 773
Instructions to use:
•For best result in using Dash Camera, we definitely recommend to keep
it plug-in into the car cigarette charger. This will allow you to use or
record for a longer period of time. Dash Camera uses a lot of battery
due to G Sensor system of the camera.
•To watch recorded video clips, please remove SD card from Dash
Camera and connect it to your computer or laptop. This will allow you to
watch all videos recorded.
•Please peel off the protective film on the screen before use.
• If you would like to use parking monitor function, please purchase
compatible hard wire kit from our store.
Dash cam is not recording properly, please check:
1. Format the SD card and try again.
2. Change to another SD card and try again.
3. Reset to factory settings under menu.
Under normal operating conditions, please refer to the solutions:
Unable to boot - Check the recorder and car charger if properly connected, if
you manually turned on, check the battery level if it is too low needs recharging.
Press RESET button to restore to the factory settings.
When the camera automatically stops recording, or do not cycle the camera -
Due to the huge high-definition video data, it is possible because the memory
card reader could not keep pace. Please use the high-speed TF card, such as
Class10 high-speed card.
If the loop recording is not working, it is also possible that gravity sensor is open,
the files on memory card are all locked. Close the gravity sensor setting, and the
format the memory card.
Table of contents
Other Elinz Dashcam manuals


