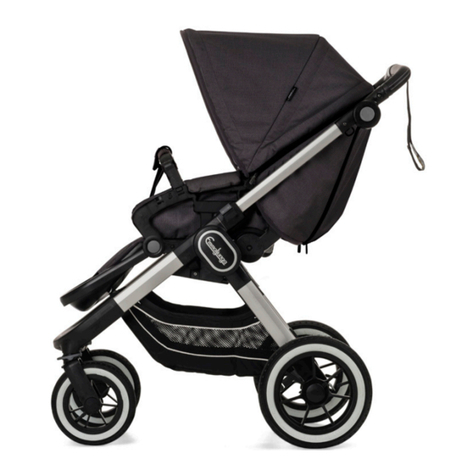
Emmaljunge Twin Cerox Sportvagn User manual

English page 14 - 25
Deutsch Seite 26 - 37
Suomi sivu 38 - 49
Cerox/Twin Cerox Sportvagn
Instruktionsmanual för:
This manual applies to the following product:
Gebrauchsanweisung für:
Seuraavien tuotteiden käyttöohjeet:
Brugsanvisning for:
Svenska sida 2 - 13
Dansk side 50 - 61
Sportstroller, Sportwagen, Sport-rattaat & Klapvogn
VIKTIG INFORMATION - SPA RA FÖR FRAMTIDA BRUK
Ditt barn kan skadas om du inte följer dessa anvisningar.
Läs igenom denna manual noggrant innan du använder produkten.
Denna produkt motsvarar standard EN 1888:2003.
IMPORTANT KEEP FOR FUTURE REFERENCE
Your child may be hurt if you do not follow these instructions.
For the proper use of this vehicle, be sure to read this User´s Manual carefully.
This product complies with EN 1888:2003.
WICHTIG! ANWEISUNGEN FÜR SPÄTERE UNKLARHEITEN AUFBEWAHREN
VOR BENUTZUNG ALLE ANWEISUNGEN LESEN!
Dieses Produkt enspricht EN 1888:2003.
TÄRKEITÄ TIETOJA - SÄILYTÄ TULEVAA KÄYTTÖÄ VARTEN
Jos näitä käyttöohjeita ei noudateta, voi lapsesi loukkaantua.
Lue nämä käyttöohjeet huolellisesti ennen kuin käytät lastenvaunuja.
Tämä tuote vastaa EN 1888:2003 standardin vaatimuksia.
VIGTIG INFORMATION – GEM FOR FREMTIDIG BRUG
Dit barn kan komme til skade hvis du ikke følger disse anvisninger.
Læs denne brugsanvisning grundigt igennem før du anvender vognen.
Dette produkt modsvarer EN 1888:2003.

Manual Cerox v. 1.2
14
Subject
Contents of the box
......................................................
15
Emmaljunga's original accessories
................................
15
Important safety information
........................................
16-17
Assembly of seat unit
....................................................
18-20
How to use the seat unit
................................................
21
Assembly and usage of the chassis
................................
22-23
Care and maintenance
...................................................
24-25
Table of contents
Please Note:
Throughout this manual the term “vehicle” will be used as a short form of “wheeled child conveyances”.

15
Manual Cerox v. 1.2
English
Contents of the box
Emmaljunga's original accessories
Please use Emmaljunga’s original accessories for maximum safety and comfort. Information about acces-
sories that match our prams can be found in our brochure or at any of our authorised retailers. Visiting
our web site is also an option
www.emmaljunga.co.uk
.
Sport stroller
1 pc.
ve point safety harness
1 set
of shoulder pads for harness
1 pc.
folded chassis with tray
4 pcs.
wheels
1 pc.
instruction manual
1 pc.
hood
1 pc.
seatunit fabrics
1 pc.
footrest fabrics
1 pc.
frontbar cover

16
Manual Cerox v. 1.2
Important safety information
Please read all
WARNING
and IMPORTANT information before you use the pram for the
rst time. Please save the instruction manual for future reference.
WARNING
:
Information regarding the child’s safety.
IMPORTANT:
Information (incl. Instructions) on how to take care of the pram.
•
Your child’s safety is your responsibility.
•
Never leave your child unattended.
•
The safety precautions and instructions that are described in this instruction manual cannot cover
all eventualities and unpredictable situations that occur. It must be understood that common
sense, general caution and care are factors that cannot be built into a pram. These factors are the
responsibility of the person that uses the pram.
•
It is important that everyone using the pram and its accessories understands the instructions. Inform
and demonstrate the pram to each person (s) that will be using the pram, even if it is going to be
used for a short period of time.
•
If anything is unclear please contact your authorised Emmaljunga retailer they will be at your service.
•
Always remember to secure your child/children with the ve point safety harness(es).
•
Please note that in use of a duo lift the lift should be attached in the harnesses' D-rings.
• • • WARNING • • •
Neglecting the following instructions could cause
severe damage(s) to your child and/or pram.
Read these instructions carefully before use and keep them for future reference. Your child’s safety
may be affected if you do not follow these instructions.
WARNING! Never leave your child/children unattended!
WARNING! Ensure that all the locking devices are engaged before use!
WARNING! Use a harness as soon as your child can sit unaided.
WARNING! Any load attached to the handle can affect the stability of the vehicle.
WARNING! The seat unit is not suitable for children under 6 months.
WARNING! This product is not suitable for running, skating or use with roller blades.
WARNING! Always use the crotch strap in combination with the waist belt on the harness.
WARNING! Check that the vehicle body or seat unit attachment devices are correctly engaged before use.
•
This vehicle is intended for children from 6 months and up to maximum weight of 15 kg.
•
Always remember to secure your child/children with the ve point safety harness(es).
17
Manual Cerox v. 1.2
English
Important safety information
•
The Cerox is made for transporting a child that weighs a maximum of 15 kg. Twin Cerox is made to
transport two children that weigh a maximum of 15 kg each.
•
The seat unit is for a child in the age group of 6 months to 3 years.
•
The pram is for transportation use only. Never use the pram as a bed for your child.
•
Keep the pram out of reach of your child/children and never let them play with the pram.
•
Never leave the child unattended without engaging the braking system correctly.
•
The brake should always be engaged when you lift your child in and out of the pram.
•
Never park the pram on a hill.
•
Always use Emmaljunga’s original accessories for maximum safety.
•
Overloading - incorrectly folded chassis or use of non approved accessories could injure the child/
children or damage the pram.
•
Never leave the pram in dangerous places, even if it is empty.
•
Stairs and escalators should be avoided since they can be an added risk for your child.
•
Do not hang anything on the handle since it can affect the prams' stability.
•
Do not place any objects on the hood.
•
The tray should not be loaded with more than 5kg. Always place heavier objects in the middle of the
tray. The pram could otherwise become unstable.
•
Make sure that no objects in the tray can be caught in the wheels' spokes.
•
Air-tyres - Make sure that the cap has been tightened.
•
Always use spare parts supplied by one of Emmaljunga's authorised retailers to avoid riks of injury to
your child.
•
Follow the care and maintenance directions.
continued from previous page:
WARNING: A CHILD'S SAFETY IS YOUR RESPONSIBILITY.
Children should be har nessed in at all times and should nev er be left unattended. The child should
be clear of moving parts while making adjustments. This vehicle requires regular maintenance by
the user. Overloading, incorrect folding and the use of non-ap proved accessories may damage or
break this vehicle. Read the manufacturer's in struc tions.
BS 7409:1996 label

9
3
3
4
6
5
5
7
8
8
1
2
Manual Cerox v. 1.2
18
2
3
4
5
1
Assembly of the seat unit
Attach the seat-unit and the 5-point harness
•
Press the back rest release mechanism (1) and move the backrest
to its up most upright position (2).
•
Release the shoulder and waist straps from the harness lock
before you assemble the seat unit. Place the seat unit fabrics back
pocket (3) over the seat unit's backrest.
Twin Cerox: two harnesses for two children
•
Place the shoulder straps through the holes in the back of the
seat unit fabrics (4).
•
Place the waist straps through the holes in the seat fabrics (5).
•
Place the crotch straps through the holes in the base and the seat
unit (6).
Twin Cerox: two harnesses
•
Please make certain that the waist harnesses have been fastened
correctly in the two D-rings (9) one on each side.
Twin Cerox: two harnesses and four D-rings
•
A harness with shoulder and crotch straps contains two shoulder
pads and one larger crotch pad. Place the shoulder pads over the
two shoulder straps (7). Attach the waist harness with the lock
(8). Put the crotch pad over the crotch strap.
Twin Cerox: two harnesses

13
11
12
10
19
Manual Cerox v. 1.2
7
6
8
9
10
English
Assembly of the seat unit
•
Make sure that the seat fabric's back pocket is attached correctly
onto the backrest frame. After making sure, attach the velcro on
the inside of the back pocket (11).
WARNING
•
Always make sure that the backrest is in a safe position before it
is used. This step is very IMPORTANT.
Twin Cerox: two backrests
•
Fasten both fabric armrests over the sides of the seat unit.
•
Place the footrest pocket (11) over the footrest and attach it with
the press studs through the gaps in the seat unit plate. The foot-
rest pad is reversible for winter and summer months.
Twin Cerox: two independent footrests
Assembly of the front bar cover
•
Place the bumper bar protection (12) over the bumper bar and
zip.
•
Fasten the crotch strap (13) around the bumper bar.
Twin Cerox: one bumper bar cover and two crotch straps
Assembly of the hood
•
Press the hood attachments into place, one on each side of the
hood, using the plastic attachments on the seat unit (one on each
side). Make sure they click into place.

15
16
15
14
Manual Cerox v. 1.2
20
11
Assembly of the seat unit
•
Attach the hood pockets (14) both plastic hooks (15) that are-
found on the hood on the the metal bar (16).

1
4
2
2
3
5
21
Manual Cerox v. 1.2
1
2
3
4
English
How to use the seat unit
Adjust the hood
•
Adjust the hood gently by gently pulling the front backwards and
forwards until it reaches the desired position.
IMPORTANT
•
Never lift the pram by holding onto the hood.
Adjust the footrest
•
The footrest can be placed in two positions. The footrest is adjus-
ted to it’s lower position by pulling it straight out.
•
Make sure that the footrest is locked into desired position before
use.
Twin Cerox: two footrests
Adjusting the 5-point harness
•
Place the crotch strap (1) between the child's legs and up
towards the waist. Place the crotch strap (2) into the harness
lock (2) until they click into place. Please check that the waist
straps are locked into position.
•
Adjust all the straps with the aid of the buckle (3).
•
You release the shoulder straps and the waist straps by pressing
the buttons into place (4) on the harness lock.
At each end of the waist straps there is an attachment point for a
harness that ful lls BS 6684.
WARNING
•
Always use the harness when the child is seated in the pram.
Please make sure that all the buckles are attached and that the
harness is attached in the D-rings.
Adjust the backrest
•
Press the backrest mechanism (5) and adjust the backrest into
desired position.
WARNING
•
Please check that the backrest is locked into one of its four po-
sitions by pressing the backrest backwards until it is locked into
one of its positions.

1
2
1
2
4
3
Manual Cerox v. 1.2
22
3
4
Unfolding the chassis
•
Start by braking the pram.
•
Pull the handle while you are holding one side of the chassis.
WARNING
•
The chassis locks need to click into the locked position.
•
The safety catch (secondary locking mechanism) is activated to
prevent unintentional folding if the chassis lock is not locked
into position.
•
Please make sure, before you use the pram that the chassis lock is
in the locked position.
Assembly and usage of the chassis
Attaching the wheels
•
Remove the plastic protection from the axles. Save them for
future use.
•
Attach the wheels with the wheel cogs (1). Press in the hub cap’s
release button (2), push the wheel onto the axles as far as it can
go. Release the button and pull the wheel towards you, until
you hear a de nite click. Repeat the same procedure for all four
wheels. Please make sure that the wheels are attached properly
and cannot be pulled off the axle.
•
Release the brake by pushing the brake bar up towards you using
minimum force with your foot.
IMPORTANT
•
The wheels are greased and can leave marks on textiles. Please
use wheel protection indoors to protect your oors.
•
Risk of suffocation. Don’t let your child play with or in some
other way handle the plastic protections.
•
Because of the in uence of ozone and UV radiation the tyres may
develop small cracks due to the rubber drying out. This does not
affect the vehicle’s driving ability and safety and is not a reason
for complaint.
Braking the vehicle/releasing the brake
•
Brake by pushing the brake bar down into the wheel cogs.
•
Release the brake by lifting it upwards.
WARNING
•
Never leave the child unattended without engaging the braking
system correctly.
•
Ensure that the brake unit sits rmly in the wheel cogs.
•
The brake should always be engaged when you lift your child in
and out of the vehicle.
•
Never park the vehicle on a hill.
•
The vehicle is equipped with cog brakes. Check that there is a
wheel cog on each wheel (four of them). Engage the brake only
when the vehicle has come to a standstill.
How to adjust the height of the handle
•
Adjust the height on the handle by pressing the grey buttons on
the inside of the handle (3).
Keep the buttons pressed in while you adjust to the required
position (4).

5
6
7
6
7
8
9
8
9
23
Manual Cerox v. 1.2
5
English
To reverse the handle
•
If you would like to change the seat direction easily you can
reverse the handle.
•
Your pram is equipped with a Newton safety catch. The safety
catch is an extra safety detail that prevents involuntary reversal of
the handle.
•
Move the handle to its
upright
position. You release the handle
with the black plastic cylinders on each side of the handle (5).
Pull and twist clockwise with both hands to release the handle.
Once it has released, push the handle carefully over to the other
side of the vehicle (6). After that the handle can be locked into
position on the other side.
•
Check that it clicks into position on the other side and that the
Newton hook has engaged properly.
•
Note! Be careful when moving the handle over so that you do not
damage the surface of the chassis.
•
Adjust the handle in the position required.
IMPORTANT
•
Make sure that the area is clear. Remember the child’s active
safety is your responsibility!
Assembly and usage of the chassis
•
Now you can fasten the footmuff in the rear press stud on the
armrest fabric (9).
Using the footmuff (accessory)
•
If you use a footmuff (accessory) with the Cerox/Twin Cerox you
must open the rear press stud (8) on the armrest fabric, i.e. the
press stud that is closest to the hood.
•
The tray
is already tted on delivery but it can be removed for
washing. Remove the wooden plate before washing.
IMPORTANT
•
It is important that the tray straps are properly af xed over the
axle. They should not be attached to the cross pipe.
Folding the pram
•
Start by making sure that the handle is on the same side as the
safety catches (7) and that the pram is braked.
•
Release the safety catches (7) by pulling these gently towards
you.
•
Press down the safety catch and fold the handle forward.
•
If you need to make more space you can remove the wheels by
pressing in the hub cap’s release mechanism and pulling the
wheel off the axle.
•
Wipe off any dirt or grease from the axles before you replace the
wheels.

Manual Cerox v. 1.2
24
IMPORTANT
By following these instructions, you can help to keep your new Emmaljunga vehicle in good condition.
General care and maintenance instructions
•
Never expose your vehicle to excessive sunlight for longer periods of time.
•
Always use a raincover when snowing or raining.
•
Never store your vehicle in cold and/or damp places.
•
Be careful when transporting the vehicle in order not to tear the fabric.
•
Should the chassis become wet, dry it off promptly. Make sure vehicle is completely dry before stor ing.
•
If the vehicle is used near the ocean or salted roads, spray the chassis with a hose and dry.
•
Powdercoated chassis, in spite of highest possible quality, it chips more easily compared to a chrome
chassis. Always be careful, especially with transportation and storage.
Routine Inspection
•
Regularly clean the chassis and metal parts of the vehicle, dry it off and lubricate all joints of the
chas sis. Spokes, and fenders on all wheels, should frequently be wiped off with a dry cloth. When the
pram is used during the winter time, cleaning of the pram should be done at least once a week. Lack of
maintenance could cause corrosion on the spokes and fenders. Should corrosion on the surface occur,
which is a possibility, you are required to remove this with a corrosion cleaning agent.
•
It is recommended to lubricate the wheel axles and suspension system every three months (clean axles
with a cloth prior to lubrication). Axles may be lubricated with petroleum jelly or au to mo bile oil.
Check that:
•
all chassis locking devices are functioning properly.
•
all rivets, nuts and bolts are rmly tightened and not broken.
•
all plastic parts are not cracked or broken.
•
the wheel bushings are in a good condition.
•
all velcros are securely fastened.
•
the press-stud is securely fastened on the footrest ap.
•
all elastic straps are in a good elastic condition.
•
the secondary locking mechanism is intact and can move freely.
•
the brake works.
•
the air pressure is correct (see marking on tyre).
PLEASE OBSERVE
•
When in need of servicing with original parts and other technical issues that require a professional
decision, always get in touch with the retailer where your Emmaljunga product was purchased. All
Emmaljunga products come with a six month manufacturing guarantee. This guarantee does not apply
when issues arise through normal wear and tear.
•
This information is relevant for Great Britain only.
WARNING
•
Tyres can when in contact with PVC- oor or other plastic materials cause discoloration. Always use
wheel protection if the pram/stroller is stored on delicate surfaces.
Care and maintenance

25
Manual Cerox v. 1.2
English
Care and maintenance
Washing instructions
•
Hood:
Take off and extend the hood. Shower the hood from the inside (interior fabric) with luke warm water.
Use mild liquid soap as detergent. Cleanse it thoroughly. Drip dry the hood, fully ex tend ed.
Twin Sportstroller:
Handle the non-woven interior material with care.
•
Seat fabric and 5-point harness:
Remove the seat fabric from the chassis. Remove the seat-board, store it in a dry place. Handwash
seat fabric in luke-warm water. Use mild liquid soap as detergent. Cleanse thor ough ly. Drip dry the
seat-fabric.
When the seat fabric is removed the 5-point harness is accessible. Only wipe the nylon
straps and plastic parts clean with a damp cloth. No handwash. Make sure the harness is dry before
reassembly.
•
Frontbar padding and apron:
Remove the frontbar padding/apron. Handwash in luke-warm water. Use mild liquid soap as de ter gent
on the surface of the exterior fabric. Handle non-woven interior material with care. Drip-dry.
General Information
•
Ironing:
If any fabric part needs to be ironed, always use a 100 % cotton cloth in between the iron
and the fabric to protect the fabric surface. Iron the exterior fabrics (100 %) polyester and the interior
fabrics (65 % cotton/35 % polyester) on a gentle heat (110°C on the iron).
•
Make sure all parts are completely dry before reassembly. Check the trimmings and the seam on the
seat-fabric underneath the backrest pocket.
•
You may apply a material protector (like Scotchgard™) on the exterior fabric after washing. Always
apply before re as sem bly.
WARNING
•
Do not place child/children in stroller for at least 24 hours after applying a material protector.
Reassembly
WARNING
•
Make sure all parts are assembled correctly according to the instructions in this manual.
•
Make sure the seat-board and the footrest-board are correctly positioned before reassembly and use.

050217-04
Instruktionsmanual för Cerox Sportvagn
© 2005 Emmaljunga Barnvagnsfabrik AB
Alla rättigheter förbehålles
Med reservation för ändringar
Emmaljunga Barnvagnsfabrik AB
Emmaljunga 2056, 280 22 Vittsjö
SVERIGE
Instruction manual for Cerox Sportstroller
© 2005 Emmaljunga Barnvagnsfabrik AB
All rights reserved
Emmaljunga Barnvagnsfabrik AB
Emmaljunga 2056, SE-280 22 Vittsjö
SWEDEN
Gebrauchsanweisung für
Cerox Sportwagen
© 2005 Emmaljunga Barnvagnsfabrik AB
Alle Rechte vorbehalten
Emmaljunga Barnvagnsfabrik AB
Emmaljunga 2056, SE-280 22 Vittsjö
SCHWEDEN
Brugsanvisning for Cerox Klapvogn
© 2005 Emmaljunga Barnvagnsfabrik AB
Alle rettigheder forbeholdt
Med forbehold for ændringer
Emmaljunga Danmark
Banegårdsgade 16, DK-8300 Odder
DANMARK
Internet: www.emmaljunga.se
This manual suits for next models
1
Table of contents
Other Emmaljunge Stroller manuals

Emmaljunge
Emmaljunge NXT60F User manual

Emmaljunge
Emmaljunge Viking User manual

Emmaljunge
Emmaljunge City Carrycot User manual

Emmaljunge
Emmaljunge NXT 90 User manual

Emmaljunge
Emmaljunge nxt90f User manual

Emmaljunge
Emmaljunge Scooter User manual

Emmaljunge
Emmaljunge Duo Combi Mondial User manual

Emmaljunge
Emmaljunge Viking User manual

Emmaljunge
Emmaljunge City Cross User manual

Emmaljunge
Emmaljunge NXT60 User manual