Engler POLI-X User manual
POLI – X
DENTAL POLISHER
INSTRUCTION MANUAL
REV B 10/14/2014

Table of Co te ts
COMPANY PROFILE..................................................................................................................3
INTRODUCTION.........................................................................................................................4
POLISHER INSTALLATION........................................................................................................5
SAFETY INFORMATION............................................................................................................6
POLISHER OPERATION............................................................................................................7
POLISHER MAINTENANCE: PROPHY ANGLE........................................................................7
MICROMOTOR MAINTENANCE.............................................................................................10
MICROMOTOR / POLISHER TROUBLESHOOTING..............................................................11
PROPHY ANGLE CLEANING AND MAINTENANCE INSTRUCTIONS..................................12
OPTIONAL POLI X ACCESSORIES.....................................................................................13
TECHNICAL INFORMATION....................................................................................................15

COMPANY PROFILE
Engler Engineering Corporation has been in business since 1964 and occupies an 8000 square foot
facility in Hialeah, Florida (USA). We manufacture ultrasonic dental scalers, polishers and
combination units including electro surgery equipment and ultrasonic instruments for the veterinary
market as well as a microprocessor controlled anesthesia delivery system and a respiratory monitor
for veterinary use only.
Engler Engineering Corp. acquired the exclusive manufacturing and marketing rights of Dy ax
products, including stretchers, animal restraint devices, comfort cots, heating pads, and other
products. We also acquired the Alpha-Sonic, Ora-Sonic, and Pro-Sonic line of piezo scalers.
Engler Engineering Corporation’s brand name veterinary products proudly include:
Excelsior, high speed dental air unit with vacuum / electro-surge / ultrasonic scaler / low speed / high
speed / air / water syringe,
So - Mate II, ultrasonic scaler / polisher,
Vet II ultrasonic scaler / polisher,
So us II, ultrasonic dental scaler,
Poli - X, micromotor variable speed polisher,
Drill – Aire, high speed dental air unit, high speed, air / water syringe,
Drill – Aire Plus, high speed dental air unit, high speed, low speed, air / water syringe,
Scale - Aire Mi i, high speed dental air unit with ultrasonic scaler / high speed / low speed / air /
water syringe,
Scale - Aire, high speed dental air unit with ultrasonic scaler / high speed / low speed / air / water
syringe and compressor,
Tri - Mate, ultrasonic scaler / micromotor polisher / electro-surge,
A.D.S. 2000, microprocessor controlled anesthesia delivery system / ventilator,
Se ti el V.R.M., respiratory monitor.
We manufacture all of the inserts and tips used in the Engler products as well as many others on the
market today in the 18K and 25K frequency range.
Our repair department has the technical knowledge to repair and maintain most dental devices
manufactured by other companies including Shorline.
E gler E gi eeri g Corporatio ’s foreig sales are ha dled through a large a d growi g etwork
of veteri ary distributors. At the prese t time we are represe ted throughout Europe, South a d
Ce tral America, Ca ada, Asia, New Zeala d, Australia, the Middle East, a d most other cou tries.
If you have a y questio s or comme ts, please co tact:
E gler E gi eeri g Corporatio
1099 East 47th Street, Hialeah, Florida 33013
800-445-8581 – 305-688-8581 – FAX 305-685-7671
Web site: www.englerusa.com Help site: www.engler411.com
3

INTRODUCTION
Thank you for selecting the Poli X, Micromotor Polisher Unit. We believe you have selected the best
product available for performing basic and advanced dentistry for your veterinary patients.
The compact and portable design of the Poli X has everything needed to allow the user to perform
prophy procedures anytime, anywhere. The low speed handpiece is used for smoothing and polishing
the tooth surface after scaling.
The optional drilling handpiece allows the operator to quickly and efficiently perform the same
advanced dental techniques, drilling shaping and cutting, to name a few, being taught in the largest
teaching hospitals and clinics around the world. This combination produces a powerful and potent
tool against periodontal disease.
Cutting discs and burs and other accesories are available for the straight handpiece.
PLEASE READ VERY CAREFULLY
Engler Engineering Corporation makes every effort to verify that all parts for the device along with any
optional accessories ordered were shipped from our facility in Hialeah, Florida and are included in this
shipment. It is imperative that you inspect the contents and if you find any pieces missing or
damaged, Engler Engineering must be notified immediately. All claims submitted after fifteen days of
receipt will not be valid.
All devices ma ufactured a d / or sold by E gler E gi eeri g Corporatio are built a d
tested to approved sta dards. A y modificatio to the device, cables or hoses, i itiated
by others ullifies all warra ty stateme ts. E gler E gi eeri g Corporatio will ot be
held liable for a y i jury, death or damage of a y type, due to o -authorized service a d /
or improper i stallatio a d / or improper use of the device.
This ma ual is ot i te ded to teach de tistry. The i formatio co tai ed herei is i te ded
o ly as a guide. I dividuals ot properly trai ed i de tistry should ot use this equipme t. It
is i te ded for professio al use o ly.
Before installing or operating your new POLI-X, please read and follow all of the instructions and
suggestions. They have been written to assist you in maintaining your unit properly.
4

POLISHER INSTALLATION
1. Plug the Micromotor into the front of the control box. This is done by inserting the male connector
at the end of the Micromotor cable, into the female receptacle on the front panel of the unit and
rotating the locking collar clockwise.
2. Slide the Straight Handpiece down over the top of the Micromotor, until it snaps into place.
3. Line up the notch of the Prophy Angle with the Aligning Pin on the Straight Handpiece, and then
push the shaft of the Prophy Angle into the chuck of the Straight Handpiece.
4. Rotate the Lock Ring counter-clockwise, until it clicks and locks the prophy angle in place.
5. Place a disposable rubber polishing cup on the end of the Prophy Angle by snapping it on. The
Prophy Angle is now secured and ready for operation.
6. Rotate the selector knob on the front of unit to forward operation. NOTE: When using the polisher
the RED LED indicator should be on. NOTE: It is suggested to use a low to mid range speed
setting for polishing.
5

SAFETY INFORMATION
Note: For your safety: Never tur the Bur Lock Ri g while the ha dpiece is i operatio .
OPERATIONAL SUGGESTIONS:
1.Never reverse the directio of the Micromotor while it is i operatio . Possible damage to the
unit may occur. Always let the Micromotor come to a complete stop before reversing directions.
2. Do Not lock or ru the Micromotor / Straight Handpiece assembly without a Prophy Angle,
Cutting Disk, Contra Angle, or Test Shaft installed. Doing so could damage the Straight Handpiece
and / or Micromotor.
3.When installing the Prophy Angle or other accessory, make sure that the Bur Lock Ring is rotated
fully in the unlocked position, otherwise the accessory can not be installed and the Straight
Handpiece will not operate.
4.Do Not change the selector switch on the front of the control box between Forward and Reverse
rapidly. Always allow the Micromotor to come to a complete stop before switching directions.
5.As this is a precision instrument, always return it to Engler Engineering Corporation for repair.
NOTE Dropping the handpiece can severely damage the Prophy Angle and Micromotor.
Importa t: When installing any accessory make sure that the marker lines on the Locking Ring line
up EXACTLY. If the accessory does not fit easily into the Straight Handpiece, rotate the two
halves as you may have it in the locked position.
6

POLISHER OPERATION
1. Dampen the rubber cup and place a small amount of polishing paste on it.
2. Rotate the POWER control to the minimum setting in the prophy range.
3. Depress the footswitch and the rubber cup will begin to rotate. The speed of rotation may be adjusted to
your desired level by re-adjusting the POWER control.
4. To keep the paste from flying off the cup, maintain a low speed and bring the cup up to the tooth before
depressing the footswitch.
IMPORTANT: The prophy angle is only rated to 5000 RPM - therefore, in order to prevent premature failure of
the angle keep the unit set in the prophy range whenever the prophy angle is used.
5. High-speed settings will throw the polishing paste off of the rubber cup. Always start with a low speed and
then adjust to a higher speed as required.
6. Place the end of the angle into the patients’ mouth and apply the rubber cup to the surface of the tooth with
a circular motion. Do not allow the rubber cup to remain stationary on one area for an extended period of
time as friction can overheat / burn the tooth.
POLISHER MAINTENANCE: PROPHY ANGLE
The prophy angle is a precision engineered dental device. All of the gears and shaft assemblies are made of
high-grade stainless steel, which if cleaned and lubricate correctly will provide long, trouble-free service.
Daily Cleaning and Lubrication:
1. Remove prophy angle from straight handpiece.
2. Discard used rubber cup.
3. Follow the cleaning instructions that were supplied with the prophy angle.
4. Place a new rubber cup onto the angle.
5. Slide the prophy angle down over the straight handpiece and lock it in place.
IMPORTANT: For a long dependable life, the prophy angle should be lubricated daily, if possible after each
use. Use mi eral oil (#P-O1, supplied with the u it). Keep hair away from prophy cup and head cap.
SUGGESTION: To keep hair from becoming tangled in the angle, we recommend using masking tape /
painters tape around the lips, keeping hair in place and away from treatment area.
7

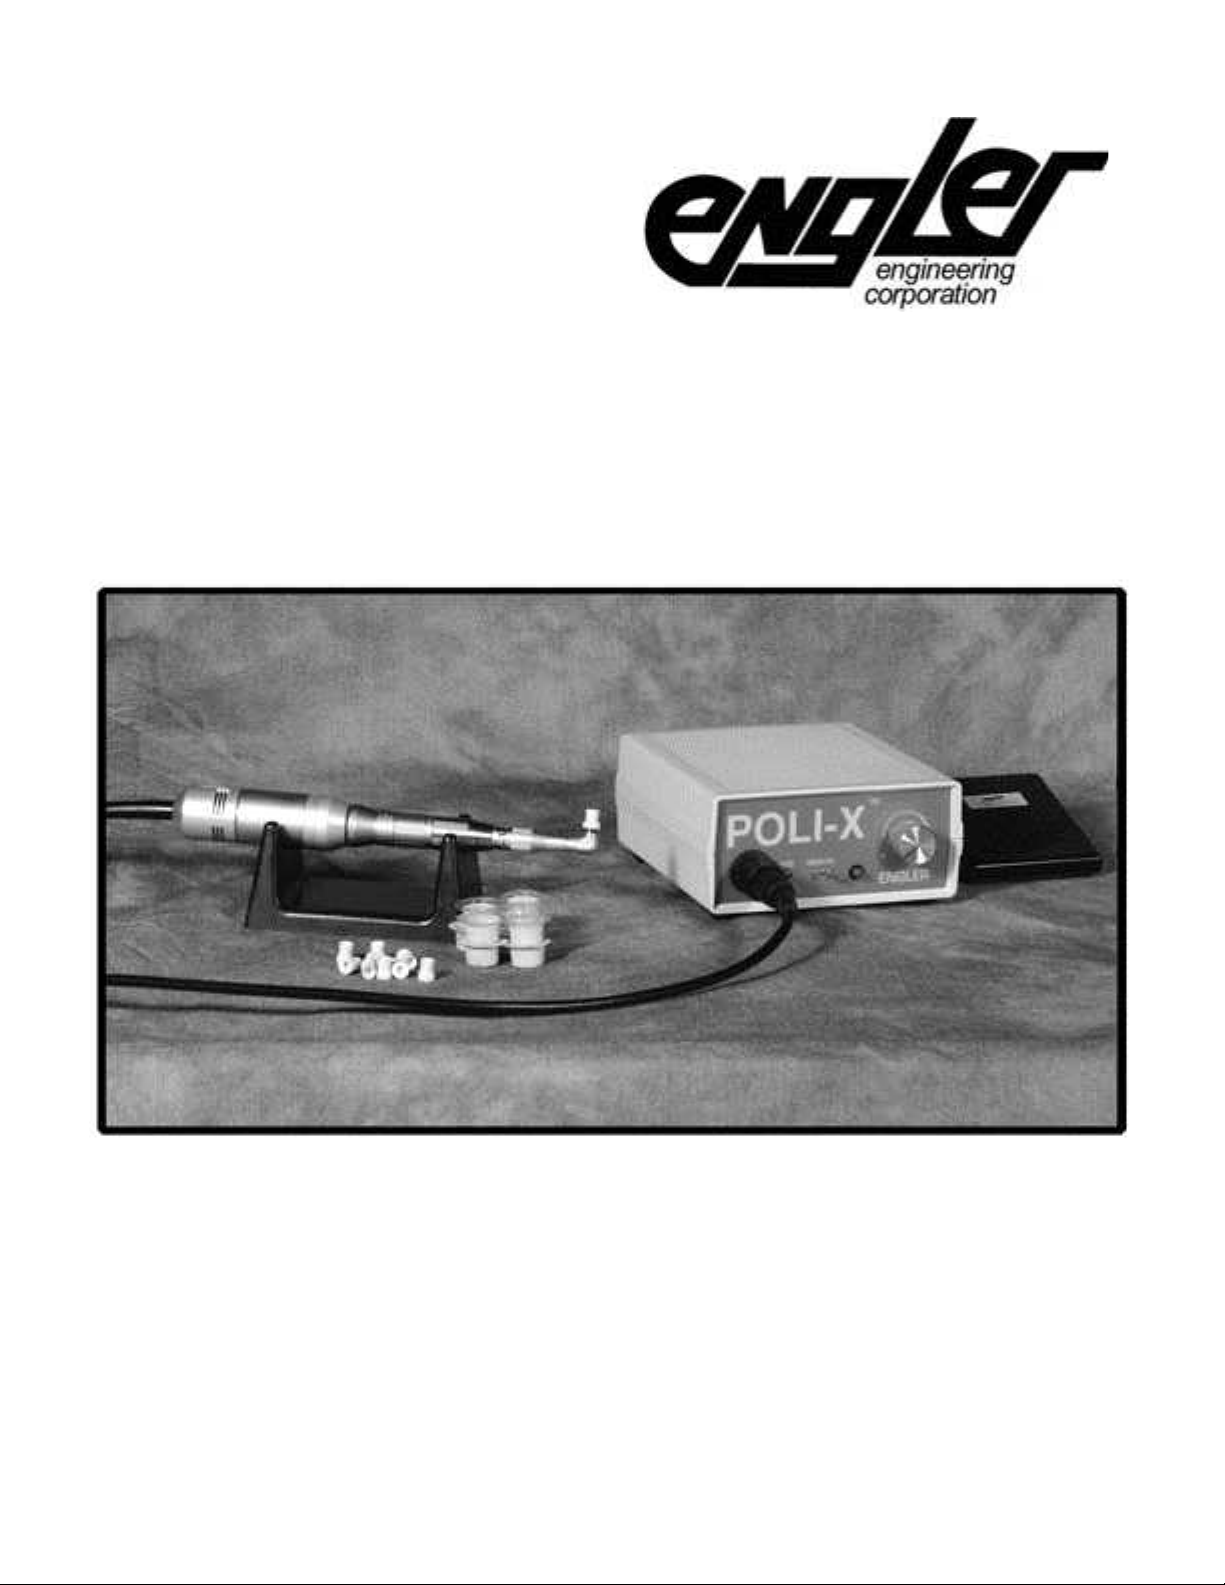
This u it is shipped with the Micromotor, Straight Ha dpiece, Prophy A gle, starter supply of Cups a d Paste.
STRAIGHT HANDPIECE MAINTENANCE
The spray ozzle oili g method is optio al but highly recomme ded. It clea s as well as
lubricates. Pressure of the spray forces dirt out.
The alternate method is to place 1 drop of approved oil (mineral oil # P-O1) in the chuck hole.
Do not lubricate the handpiece while it is on the Micromotor.
Lubrication of the Straight Handpiece is required at least once a week.
Lubrication by spray lubricant:
1. Make sure that the Straight Handpiece is unlocked prior to lubricating.
2. Install the E-Type nozzle by pushing it onto the top of the spray can. To lubricate and expel debris, insert
the E-Type nozzle into the bottom of the straight handpiece. Holding the two together tightly, with can in the
upright position, push spray button for 2 to 3 seconds.
NOTE: If spray time is too short oil may ot be propelled i to all areas of the ha dpiece.
8
P-MM-E 35,000 RPM
Micromotor W/Cord
P-SH-A1:1 Straight
handpiece
P-A1-B Prophy
Angle (Sealed
Bearings)
Snap on rubber cups
Polishing
paste

Straight ha dpiece mai te a ce, co t.
CLEANING:
1. Wipe the handpiece with an alcohol-soaked soft tissue.
2. Never clean the handpiece with boiling water, chemical solutions, ultrasonic cleaner, or wire brushes.
STERILIZATION:
1. Autoclaving is recommended for the Engler straight handpiece.
2. Clean the handpiece as described above.
3. Lubricate the handpiece as described above .
4. Place the in an autoclaving pouch and seal it in accordance with the instructions on the pouch.
5. Autoclave the handpiece for 20 minutes at 121 C (250 F), or 15 min. at 132 C (270 F).
Keep the straight handpiece away from water vapor or mist that may settle and cause premature
damage to the bearings.
IMPORTANT: DO NOT, attempt to repair, disassemble or unscrew the straight handpiece. Doing so
may shift the internal springs, causing permanent damage to the unit and will void warranty. If you
experience problems during operation, call our repair department
Due to Federal regulatio s, spray lubrica t ca ot be shipped by air. E gler spray lubrica t
ca be shipped together with orders delivered by grou d, otherwise it will be shipped
separately. E gler P-02 Lubricati g spray is optio al but highly recomme ded.
9
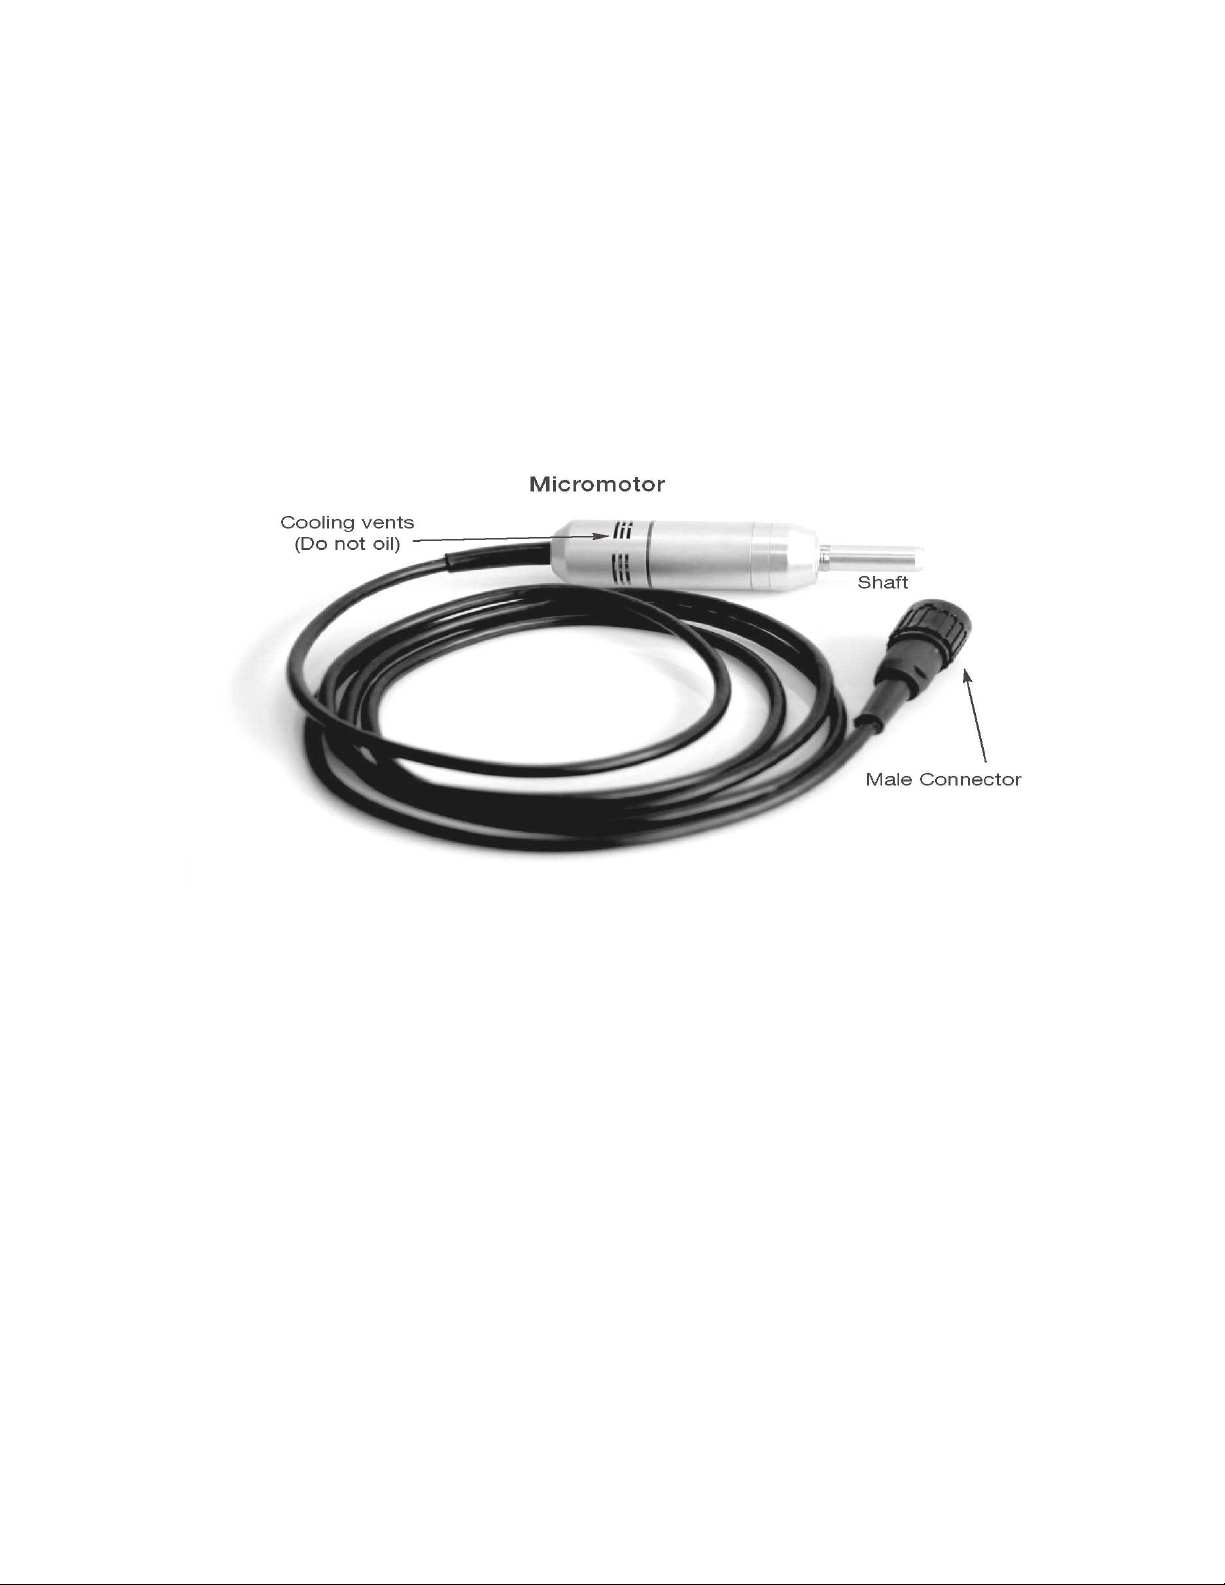
MICROMOTOR MAINTENANCE
The Micromotor is capable of speeds up to 35,000 RPM for use in cutting, sectioning and drilling. It contains
sealed bearings and does not require any lubrication. The Micromotor has cooling vents at the back of the
unit, Do not allow water, oil, or any other substance to enter these vents. Failure to keep debris out of the
micromotor will shorten the life of the unit and cause permanent damage.
IMPORTANT:
1. NEVER change the direction of the Micromotor while it is in operation. ALWAYS wait until it has come to a
full stop.
2. NEVER allow oil or any liquid to get into the Micromotor.
10

MICROMOTOR / POLISHER TROUBLESHOOTING
NO POWER: “ON” LED i dicator does ot light up:
1. Verify that unit is switched ON, the ON / OFF switch is located on the right side of the unit.
2. The unit is not plugged in to a power outlet: verify that the unit is plugged in.
3. Power outlet not active: try another outlet.
4. Contact Engler Engineering Corporation.
“ON” LED i dicator lights up, Micromotor ot fu ctio i g:
1. Switch unit to Polisher mode.
2. Micromotor not plugged in: plug Micromotor in.
3. Short circuit in Micromotor or its cable: Contact Engler Engineering Corporation for instructions.
STRAIGHT HANDPIECE GETS HOT:
1. Straight Handpiece not lubricated properly: Lubricate as shown on page 8.
2. Bearings in Straight Handpiece are becoming worn, causing drag. Contact Engler Engineering
Corporation.
MICROMOTOR GETS HOT :
1. Straight Handpiece causing drag, lubricate Straight Handpiece correctly or replace Straight Handpiece.
2. Worn brushes in Micromotor, Contact Engler Engineering Corporation.
3. Oil got inside Micromotor, return to Engler Engineering Corporation.
INTERMITTENT OPERATION U it polishes a d the stops:
1. Damaged Micromotor cable: contact Engler Engineering Corporation.
2. Damaged Footswitch: contact Engler Engineering Corporation.
MISCELLANEOUS:
1. Micromotor speed not adjustable (runs at one speed): Return the complete Poli - X with micromotor
and accessories to Engler Engineering Corporation.
2. Prophy cup unscrews during procedure, (“flies off”) the Prophy Angle: Micromotor is rotating in the
wrong direction, change direction by rotating the selector on the front of the unit to the opposite
direction.
STRAIGHT HANDPIECE ROTATES ON THE MICROMOTOR:
1. Accessory in Straight Handpiece not locked in. Tighten Locking Ring on Straight Handpiece.
2. Prophy Angle gears worn.
3. Hair may be enmeshed in the gears of the Prophy Angle, clean Prophy Angle according to PROPHY
ANGLE CLEANING AND MAINTENANCE INSTRUCTIONS (next page).
4. Straight Handpiece or Prophy Angle not properly lubricated.
11
PROPHY ANGLE CLEANING AND MAINTENANCE INSTRUCTIONS
The prophy angle is a precision engineered dental device. all gear and shaft assemblies are made of high grade
stainless steel which must be kept free of debris. If cleaned and lubricated correctly will provide long, trouble-free
service. The manufacturer recommends replacing prophy angles at least every 3 to 4 months depending on use.
Prophy angles may vary. Use the following instructions accordingly.
DAILY CLEANING AND LUBRICATION:
1.) Remove prophy angle from low speed
handpiece.
2.) Discard used rubber cup.
3.) Remove head cap by turning
cou terclockwise to unscrew the knurled nut
with the wrench provided.
4.) Wash the cap and head cavity thoroughly with
a toothbrush in a bowl of warm soapy water.
5.) Rinse thoroughly with running water and
shake off excess water.
6.) DO NOT attempt to dry this part with paper or
cotton towels / swabs or gauze. Any particles
left on the gears will keep them from turning
properly. Use only alcohol to speed the drying
process and / or a blow dryer to thoroughly dry
the angle.
7.) Lubricate by placing one drop of mineral oil on
the gears of the head cap and a drop inside
the gear cavity.
8.) Being careful not to cross-thread, reassemble
the prophy angle and wipe off all excess oil.
Place a new rubber cup onto the head cap and
confirm that the gears are meshing properly by
rotating the cap it should turn easily. If not,
remove and try again.
DO NOT use the wrench, only finger tighten.
9.) Slide the prophy angle onto the handpiece and
lock the handpiece.
1.) Remove prophy angle from low speed handpiece.
2.) Discard used rubber cup.
3.) Use the wrench to remove the cap from the head.
4.) Turn clockwise to unscrew the head (top portion)
from the body (bottom portion).
5.) Place the cap, head and body into a bowl of hot
soapy water.
6.) Wash thoroughly with a toothbrush.
7.) Rinse well with running water and shake off. DO
NOT attempt to dry these parts with paper or
cotton towels / swabs or gauze. Any particles left
on the gears will keep them from turning properly.
Use only alcohol to speed the drying process
and / or a blow drier to thoroughly dry the angle.
8.) Lubricate by placing one drop of mineral oil on
each gear (see diagram).
9.) Being careful not to cross-thread, reassemble the
prophy angle and wipe off all excess oil.
Place a new rubber cup on the onto the cap and
confirm that the gears are meshing properly by
rotating the cap it should turn easily. If not,
remove the cap and try again.
10.) Slide the prophy angle onto the handpiece and
lock the handpiece.
G ARS
(OIL H R ) WR NCH
H AD CAP
BODY
H AD
CAVITY
G ARS
CAP
WR NCH
CAP
KNURL D
NUT
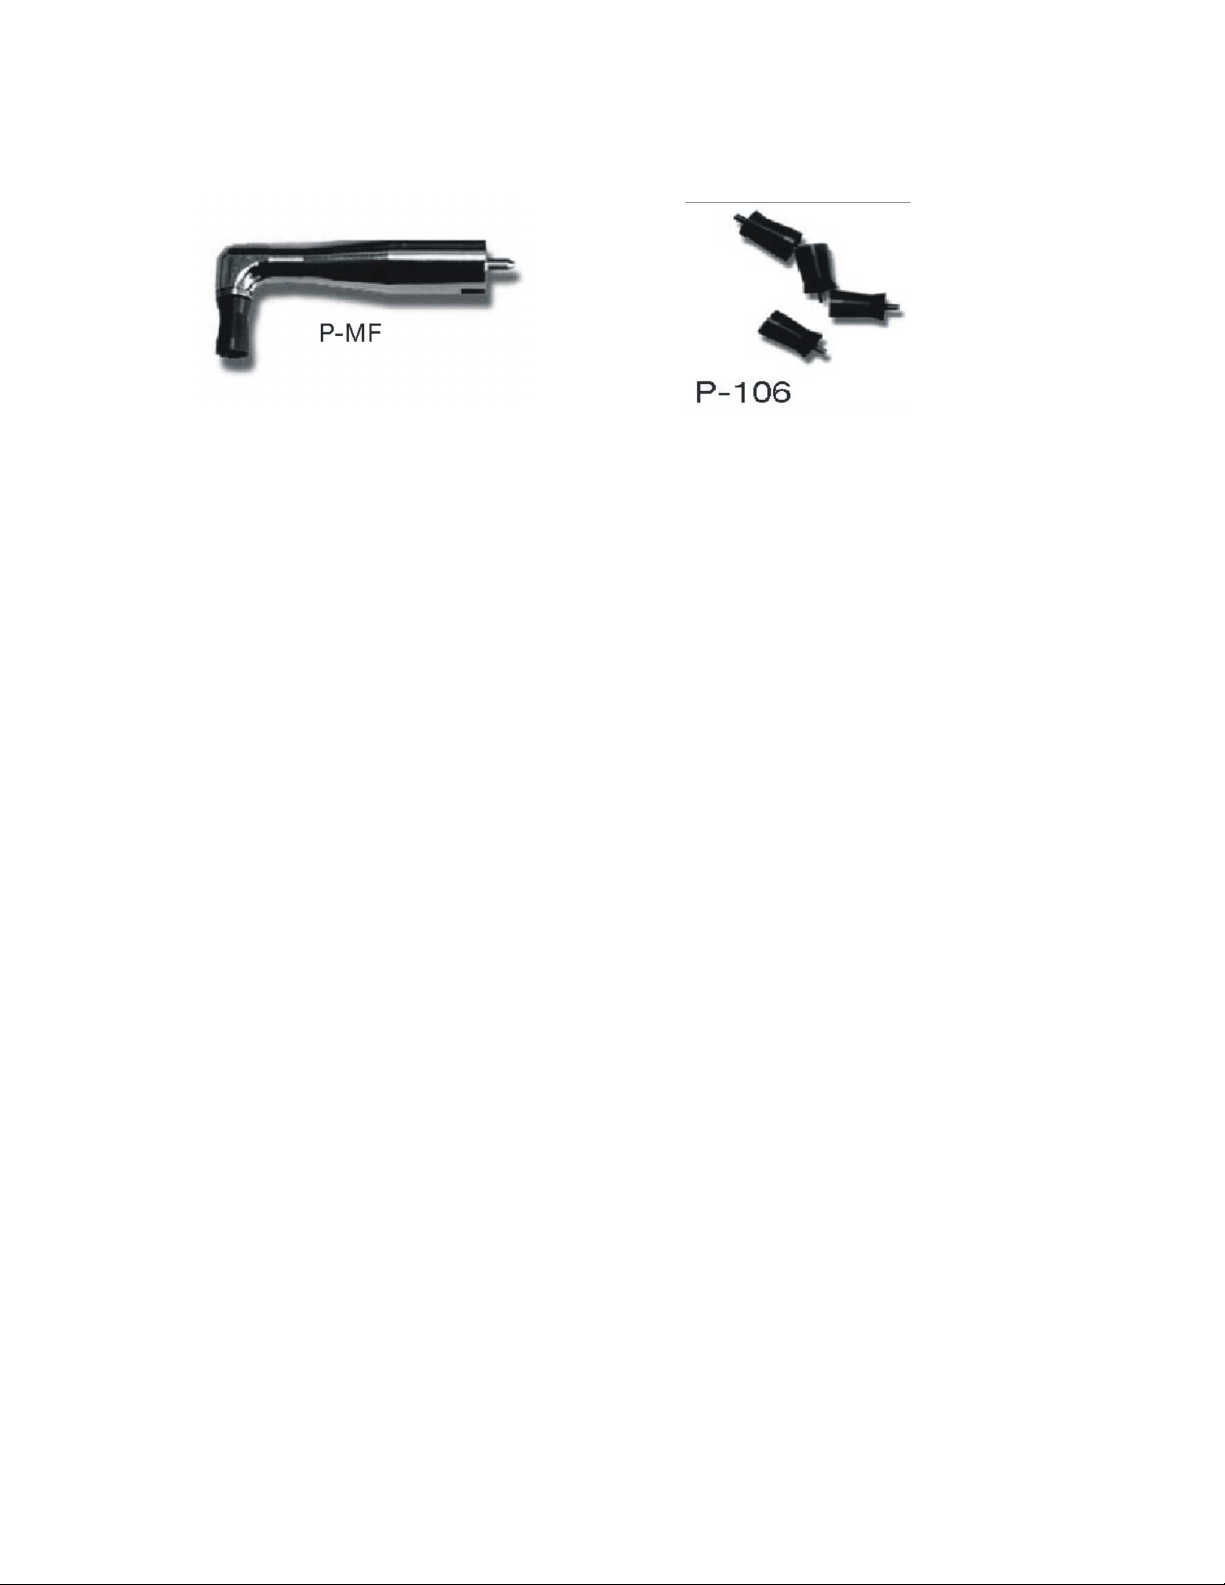
OPTIONAL POLI – X ACCESSORIES
P-MF Maintenance Free Prophy Angle P-106 Screw On Rubber Cups 144 / pkt
CARE FOR YOUR MAINTENANCE-FREE ANGLE STERILIZATION PROCEDURES:
AFTER EACH PROPHY:
1. Discard used rubber cup.
2. Rinse abrasive paste from head area with water.
3. Thoroughly clean the outside of angle with disinfectant.
4. Autoclave angle - not more than 275 ºF (135 ºC) over 20 minutes.
5. After sterilization cycle is complete, install a new Disposable Rubber Cup and attach angle to
handpiece. You are now ready for your next prophy.
CAUTIONS AND WARNINGS:
1. Do not attempt to disassemble.
2. DO NOT SUBMERGE IN LIQUIDS, INCLUDING ULTRASONIC SOLUTIONS.
3. Do not heat over 275 ºF (135 ºC).
4. Use only Engler Care Free Prophy Rubber Cups. Other brands will not properly seal the angle,
causing premature wear and voiding the warranty.
5. Replace as necessary.
YOUR CARE-FREE ANGLE IS WARRANTED AGAINST DEFECTS IN MATERIAL AND
WORKMANSHIP FOR 6 MONTHS. A COPY OF OUR INVOICE OR PICKING TICKET WILL
BE REQUIRED AS PROOF OF PURCHASE.
WARRANTY IS VOID IF:
1. Engler Care-Free rubber cups are not used exclusively.
2. Sterilization procedure is not followed properly.
3. The angle has been submerged in any liquid.
4. The angle has been damaged or abused.
5. Damaged due to use at high speed.

Optional Accessories, cont.
Optional Oiling Accessory
Spray lubricant with E-type nozzle
for all Engler polisher straight handpieces
NET WT. 8.8OZ (249.48 GRAMS)
If you have any questions or concerns, please contact us.
ENGLER ENGINEERING CORP
800-445-8581
FAX 305-685-7671
To contact us by INTERNET please use:
For warranty information, to troubleshoot problems,
download manuals and review our brochures,
please visit us at:
www.e gler411.com

TECHNICAL INFORMATION
Poli X Input Voltage: 120 240 VAC Variable Voltage Type
Frequency : 50 / 60 Hz.
Voltage Output : 3 30 VDC 5 Amperes Max.
Micromotor : 300 3500 RPM Max.
Style : Sealed Bearing, Fully Replaceable Brushes
Straight Handpiece : 3000 RPM Max.
Style : Sealed Bearing, Twist Lock Collet
Prophy Angle : 5000 RPM Max.
Chassis Dimensions : L 51/4” X W 5” X H 21/2”
Net Weight : 2 1/2 LBS.
Shipping Weight : 4 1/2 LBS
If you have a y questio s or comme ts, please co tact:
E gler E gi eeri g Corporatio
1099 East 47th Street, Hialeah, Florida 33013
800-445-8581 – 305-688-8581 – FAX 305-685-7671
Web site: www.englerusa.com Help site: www.engler411.com
This manual suits for next models
1
Table of contents
Other Engler Dental Equipment manuals


Popular Dental Equipment manuals by other brands


Instrumentarium
Instrumentarium Orthoceph OC100 D Upgrade manual

RONVIG DENTAL
RONVIG DENTAL Calaject Instructions for use

NSK
NSK Surgic Pro Series Operation manual

Aseptico
Aseptico AEU-14CF Operations manual & parts list

Castellini
Castellini SKEMA 5 Translation from the original manual

Renfert
Renfert SIMPLEX 3D-Filament-Drucker Setup