ISSUED: 01-23-07 SHEET #:055-9498-2 05-29-08
Visit the Peerless Web Site at www.peerlessmounts.com 8 of 10
For Technical Support Contact Peerless Mounts at 1-800-729-0307 or 708-865-8870.
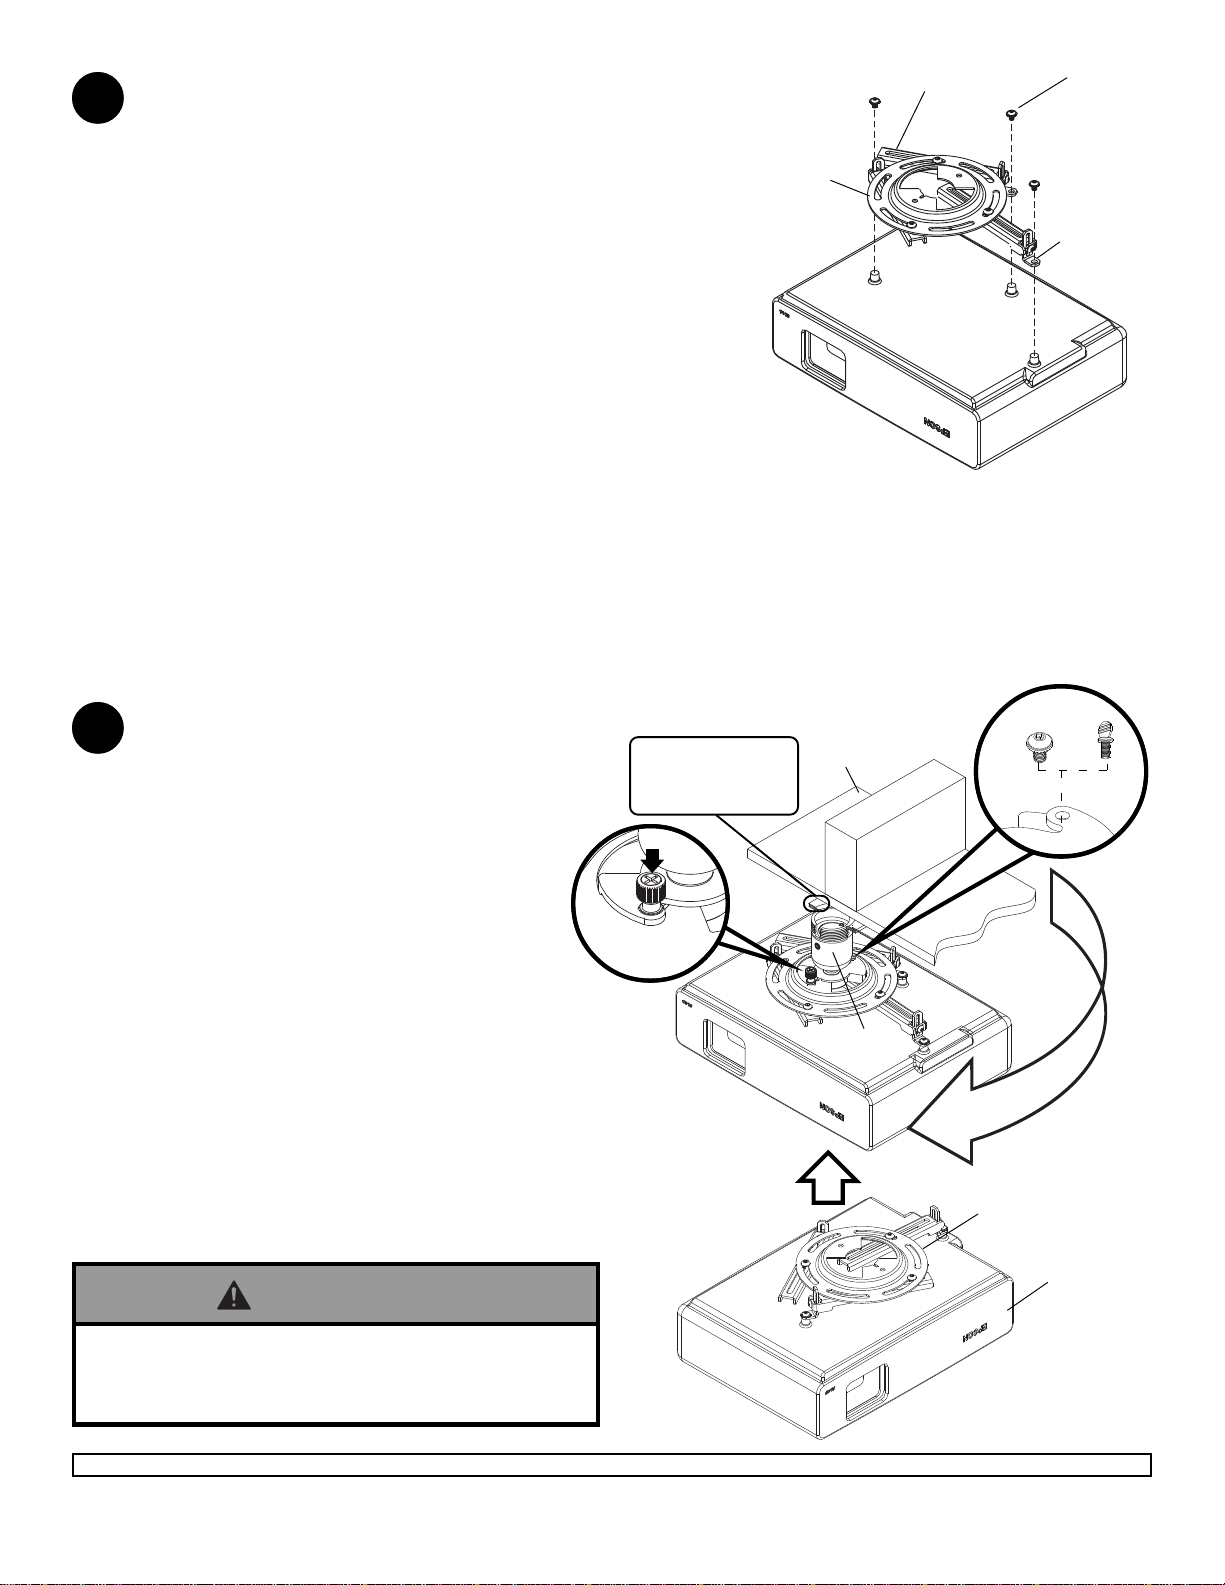
Attach adapter plate (L) to projector using one
screw (M, N, O or P) for each channel as shown.
Tighten all screws, while keepingthecenterofgravity.
Be sure that adapter plate (L) is straight.Adjust the feet
ofthechannelsto keep the adapter platelevel.Tighten
all screws with 4 mm security allen wrench (B) or
wrenchprovidedwith projectormount,while keeping the
center of gravity. If M3 screws are used, tighten using 2
mm security allen wrench (Q).
NOTE:Projectors may requiredifferentsizescrews for
mounting. Use a combination of screws (M, N, O or P)
and foot adjustment that will result in channels of
adapterplate(L)fitting tightly against projector.
Important:In order to properlyengagethethreads in
the mounting holes, the screw must be turned at least
3 full turns.
NOTE: Ifusingscrew (M),placewasher (R)between
screw(M)and foot of channel.
FOOTOF
CHANNEL
L
M,N, O
or P
4Attach projector, with adapter plate already on it,
to the projector mount (A) by inserting the
projectormount(A)into theadapterplate
connection and twisting until the adapter plate will
nolongerturn (about75°).The spring loaded
captivescrewshould line up withacorresponding
hole on the adapter plate (this should line up
automaticallywhenthetwoareconnected).Push
downandtighten the springloadedcaptivescrew
to secure the adapter plate to the mount. If not
usingtheoptionalsecurity feature, fasten thumb
screw (D)intheholeoppositethe spring loaded
captivescrew.
OPTIONAL: For security option, use #10-32 x
3/8" security screw (E) in the hole opposite the
springloadedcaptivescrew.Tightenwithsecurity
allenwrench(B). Thiswillprevent the projector
frombeingremoved.
NOTE: Be sure to only use the #10-32 x 3/8"
screw (E) (or the thumb screw (D) opposite
the spring loaded captive screw.
LEG
3
Attaching Adapter Plate to Projector Mount
CAPTIVE
SCREW
WOOD
JOIST
CEILING
CUTAWAY VIEW
OFCEILING
PLATE (G)
2
1
PROJECTOR
L
ED
A
• Do not lift more weight than you can handle! Use
additionalmanpower or mechanicalliftingequipment
tosafelyhandle placement of the projector!
WARNING