Contents
Copyright and Trademarks
Safety Instructions
ImportantSafetyInstructions.................4
CautionsandNotes.........................4
Getting to Know Your Network
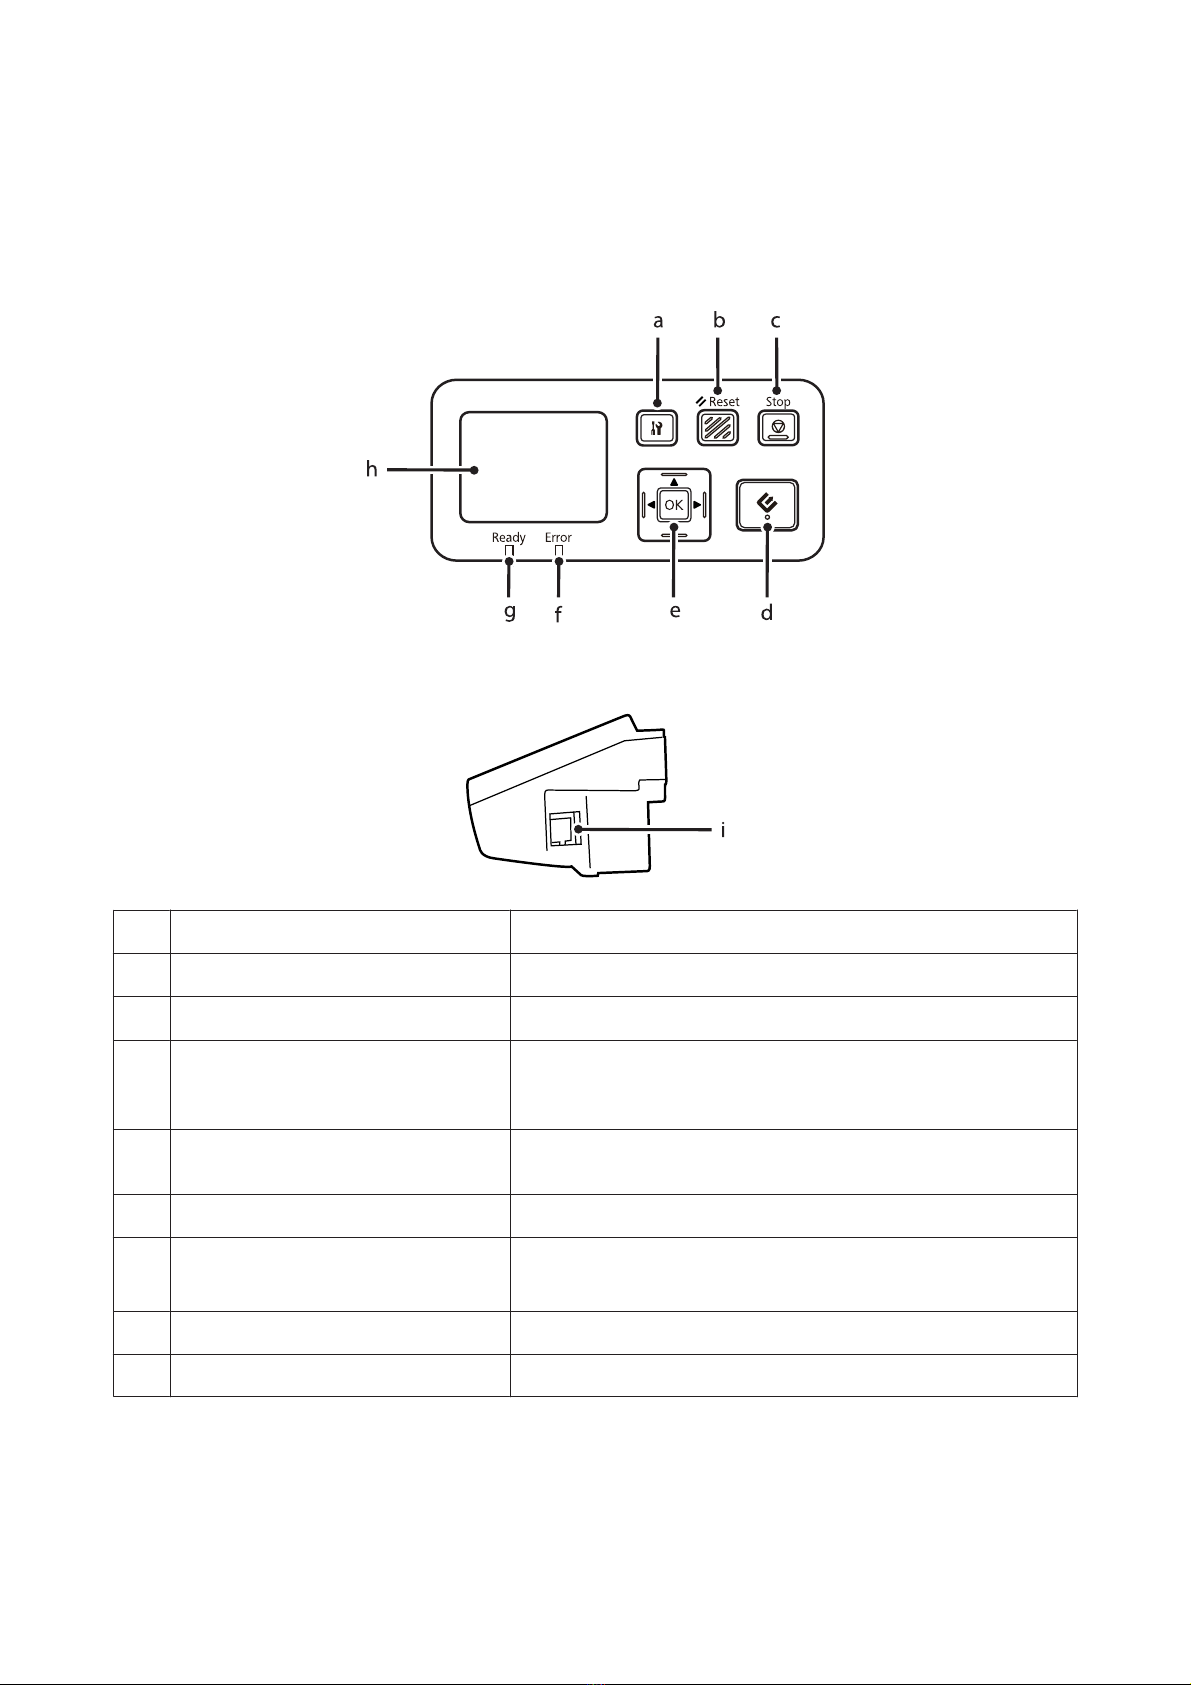
Interface Panel
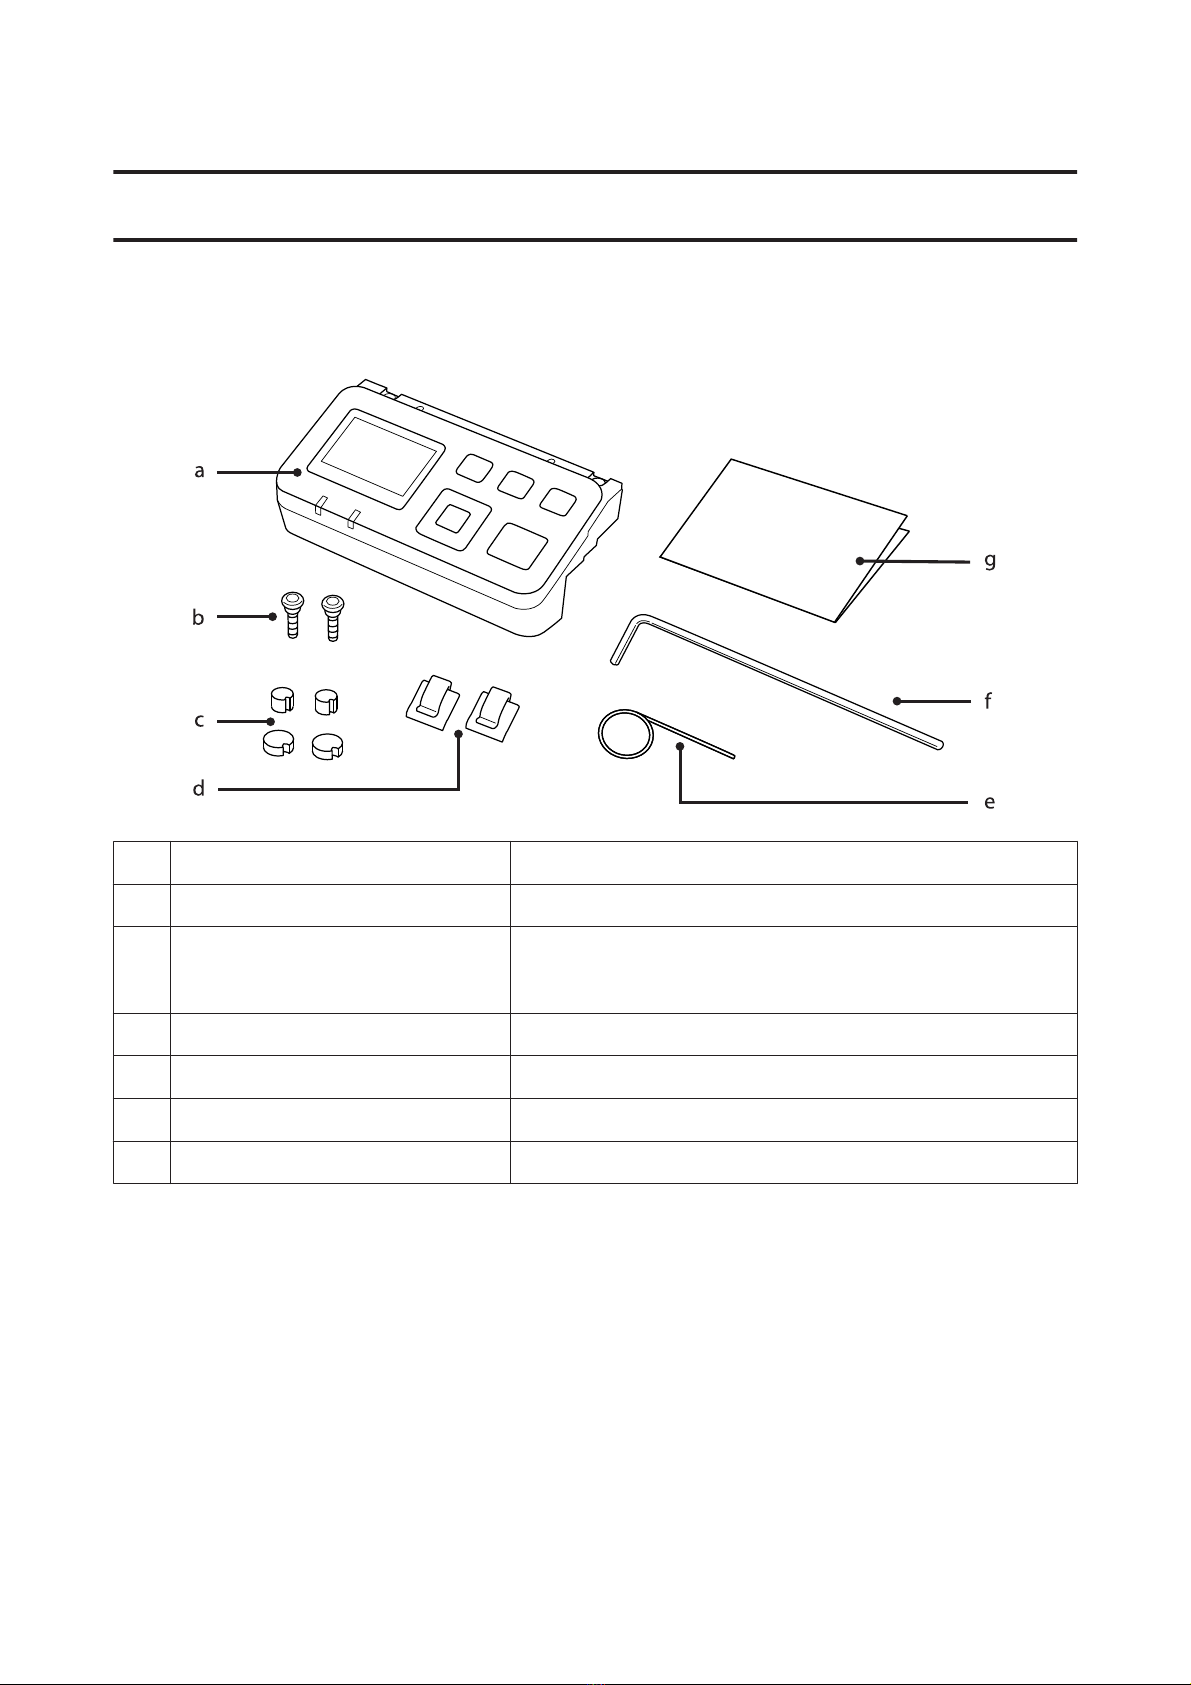
PackageContents..........................5
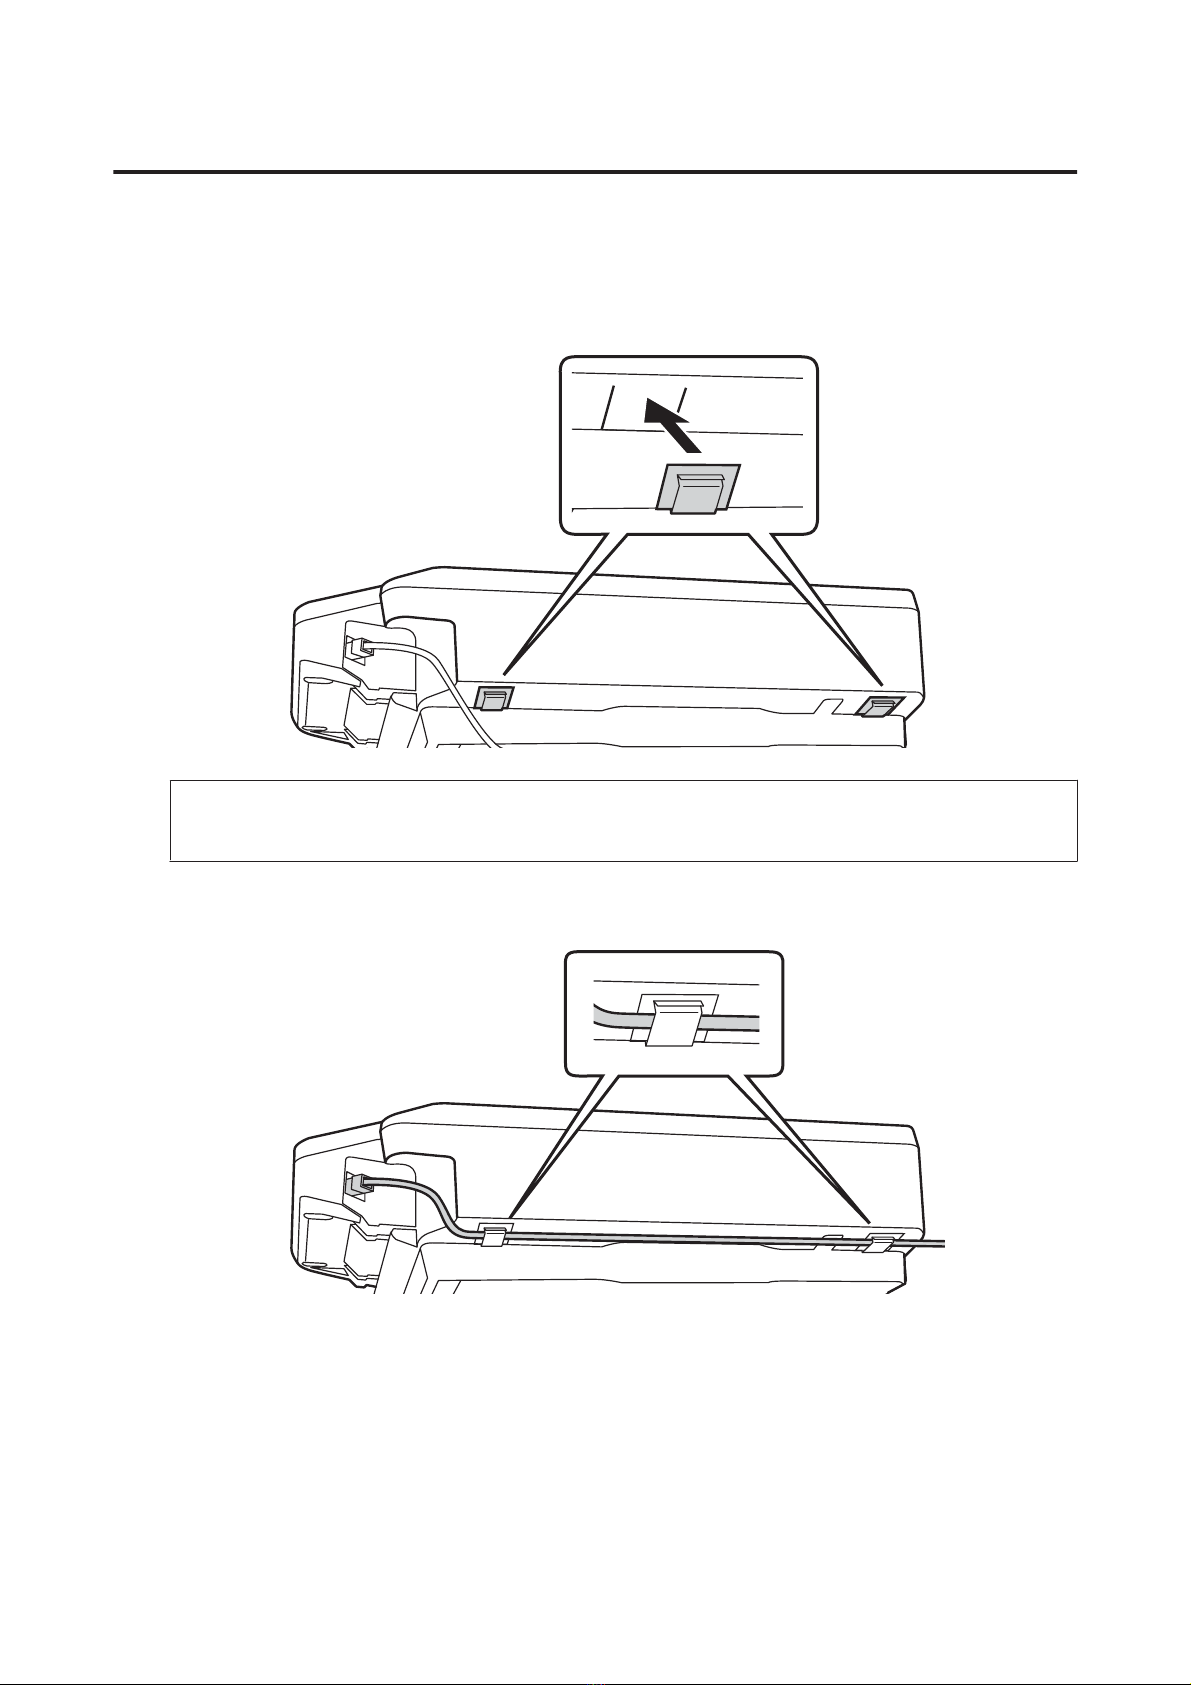
UsingtheCableClips.....................6
Panelparts...............................7
Setting Up the Network Interface Panel
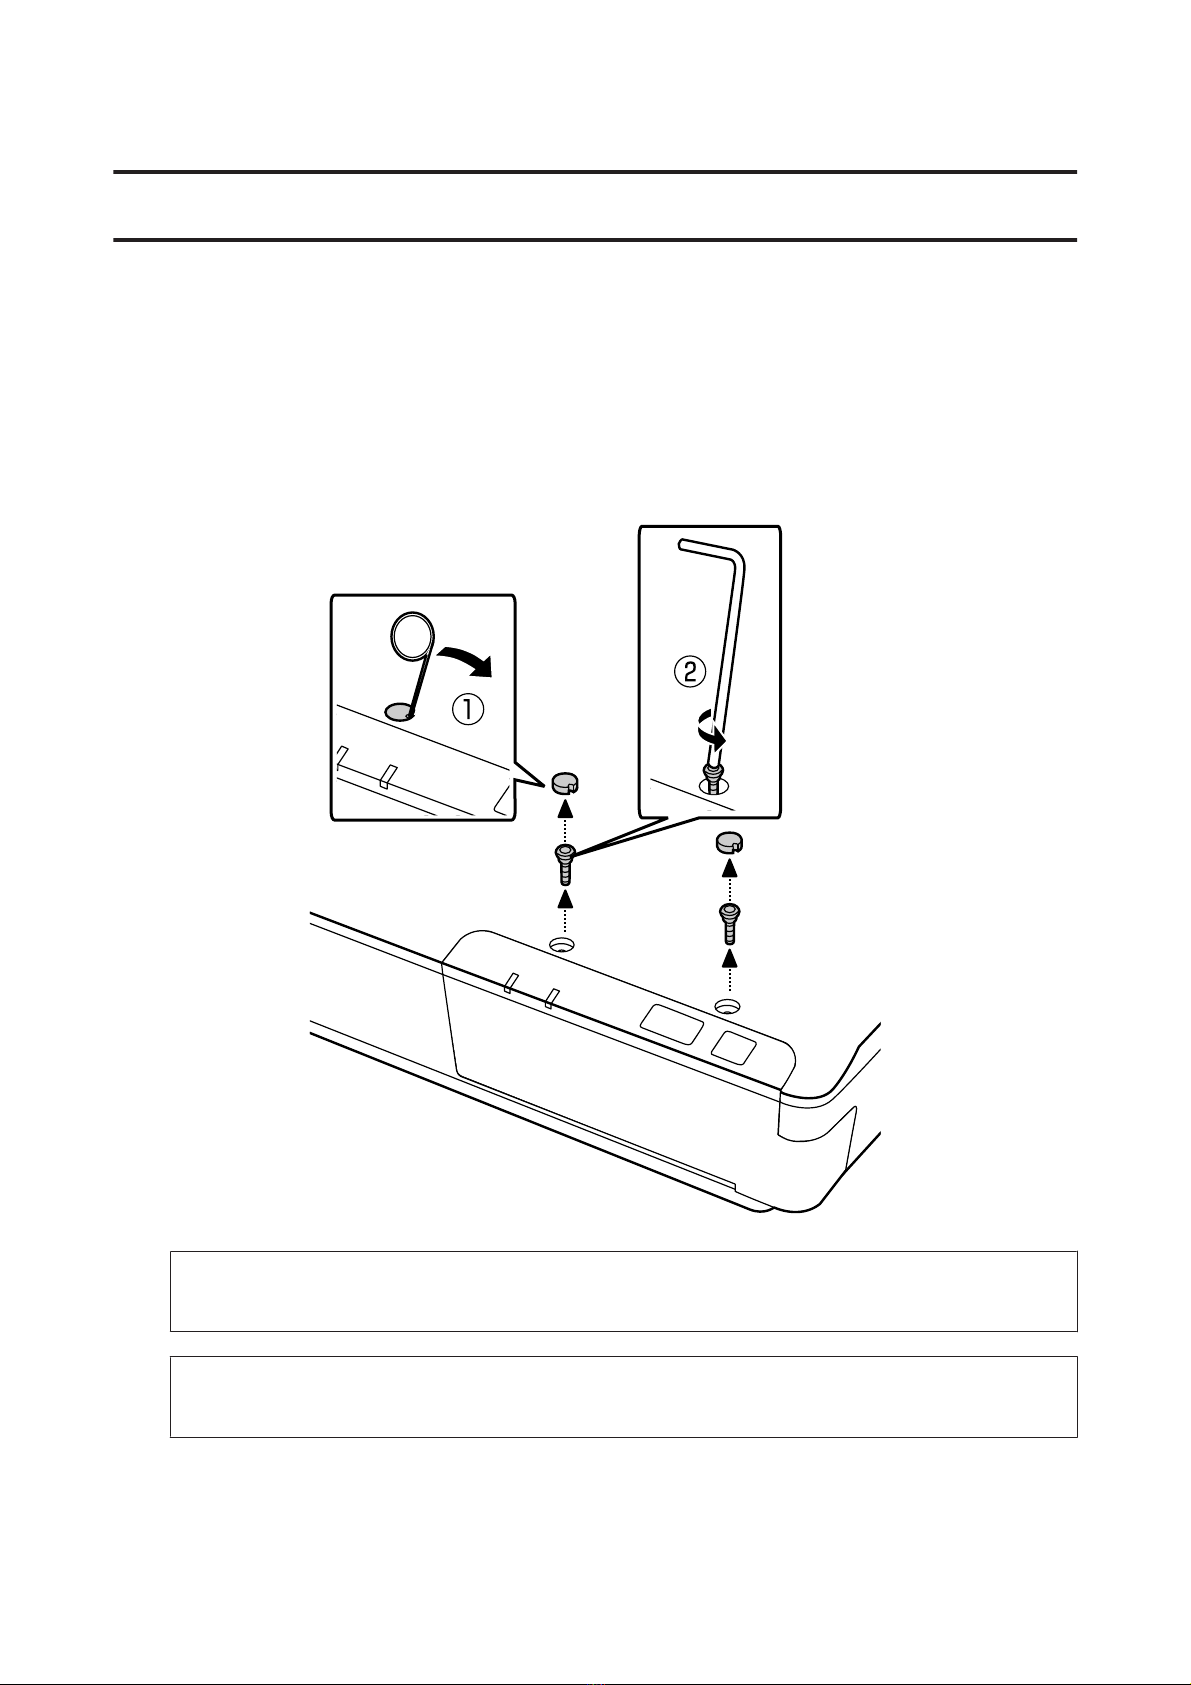
Connecting the Network Interface Panel to a
Network.................................8
Configuring Scanning Software on Your
Computer...............................11
Connecting to an IPv4 Network Automatically
....................................11
Connecting to an IPv4 Network Manually. . . . . 12
ConnectingtoanIPv6Network.............14
UsingEpsonNetConfig.....................14
OperatingEnvironment..................15
Scanning an Image
Configuring Scanning Software on Your
Computer...............................16
ConfiguringEPSONScan.................16
ConfiguringEpsonScan2.................17
ScanningOveraNetwork...................18
ForWindows..........................19
ForMacOSX..........................19
ScanningfromthePanel....................19
About the Control Panel
MenuList...............................21
Environmentmenu......................21
Displaymenu..........................21
Energysavingmenu.....................21
Networkmenu.........................21
Timeoutmenu.........................22
Restoresettingsmenu....................22
Troubleshooting
Problems Indicated by Messages on the LCD
PanelorStatusLights......................23
ProblemsandSolution.....................23
The LCD screen is not displayed even when the
scannerison...........................24
Thescannerdoesnotscan.................24
Web-based EpsonNet Config cannot be
startedorbemadesettings.................25
Technical Specifications
SystemRequirements......................26
ForWindows..........................26
ForMacOSX..........................26
NetworkInterfacePanelSpecifications..........26
General..............................26
Mechanical............................26
Electrical.............................27
Environmental.........................27
Interfaces.............................27
StandardandApprovals..................27
Network Interface Panel User's Guide
Contents
2