manuals.online logo
Brands
  1. Home
  2. •
  3. Brands
  4. •
  5. Ergotron
  6. •
  7. Outdoor Cart
  8. •
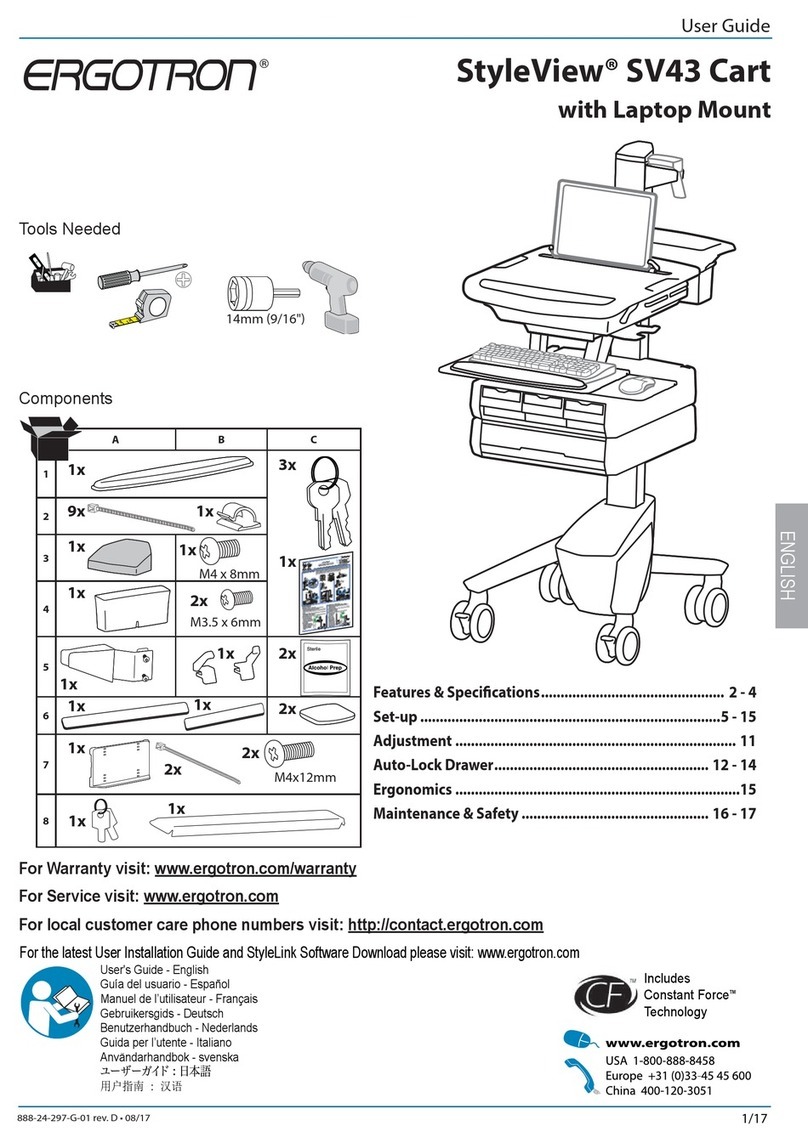
  9. Ergotron Anthro MiniCart GT23 Series User manual

Ergotron Anthro MiniCart GT23 Series User manual

300-068-00 rev. E
• /
Anthro MiniCart
Assembly Instructions
01– Insert Screws......................... Qty. 4 .................325-5052-00
02– 2 3/8” Non-Locking Casters .... Qty. 2 ...............150-5002-03*
03– Caster Inserts ....................... Qty. 4................525-1000-00*
04– 2 3/8” Locking Casters ............ Qty. 2 ...............150-5003-03*
05– 1.75” Large End Caps ............ Qty. 2...................175-5021-xx
06– Base Tube Screws.......................Qty. 3..................325-5000-00
07– MiniCart Base Tube ............... Qty. 1 ..................125-5004-xx
08– Self-threading Screws ..............Qty. 6..................325-5010-00
09– Vertical Legs ......................... Qty. 3..........................................
23.875” Vertical Legs (GT23xx) .. .............................125-5020-xx
10– 1-5/8” Screws...............................Qty. 6.................. 325-5086-00
11– Shelf Supports ............................Qty. 6...................175-5060-xx
12– Shelf Clamps................................Qty. 6...................175-5059-xx
13– MiniCart Shelves................... Qty. 2...................100-6003-xx
14– 1.5” Small End Caps............... Qty. 3...................175-5020-xx
Enclosed Parts List
Detailed views of all hardware is provided with each
assembly step.
All fastener quantities listed here are the minimum needed for
your cart assembly. Your shipment may include a few extras.
Cable Management Components
Cable Alley, 9” .................. Qty 1....................................... 175-5061-03
Cable Alley, 3” .................. Qty 1....................................... 175-5062-03
Cord Handler ...................Qty 1....................................... 175-5001-03
Self-threading Screws....Qty 6.......................................325-5010-00
These Assembly Instructions are
for the GT23xx.
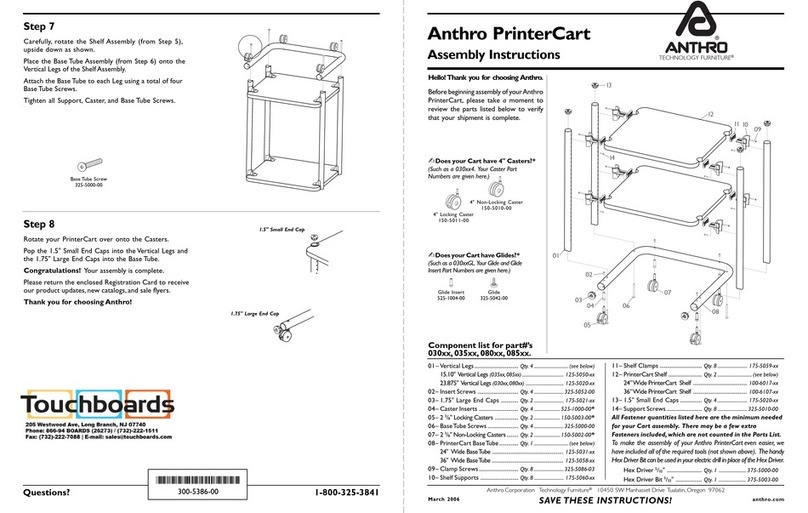
Before beginning assembly of your
Anthro MiniCart, please take a moment
to review the parts list below to verify
that your shipment is complete.
Does your Cart have 4” Casters?*
Then these are your casters:
4” Locking Caster
150-5011-03 4” Non-Locking Caster
150-5010-03
04 06
07
03 02
09
10
05
12
01
08
11
14
13
TOOLS
To make the assembly of your cart
even easier, we have included all of the
required tools . Use the handy Hex Driver
Bit in your electric drill in place of the Hex
Driver.
Hex Driver 5/32”..............375-5000-00
Hex Driver Bit 5/32”........375-5003-00
8 oz. Rubber Mallet......... 375-5022-00
Built with Anthro-DNA™
300-068-00 rev. E
• /
Anthro MiniCart
Assembly Instructions
Step 1
Before proceeding, please review the Assembly Instruc-
tions of all Anthro products you purchased and are
planning to include in this installation.
Step 3
Attach three shelf supports to each shelf.
Begin by rst installing a shelf clamp into the shelf notch. Be
sure the pointed barbs face towards the outer shelf edge.
Next, slide a shelf support into the recesses of the shelf clamp
and shelf. Push in as far as possible.
Finally, secure with a 1-5/8” Clamp Screw (325-5086-00).
First
Next
Finally
Barbs
Step 2
Decide on the shelf locations for your MiniCart. You can
place your shelves almost anywhere on the vertical legs
(the legs are stamped at 1” increments).
For a lower shelf location that is higher or lower than
19” from the oor, refer to the illustrations shown at right
to determine which holes to attach your lower shelf.
Once your MiniCart is assembled, it’ll take a little eort to
remove and reinstall it. Measure, measure, measure.
NOTE: These instructions will place your lower shelf 19” from
the oor using the standard 2 3/8” casters.
GT23xx with 2 3/8” Casters
GT23xx4 with 4” Casters
Hole 12=20”
Hole 11=19” (measured from the coped end)
Hole 10=18”
Hole 11=20”
Hole 10=19”
Hole 9=18”
REMINDER: You may want to
measure your equipment to make
sure it ts between the selected
shelf locations and adjust your
assembly as needed
Coped end
19”
19”
GT23xx
Overall MiniCart height is
28” using 23/8” casters
NOTE: Add 1” to overall height for 4” casters and subtract 3” from
overall height for glides.
NOTE: These Instructions will create
approximately 6” of usable space
between your shelves.
Lower Shelf
1-5/8" Screw
325-5086-00
300-068-00 rev. E
• /
Step 4
Loosely attach one shelf to hole 14 from the bottom (coped
end) of one vertical leg using a Self-threading Screw. These
fasteners are cutting threads into the leg, so the rst few
turns will require some force.
NOTE: This will place your lower shelf 22” from the oor using the
standard 2 3/8” casters.
Step 5
Loosely attach the remaining shelf to hole 2 from the top
(non-coped end) of the vertical leg assembly (from Step 4)
using one Self-threading Screw.
NOTE: Handle the shelf assembly carefully until the cart is
fully assembled.
Step 6
Loosely attach the 2nd and 3rd vertical legs to the shelf
assembly (from Step 5) using one Self-threading Screw
per shelf support.
TIP: Use the holes in the vertical legs as a ruler to ensure
that your Self-threading Screws are installed into the
correct locations.
Bottom
(coped)
end
Hole 14=22”
(using 2 3/8” Casters)
Insert one Self-threading Screw
through each Shelf Support
Top
(non-coped)
end Hole 2
Top
(non-coped)
end
Bottom
(coped)
end
Self-threading Screw
325-5010-00
Self-threading Screw
325-5010-00
Self-threading Screw
325-5010-00
300-068-00 rev. E
• /
Step 7
Install all four caster inserts into the base tube and secure (fully
tighten) with one Caster Insert Screw per insert.
Next, push the casters, (locking ones in front) into the caster inserts.
Step 8
Carefully rotate the shelf assembly (from Step 6), upside
down as shown.
Place the base tube assembly (from Step 7) onto the verti-
cal legs of the shelf assembly.
Attach the base tube to each leg using a total of three
3-1/2” Bolts.
Tighten all Self-threading and Base Tube Screws.
Step 9
Rotate your MiniCart over onto the casters.
Pop the three 1.5” small end caps into the vertical legs
and the two 1.75” large end caps into the base tube.
After you add your equipment to the cart, select the
cable management components that suit.
To install the Cable Alleys, expand each sleeve and t it
over a cart leg. Align the mounting hole(s) in the sleeve
with the holes on the leg, then install with self-threading
screws.
To install the Cord Handler, snap the large end around
any cart leg, then route cables through the small end.
1.5” Small End Cap
1.75” Large End Cap
3-1/2” Bolt
325-5000-00
1/2” Caster Insert Screw
325-5052-00
Locking Casters
© 2018 Ergotron, Inc. All rights reserved.
All trademarks are the property of their respective companies.
Anthro is a registered trademark and brand of Ergotron Inc.
Anthro-DNA is a trademark of Ergotron Inc.
For local customer care phone numbers visit: http://contact.ergotron.com
For Service visit: www.ergotron.com
For Warranty visit: www.ergotron.com/warranty

Other Ergotron Outdoor Cart manuals

Ergotron LX Desk Mount LCD Arm User manual

Ergotron

Ergotron LX Desk Mount LCD Arm User manual

Ergotron StyleView SV44-12B1-1 User manual

Ergotron

Ergotron StyleView SV44-12B1-1 User manual

Ergotron STYLEVIEW SV42-7202-1 User manual

Ergotron

Ergotron STYLEVIEW SV42-7202-1 User manual

Ergotron Dell Network Ready/Unmanaged Charging Cart 30... User manual

Ergotron

Ergotron Dell Network Ready/Unmanaged Charging Cart 30... User manual

Ergotron YES36 User manual

Ergotron

Ergotron YES36 User manual

Ergotron CareFit Pro User manual

Ergotron

Ergotron CareFit Pro User manual

Ergotron StyleView SV42 User manual

Ergotron

Ergotron StyleView SV42 User manual

Ergotron YES36 User manual

Ergotron

Ergotron YES36 User manual

Ergotron Styleview SV22-92026 User manual

Ergotron

Ergotron Styleview SV22-92026 User manual

Ergotron PS Laptop Cart User manual

Ergotron

Ergotron PS Laptop Cart User manual

Ergotron SV44-1312-4 User manual

Ergotron

Ergotron SV44-1312-4 User manual

Ergotron ERGITD-013 User manual

Ergotron

Ergotron ERGITD-013 User manual
Ergotron ERGITD-010 User manual

Ergotron

Ergotron ERGITD-010 User manual

Ergotron STYLEVIEW SV42-3262-1 User manual

Ergotron

Ergotron STYLEVIEW SV42-3262-1 User manual

Ergotron ERGITD-015 User manual

Ergotron

Ergotron ERGITD-015 User manual

Ergotron STYLEVIEW SV42-3362-1 User manual

Ergotron

Ergotron STYLEVIEW SV42-3362-1 User manual

Ergotron LTSC20 Series User manual

Ergotron

Ergotron LTSC20 Series User manual

Ergotron STYLEVIEW SV44-22C2-1 User manual

Ergotron

Ergotron STYLEVIEW SV44-22C2-1 User manual

Ergotron Peanut User manual

Ergotron

Ergotron Peanut User manual

Ergotron StyleView SV40-6100-0 User manual

Ergotron

Ergotron StyleView SV40-6100-0 User manual

Ergotron StyleView SV41 User manual

Ergotron

Ergotron StyleView SV41 User manual

Ergotron StyleView SV44 User manual

Ergotron

Ergotron StyleView SV44 User manual

Ergotron CareFit Slim LCD Cart with Drawer User manual
Ergotron

Ergotron CareFit Slim LCD Cart with Drawer User manual

Ergotron StyleView SV42 User manual

Ergotron

Ergotron StyleView SV42 User manual

Popular Outdoor Cart manuals by other brands

Gorilla Carts GOR865D11-1 manual

Gorilla Carts

Gorilla Carts GOR865D11-1 manual

VALERA 9050-CT2 Dimensions

VALERA

VALERA 9050-CT2 Dimensions

Black Stone 2193 owner's manual

Black Stone

Black Stone 2193 owner's manual

adeptus 10016 Assembly instructions

adeptus

adeptus 10016 Assembly instructions

G21 GA-75-DC Mounting instructions

G21

G21 GA-75-DC Mounting instructions

Rock-N-Roller Multi-Cart R12RT quick start guide

Rock-N-Roller

Rock-N-Roller Multi-Cart R12RT quick start guide

U-Line H-2523 manual

U-Line

U-Line H-2523 manual

odesea TX-65 installation instructions

odesea

odesea TX-65 installation instructions

Stihl FW 20 TS 410 instruction manual

Stihl

Stihl FW 20 TS 410 instruction manual

Bartscher TSA300V Original instruction manual

Bartscher

Bartscher TSA300V Original instruction manual

Bartscher TS 301 manual

Bartscher

Bartscher TS 301 manual

Anthro TECHNOLOGY FURNITUR SEC24 Series Assembly instructions

Anthro

Anthro TECHNOLOGY FURNITUR SEC24 Series Assembly instructions

U-Line H-2666 manual

U-Line

U-Line H-2666 manual

E-Z Trail 870 Operator's manual

E-Z Trail

E-Z Trail 870 Operator's manual

MONSTER MOBILE MST3304BKFBH owner's manual

MONSTER MOBILE

MONSTER MOBILE MST3304BKFBH owner's manual

JWA ALDINGTON 68219 Assembly instruction

JWA

JWA ALDINGTON 68219 Assembly instruction

Crosley Furniture CF3008 Assembly instructions

Crosley Furniture

Crosley Furniture CF3008 Assembly instructions

Jegs 81434 installation instructions

Jegs

Jegs 81434 installation instructions

manuals.online logo
manuals.online logoBrands
  • About & Mission
  • Contact us
  • Privacy Policy
  • Terms and Conditions

Copyright 2025 Manuals.Online. All Rights Reserved.