manuals.online logo
Brands
  1. Home
  2. •
  3. Brands
  4. •
  5. ESI
  6. •
  7. Telephone
  8. •
  9. ESI IVX C-Class User manual

ESI IVX C-Class User manual

WITH voice mail
Installation Manual
0450-0406
Rev. H
About ESI
ESI (Estech Systems, Inc.) is a privately held corporation based in Plano, Texas. Founded in 1987, ESI
designs and builds innovative telecommunications products for businesses like yours. Because of their
powerful combination of value and features, ESI products are consistently recognized by industry
publications and leaders.
Copyright © 2007 ESI (Estech Systems, Inc.).
IVX is a registered trademark, and Esi-Dex, Integrated Answering Machine, and Verbal User’s Guide are trademarks, of ESI.
CompactFlash is a registered trademark of SanDisk Corporation. Motorola and ColdFire are registered trademarks of Motorola, Inc.
Texas Instruments is a registered trademark of Texas Instruments Corporation.Rayovac is a registered trademark of Rayovac
Corporation. Velcro is a registered trademark of Velcro Industries B.V. Panasonic and DBS are registered trademarks of
Matsushita Electric Corporation of America. Smart Jack is a trademark of Westell Technologies, Inc.
Information contained herein is subject to change without notice.
ESI products are protected by various U.S. Patents, granted and pending.
ESI is an ISO 9001:2000-certified company. Visit ESI on the Web at www.esi-estech.com.
Table of contents
General description..................................................................................................................................................A.1
Telephone system features.........................................................................................................................................................................A.1
Voice mail features.......................................................................................................................................................................................A.2
Auto attendant features ...............................................................................................................................................................................A.2
Hardware overview/installation..............................................................................................................................B.1
Phone models ..............................................................................................................................................................................................B.2
System programming: An introduction.................................................................................................................C.1
Programming keys.......................................................................................................................................................................................C.1
Entering alphanumeric characters..............................................................................................................................................................C.2
System fixed numbering plan......................................................................................................................................................................C.2
System programming overview: Programming menu..............................................................................................................................C.3
Accessing programming..............................................................................................................................................................................C.3
Function 1: System parameters .............................................................................................................................D.1
Function 11: Initialize....................................................................................................................................................................................D.1
Functions 12 and 13: Installer and Administrator passwords................................................................................................................D.1
Function 14: System clock ..........................................................................................................................................................................D.2
Function 15: System timing parameters ....................................................................................................................................................D.3
Function 16: System feature parameters...................................................................................................................................................D.3
Function 17: System speed-dial..................................................................................................................................................................D.7
Function 18: SMDR serial port baud rate...................................................................................................................................................D.7
Function 2: CO lines ................................................................................................................................................E.1
Function 21: CO line programming.............................................................................................................................................................E.1
Function 22: Access codes/toll restriction..................................................................................................................................................E.3
Function 23: CO line parameters................................................................................................................................................................E.4
Function 24: Caller ID ..................................................................................................................................................................................E.5
Function 3: Extension programming.....................................................................................................................F.1
Function 31: Extension definition and routing............................................................................................................................................F.1
Function 32: Extension feature authorization.............................................................................................................................................F.3
Function 33: Department programming.....................................................................................................................................................F.5
Function 35: Extension button mapping.....................................................................................................................................................F.6
Function 4: Auto attendant programming............................................................................................................ G.1
Function 41: Auto attendant branch programming...................................................................................................................................G.1
Function 43: Automatic day/night mode table ..........................................................................................................................................G.4
Function 5: Voice mail programming ....................................................................................................................H.1
Function 53: Guest/info mailboxes.............................................................................................................................................................H.1
Function 55: Message notification..............................................................................................................................................................H.2
Function 56: Cascade paging mailboxes...................................................................................................................................................H.4
Function 6: Recording..............................................................................................................................................I.1
Function 61: Re-record main greeting......................................................................................................................................................... I.1
Function 62: Record directory names ......................................................................................................................................................... I.2
Function 63: Message-on-hold (MOH) programming................................................................................................................................ I.2
SMDR.........................................................................................................................................................................J.1
Tabular SMDR format.................................................................................................................................................................................. J.1
CSV SMDR format....................................................................................................................................................................................... J.1
Reporting conventions and rules................................................................................................................................................................ J.2
Index
(This page included for pagination purposes only.)
IVX C-Class with voice mail: Installation Manual Generaldescription
A.1
General description
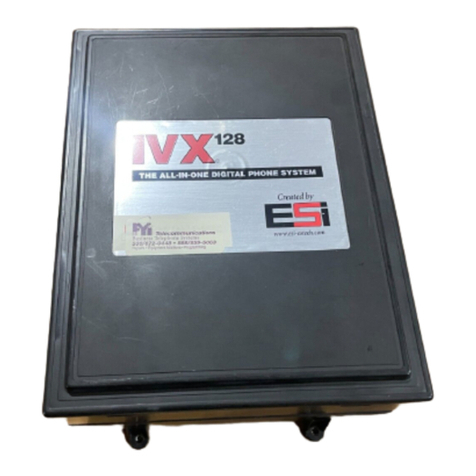
Welcome to IVX®C-Class (IVX stands for Integrated Voice Exchange.). IVX C-Class (IVX 20c) offers the
small business an all-in-one phone system including not only phone service but also voice mail and
automated attendant. The system itself is housed in a surprisingly small case that is wall-mounted in the
telephone equipment room. An external, wall-mounted power transformer powers the system.
Telephone system features
Important: Some of the features this manual describes are either optional or are exclusive to IVX C-Class
Generation II, and will be so noted throughout. Additionally, some product art may vary from the
actual product depending whether the product is IVX C-Class or IVX C-Class Generation II.
The IVX C-Class system has a three-line, six-station, two-analog-port configuration.
• Impressive capacity — Handles six CO lines and up to 12 stations.
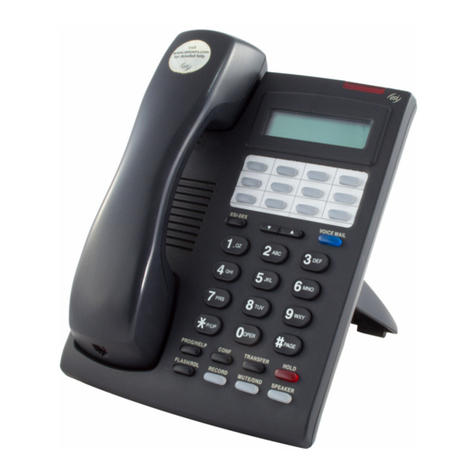
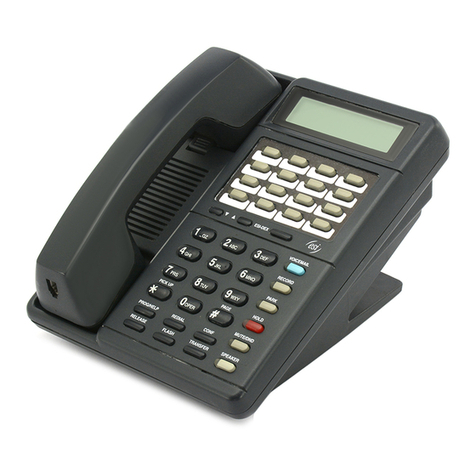
• ESI Feature Phones — Compact and stylish, yet rugged, the 24-Key Digital Feature Phone includes a
high-quality speakerphone, large and informative multi-functional display and a specially designed
key layout with several dedicated keys to minimize or eliminate the need to memorize codes. ESI
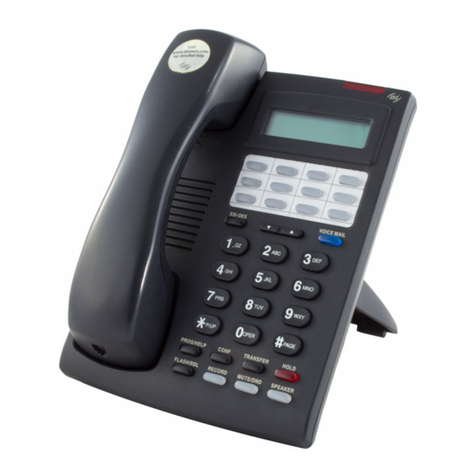
also offers the 12-Key Digital Feature Phone with similar design and basic functions (See page B.2).
At least one 24-Key Digital Feature Phone must be purchased with each C-Class system.
• Extensive help — ESI’s Verbal User’s Guide™uses spoken and displayed help prompts to help
everyone from the Installer through the Administrator down to the least experienced end user.
Easily accessible with one press of the HELP key. You may also go to www.esiusers.com for
detailed on-line help.
• Enhanced Caller ID — Allows one-touch automatic message return.1 2
• Live call recording3— Can record any conversation or personal memo along with moving or
copying of any recording to another user’s voice mailbox.
• Call waiting — Includes helpful display, showing both calls’ Caller ID information, and easy one-key
toggling between calls.
• Conference calling — Includes two conference bridges, and a conference may contain up to four
parties, so the IVX C-Class system can support two conferences of four parties each.Analog phones
on the system also may be parts of conferences.
• Esi-Dex™speed-dialing2— Calls any number using three separate lists (personal, station, and
system); uses Caller ID1information or direct keypad entries.
• Dedicated overhead paging interface — Allows for external paging through overhead speakers or
multi-zone paging units (amplification required)
• 911 alert — Provides immediate line access if any station with line access dials 9 1 1 to report an
emergency; sends a message via the serial port indicating the start date, time, station number and
end-time of the 911; also sounds a warning tone at the operator station and displays, for example:
911 CALL FROM
X102 JOHN JAMES
• Status indicator lamp — Indicates three conditions of the 24-Key Digital Feature Phone: off-hook,
ringing and new voice mail message.
1This and all other references to Caller ID service within this manual assume the end-user organization subscribes to Caller ID
service from its telephone service provider.
2IVX C-Class Generation II passes Caller ID data to both digital and analog ports; Generation I passes it only to digital ports.
3Not available on the 12-Key Feature Phone.
Generaldescription IVX C-Class with voice mail: Installation Manual
A.2
Voice mail features
• Up to four built-in voice mail ports — These are in addition to the up-to-20 possible call-
processing ports; thus, you may build the system to its maximum for call-handling without having to
balance voice mail needs versus call-handling needs.
• Highest-grade voice quality (64-kilobit/second sampling) for voice mail and other storage of voice
messages. The C-Class offers two hours of storage on the two-port system and six hours of storage
on the four-port system.
• Quick Groups™— Makes it easy to leave voice mail messages for several users.
• Quick Move™— Records a conversation into another user’s mailbox.
• Virtual Mailbox Key™allows easy monitoring of a second mailbox.
• Different mailbox types, including broadcast, cascade, and guest.
• Message-on-hold recordings — Up to five recording: three prerecorded, one customized, and one
live entry. This feature is also available on using the Integrated Answering Machine mailbox 501.
• Message Recycle Bin (undelete) — Remembers, and can restore, each mailbox’s 10 most recently
deleted messages.
Auto attendant features
• 18 branches —Allow you and your customer to set up a caller-friendly answering environment,
including a company directory.
• Virtually unlimited call routing — Includes pager or cell phone notification.
IVX C-Class with voice mail: Installation Manual Hardware overview/installation
B.1
Hardware overview/installation
IVX C-Class starts out as a three-line, six-station, two-analog-portsystem, but can expand to handle as
many as six lines and 12 digital stations (and two analog ports).
Base Cabinet I
The wall-mounted Base Cabinet I measures 81/2″W 11″H 3″D, and is designed for easy
installation and easy component access. It houses the Memory Module and Main Board (3x6x2), one
multi-purpose serial port, a MOH connector and another port card slot — which accepts an additional
360 port card.
Main board
The main board combines leading-edge hardware components — including a Motorola♦ColdFire♦
processor and Texas Instruments♦DSP structure — along with proprietary operating system software.
The board provides: system control of the Memory Module and port cards1; a standard RS-232C DB9
serial port; a built-in 33.6 Kbps modem for remote access; an external paging-device interface; and
MOH interface. The C-Class main board has a three-line, six-digital station, two-analog port configuration.
The CO line ports support standard CO and Centrex loop-start lines; ground-start CO lines are not
supported. The analog ports provide a standard 24-volt,two-wire connection to fax machines, analog
phones, and modems. Only one analog device can be connected to each analog station port.
Port card
There is only one port card type, 360, available for IVX C-Class.1The 360 port card is equipped with a
standard female Amphenol connector for easy wiring to a standard 66 or 110 block. This C-Class port
card cannot be used on any other ESI phone system. The 360 port card provides circuits to connect up
to three loop-start CO lines and six Digital Feature Phones.
Note: The system must contain a 360 portcard to access both conference bridges.
Wall-mount transformer
The System Cabinet requires a 1.25-amp transformer (supplied).
Memory Module
The Memory Module2consists of a CompactFlash®card. The memory module on IVX C-Class
contains all system programming and configuration data, including pre-loaded voice prompts.
1Generation II only. IVX C-Class Generation I systems are configured 6x12x2 and don’t support additional port cards.
2Memory Modules are packaged separately and are mounted in the cabinet during installation.
Hardware overview/installation IVX C-Class with voice mail: Installation Manual
B.2
Phone models
IVX C-Class supports two phone models, each of which connects to the cabinet via standard two-wire
twisted pair.
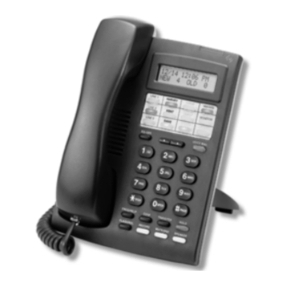
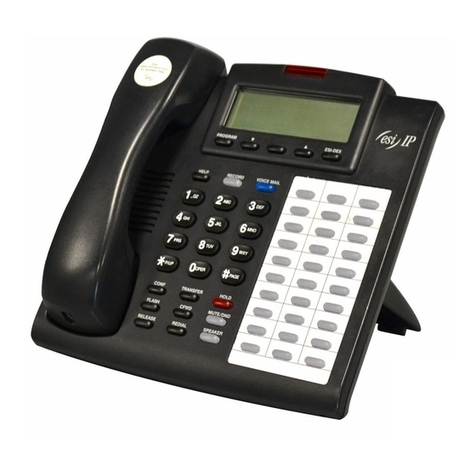
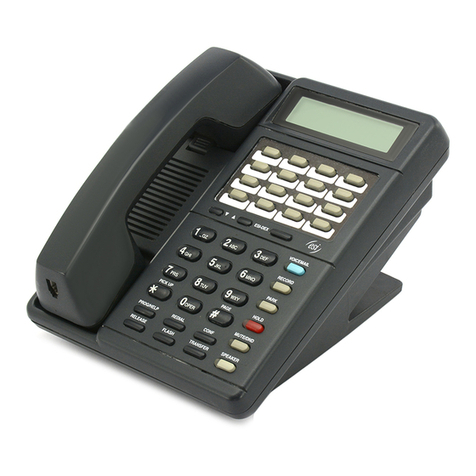
• 24-Key Digital Feature Phone — Two-line, 32-character display; 12 programmable feature keys;
equipped with speakerphone
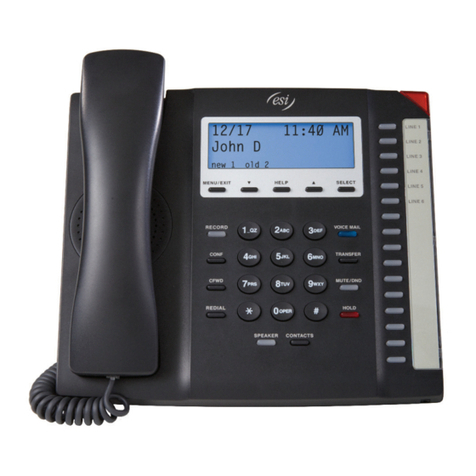
• 12-Key Digital Feature Phone— One-line, 16-character display; nine programmable feature keys.
Notes: Programming cannot be done from the 12-Key Digital Feature Phone.
When the phone is in its mostupright position, use the wall hook located under the handset to keep the
handset in place.
Phone overlays
Each ESI Phone comes with one overlay for the programmable feature keys. To order additional
overlays, visit the DESI™Web site at www.desi.com. You can also download the free Windows®-based
software, DESI Lite, which allows you to print on the overlays. For assistance with DESI products,
please consult the DESI Web site.
IVX C-Class with voice mail: Installation Manual Hardware overview/installation
B.3
Cautions
Important: This information complies with the requirements of Underwriters’ Laboratories (UL) and UL
Standard 60950.
When using this telephone equipment, always exercise basic safety precautions in order to minimize the
risk of fire, electric shock or injury to persons. Before proceeding, please read the following:
• The airflow vents on the IVX case must be free of obstruction for proper cooling. Similarly, do not
install the cabinet in areas of extreme heat or improper ventilation. Never insert objects of any kind
through the ventilation slots on the system cabinet; doing so may result in contact with dangerous
voltages — or cause an electrical short capable of producing fire or shock.
• Do not use liquids or aerosols to clean any IVX equipment; rather, use a cloth that is only
slightly damp.
• The IVX telephone/voice-mail system contains no components that are serviceable by either
non-Resellers or non-manufacturer technicians. All service must be referred to the Reseller for
further handling.
• To reduce the risk of fire, use only 26 AWG or better telecom wire.
Power supply
Always disconnect the power supply and telephone lines from the system cabinet before opening the
case for service or component disassembly or replacement.
Heed all warnings and instructions in documentation or marked on the cabinet or peripheral equipment.
Note: If necessary, review “Wall-mount transformer” (page B.1) for information on the type of power supply for
the IVX C-Class system.
Fuse
Contact the factory before attempting to replace the fuse. The fuse is marked with “F1” and is located at
the top (when the system is installed on the wall) of the motherboard.
Battery
“Caution: There is a dangerof explosion if the onboard lithium battery is incorrectly replaced. Replace only
with Ray-O-Vac BR1225 (or equivalent). Dispose of used batteries according to the battery
manufacturer’s instructions.”
Hardware overview/installation IVX C-Class with voice mail: Installation Manual
B.4
Regulatory information
United States of America
Registration
The CO line telephone numbers, FCC registration number, and ringer equivalence number (REN) of this equipment
must be provided to the telephone company before installation. (See below for FCC registration number and ringer
equivalence number.)
FCC Part 15
This equipment has been tested and found to comply with the limits for a Class A digital device, pursuant to Part 15
of the FCC Rules. These limits are designed to provide reasonable protection againstharmful interference when the
equipment is operated in a commercial environment. This equipment generates, uses and can radiate radio
frequency energy and — if not installed and used in accordance with the instruction manual — may cause harmful
interference to radio communications (in which case, the user will be required to correct the interference at his/her
own expense).
FCC Part 68
This equipment complies with Part 68 of the FCC Rules. On the side of this equipment is a label that contains,
among other information, the FCC Registration Number and Ringer Equivalence Number (REN) for this equipment.
You must,upon request, provide this information to your telephone company.
The REN is helpful to determine the quantity of devices you may connect to your telephone line and still have all of
those devices ring when your telephone number is called. In most, but not all, areas, the sum of the RENs of all
devices connected to one line should not exceed five (5.0). To be certain of the number of devices you may connect to
yourline,as determined by the REN, you should contact your local telephone company to determine the maximum
REN for your calling area.
If your telephone equipmentcauses harm to the telephone network, the telephone company may discontinue your
service temporarily. If possible, the telephone company will notify you in advance but, ifadvance notice is not
practical, you will be notified as soon as possible. You will be informed of your right to file a complaint with the FCC.
Your telephone company may make changes to its facilities, equipment, operations or procedures that could affect
the proper functioning of your equipment. If so, you will be notified in advance, to give you an opportunity to
maintain uninterrupted telephone service.
Ifyou experience trouble with this telephone equipment,the telephone company may ask that you disconnect this
equipmentfrom the network until the problem has been corrected or until you are sure that the equipment is not
malfunctioning.
This equipmentmay not be used on coin service provided by the telephone company. Connection to party lines is
subject to state tariffs.
Installation: The device is equipped with a USOC connector.
Registration Number: 1T1MF08B33727
Ringer equivalence number (REN): 0.8
IVX C-Class with voice mail: Installation Manual Hardware overview/installation
B.5
Hardware installation
Site location
As with most electronic equipment, the environmentalconsiderations for this site need to observe good
common sense. Provide a dry, clean, and accessible area.
Locate space in the telephone equipmentroom, which will provide easy connection to the 66 blocks and
110VAC power. The location should be no further than 1,000 feet from the farthest station.
Ambient room temperature must be 400 –800(F.), and relative humidity no higher than 90%.
Notes: Do not place the equipmentor run station cabling near high voltage electrical equipment or electrical
lines susceptible to high voltage surges from air conditioner compressors, etc.
Do not mount the equipment in a place that receives direct sunlight.
The system and supporting components should be mounted to a half-inch (or thicker) plywood backboard.
Here is the layout of a typical IVX C-Class installation:
IVX C-Class typical installation
Hardware overview/installation IVX C-Class with voice mail: Installation Manual
B.6
Opening the cabinet
The lid on all cabinets is held in place by two tabs that rest in slots in the bottom
of the case, and a release tab that snaps into an opening in the top-center of the
cabinet and is secured by a retaining screw.
To remove the lid:
1. Remove the retaining screw and depress the release tab at the top of
the cabinet.
2. Rock the lid back from the top.
3. Lift and pull the lid free from the slots in the bottom of the cabinet.
Mounting the cabinet
Use three #8 hex-head screws. Note the position of the three mounting holes in IVX.
1. Screw in the top screw to the backboard (at least half-inch thick
plywood) leaving about one-eighth-inch clearance between the
screw head and the plywood.
2. Hang the unit using the keyhole at the top of the case.
3. Level the unit and install the bottom two screws.
Attach the power transformer to the wall, allowing sufficient length in
both cords to reach the power connector on the upper right side of
the cabinet and to reach a UPS or a dedicated 110 VAC outlet.
Memory Module
Note: The Memory Module has a proprietary formatting scheme — do not attempt to install a non-ESI
CompactFlash®. Contact ESI for a replacement Memory Module, if needed.
Adding or replacing the Memory Module will require that the system be powered down.
Replacingthe Memory Module erases all its configuration data and custom recordings.
(Prompts stay intact, however.)
IVX C-Class with voice mail: Installation Manual Hardware overview/installation
B.7
Grounding instructions
System grounding (supplemental ground) is as follows:
• The conductor wires can be no smaller than the ungrounded branch-circuit supply conductors
(usually 16-gauge or larger).
• Acceptable wire: bare or covered with green (or green-and-yellow-striped) jacket.
• Conductors (and power receptacles) shall connect to earth ground at the service equipment (usually
a cold water pipe or copper ground rod).
• The supplemental ground must: be used regardless of power cord ground, be connected to the
ground lug on the bottom of the IVX cabinet, and retain ground connection when the IVX power
supply module is unplugged.
Note: IVX C-Class system lines are protected against a 10 KV surge only if the earth ground procedures
described above are followed.
Power
The system cabinet requires a 120 VAC outlet (if possible, a dedicated outlet). Use only the Class-2
power supply module provided. A clean, isolated power source in conjunction with a UPS (see “UPS,”
below) is STRONGLY recommended. The system draws a maximum of 25 watts.
If AC power is interrupted, the system will drop all connections. When power is restored, the system
will resume normal operation in approximately one minute, having retained its full programming and
clock setting.
UPS
For system protection and to maintain uninterrupted operation, an uninterruptible power supply (UPS, or
“battery back-up”) is STRONGLY recommended. A UPS rated for 200 VA will provide approximately
two hours of uninterrupted service for an IVX C-Class system.
Note: The remaining information under “UPS” comes from Technical Update #216.
Most people have heard about UPSs, but seem to think that there is just one kind of device that goes by
that name. In fact, there are several different major designs in use by today’s major UPS manufacturers.
These makers share much of the blame for confusing UPSs’ end users by, far too often, lumping
different designs under the “UPS” name.
UPSs can first be broken down into system types:
• Stand-by — A very simple design that affects power only when either a lag/brownout occurs below,
or a spike/surge occurs above, a certain threshold. When either occurs, the unit trips — i.e., goes into
battery mode. This "cleans" the voltage and helps to keep any load safe. Industry average "trip" times
are 2–8 ms. No other filtration of AC power is performed.
• Line interactive — Constantly monitors inbound voltages, and uses special circuitry to boost low
voltages and clamp high voltages without having to use the batteries. Indeed, the batteries are used
only if the input voltage drops below acceptable levels (typically about 12% below normal), goes out
completely or rises to dangerous levels (typically about 14% above normal) at which components will
be damaged if line voltage is not removed. Industry average transfer time is 1–3 ms. (If voltage stays
within its normalwindow, this unit continues to pass voltage, unaltered, from the wall.)
• On-line (or full on-line) — Constantly filters the power and performs a function known as double
conversion (AC to DC to AC). This assures that the load — in this case, phone equipment — will
receive not only uninterrupted, true sine wave output butalso the cleanest, steadiest power possible
throughout any foreseeable power disruptions or voltage irregularities. According to industry specs, it
Hardware overview/installation IVX C-Class with voice mail: Installation Manual
B.8
is not unusual for these types of units to be able to regulate utility power, even when it drops to 27%
below or rises to 33% above normal, all without using their batteries.
From this point, UPSs can be further broken down by inverter types, which determine output. These are:
• Square wave.
• Modified sine wave (or quasi sine wave).
• Sine wave.
Most devices with wall-mounted chargers, such as cordless drills or screwdrivers, can behave erratically
— sometimes not allowing the charge circuit to engage at all — when operating with modified sine or
square wave inverters. Small wall-based transformer-style power supplies, similar to those ESI phone
systems use, can experience overheating problems with modified sine or square wave outputs, which
occur while some UPSs are operating in battery mode. This overheating could eventually cause
damage to the power supplies; and, in time, the damage could cause a spike through the phone system
— seriously damaging some of the static-sensitive components inside the casing.
While the true sine wave UPS output power curve smoothly increases to its peak, then smoothly
decreases (allowing connected loads and equipment to operate the same as they would from utility
supplied wall power), the modified sine wave and square wave UPS output power curve will shoot
straight up, level off at peak voltage and then drop straight down. Additionally troublesome is that the
modified sine wave sits at zero voltage for a short period during the transition to or from batteries —
which is the main difference between it and the square wave output of some UPS. Please note that this
short interval during which the modified sine wave UPS sits at zero voltage can directly affect the
transfer time of the UPS and could, theoretically, be enough to cause the phone equipment to reset or
even “freeze.”
Though it is hard to predict exactly when different ESI systems will have problems with modified sine
wave or square waveform UPSs (meaning during a power failure event or the recovery from one), it’s
fair to assume that a problem will eventually arise from the use of such UPSs. Therefore, ESI
recommends that only true sine wave output UPSs provide backup power to our phone systems
and equipment.
LED functions
The unit's various LEDs are designed to provide visual feedback as follows:
Power LED
The Power LED is located on the top-right side of the cabinet and is illuminated when power is being
applied to the system. This LED blinks periodically to indicate that the main processor is operational.
Memory Transfer LED
This LED is located inside the cabinet in the center of the main board. It serves as a diagnostic aid by
flashing as data is transferred to and from the Memory Module.
IVX C-Class with voice mail: Installation Manual Hardware overview/installation
B.9
MOH port
The MOH (messages-, or music-, on-hold) connector on the upper right side of the cabinet is a standard
1/8″monophonic mini-jack, used for loading custom MOH recordings or for playing live music-on-hold
from an external source such as a radio or CD player.
Maintenance/SMDR serial port
The Maintenance/SMDR port is a standard DB9 serial connector located on the side of the cabinet.
Use a standard shielded serial cable, DB9-to-DB9, for printer-to-computer (this is usually male-to-female).
Note: The maximum distance from the cabinet is 100 ft.
The output from the Maintenance/SMDR port is, 8 data bits, 1 stop bit, and no parity. The pinout is:
Data Transmit Pin 2
Receive Pin 3
Ground Pin 5
Range: Programmable for 300, 1,200, 2,400, 4,800, 9,600, 19,200, or 38,400 bps.
Default: 38.4K.
SMDR
The IVX C-Class system continuously outputs real-time SMDR call records to the port.
Note: The system will buffer up to 1000 SMDR records (80 KB) in non-volatile memory (CompactFlash) when
the maintenance port is in use for programming or uploading. When the buffer reaches capacity, the
oldest records are discarded.
External paging device connection
A dry contact overhead-paging device can be connected to the system through the port card's 66 block.
The overhead paging port is fixed (located on the main board) as extension 199 for programming
purposes and user access.
Audio connection
The audio pair is connected to the 66 block at terminal 33 and 34. The pair’s impedance is 600 ohms.
Dry contact control
The manner in which the dry contact pair is punched down on the 66 block sets the pair as normally
open (sending a page to the port will close the contacts) or normally closed (sending a page to the port
will open the contacts).
Connect the dry contact pair of the device to IVX as follows:
• Terminals 35 and 36 to provide normally open operation
or
• Terminals 35 and 37 to provide normally closed operation.
The port can be used with zone paging units.
Note: The port doesn’t support talk-back paging (which requires a CO port), nordoes it support CO ring
through the port.
Hardware overview/installation IVX C-Class with voice mail: Installation Manual
B.10
Amphenol cable connections
Connect a standard 66 Block using a male 50-pin Amphenol cable to the port card’s female connector
located on the bottom-right side of the cabinet. The connector closest to the wall is the first port card
(which is the main board on the C-Class).
CO line connection
Local loop
The IVX C-Class system's advanced CO line circuitry provides for open loop detection and the system’s
built-in Caller ID interface.
Note: Observe correct order of connection to preserve proper rotary hunting of the CO lines.
Station connection
The first six pairs on the Amphenol are station ports.
All stations are connected using a single pair. Each port position is pre-numbered and fixed as indicated
in the 66 block wiring diagram (“Worksheet,” page B.13).
Note: The station runs can be up to 1,000 ft.
Digital stations
The digital station wiring is not polarity-sensitive. Only one phone can be connected per digital port.
Analog ports
The analog ports do not require that tip-and-ring polarity be observed. The analog ports can be used for
2500 type sets or for devices such as fax machines, cordless phones, etc., that can be connected via a
normal tip-and-ring pair. Each analog port will support only a single analog device.
Station Numbering Plan
Digital stations Analog stations
Main board 100 through 105 112 through 113
Portcard 1 108 through 112 n/a
Refer to pages B.11 through B.13 for punchdown assignments.
IVX C-Class with voice mail: Installation Manual Hardware overview/installation
B.11
3x6x2 main board
Term Wire color Signal RJ11 Port
1 White-Blue Data+ Green
2 Blue-White Data- Red
Digital
3 White-Orange Data+ Green
4 Orange-White Data- Red
Digital
5 White-Green Data+ Green
6 Green-White Data- Red
Digital
7 White-Brown Data+ Green
8 Brown-White Data- Red Digital
9 White-Slate Data+ Green
10 Slate-White Data- Red
Digital
11 Red-Blue Data+ Green
12 Blue-Red Data- Red
Digital
13 Red-Orange
14 Orange-Red
15 Red-Green
16 Green-Red
17 Red-Brown
18 Brown-Red
19 Red-Slate
20 Slate-Red
21 Black-Blue
22 Blue-Black
23 Black-Orange
24 Orange-Black
25 Black-Green Tip Green Analog
26 Green-Black Ring Red
27 Black-Brown Tip Green Analog
28 Brown-Black Ring Red
29 Black-Slate
30 Slate-Black
31 Yellow-Blue
32 Blue-Yellow
33 Yellow-Orange
34 Orange-Yellow
35 Yellow-Green
36 Green-Yellow
37 Yellow-Brown
38 Brown-Yellow
39 Yellow-Slate Tip Green
40 Slate-Yellow Ring Red CO
41 Violet-Blue Tip Green
42 Blue-Violet Ring Red CO
43 Violet-Orange Tip Green
44 Orange-Violet Ring Red CO
45 Violet-Green
46 Green-Violet
47 Violet-Brown
48 Brown-Violet
49 Violet-Slate
50 Slate-Violet
Hardware overview/installation IVX C-Class with voice mail: Installation Manual
B.12
360 port card
Term Wire color Signal RJ11 Port
1 White-Blue Data+ Green
2 Blue-White Data- Red
Digital
3 White-Orange Data+ Green
4 Orange-White Data- Red
Digital
5 White-Green Data+ Green
6 Green-White Data- Red
Digital
7 White-Brown Data+ Green
8 Brown-White Data- Red
Digital
9 White-Slate Data+ Green
10 Slate-White Data- Red
Digital
11 Red-Blue Data+ Green
12 Blue-Red Data- Red
Digital
13 Red-Orange
14 Orange-Red
15 Red-Green
16 Green-Red
17 Red-Brown
18 Brown-Red
19 Red-Slate
20 Slate-Red
21 Black-Blue
22 Blue-Black
23 Black-Orange
24 Orange-Black
25 Black-Green
26 Green-Black
27 Black-Brown
28 Brown-Black
29 Black-Slate
30 Slate-Black
31 Yellow-Blue
32 Blue-Yellow
33 Yellow-Orange
34 Orange-Yellow
35 Yellow-Green
36 Green-Yellow
37 Yellow-Brown
38 Brown-Yellow
39 Yellow-Slate Tip Green
40 Slate-Yellow Ring Red CO
41 Violet-Blue Tip Green
42 Blue-Violet Ring Red CO
43 Violet-Orange Tip Green
44 Orange-Violet Ring Red CO
45 Violet-Green
46 Green-Violet
47 Violet-Brown
48 Brown-Violet
49 Violet-Slate
50 Slate-Violet
IVX C-Class with voice mail: Installation Manual Hardware overview/installation
B.13
Worksheet
IVX C-Class
Cabinet
Term. Wire color Signal RJ11 Pt. Crd. 1 Pt. Crd. 2
1 White-Blue Data+ Green
2 Blue-White Data- Red
Digital
100 Digital
106
3 White-Orange
Data+ Green
4 Orange-White
Data- Red
Digital
101 Digital
107
5 White-Green Data+ Green
6 Green-White Data- Red Digital
102 Digital
108
7 White-Brown
Data+ Green
8 Brown-White
Data- Red
Digital
103 Digital
109
9 White-Slate Data+ Green
10 Slate-White Data- Red Digital
104 Digital
110
11 Red-Blue Data+ Green
12 Blue-Red Data- Red
Digital
105 Digital
111
13 Red-Orange
14 Orange-Red
15 Red-Green
16 Green-Red
17 Red-Brown
18 Brown-Red
19 Red-Slate
20 Slate-Red
21 Black-Blue
22 Blue-Black
23 Black-Orange
24 Orange-Black
25 Black-Green Data+/Tip Green
26 Green-Black Data-/Ring
Red Analog
112
27 Black-Brown Data+/Tip Green
28 Brown-Black Data-/Ring
Red Analog
113
29 Black-Slate
30 Slate-Black
31 Yellow-Blue
32 Blue-Yellow
33 Yellow-
Orange OH Page Audio A
34 Orange-
Yellow OH Page Audio B
35 Yellow-Green
OH Page Relay Common
36 Green-Yellow
Relay Normally Open or
37 Yellow-Brown
Relay Normally Closed
38 Brown-Yellow
39 Yellow-Slate Tip Green
40 Slate-Yellow Ring Red CO CO
41 Violet-Blue Tip Green
42 Blue-Violet Ring Red CO CO
43 Violet-Orange
Tip Green
44 Orange-Violet
Ring Red
CO CO
45 Violet-Green Tip Green
46 Green-Violet Ring Red
47 Violet-Brown Tip Green
48 Brown-Violet Ring Red
49 Violet-Slate Tip Green
50 Slate-Violet Ring Red
Hardware overview/installation IVX C-Class with voice mail: Installation Manual
B.14
(This page included for pagination purposes only.)

Other manuals for IVX C-Class

3

Other ESI Telephone manuals

ESI IP 200 User manual

ESI

ESI IP 200 User manual

ESI ORIGINAL IVX User manual

ESI

ESI ORIGINAL IVX User manual

ESI Feature Phone User manual

ESI

ESI Feature Phone User manual

ESI Feature Phone User manual

ESI

ESI Feature Phone User manual

ESI IVX 128 Plus Installation and operation manual

ESI

ESI IVX 128 Plus Installation and operation manual

ESI IVX S-Class Use and care manual

ESI

ESI IVX S-Class Use and care manual

ESI IVX C-Class User manual

ESI

ESI IVX C-Class User manual

ESI IVX S-Class Operating and safety instructions

ESI

ESI IVX S-Class Operating and safety instructions

ESI IVX 20 User manual

ESI

ESI IVX 20 User manual

ESI IVX X-Class User manual

ESI

ESI IVX X-Class User manual

ESI ivx e-class series Use and care manual

ESI

ESI ivx e-class series Use and care manual

ESI 55 User manual

ESI

ESI 55 User manual

ESI 50L User manual

ESI

ESI 50L User manual

ESI IVX 20 User manual

ESI

ESI IVX 20 User manual

ESI eSIP Evolution Series User manual

ESI

ESI eSIP Evolution Series User manual

ESI 12-Key Feature Phone User manual

ESI

ESI 12-Key Feature Phone User manual

ESI IVX 20 Plus Owner's manual

ESI

ESI IVX 20 Plus Owner's manual

ESI IVX 128 User manual

ESI

ESI IVX 128 User manual

ESI ePhone8 User manual

ESI

ESI ePhone8 User manual

ESI 60 Business Phone User manual

ESI

ESI 60 Business Phone User manual

ESI ePhone3 V2 User manual

ESI

ESI ePhone3 V2 User manual

ESI IVX C-Class Operating and safety instructions

ESI

ESI IVX C-Class Operating and safety instructions

ESI ePhoneX eSIP Evolution Series User manual

ESI

ESI ePhoneX eSIP Evolution Series User manual

ESI 48-Key Feature Phone User manual

ESI

ESI 48-Key Feature Phone User manual

Popular Telephone manuals by other brands

Masergy IP650 quick guide

Masergy

Masergy IP650 quick guide

Trillium Panther 612 Technical & service manual

Trillium

Trillium Panther 612 Technical & service manual

AEG ECLIPSE 10 user guide

AEG

AEG ECLIPSE 10 user guide

Mitel 6510 user guide

Mitel

Mitel 6510 user guide

Uniden FP1100 owner's guide

Uniden

Uniden FP1100 owner's guide

Yealink W76P user guide

Yealink

Yealink W76P user guide

Panasonic KX-A114EX/E operating instructions

Panasonic

Panasonic KX-A114EX/E operating instructions

AUDIOLINE BIGTEL 180 COMBO operating instructions

AUDIOLINE

AUDIOLINE BIGTEL 180 COMBO operating instructions

RCA 25425 user guide

RCA

RCA 25425 user guide

Audiovox TX-160C manual

Audiovox

Audiovox TX-160C manual

Panasonic DBS-2.3-400 Programming manual

Panasonic

Panasonic DBS-2.3-400 Programming manual

Telematrix 3002CID Installation and user guide

Telematrix

Telematrix 3002CID Installation and user guide

Nortel Enterprise Edge 2.0 Messaging Guide

Nortel

Nortel Enterprise Edge 2.0 Messaging Guide

Gentner TS612 Call handling instructions

Gentner

Gentner TS612 Call handling instructions

Verizon One Talk VZP59 user guide

Verizon

Verizon One Talk VZP59 user guide

Scitec 600T datasheet

Scitec

Scitec 600T datasheet

Samsung SMT-i5243 user guide

Samsung

Samsung SMT-i5243 user guide

GE 29897GE2 Specifications

GE

GE 29897GE2 Specifications

manuals.online logo
manuals.online logoBrands
  • About & Mission
  • Contact us
  • Privacy Policy
  • Terms and Conditions

Copyright 2025 Manuals.Online. All Rights Reserved.