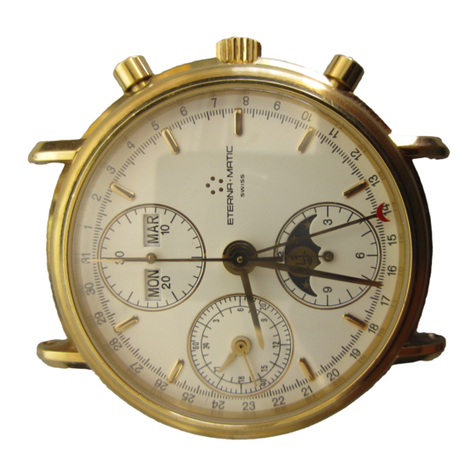
Eterna Super Kontiki User manual

USER MANUAL
ETA 251.262
ETA 251.264

1
Kontiki Chronograph - Quartz
1

2
TABLE OF CONTENTS
3 Kontiki Chronograph - Quartz
8 Important Advice
ENGLISH
2

A
5
BC
9
6B.
4
2
7 8
A.
3
1
3
1. DISPLAY – FUNCTIONS
ENGLISH
3
WATCH
1Hour hand
2Minute hand
3Small seconds hand
(counter at 6 o'clock)
4Date indicator
5Setting crown
CHRONOGRAPH
660-minute hand
760-second hand
81/10-second counter
(counter at 2 o'clock)
912-hour counter
(counter at 10 o'clock)
A. Start/stop push-button
B. Reset push-button

4
2. WINDING – SETTINGS
2.1 GENERAL POINTS
Your watch is equipped with an electronic quartz movement
providing extreme accuracy and reliability. It is powered by a
battery, and so does not need to be wound. The battery life
is approximately two years under normal conditions of use.
To ensure optimum water resistance, your watch has a
screw-in setting crown. This one oers one waterproof-
ness to your watch, assured until 200 m (20 bar) of depth.
Rapid date correction and setting the time on your watch
requires the screw-in crown to be loosened 5. To do so,
undo the crown a few turns. Once setting is complete,
push the crown back in against the case, and screw it
back in fully. The crown 5has 3 positions:
A Rest position
B Date correction position at midnight
C Time-setting position with stop seconds and
date change at midnight
NOTE
Never operate the crown underwater or when it is
still wet. To save the battery if your watch is going
to be out of use for a long period, we advise pulling
the crown out to position C, which has the eect
of stopping the movement.
ENGLISH
4

5
2.2 SETTING THE TIME
CROWN 5PULLED OUT TO POSITION C
To set the time, unscrew the crown and pull it out 5two
notches until in position C. Turn the crown clockwise or
anti-clockwise to position the hands to the desired time.
When the hour hand passes the 12 o'clock position, you will
see whether it is indicating midnight (the date changes) or
midday (the date does not change). Check that the date set
previously has not changed. Once the setting is complete,
push the crown back in against the case to the rest position
Aand screw it back in. The hands will restart.
NOTE
For a time setting accurate to the second, we
recommend pulling the crown out to position C
when the small seconds hand 3is at precisely 12
o'clock, and pushing it back in to synchronise with
an ocial time signal, then screwing it down.
2.3 RAPID DATE CORRECTION
CROWN
5
PULLED OUT TO INTERMEDIATE POSITION
B
Unscrew the crown 5and pull it out one notch to position
B. Turn it clockwise until the correct date appears in the
window 4. Then push the crown 5back against the case
into the rest position A, and screw it back in.
ENGLISH
5

6
NOTE
During this operation your watch continues to run nor-
mally, hence the time does not need to be corrected.
IMPORTANT
Never correct the date between 8:00 p.m. and 2:00
a.m. The movement is in the date change process,
and could be damaged.
3. USING THE CHRONOGR APH
The chronograph allows the chronometer to run for du-
rations of up to 12 hours with the crown in position A.
3.1 STARTING THE CHRONOGRAPH
Pressing push-button Asets o the central seconds hand
of the chronograph 7. It completes a full turn of the dial in
60 seconds. The central minute hand of the chronograph
6registers the time elapsed since it was set o.
3.2 STOPPING THE CHRONOGRAPH
Pressing push-button
A
again stops the central seconds
hand of the chronograph
7
, the central minute hand
6
as
well as the counters
8
and
9
, which display the time elapsed.
3.3 RESETTING THE CHRONOGRAPH
Pressing push-button Bresets the chronograph to zero,
readying it for a new timing operation.
ENGLISH
6

7
3.4 SUCCESSIVE TIMING OPERATIONS (LAP TIMES)
To carry out successive timings, all you need to do is stop
and start the chronograph as many times as needed by
pressing push-button Alocated at 2 o'clock. The corres-
ponding hands are not reset, but restart directly from
their stop position. The chronograph can be reset to zero
by pressing push-button Blocated at 4 o'clock.
4. STARTING THE COUNTERS
After changing the battery, or exceptionally, when there
has been a problem, the counters need to be initialised
(set to zero) before starting the chronograph. If neces-
sary, proceed as follows:
1. Set the hand on the hour counter to zero 9(crown
in position B, push-button A).
2. Set the hand on the 60-minute counter to zero 6
(crown in position B, push-button B) .
3. Set the hand on the seconds counter to zero 7
(crown in position B, push-button A) .
4. Set the hand on the 1/10 seconds counter to zero 8
(crown in position B, push-button B) .
7

8
IMPORTANT ADVICE
WATER RESISTANCE
The waterproofness of your watch is assured according
to specification quoted in the paragraph 2.1 majorities.
Nevertheless, it is important to understand that repea-
ted handling of the case, ageing of the sealing compo-
nents and high temperature variations (e.g. from hot
sun to cold water) may get the better of the most water-
resistant case.
Since water and moisture infiltration may lead to costly
repairs, you are strongly advised to have your watch's
water resistance checked regularly by an Eterna autho-
rised retailer or an approved Eterna general agent.
ENGLISH
8

9
CARE AND MAINTENANCE
Your watch was manufactured with the utmost care.
Observing the recommendations below will help
preserve its rate accuracy and as-new appearance for as
long as possible.
If your watch is equipped with a leather strap, we
recommend avoiding any contact with water, to
optimise the leather’s longevity. We also recommend
cleaning your watch regularly using a damp soft cloth.
After bathing in seawater, rinse the watch in fresh water
and leave it to dry out completely.
Avoid leaving your watch in places exposed to high
variations in temperature or humidity, extreme
temperatures, bright sunlight or strong magnetic
fields. Avoid direct contact with solvents, detergents,
perfumes, cosmetics, etc. They may damage the wristlet,
case or gaskets. Avoid thermal shocks, or impacts: they
could damage your watch. In case of violent impact,
please have your watch checked by an Eterna authorised
retailer or an approved Eterna general agent.
ENGLISH
9

10
SERVICING
It is advisable to have your watch overhauled and fully
cleaned at least once every 4 years, and in particular to
have the movement overhauled, since its operation may
be disrupted due to ageing of the oil and grease.
To ensure irreproachable maintenance service and
safeguard the warranty validity, always entrust your
watch to an Eterna authorised retailer or an approved
Eterna general agent.
For any questions, please contact your Eterna authorised
retailer or the Eterna general agent for your country. You
can find the addresses and a host of information on our
website: www.eterna.com
ENGLISH
10

11
END-OF-LIFE COLLECTION AND TREATMENT
OF QUARTZ WATCHES*
This symbol indicates that this product must
not be disposed of with household waste.
It must be taken to an approved collection
point. By following this procedure, you will
contribute to protecting the environment and
human health. Recycling of materials helps conserve
natural resources.
* applicable in European Community member countries,
and in countries with comparable legislation.
ENGLISH
11

12
INHALTSVERZEICHNIS
13 Kontiki Chronograph - Quartz
19 Wichtige Hinweise
DEUTSCH
12

A
5
BC
9
6B.
4
2
7 8
A.
3
1
13
1. ANZEIGEN – FUNKTIONEN
DEUTSCH
UHR
1 Stundenzeiger
2 Minutenzeiger
3Zeiger der
kleinen Sekunde
(Zähler bei 6 Uhr)
4Datumsanzeige
5Einstellkrone
CHRONOGRAPH
660-Minutenzeiger
7 60-Sekundenzeiger
8 1/10-Sekundenzähler
(Zähler bei 2 Uhr)
912-Stundenzähler
(Zähler bei 10 Uhr)
A. Drücker für Start/Stopp
B. Drücker für Nullstellen
13

14
2. AUFZUG – EINSTELLUNGEN
2.1 ALLGEMEINE BEMERKUNGEN
Ihre Uhr ist mit einem elektronischen Quarzwerk ausges-
tattet, dass extreme Präzision und Zuverlässigkeit bietet.
Es wird durch eine Batterie mit Energie versorgt und
muss deshalb nicht aufgezogen werden. Die Lebensdauer
der Batterie beträgt unter normalen Verwendungsbedin-
gungen ungefähr zwei Jahre.
Um eine absolute Wasserdichtheit Ihrer Armbanduhr
zu gewährleisten, verfügt sie über eine verschraubte
Einstellkrone. Diese bietet eine Wasserdichte die bis zu
200 M versichert ist (20 Bar). Für die Datumsschnellkor-
rektur und die Zeiteinstellung der Uhr muss zuerst die
verschraubte Krone 5gelöst werden. Lösen Sie die Krone
durch ein paar Umdrehungen. Drücken Sie nach erfolg-
ter Einstellung die Krone wieder gegen das Gehäuse und
schrauben Sie sie fest. Die Krone 5verfügt über 3 Stel-
lungen:
A Ruhestellung
B Stellung für den Datumswechsel bei Mitternacht
C Stellung für die Uhrzeiteinstellung mit Sekun-
denstopp und Datumswechsel bei Mitternacht
BEMERKUNGEN
Betätigen Sie niemals die Krone unter Wasser oder
wenn sie noch feucht ist. Um die Batterie
DEUTSCH
14

15
zu schonen, empfehlen wir Ihnen, wenn Sie
Ihre Uhr über eine längere Dauer nicht tragen,
die Krone in die Stellung Cherauszuziehen,
wodurch das Uhrwerk zum Stillstand gebracht wird.
2.2 ZEITEINSTELLUNG
KRONE 5IN DIE STELLUNG CHERAUSGEZOGEN
Um die Zeit einzustellen, lösen Sie die Krone 5und ziehen
Sie sie um zwei Stufen in die Stellung Cheraus. Drehen
Sie die Krone im oder gegen den Uhrzeigersinn, bis die
gewünschte Uhrzeit angezeigt wird. Beim Drehen des
Stundenzeigers über 12 Uhr hinweg können Sie erkennen,
ob Mitternacht (das Datum ändert) oder Mittag (das
Datum ändert nicht) ist. Stellen Sie sicher, dass das zuvor
eingestellte Datum nicht geändert wird.
Drücken Sie nach erfolgter Einstellung die Krone wieder
gegen das Gehäuse in die Ruhestellung Aund schrauben
Sie sie fest. Die Zeiger laufen weiter.
BEMERKUNG
Für eine sekundengenaue Einstellung empfehlen
wir Ihnen, die Krone zu lösen und in die Stellung
Cherauszuziehen, wenn sich der Zeiger der kleinen
Sekunde 3genau auf 12 Uhr befindet, und die Krone
synchron zu einem oziellen Zeitzeichen wieder
hineinzudrücken und danach festzuschrauben.
DEUTSCH
15

16
2.3 DATUMSSCHNELLKORREKTUR
KRONE 5IN DER MITTLEREN STELLUNG B
Lösen Sie die Krone 5und ziehen Sie sie um eine Stufe in
die Stellung Bheraus. Drehen Sie sie im Uhrzeigersinn, bis
das richtige Datum bei der Datumsanzeige 4erscheint.
Drücken Sie die Krone 5wieder gegen das Gehäuse in die
Ruhestellung Aund schrauben Sie sie fest.
BEMERKUNG
Während Sie diese Einstellung vornehmen, läuft
die Uhr normal weiter. Es ist somit keine Korrektur
der Uhrzeit erforderlich.
WICHTIG
Ändern Sie niemals das Datum zwischen 20.00
Uhr und 02.00 Uhr. Die Mechanik des Datums
wechsels ist dann bereits in Gang und könnte
beschädigt werden.
3. VERWENDUNG DES CHRONOGRAPHEN
Mit Hilfe des Chronographen können Sie mit der Krone in der
Stellung
A
Zeitintervalle bis zur Dauer von 12 Stunden stoppen.
DEUTSCH
16

17
3.1 STARTEN DES CHRONOGRAPHEN
Wenn der Drücker Abetätigt wird, beginnt der zentrale
Sekundenzeiger des Chronographen 7zu laufen. Er führt
in 60 Sekunden eine ganze Umdrehung aus. Der zentrale
Minutenzeiger des Chronographen 6registriert die seit
dem Starten verflossene Zeit.
3.2 ANHALTEN DES CHRONOGRAPHEN
Durch erneutes Betätigen des Drückers Akönnen der
zentrale Sekundenzeiger des Chronographen 7, der zen-
trale Minutenzeiger 6sowie die Zeiger der Zähler 8und
9gestoppt werden, um die verflossene Zeit abzulesen.
3.3 NULLSTELLEN DES CHRONOGRAPHEN
Durch Betätigen des Drückers Bwird der Chronograph
auf null gestellt. Der Chronograph ist nun bereit für einen
neuen Stoppvorgang.
3.4 ADDITIONSSTOPPZEITEN
Für Additionsstoppzeiten können Sie den Chronographen
mit Hilfe des Drückers Abei 2 Uhr beliebig oft starten
und wieder anhalten. Die entsprechenden Zeiger werden
dabei nicht auf null gestellt, sondern starten jeweils aus
der zuletzt eingenommenen Position. Durch Betätigen
des Drückers Bbei 4 Uhr wird der Chronograph auf null
gestellt.
17

18
4. INITIALISIERUNG DER ZÄHLER
Nach einem Batteriewechsel oder in Ausnahmefällen bei
einer Verstellung müssen die Zähler vor dem Stoppvorgang
initialisiert (auf null gestellt werden) werden. Gehen Sie
bei Bedarf wie folgt vor:
1. Nullstellen des Stundenzählerzeigers 9(Krone in
der Stellung B, Drücker A).
2. Nullstellen des 60-Minutenzählerzeigers 6(Krone
in der Stellung B, Drücker B).
3. Nullstellen des Sekundenzählerzeigers 7(Krone in
der Stellung B, Drücker A).
4. Nullstellen des 1/10-Sekundenzählerzeigers 8(Krone
in der Stellung B, Drücker B).
18

19
WICHTIGE HINWEISE
WASSERDICHTIGKEIT
Die Dichtheit Ihrer Uhr ist nach Spezifikation, im Ab-
satz 2.1 Allgemeinheiten zitiert. Dabei gilt es jedoch zu
beachten, dass Manipulationen am Gehäuse, Alterungs-
prozesse beim Dichtungsmaterial sowie starke Tempe-
raturschwankungen (z. B. von der prallen Sonne ins kalte
Wasser) selbst dem dichtesten Gehäuse zusetzen.
Wasser kann eindringen und zu kostspieligen Reparatu-
ren führen. Deshalb empfehlen wir Ihnen dringend, Ihre
Armbanduhr regelmässig durch ein Eterna Fachgeschäft
oder eine Eterna Generalvertretung auf ihre Wasser-
dichtigkeit überprüfen zu lassen.
DEUTSCH
19
Other manuals for Super Kontiki
2
This manual suits for next models
2
Table of contents
Languages:
Other Eterna Watch manuals

Eterna
Eterna KonTiki Date User manual

Eterna
Eterna SELLITA SW200 User manual

Eterna
Eterna Madison Eight-Days with Eterna Spherodrive User manual

Eterna
Eterna Super Kontiki User manual

Eterna
Eterna Legacy User manual

Eterna
Eterna ARTENA User manual

Eterna
Eterna 1948 User manual

Eterna
Eterna Heritage 1948 for Him Reveil User manual

Eterna
Eterna Super Kontiki User manual

Eterna
Eterna AVANT-GARDE LADY User manual