manuals.online logo
Brands
  1. Home
  2. •
  3. Brands
  4. •
  5. Exmark
  6. •
  7. Lawn And Garden Equipment
  8. •
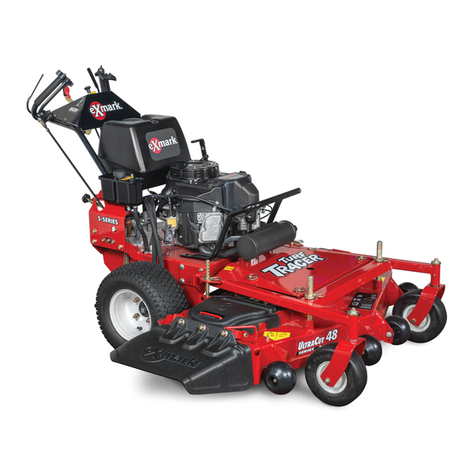
  9. Exmark TURF TRACER S Series Manual

Exmark TURF TRACER S Series Manual

TURF TRACER ®
S-Series
Setup Instructions
For Serial Nos. 416,150,475 & Higher
Loose Parts
Use the c har t belo w to v erify that all par ts ha v e been shipped. P ar t n umbers not sho wn are a v ailable on the dealer
extranet.
Dealer P ack
P ar t No. Description Qty . Use
103-2106
K ey , Exmark Log o
1
1-603511
K ey , Standard
1
Fill out the online w ar ranty registration
for m and place k eys into literature
pac k.
Literatur e P ack
Man ual, Operator's
Man ual, Engine Operator's (Non-Exmark Engine)
Checking T ire Pressure
1. Chec k the tire pressure in the dri v e tires . Proper
ination for dri v e tires is 12-16 psi (83-110 kP a).
2. Adjust the tire pressure within 12-16 psi (83-110
kP a) rang e to mak e the tire circumferences matc h as
closely as possible .
3. T he front caster tires are semi-pneumatic . No
adjustment is necessar y .
Servicing the Battery
W ARNING
CALIFORNIA
Pr oposition 65 W ar ning
Batter y posts, ter minals, and r elated
accessories contain lead and lead compounds,
chemicals kno wn to the State of Calif or nia
to cause cancer and r epr oducti v e har m.
W ash hands after handling .
Important: T he machine is shipped with a lled
lead acid batter y .
DANGER
Charging or jump star ting the batter y may pr oduce
explosi v e gases. Batter y gases can explode causing
serious injur y .
• K eep spar ks, ames, or cigar ettes a w ay fr om
batter y .
• V entilate when charging or using batter y in an
enclosed space.
• Mak e sur e v enting path of batter y is al w ays open
once batter y is lled with acid.
• Al w ays shield ey es and f ace fr om batter y .
DANGER
Batter y electr ol yte contains sulfuric acid, which is
poisonous and can cause sev er e bur ns. Sw allo wing
electr ol yte can be f atal or if it touches skin can
cause sev er e bur ns.
• W ear safety g lasses to shield ey es, and r ub ber
g lo v es to pr otect skin and clothing when
handling electr ol yte.
• Do Not s w allo w electr ol yte.
• In the ev ent of an accident, ush with w ater and
call a doctor immediatel y .
1. Chec k the v oltag e of the batter y with a digital
v oltmeter . Locate the v oltag e reading of the batter y
© 2023—Exmark Mfg. Co., Inc.
415 Industrial Row
Beatrice, NE 68310
Part No. 4506-755 Rev . A
Printed in the USA
All Rights Reserved
*4506-755* A
in the table belo w and c harg e the batter y for the
recommended time inter v al to bring the c harg e up
to a full c harg e of 12.6 v olts or g reater .
Important: Mak e sur e the negati v e batter y
ca ble is disconnected and the batter y charger
used f or charging the batter y should ha v e
an output of 16 v olts and 7 amps or less to
a v oid dama ging the batter y (see char t f or
r ecommended charger settings). T his is
especiall y impor tant on K ohler EFI (Electr onic
Fuel Injection) units. F ailur e to do so may
dama ge the ECU (Electr onic Contr ol Unit).
V olta ge
R eading
P ercent
Charge
Maximum
Charger
Settings
Charging
Inter v al
12.6 or
g reater
100%
16 v olts/7
amps
No Charging
R equired
12.4 – 12.6 75–100%
16 v olts/7
amps
30 Min utes
12.2 – 12.4 50–75%
16 v olts/7
amps
1 Hour
12.0–12.2 25–50%
14.4 v olts/4
amps
2 Hours
11.7–12.0 0–25%
14.4 v olts/4
amps
3 Hours
11.7 or less
0%
14.4 v olts/2
amps
6 Hours or
More
CAUTION
If the ignition is in the “ON” position ther e
is potential f or spar ks and enga gement of
components. Spar ks could cause an explosion or
mo ving par ts could accidentall y enga ge causing
per sonal injur y .
Be sur e ignition s witch is in the “OFF” position
bef or e charging the batter y .
2. Connect the neg ati v e batter y cable .
Note: If the positi v e cable is also disconnected,
connect the positi v e (r ed) ca ble to the positi v e
batter y ter minal r st , then the neg ati v e (blac k) cable
to the neg ati v e batter y ter minal. Slip insulator boot
o v er the positi v e ter minal.
Note: If time does not per mit c harging the batter y ,
or if c harging equipment is not a v ailable , connect
the neg ati v e batter y cable and r un the v ehicle
contin uously for 20 to 30 min utes to sufciently
c harg e the batter y .
Positioning the Discharge
Deector
Loosen tw o 5/16 inc h nyloc n uts attac hing disc harg e
deector . Lo w er the disc harg e deector into position.
R etighten nyloc n uts until c hute is sn ug but can pi v ot
freely .
Servicing the Engine
T he engine is shipped with oil; c hec k oil lev el and if
necessar y ll to the appropriate lev el. Exmark 4-Cycle
Premium Engine Oil is recommended; refer to the
Engine Owner's man ual for an appropriate API rating
and viscosity .
Servicing the Hydraulic Oil
T he mac hine is shipped with h y draulic oil in the
reser v oir .
1. R un the mac hine for appro ximately 15 min utes to
allo w any extra air to purg e out of the h y draulic
system.
2. Chec k h y draulic reser v oir and if necessar y ll the
reser v oir to the appropriate lev el with Exmark
Premium Hy dro oil.
3. R e place h y draulic reser v oir cap and tighten until
sn ug . Do Not o v er tighten.
Note: T he bafe is labeled “HOT” and “COLD”.
T he oil lev el v aries with the temperature of the oil.
T he “HOT” lev el sho ws the lev el of oil when it is at
225°F (107°C). T he “COLD” lev el sho ws the lev el of
the oil when it is at 75°F (24°C). Fill to the appropriate
lev el de pending upon the temperature of the oil. F or
example: If the oil is about 150° F (65°C). Fill to halfw a y
betw een the “HOT” and “COLD” lev els . If the oil is at
room temperature (about 75° F (24°C)), ll only to the
“COLD” lev el.
Filling Out the Product
Registration
Fill out the online w ar ranty registration for m and place
k eys into literature pac k.
2
Other manuals for TURF TRACER S Series

1

Other Exmark Lawn And Garden Equipment manuals

Exmark Lazer Z HP Manual

Exmark

Exmark Lazer Z HP Manual

Exmark ARS180KA21 User manual

Exmark

Exmark ARS180KA21 User manual

Exmark Pioneer E Series Manual

Exmark

Exmark Pioneer E Series Manual

Exmark QUEST User manual

Exmark

Exmark QUEST User manual

Exmark ARX541CKA30000 Manual

Exmark

Exmark ARX541CKA30000 Manual

Exmark TURF TRACER S-SERIES Operators Manual

Exmark

Exmark TURF TRACER S-SERIES Operators Manual

Exmark ARS180CKA21000 Manual

Exmark

Exmark ARS180CKA21000 Manual

Exmark MK523Q User manual

Exmark

Exmark MK523Q User manual

Exmark 126-7882 User manual

Exmark

Exmark 126-7882 User manual

Exmark LZUV52 User manual

Exmark

Exmark LZUV52 User manual

Exmark Quest Bagger Manual

Exmark

Exmark Quest Bagger Manual

Exmark Quest 126-7508 User manual

Exmark

Exmark Quest 126-7508 User manual

Exmark 135-5313 User manual

Exmark

Exmark 135-5313 User manual

Exmark STANDON Series User manual

Exmark

Exmark STANDON Series User manual

Exmark Quest 126-7506 User manual

Exmark

Exmark Quest 126-7506 User manual

Exmark MK443Q User manual

Exmark

Exmark MK443Q User manual

Exmark ARX440CKC24000 User manual

Exmark

Exmark ARX440CKC24000 User manual

Exmark Ultravac Bagger 126-8680 Manual

Exmark

Exmark Ultravac Bagger 126-8680 Manual

Exmark STANDON User manual

Exmark

Exmark STANDON User manual

Exmark 4502-619 Manual

Exmark

Exmark 4502-619 Manual

Exmark Z Turf Equipment Z-SWEEP User manual

Exmark

Exmark Z Turf Equipment Z-SWEEP User manual

Exmark QUEST User manual

Exmark

Exmark QUEST User manual

Exmark SAR481KA30 User manual

Exmark

Exmark SAR481KA30 User manual

Exmark BRS270CKC36000 User manual

Exmark

Exmark BRS270CKC36000 User manual

Popular Lawn And Garden Equipment manuals by other brands

ECOSURE SLIMLINE installation guide

ECOSURE

ECOSURE SLIMLINE installation guide

Kooper flash 2192076 User instructions

Kooper

Kooper flash 2192076 User instructions

Ryobi P2900 Operator's manual

Ryobi

Ryobi P2900 Operator's manual

SCH RR3 operating instructions

SCH

SCH RR3 operating instructions

NOCH 14231 quick start guide

NOCH

NOCH 14231 quick start guide

Premier designs WindGarden 26822 Assembly instructions

Premier designs

Premier designs WindGarden 26822 Assembly instructions

Toro 25454 installation instructions

Toro

Toro 25454 installation instructions

Scag Power Equipment Grass Catcher GCZ-5KH Technical manual

Scag Power Equipment

Scag Power Equipment Grass Catcher GCZ-5KH Technical manual

Bird-X Mega Blaster PRO user manual

Bird-X

Bird-X Mega Blaster PRO user manual

juwel Easy-Fix 100/60 Assembly instructions

juwel

juwel Easy-Fix 100/60 Assembly instructions

Clarke ED160A Operation & maintenance instructions

Clarke

Clarke ED160A Operation & maintenance instructions

Makita PE3450H instruction manual

Makita

Makita PE3450H instruction manual

Holman 40203 Instruction guide

Holman

Holman 40203 Instruction guide

Gronomics MRGW 34-48 EXT Assembly instruction

Gronomics

Gronomics MRGW 34-48 EXT Assembly instruction

SPYKER 46 Operation guide service manual parts list

SPYKER

SPYKER 46 Operation guide service manual parts list

BIOLAN COMPOSTER 220 Instructions for installation, use and maintenance

BIOLAN

BIOLAN COMPOSTER 220 Instructions for installation, use and maintenance

DH Lifelabs Sciaire Pro Ceiling instruction manual

DH Lifelabs

DH Lifelabs Sciaire Pro Ceiling instruction manual

Stiga RECYCLING VE32 Instructions for use

Stiga

Stiga RECYCLING VE32 Instructions for use

manuals.online logo
manuals.online logoBrands
  • About & Mission
  • Contact us
  • Privacy Policy
  • Terms and Conditions

Copyright 2025 Manuals.Online. All Rights Reserved.