Exo Terra PT2348 User manual

Reptile Dome
PT2349
Reptile Dome
PT2348
Thank you for purchasing the Exo Terra®Reptile Dome. Please read
this operation manual carefully before use and operate according to
the instructions provided for maximum safety and performance. We
recommend that you keep this manual handy for future reference.
• Extra deep aluminum reflector dome
increases light, UVA and UVB output
significantly!
• Ideal for use with compact fluorescent and
incandescent bulbs (PT2348: max. 75W /
PT2349: max. 160W)
• With On/Off switch, 6ft (180 cm) power cord
• Heat resistant porcelain socket
INTRODUCTION
The Exo Terra® Reptile Dome has an extra long aluminum reflector
dome that extends beyond the face of most bulbs. The Reptile Dome
Fixture gives you the versatility of placing heat and/or light sources
on your terrarium where needed. The aluminum reflector increases
the light, UVA and UVB output significantly! Its heat resistant ceramic
socket can accommodate either compact fluorescent bulbs or
incandescent bulbs (PT2348: max. 75W / PT2349: max. 160W). The
light can be easily turned on and off by the On/Off switch, mounted
on the extra long power cord (180 cm – 6 ft). Combine multiple
fixtures with specific light bulbs to create the ideal lighting system.
Visit the lighting section on www.exo-terra.com for information on
the lighting requirements for your animal.
AVAILABLE IN 2 SIZES:
PT2348 – Reptile Dome – 15 cm / 6” (max. 75 Watt Bulb)
PT2349 – Reptile Dome – 21 cm / 8” (max. 160 Watt Bulb)
For maximum security, please use in conjunction with the
Exo Terra® Light Bracket.
Read instructions thoroughly prior to installation and operation.
INSTRUCTIONS PERTAINING TO A RISK OF FIRE, ELECTRIC
SHOCK, OR INJURY TO PERSONS
IMPORTANT SAFETY INSTRUCTIONS
WARNING: To guard against injury, basic safety precautions should
be observed when handling the Exo Terra®Reptile Dome, including
the following:
1. READ AND FOLLOW ALL SAFETY INSTRUCTIONS
and all important notices on the appliance before using.
Failure to do so may result in damage to unit.
2. WARNING: NOT FOR USE WITH THERAPEUTIC LAMPS
WARNING – ONLY FOR USE IN DRY LOCATION:
This appliance
is NOT waterproof and MUST be prevented from coming in
contact with water.
WARNING:
This appliance has a polarized plug (one blade is
wider than the other). As a safety feature, this plug will fit in a
polarized outlet only one way. If the plug does not fit fully in the
outlet, reverse the plug. If it still does not fit, contact a qualified
electrician. Never use with an extension cord unless plug can
be fully inserted. Do not attempt to defeat this safety feature.
3.
For INDOOR HOUSEHOLD USE ONLY, NOT FOR
COMMERCIAL USE.
4.
Hot surface, avoid any contact while operating. To avoid injury,
do not contact hot parts, allow to cool down before handling.
5.
This appliance is not intended for use by persons (including
children) with reduced physical sensory or mental capabilities,
or lack of experience or knowledge, unless they have been
given supervision or instruction concerning use of the
appliance by a person responsible for their safety. Children
should be supervised to ensure that they do not play with the
appliance.
6.
Keep Reptile Dome away from curtains or other flammable
objects
7.
Always unplug an appliance from an outlet when not in use,
before putting on or taking off parts, and before cleaning.
Never yank cord to pull the plug from the outlet. Grasp the plug
and pull to disconnect.
8.
Do not use the appliance for other than intended use. The use
of attachments not recommended or sold by the appliance
manufacturer may cause an unsafe condition.
9.
If an extension cord is necessary, a cord with a proper rating
should be used. A cord rated for less amperes or watts than
the appliance rating may overheat. Care should be taken to
arrange the cord so that it will not be tripped over or pulled.
10.
Do not operate any appliance if it has a damaged electrical
cord or plug, or if it is malfunctioning or if it is dropped or
damaged in any manner. The power cord of this appliance
cannot be replaced: if the cord is damaged, the appliance
should be discarded. Never cut the cord.
11.
Make sure the appliance is securely installed before
operating it.
12.
CAUTION: Allow fixture to cool for 15 min. before RE-lamping,
cleaning or repositioning the fixture.
SAVE THESE INSTRUCTIONS
Only close adherence to these installation, electrical and
maintenance guidelines will ensure the safe and efficient use of
this appliance.
Exo-Terra Reptile Dome Operating Instructions
Petsmart Item
#5285675
Petsmart Item
#5300504

2.
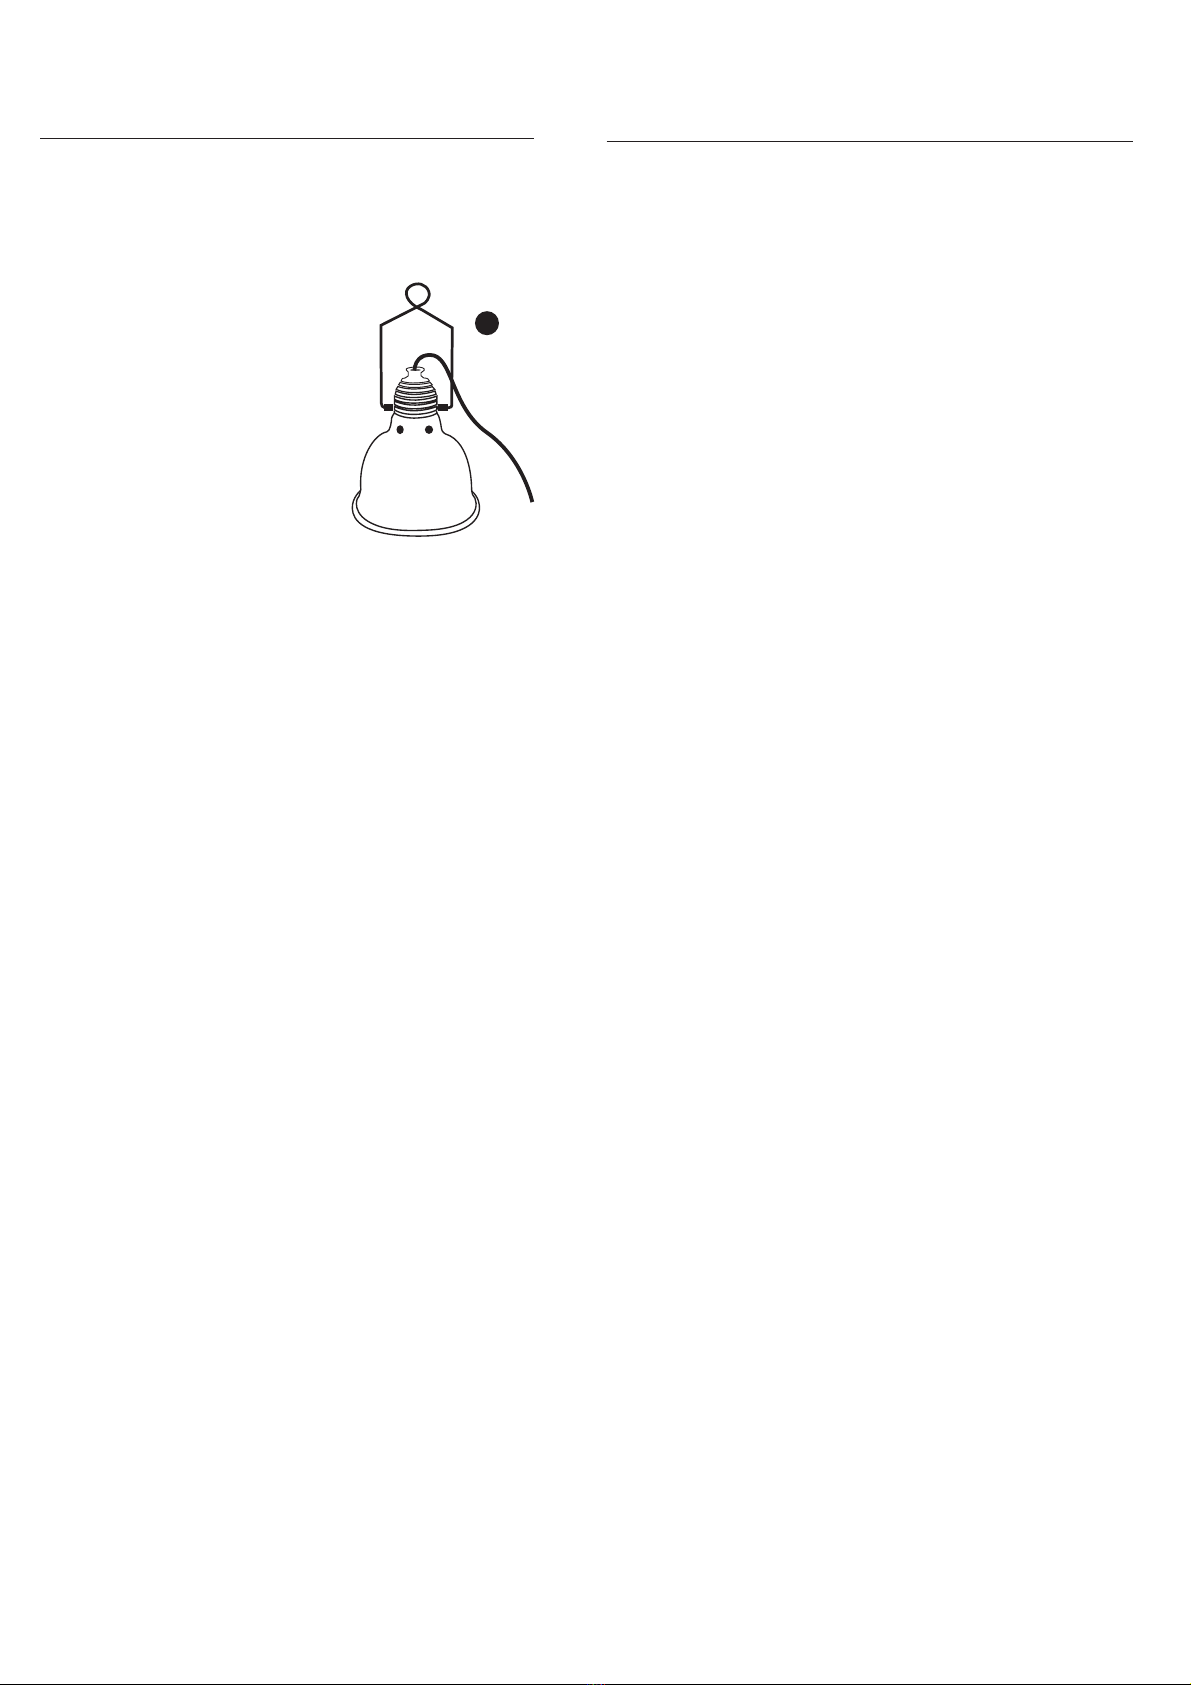
Insert Hanger into the mounting
brackets located on either side of the
lamp socket
(A)
.
3.
Suspend Exo Terra
®
Reptile Dome
from ceiling or other elevated
platform using a chain or other
recommended suspension method.
For maximum security, please use
in conjunction with the Exo Terra
®
Light Bracket. Ensure that the lamp
is positioned over the top metal
screen portion of your terrarium and
NOT over any glass, plastic parts, or
other flammable material. Failure to
do so could result in a possible fire hazard.
4.
Keep unit out of reach of children. Keep unit away from curtains
or other flammable objects.
Installation with Light Bracket (Sold seperately PT2223)
1. Screw light bulb into the Exo Terra®Reptile Do Vme (follow
maximum wattage guidelines). TIP: apply 1yer of
petroleum jelly to the threads on the base of the light bulb before
screwing it in. This will make it easier to unscrew the bulb when
it is time to replace it.
2. Insert hanger into the mounting brackets located on either side
of the lamp socket (A).
3. Clean the outside surface of the terrarium glass.
4. With the protective backing still intact, place the Light Bracket
support on the back or the side of the terrarium to determine its
final position.
5. Mark the position with a wax pencil or other marker.
6. Remove the protective backing and carefully fit the Light Bracket
support within the marked area.
7. Make sure the tape is pressed evenly against the terrarium glass
and that no air bubbles are showing.
8. Press the adhesive sides firmly against the glass panel for at
least 30 seconds.
9. Wait a few moments and make sure the tape is attached firmly
to the terrarium before suspending the fixture.
10. Once in place, the Light Bracket should not be removed.
11. Adjust the height and tighten the screw of the Light Bracket
when the Exo Terra®Reptile Dome is suspended above the
terrarium at the desired height.
12. Remove the first rubber washer and slide the ring of the fixture’s
support tightly in between both rubber stoppers.
13. Adjust the position of the Exo Terra®Reptile Dome by moving the
remaining rubber washer.
14. Replace the first rubber stopper to secure the ring of the fixture’s
support tightly in between both rubber stoppers.
15. Ensure that the light’s focal point is not positioned above any
plastic parts of the terrarium or screen cover to prevent damage.
16. Keep unit out of reach of children. Keep unit away from curtains
or other flammable objects.
GUARANTEE
This product is guaranteed for defects in material or workmanship
for a period of 1 year from date of purchase. The guarantee is valid
with proof of purchase only. The guarantee is limited to repair or
replacement of the unit only and does not cover consequential loss
or damage of or to animate or inanimate objects. This guarantee
A
INSTALLATION
Installation with Fixture support hanger:
1.
Screw light bulb into the Exo Terra
®
Reptile Dome (follow
maximum wattage guidelines). TIP: apply a thin layer of
petroleum jelly to the threads on the base of t t bulb
before screwing it in. This will make it easier to unscrew the
bulb when it is time to replace it.
is valid only under normal operating conditions for which the unit
is intended. It excludes any damage caused by unreasonable use,
improper installation, negligence, tampering, or abuse of the unit.
The warranty does not cover commercial use. The guarantee covers
only domestic household use and does not cover bulbs used with
this fixture. For guarantee service or spare parts contact your
local pet dealer or write to the representative in your country. This
guarantee does not affect your statutory rights.
Service
If you have any problems or questions about the operation of
this product, please let us try to help you before you return the
product to your dealer. Most problems can be handled promptly
with a phone call. When you call (e-mail or write), please have all
relevant information such as model number and/or part numbers
available, as well as the nature of the problem. Please ensure that all
maintenance instructions have been adhered to before returning the
product to your retailer.
Customer Service and Authorized Warranty Repair Service:
Canada:
Rolf C. Hagen Inc.
20500 Trans Canada Hwy
Baie d’Urfé QC,
H9X 0A2
Toll Free Number 1-800-55HAGEN (1-800-554-2436)
Between 9:00 am and 4:30 pm (Eastern Standard Time)
http://faq.hagencrm.com/?en
U.S.A.:
Rolf C. Hagen (U.S.A.) Corp.
305 Forbes Blvd, Mansfield, MA. 02048
Toll Free Number 1-800-724-2436
Between 9:00 am and 5:00 pm (Eastern Standard Time)
mail to: customer.service-usa@rchagen.com
For general information on our whole product range, explore our
websites at: www.exo-terra.com or www.hagen.com.
Distributed by:
Canada: Rolf C. Hagen Inc., Montreal, QC H9X 0A2
U.S.A.: Rolf C. Hagen (U.S.A.) Corp., Mansfield MA. 02048
This manual suits for next models
3
Other Exo Terra Lighting Equipment manuals
Popular Lighting Equipment manuals by other brands

Fomei
Fomei LED ROLL 62 DMX user guide

Hama
Hama AL300 Operating instruction

Haushalt International
Haushalt International 70301 quick start guide

DreamLED
DreamLED BTL-10 user manual

ProLights
ProLights MOVING HEAD user manual

HUBBELL LIGHTING
HUBBELL LIGHTING Dual Lite EVE4X Series Installation, operation and service instructions