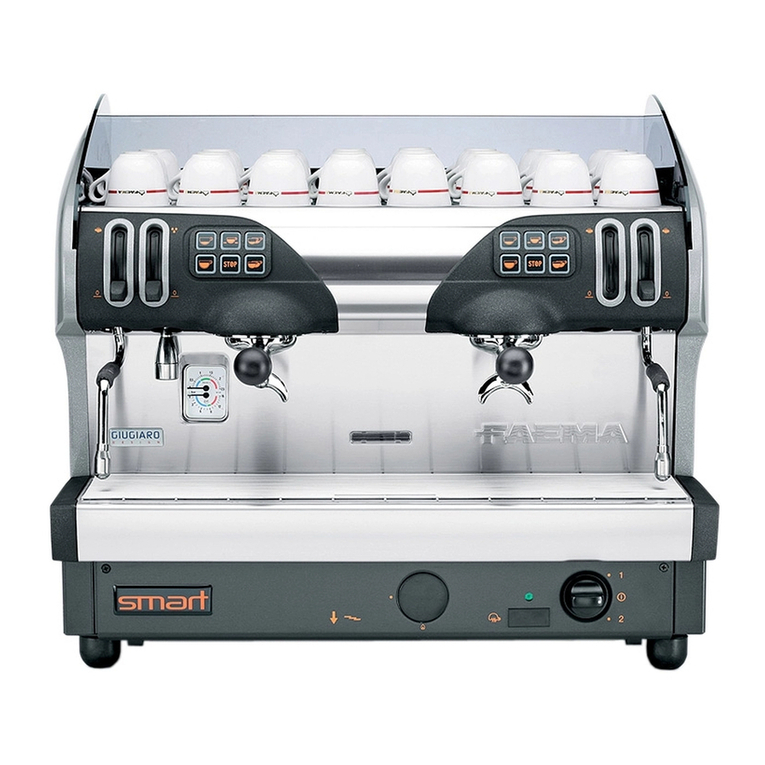
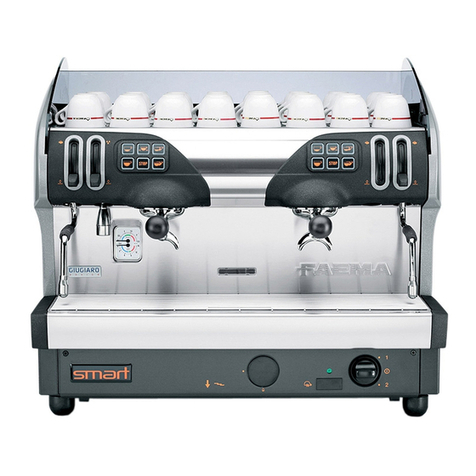
Faema SMART / S Technical manual

Code 930-065-050 (rev. 1745)
SMART / S
USO E INSTALLAZIONE
USE AND INSTALLATION
UTILISATION ET INSTALLATION
GEBRAUCH UND INSTALLATION
USO E INSTALACIÓN
USO E INSTALAÇÃO

III
Italiano English Français Deutsch Español Português
Português
Italiano
English
Français
Español
Deutsch
Istruzioni originali
......................................................
Translation of the original instructions
......................................................
Traduction du manuel d’origine
......................................................
Übersetzung der Originalanleitung
......................................................
Traducción de las instrucciones originales
......................................................
Tradução das instruções originais
......................................................

IV
LEGENDA
1 Interruttore generale
2 Pulsante erogazione caffè
6Lancia vapore orientabile
7 Leva regolazione vapore
8 Lancia acqua calda
9 Leva erogazione acqua calda
10 Porta¿ltro
11
Piano scaldatazze (*)
12 Interruttore scaldatazze
14
Manometro caldaia / pompa
15 Bacinella
I componenti - (*) - sono applicati solo
in alcune con¿gurazioni di prodotti.
LEGEND
1Main 21/2)) sZitcK
2 Coffee dispensing push button
6 6Zivel steam Met pipe
7 Steam adjustment knob
8 +ot Zater dispensing pipe
9 +ot Zater dispensing knob
10 Filter holder
11 Cups-Zarmer (*)
12 Cup heating sZitch
14
Boiler / pump pressure gauge
15 Pan
Items marked - (*) - are ¿tted in some
product con¿gurations onl\.
LEGENDE
1Interrupteur général.
2
Touche débit café
6
Tuyau (lance) orientable de la vapeur.
7Poignée de réglage de la vapeur.
8Tuyau (lance) d’eau chaude.
9Poignée de débit de l’eau chaude.
10 Porte-¿ltres.
11 Chauffe-tasses (*)
12 Touche plateau chauffant.
14 Manomètre de la chaudière/pompe.
15 Cuvette.
Les détails - (*) - ne sont appliqués qu'à
certaines con¿gurations de produits.
IT EN FR
LEGENDE
1Hauptschalter
2 Taste Abgabe Kaffee
6 'ampfrohr (beZeglich)
7 Dampfhahn
8 TeeZasserrohr (beZeglich)
9 TeeZasserhahn
10 Filterhalter
11 TassenerZlrmer (*)
12 (inschalter TassenZlrmeplatte
14
Manometer Kessel / Pumpe
15 :anne
Die mit - (*) - gekennzeichneten
Komponenten sind nur in bestimmten
Modellen installiert.
LEYENDA
1Interruptor general
2 Botón erogación café
6 Tubo (lanza) vapor orientable
7 Mando regulación vapor
8 Tubo (lanza) agua caliente
9 Mando erogación agua caliente
10 Porta¿ltro
11 Calientatazas (*)
12 Botón calienta-tazas
14
Manómetro caldera / bomba
15 Bandeja
Los detallos - (*) - se pueden aplicar sólo
en algunas con¿guraciones del producto.
LEGENDA
1Interruptor geral
2
Botão de erogação do café
6Tubo vapor orientável
7Manípulo regulação do vapor
8Tubo água quente
9Manípulo distribuição água quente
10 Porta-¿ltro
11 Grelha para esquentar chávenas (*)
12
Interruptor para aquecer as chávenas
14 Manómetro caldeira / bomba
15 Bandeja
Os detalhes - (*) são aplicados só em
algumas con¿guraç}es de produtos
PTESDE
15
1
7
6
7
92
8
6
2
14 12
11 10
SMART / S

V
SMART / S
PED / DESP Pmax
[ bar ]
Tmax
[ °C ]
tipo di macchina
Type of machine
type de machine
Maschinentypen
modelo de la máquina
tipo de la màquina
2 gruppi
2 groups
2 groupes
2 Einheiten
2 grupos
2 grupos
Fluido - Fluid - Fluide
Flüssig - Fluido - Fluido Capacità - Capacity [ L ]
Capacité - Fassungsvermögen
Capacidad - Capacidade
Caldaia
Service boiler
Chaudière
Heizkessel
Caldera
Caldeira
2 133
acqua/vapore
Zater/steam
eau/vapeur
Zasser/dampf
agua/vapor
água/vapor
11
Scambiatore
Heat e[changer
Échangeur de chaleur
:lrmeaustauscher
Intercambiador de calor
Permutador de calor
12 133
acqua
Zater
eau
:asser
agua
água
0.65
[2
100 (130 VA)
555
445
555
534
345
80 (110 VA)
655
272
260
Ø~100(3.9) Net Kg
pounds 55
121.25
Weight

1 EN
English
Page
Dear Madam, Dear Sir
Congratulations on your new Faema!
With this purchase, you have chosen an advanced espresso coffee machine built using the most
cutting edge technology. This machine not only offers you a perfect combination of ef¿ciency and
functionality, but also provides you with all the tools you need to do your job in the best possible way.
We recommend that you take some time to read this Use and Maintenance Booklet. It will help
you become more familiar with your new espresso machine, which we’re sure you are looking
forward to using.
Wishing you all the best.
GRUPPO CIMBALI S.p.A.
Index
1. General Rules 2
2.1 Transport and handling 3
2.2 Installation Rules 4
3. Electrical Installation Rules 5
4. Water Installation Rules 5
5. Installation Check-up 6
6. Rules for the worker operating
the machine 7
7. Caution 8
8. Maintenance and Repairs 8
9. Dismantling the machine 9
USE
10. Daily Switch-On 10
11. Cup Warmer (if provided) 10
12. Heating phase 10
13. Coffee dispensing 11
14. Other hot beverage 11
15. Cleaning and maintenance 12
16. Defects – Malfunctions 14
ILLUSTRATIONS VII
Service Line XII

2 EN
English
Please read the warnings and rules in this User’s Manual carefully before using
or handling the machine in any way because they provide important information
regarding safety and hygiene when operating the machine.
Keep this booklet handy for easy reference.
1. General Rules
• The machine was designed solely for preparing espresso coffee and hot beverages using hot
water or steam, and for warming cups.
• The machine must be installed in a place where it is only used by carefully trained staff that know
the risks attached to using the machine.
• The machine is for professional use only.
• This appliance can be used by children aged from 8 years and above and persons with reduced
physical, sensory or mental capabilities or lack of experience and knowledge if they are supervised
or given instruction concerning the safe use of the appliance and understand the hazards involved.
Children must not play with the appliance.
Cleaning and user maintenance must not be made by children without supervision.
• The appliance must not be left unattended.
• The appliance must not be used outdoors.
• If the appliance is stored in rooms where the temperature can drop below the freezing point,
empty the boiler and water circuit tubes.
• Do not expose the appliance to atmospheric agents (rain, sun, and cold).
• Do not clean the appliance with jets of water.
• Noise: the equipment does not exceed 70dB.
• If the power-supply cord is damaged, it can only be replaced by quali¿ed and authorized
technicians.
• If the machine is used improperly or for purposes other than those described above, it can be a
source of danger. The manufacturer will not be held responsible for damages caused by improper
use of the appliance.

3 EN
English
WARNING
,QVWDOODWLRQGLVPDQWOLQJDQGDGMXVWPHQWVPXVWRQO\EHSHUIRUPHGE\TXDOL¿HGDQG
authorized technicians.
Carefully read the warnings and rules in this manual because they provide important
information regarding safe installation, use and maintenance of the machine.
Keep this booklet handy for easy reference.
2.1 Transport and handling
Packaging
• The machine is delivered in a robust cardboard package, with appropriate internal protection. The
package features the standard symbols indicating rules to be followed when handling and storing
the appliance.
• Transport must be carried out according to the instructions on the package, handling with
appropriate caution and avoiding impact of any type.
• Do not expose the appliance to atmospheric agents (rain, sun, and cold).
Checks on receipt
• On receipt of the appliance, carefully check all transport documentation is correct (against label
on package).
• Check that the original packaging is not damaged.
• After removing the appliance from its packing materials, make sure that the appliance and its
safety devices are intact.
• Packing materials (plastic bags, polystyrene foam, staples, etc.) must be kept out of the reach of
children because they are potentially hazardous.
Advice for disposal of packaging
The packaging materials are eco-compatible and recyclable. For the protection of the
environment they must not be dumped, but taken to a recovery / waste-disposal centre,
according to local regulations.
Handling
Staff responsible for moving the appliance must be aware of the risks in moving heavy loads.
Move the appliance carefully, using, where possible, the correct lifting equipment (fork lift, for
example).
If moving the appliance by hand, make sure:
- enough people are available for the task, depending on the appliance weight and how
dif¿cult it is to handle;
- to always use the necessary safety equipment (shoes/gloves).
3

4 EN
English
2.2 Installation Rules
• Before plugging in the appliance, make sure that the information on the nameplate (voltage, etc.)
matches that of the electrical and water systems.
• Check the condition of the power-supply cord; if it is damaged it must be replaced.
• Completely unwind the power-supply cable.
• The coffee machine should sit on a Àat, stable surface at least 20 mm from walls and from the
counter. Keep in mind that the highest surface on the machine (the cup-warmer tray) sits at a
height of at least 1.2 meters. Make sure there is a shelf nearby for accessories.
• Room temperature must range between 10° and 32°C (50°F and 90°F).
• An electrical outlet, water connections, and a drain with siphon must be in the immediate vicinity.
• Do not install in rooms (kitchens) that are cleaned with jets of water.
• Do not obstruct openings or ventilation and heat vents.
• Do not install the appliance outdoors.

5 EN
English
WATER REQUIREMENTS
Water used in coffee machines must be suitable for human consumption (see laws and regulations in force).
Check on the machine’s water inlet that the pH and chloride values comply with current law.
If the values do not fall within the limits, an appropriate water-treatment device must be inserted (respecting the local laws
and compatible with the machine).
If the machine uses water with a hardness exceeding 8°F (4.5 °D), a speci¿c maintenance plan must be implemented
according to the hardness detected and machine usage.
WARNING
Only use the supplied parts for installation. If other parts are installed, they must be new (unused
pipes and gaskets for the water connection) and they must be permitted for contact with water
suitable for human consumption (according to local laws in force).
WATER CONNECTIONS
Place the appliance on a Àat surface and stabilize it by adjusting and securing the feet.
Hook up the water connections as shown in the Illustrations chapter, Figure 2, respecting the hygiene, water safety, and
anti-pollution laws in the country of installation.
Note: If the water pressure can rise above six bar, install a pressure reducer set at 2-3 bar. See Illustrations chapter,
Figure 3.
Water draining tube: place the end of the water draining tube in a drain with a siphon for inspection and cleaning.
IMPORTANT: The curves of the water-draining tube must NOT bend as shown in Illustrations chapter, Figure 4.
Prior to installation, make sure there is a circuit breaker installed with a distance between the contacts
that allows for complete disconnection when there is a category III overload and that provides
protection against current leakage equal to 30 mA. The circuit breaker must be installed on the
power-supply in compliance with installation rules.
If the power-supply is not working properly, the appliance can cause transitory voltage drops.
The electrical safety of this appliance is only ensured when it is correctly connected to an ef¿cient earthing system in
compliance with the electrical safety laws in force. This fundamental safety requirement must be veri¿ed. If in doubt,
request that a quali¿ed electrician inspect the system. The manufacturer cannot be held responsible for any damage
caused by the lack of an earthing system on the electrical supply.
Do not use adaptors, multiple plugs, and/or extension cords.
Check that the type of connection and voltage correspond with the information on the nameplate: see
illustrations chapter, Figure 1.
7KH PDFKLQHV DUH ¿WWHG ZLWK SRZHUVXSSO\ FDEOHV LQ WKH IDFWRU\ VSHFL¿F WR WKH W\SH RI FRQQHFWLRQ
UHTXLUHGWKUHHSKDVH<FRQQHFWLRQ ZLUHVRUWKUHHSKDVHǻFRQQHFWLRQZLUHVRUVLQJOHSKDVH
connection (3 wires).
IT IS NOT PERMITTED TO CHANGE THE ELECTRICAL SUPPLY.
3. Electrical Installation Rules
4. Water Installation Rules
6 EN
English
WATER CONNECTIONS
• No leaks from the connections or tubes
FUNCTIONING
• Boiler and operating pressures are normal.
• The pressure gauge is working properly.
• The self-levelling device is working properly.
• The expansion valves are working properly
GROUPS
• Hook up the ¿lter holders to the groups (without coffee).
• Let each group dispense water for about a minute.
HOT WATER
• Continuously dispense hot water (pressing the appropriate button) until at least 6 litres of water have been dispensed
for a machine with 2 groups (see the “Hot water dispensing” chapter in the User’s Manual).
STEAM
• Dispense steam from the nozzles for about a minute, using the appropriate buttons.
WARNING: AFTER INSTALLATION, CHECK TO SEE IF THE MACHINE IS WORKING PROPERLY (see the
Installation Module C).
WARNING: ONCE THE MACHINE HAS BEEN INSTALLED AND IS READY FOR USE, BEFORE ALLOWING
THE WORKER TO START USING THE MACHINE, WASH THE INTERNAL COMPONENTS ACCORDING
TO THE INSTRUCTIONS BELOW:
5. Installation Check-up

7 EN
English
BEFORE YOU START
Groups
• Hook up the ¿lter holders to the groups (without coffee).
• Let each group dispense water for about a minute.
Hot water
• Continuously dispense hot water (pressing the appropriate button) until at least 6 litres of water
have been dispensed for a machine with 2 groups (see the “Hot water dispensing” chapter in the
User’s Manual).
Steam
• Dispense steam from the nozzles for about a minute, using the appropriate buttons.
DURING OPERATION
Steam dispensing
• Before heating the beverage (water, milk, etc.), open the steam nozzle for at least 3 seconds and
let the steam escape so that condensation is eliminated.
Coffee dispensing
• If the machine has not been used for more than an hour, before using the hot water, dispense
about 100 cc and discard the liquid.
Hot water dispensing
• If the machine has not been used for more than an hour, before using the hot water, dispense
about 200 cc and discard the liquid.
Cleaning the coffee circuits
• Please read the speci¿c section in the user’s manual to learn how to clean these circuits.
WARNING: BEFORE YOU START OPERATING THE MACHINE, WASH THE INTERNAL
COMPONENTS FOLLOWING THE INSTRUCTIONS INDICATED BELOW.
THESE STEPS MUST BE REPEATED AT LEAST ONCE A DAY AND WHEN THE MA-
CHINE HAS NOT BEEN OPERATED FOR MORE THAN 8 HOURS.
6. Rules for the worker operating the machine

WARNING: Hot surface
ACHTUNG: Heisse OberÀlche
ATTENTION: Surface chaude
ATTENZIONE: Super¿cie calda
8 EN
English
GENERAL
The manufacturer disclaims all liability for
damages to items or persons due to improper
use or due to the coffee machine being used
for purposes other than its intended use.
Never operate the coffee machine with wet hands
or naked feet.
Ensure that the appliance is not used by children
or persons who have not been instructed in its
correct use.
Danger of Burns
Do not place the hands or other parts of the body
close to the coffee dispensing groups, or near to
the steam and hot-water nozzles.
Cup-warmer tray
Place only coffee cups, cups and glasses to be
used in conjunction with the coffee machine on
the cup-warmer tray.
Ensure that the coffee cups are completely
drained before placing them on the cup-warmer
tray.
No other objects shall be placed on the cup-
warmer tray.
Danger of Burns
The areas marked with this sign become
hot. Great care should be taken when
in the vicinity of these areas.
If the machine is not working properly, turn off the
machine, turn off the main off-on switch, and call
the service centre.
If the power-supply cord is damaged, switch off
the machine and request a replacement from the
service centre.
MACHINE CLOSE-DOWN
When the machine is left unattended
for a prolonged period (for example
out of hours), carry out the following steps:
• Remove the plug or turn off the main
off-on switch;
• Close the water tap.
Non-compliancewiththesesafetymeasures
exoneratesthemanufacturerfromallliability
for malfunctions, damage to property and/
or injury to persons.
WARNING
Maintenance by unquali¿ed individuals
can jeopardize the safety and conformity
of the machine.
Only use quali¿ed, authorized technicians for
repairs.
WARNING
Only use original spare parts guaranteed by
the manufacturer.
If original spare parts are not used, the
manufacturer's warranty will no longer be
valid.
WARNING
After maintenance, perform the installation
CHECK-UP as indicated in the speci¿c section
of the user’s manual.
To ensure safety during operation, it
is absolutely necessary to:
• follow all the manufacturer’s instructions;
• have qualified and authorized
technicians periodically check that
all safety devices are intact and
functioning properly (the first
inspection within three years of
purchase and every year after that).
7. Caution
8. Maintenance and Repairs

9 EN
English
Pursuant to European Directive 2012/19/UE on
electrical waste (WEEE), users in the Europe-an
community are advised of the following.
Electrical equipment cannot be disposed of as
ordinary urban waste: it must be disposed of
according to the special EU directive for the
recycling of electric and electronic equipment.
Suitable differentiated waste disposal so
that the machine can then be recycled,
treated and disposed of in an
environmentally friendly manner contributes
to avoiding possible negative effects on the
environment and health, and encourages the
reuse and/or recycling of the materials from which
the machine is made.
Improper disposal of electric equipment that fails
to respect the laws in force will be subject to
administrative ¿nes and penal sanctions.
GRUPPO CIMBALI electrical equipment is
marked with a pictogram of a garbage. This
symbol means that the equipment was sold on
the market after August 13, 2005, and must be
disposed of accordingly.
DISMANTLING THE MACHINE
To protect the environment,
please proceed in compliance
with the local laws in force.
3
9. Dismantling the machine

1
12
11
14 10
2
10 EN
English
10. Daily Switch-On
USE
“Before setting the machine to work, make sure that:
• the main electric power switch is on;
• the mains water tap has been turned on".
CAUTION: do not cover the cup warmer tray
with any type of cloth.
The machines have a cup tray (11) for stocking the cups.
Only place cups and glasses used with the coffee machine
on the cup tray. No other objects must be placed on
the tray.
Thoroughly drain the cups before placing them on the tray.
Pressthebutton (12) and check to seethatthe light turns on.
11. Cup Warmer (if provided)
Turn the master switch (1) to position 1.
If the water level in the boiler is less than the minimum
required, the boiler is ¿lled up to the correct level.
Turn the master switch (1) to position 2.
“Heating” now begins.
At the end of the day, turn the machine OFF by turning the
main ON/OFF switch (1) to position 0.
12. Heating phase
During heating, if one of the coffee dispensing push
buttons is pressed, the machine dispenses a coffee at the
temperature reached at the time.
Heating is completed when the boiler gauge indicator (14)
remains stable in the green area.
The machine is now ready to dispense coffee, steam and
hot water.
To make sure that the dispenser unit and the ¿lter holder
(10) are at similar temperatures, press the coffee dispen-
sing button (2) and let the machine dispense coffee for a
few seconds. Then press the button (2) to stop dispensing.

6
7
8
9
A
A
10
2
11 EN
English
13. Coffee dispensing
14. Other hot beverage
Steam dispensing
Completely immerse the right or left steam nozzle (6) into
the container with the liquid to be heated and push the
steam control lever (7) upwards.
Wait until the liquid has reached the desired temperature,
then lower the steam command lever (7) to stop the issue
of steam.
Cleaning of steam nozzles
At the conclusion of each steam dispensing
phase:
- Using a clean sponge, wash with hot water
removinganyorganicresiduepresent.Rinse
carefully.
- clean the inside of the steam nozzle as
follows:turnthenozzletowardsthecuptray
and carefully activate steam dispensing at
least once.
Heating milk for frothy coffee (cappuccino)
General indications
Milk is a delicate biological product and can easily
deteriorate. Heat modi¿es its structure. Milk must be kept
at a storage temperature no higher than 5°C (41°F) from
the moment the container is opened and throughout its
entire period of use. Our storage appliances are suitable
for this purpose.
NOTE: at the end of the work day (or not more than 24
hours from the time the container is opened), any remaining
milk must be discarded.
Use a tall narrow jug and ¿ll it up to about the half-way mark.
Then plunge the steam jet pipe (6) into the milk.
Gradually open up the steam tap (7) and heat the milk for
a few seconds.
When the required amount of froth has been made and the
temperature is suf¿ciently high, stop the Àow of steam by
turning knob (7) the other way (towards “0”).
When the steam jet pipe (6) is no longer required, clean it
thoroughly with a sponge and a clean cloth.
Dispensing hot water
Put a cup or other container under the hot water spout (8).
Lift lever (9) to dispense the desired amount of hot water.
Stop the dispensing by put lever (9) back into its original
position.
'RQRWUHPRYH WKH¿OWHU KROGHUEHIRUH WKH
coffee dispensing has completed.
Danger of Burns! Use the appropriate
insulating devices (A) to move the water and
steam nozzles.
Remove the ¿lter holder (10), empty out any coffee grouts
and ¿ll it up with 1 or 2 servings of ground coffee, depending
on the ¿lter holder used.
Press the ground coffee in ¿lter down uniformly, using the
grinder/doser presser.
Remove any residues of ground coffee from the ¿lter rim.
Fit and tighten the ¿lter holder (10) on the coffee dispenser
unit, positioning the cup (or cups) under the nozzle (or
nozzles) of the ¿lter holder (10).
Press the coffee dispensing button (2) for dispensing.
When the required serving is complete, press the button
(2) to stop dispensing.

2 3
6 7
1 4
132
45A
5
12 EN
English
15. Cleaning and maintenance
Forcorrectapplication of the food safety system(HACCP),please follow the instructionsinthis paragraph.
Washing must be carried out using original “Service Line” products, see details on the last page. Any other
product could compromise the suitability of the materials which come into contact with food products.
Remove the ¿lter holder from
the coffee group.
Using a brush, clean the
cover gasket.
Insert the rubber disk into
the ¿lter-holder with its ¿lter.
Attach the ¿lter-holder to the
dispenser unit and make a
few coffee cycles.
Remove the filter-holder
and clean the shower with
a sponge.
Flush each dispenser unit
with water for about 30
seconds.
Pour in a packet or dosing
cupful of detergent powder.
Put a liter of cold water in a
suitable container and add
detergent. Remove the ¿lters from the ¿lter-holders.
Soak the filters and the
¿lter-holders in this solution
for about 15 minutes.
Remove any residue with a sponge and rinse well with cold
water.
Remove any residue with a sponge and rinse well with
cold water.
FILTER-HOLDERS - 7KLVRSHUDWLRQPXVWEHPDGHRQDOOWKH¿OWHUKROGHUVDWWKHHQGRIHDFKZRUNLQJGD\
CLEANING DISPENSING UNIT - 7KLVRSHUDWLRQPXVWEHPDGHRQDOOWKHJURXSVDWWKHHQGRIHDFK
ZRUNLQJGD\
'RQRWUHPRYHWKH¿OWHUKROGHUGXULQJFRIIHHGLVSHQVLQJ

1 32
13 EN
English
GRILLE AND DRIP BASIN - 7KLVRSHUDWLRQPXVWEHPDGHDWWKHHQGRIHDFKZRUNLQJGD\
Remove the grille from the
basin. Extract the basin.
Rinse the grid andtray
under running water.
DISCHARGE BASIN
- TKLV RSHUDWLRQ PXVW EH PDGH DW WKH HQG RI HDFK
ZRUNLQJGD\
Pour about a liter of hot water into the discharge basin to
remove any discharge residues.
BODYWORK - 7KLVRSHUDWLRQPXVWEHPDGHDWWKHHQGRIHDFKZRUNLQJGD\
Use a soft cloth and cleaning products WITHOUT ammonia
or abrasives, removing any organic residue present in the
work area.
NOTE. Do not spray liquids into the panel slots.
STEAM NOZZLES AND HOT-WATER DISPENSING PIPES - 7KLVRSHUDWLRQPXVWEHFDUULHGRXWDWWKHHQGRI
HDFKZRUNLQJGD\
Using a clean sponge, wash with hot water removing any
organic residue present. Rinse carefully.
Do not use abrasive products.
To clean the inside of the steam nozzles, follow these steps:
Turn the nozzle towards the cup tray and carefully activate
steam dispensing at least once.
NOTE: the procedures described below can also be carried out when the machine is switched off.

14 EN
English
Direct action by the customer
Before calling service personnel, to avoid unnecessary expense, check whether the machine problem corresponds to
one of the cases listed below.
16. Defects – Malfunctions
PROBLEM CAUSE SOLUTION
The coffee machine is not
working.
No electricity supply. Check the electricity supply.
Check the position of the ON/OFF
switch (1).
The coffee machine is not
heating up.
ON/OFF switch (1) position incorrect. Turn the ON/OFF switch (1) to
position 2.
Leaking from the ¿lter holder
rim (10).
Underpan gasket dirty with coffee. Clean using the special brush
provided.
Coffee dispensing time too
short.
Coffee ground too coarse.
Coffee too old.
Use a ¿ner grind.
Use new coffee.
Coffee drips out of machine. Filter holes blocked or filter holder (10)
outlet hole dirty.
Coffee ground too ¿ne.
Clean.
Use a coarser grind.
Loss of water under the
machine.
Discharge well clogged up.
Discharge pan hole blocked.
Clean.
Clean.
Machine heated up, but it does
not dispense coffee.
Water supply or water softener tap closed.
No water in system.
Open.
Wait until water is available or call a
plumber.


GRUPPO CIMBALI SpA - 20082 BINASCO (MILANO) ITALY
CERT. NR. 50 100 3685 / 10877 / 11721
Il Costruttore si riserva il diritto di modicare senza preavviso le caratteristiche
delle apparecchiature presentate in questa pubblicazione
The Manufacturer reserves the right to modify the appliances presented in this
publication without notice
Le fabricant se réserve le droit de modier sans préavis les caractéristiques
des appareils présentés dans cette publication
Der Hersteller behält sich das Recht vor, die in dieser Veröffentlichung vorgestellten
Geräte ohne Vorankündigung zu ändern
El fabricante se reserva el derecho de modicar sin preaviso las
características de los equipos citados en este manual
O Construtor reserva-se o direito de modicar sem aviso prévio as
máquinas tratadas neste manual
Table of contents
Other Faema Coffee Maker manuals

Faema
Faema TEOREMA A Technical manual

Faema
Faema E61 Jubile Technical manual

Faema
Faema Family User manual

Faema
Faema X20 User manual

Faema
Faema SMART / A Technical manual

Faema
Faema E61 3 GR User manual

Faema
Faema E98/A-2 Compact User manual

Faema
Faema Enova S Technical manual

Faema
Faema E71 E Technical manual

Faema
Faema CARISMA S-1 Technical manual

Faema
Faema CARISMA S-1 Technical manual

Faema
Faema E61 Legend Technical manual

Faema
Faema E92 User manual

Faema
Faema E61 Legend Technical manual

Faema
Faema BARCODE Technical manual

Faema
Faema PRESTIGE + Technical manual

Faema
Faema E61 Jubile User manual

Faema
Faema X2 GRANDITALIA User manual

Faema
Faema E71 E Quick start guide

Faema
Faema E98/S-1 User manual