manuals.online logo
Brands
  1. Home
  2. •
  3. Brands
  4. •
  5. Fantini Cosmi
  6. •
  7. Thermostat
  8. •
  9. Fantini Cosmi Intellitherm C76 User manual

Fantini Cosmi Intellitherm C76 User manual

2000/02
2 1 4
6
18
-
+
2
4
20
22 24
C
C
4
24
22
20
2
FITTING AND CHANGING THE BATTERIES
Lift the cover and fit two 1.5V batteries
ANTIFREEZE (5°C)
OFF
83,5 mm
6 0 mm
60 mm
A -
B-
B -
SPACE DIMENSIONS TO FIX THE BASE
ADVA NCED FUNCTIONS
MONITORING HOW MANY HOURS THE HEATING STAYS ON
Intellitherm C76 - C76B
1
2
3
4
24
22
20
18
16
14 12 10
8
6
4
2
C
DAY
DAY
C
24
22
20
18
16
14 12 10
8
6
4
2
P
S
SUMMER - AIR CONDITIONING OPERATION
I
2
3
4
MINIMUM AND MAXIMUM ROOM TEMPERATURE ON THE PREVIOUS DAY
1
P
S
24
22
20
18
16
14 12 10
8
6
4
2
C
DAY
DAY
C
24
22
20
18
16
14 12 10
8
6
4
2
We reserve the right to make any technical and structural changes deemed necessary without .
TECHNICAL FEATURES
terminals 1 - 2 and closes 1 - 4
1 - WALL MOUNTING
Intellitherm C76 is supplied complete with a base
suitable for mounting flush in a rectangular three-
module or a round outlet box, or for attaching to the
wall.
Fit the controller 1.5 m above floor level, well away
from kitchens, sources of heat, doors or windows.
Make sure that the base is attached on a level and
without any straining.
2 - ELECTRICAL CONNECTIONS
Connect terminals1 - 2 to the heating system with two
wires, replacing the conventional thermostat at any
time, without adding any further connections. When
the room temperature increases, the relay opens
.
Terminal 4is free and can be used for signals or other
purposes.
3 - “OFF MODE” SELECTION
During periods when it is OFF, Intellitherm can be set
to maintain a temperature setting of 5°C to protect the
system from the risk of freezing.
If you require such ANTIFREEZE protection, position
the dip switch (situated at the bottom left-hand side on
the back of the body of the C76) on HIGH. If, on the
other hand, you want the system to be switched OFF
completely, position the dip switch on LOW
.
This selection must be made at the time of installation
and before fitting the batteries.
NOTE: if, at any time after installation, you wish to
change this selection, the Intellitherm must be
reset and reprogrammed.
4 - FITTING THE C76-C76B BODY ON THE BASE
5 - FITTING THE BATTERIES
Insert two good-quality, alkaline long-life AA 1.5 V
pencil batteries in the space provided, taking care to
comply with the polarity indicated. The batteries can
last about two years; when they begin to run down,
the batterysymbol onthe displaystarts toflash .
If the batteries are not changed within 15 days,
Intellitherm C76 will automatically switch off and only
the word OFF will appear on the display.
A = for rectangular
flush-mounted boxes
type 503 (three
modules)
B = for round flush-
mounted boxes
LOOSEN THIS
SCREW AND TURN
THE BODY OF THE
CONTROLLER
UPWARDS TO
DETACH THE BASE
FOR FIXING TO THE
WALL.
Move the switch Sto the position
Move the switch P to the PROG position
Read the hours of heating on the previous day
Read the hours of heating since the controller was
enabled.
With Intellitherm C76, you can keep a check on how many
hours the heating has actually been on (relay closed - ON) on
the previous day or since the temperature controller was last
enabled (i.e. since the last time the batteries were changed or
the device was reset).
Move the switchSto the (economy) position
for the MINIMUM temperature or to the
(Comfort)position for the MAXIMUM
temperature
When you move the switch I to the SUMMER position, Intellitherm C76
switches to operating the AIR CONDITIONING system. The red knob is used for
adjusting the comfort mode temperature required in the room, while the economy
and antifreeze modes are disabled.
The red sectors on the ring appearing on the display consequently indicate the
hours when the air-conditioning system is in operation, while the sectors in any
other color indicate when it is off.
With Intellitherm C76 you can also keep a check on
the MINIMUM and MAXIMUM temperatures
recorded in the room on the previous day and the time
when they occurred.
Read the MINIMUM or MAXIMUM room temperature
Read the time when said MINIMUM or MAXIMUM temperature was
recorded
Move the switch Pto the PROG position
-In compliance with the CEI EN 60730-1 and parts two
-Terminal carrying capacity 5 (3)A 250 V ac
-Micro-disconnection (1BU)
-Co-load switching contact
-Temperature control:
- comfort from 2 to 62 °C
- economy from 2 to 62 °C
-Differential ± 0.25 °C
-Reference thermal gradient 4° K/h
-OFF mode with optional antifreeze protection (5 °C)
selected by means of a dip switch
-doubleinsulation
-Protection grade IP 20 (normal pollution)
-Powered by 2 alkaline AA 1.5V pencil Batteries,
with no connection to the mains
-Battery life two years approx.
-Automatic monitoring of battery charge with
signal on display when battery is low
-Battery changing without losing previously-
memorized programs
-Switch for summer/winter operating modes
-Reset button for restoring standard program
-Overall dimensions: 144 x 84 x 31 mm
2
1
4
DAILY PROGRAMMABLE THERMOSTAT
Intellitherm C76 - C76B
Via dell’Osio, 6 - 20090 Caleppio di Settala MI - ITALY
International Calls Tel. +39 02 95682.222 Fax +39 02 95307006
E-mail: [email protected] http://www.fantinicosmi.it
TERMINAL BOARD
AND ELECTRICAL CONNECTIONS
OFF MODE SELECTION or
OFF WITH ANTIFREEZE PROTECTION
-Class A software
CUSTOMIZING THE (PROGRAMMING)
Intellitherm
4
21
3
WILD CARD FUNCTION
1
2
3
P
S
P
H
USING WITH STANDARD PROGRAMS
i.e. with the default schedules and temperatures already programmed at the factory
Intellitherm
1
822,30
8,30 221713,3011,306,30
20
17
5
°C
20
17
5
°C
AUTO 1 for weekdays AUTO 2 for weekends and holidays
24
22
20
18
16
14 12 10
8
6
4
2
C
C
24
22
20
18
16
14 12 10
8
6
4
2
6
P
I
H
SS
5
4
=ANTIFREEZE MODE
=ECONOMY MODE
=COMFORT MODE
24
22
20
18
16
14 12 10
8
6
4
2
C
C
24
22
20
18
16
14 12 10
8
6
4
2
THE DISPLAY
Intellitherm
THE OTHER PROGRAMS
Intellitherm
3
2
PROG
AUTO
24
22
20
18
16
141210
8
6
4
2
C
C
24
22
20
18
16
141210
8
6
4
2
P
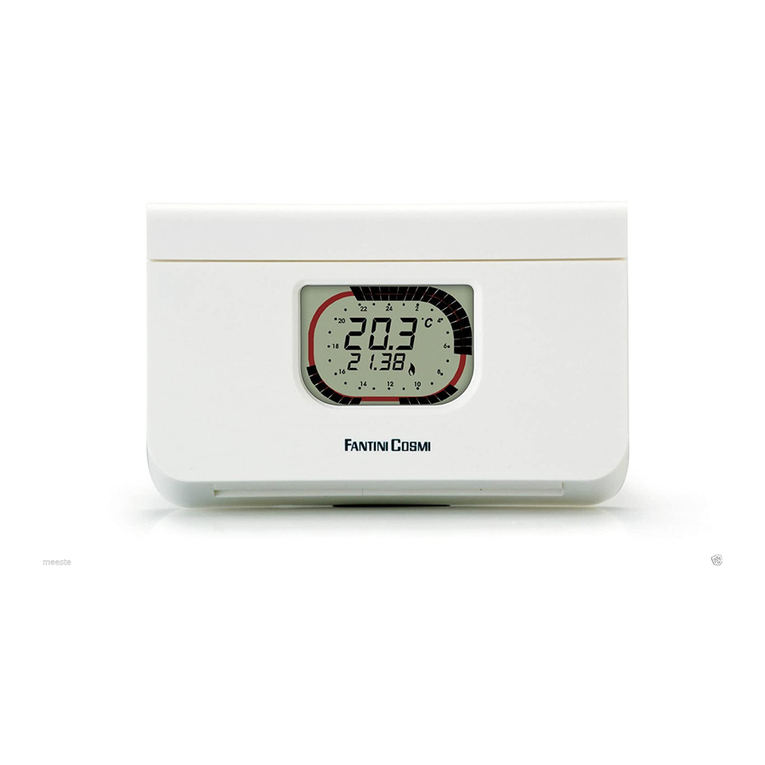
At all times, the display shows the room temperature, the actual time of
day, whether there is any demand for heating (or for conditioning
in summer) and the battery low signal . The display also
shows a programming ring that represents a 24-hour clock, divided into
48 sectors, each corresponding to half an hour. Each sector is further
divided in half and colored red, red-and-black, or black (depending on
the program selected). The color of the sectors indicates the type of
temperature programmed for that particular time of day, i.e.
- red = comfort temperature
- half red and half black = economy temperature
- black = off.
After installing and wiring up the C76, simply follow the numbered steps specified below.
Move the switch S to one of the two STANDARD
AUTOMATIC
PROGRAMS,
AUTO1 or AUTO 2,
with the default schedules and temperatures already programmed at the factory.
Using the red buttons, adjust
the COMFORT mode
temperature. The display will
show the temperature setting
instead of the room
temperature.
Using the blue buttons,adjust
the ECONOMY mode
temperature. The display will
show the temperature setting
instead of the room
temperature.
Reset button. By holding this
down for a few seconds with the
tip of a tool, you can zero all
programming operations and
restore the standard program.
Make sure that the
switch Iis low, on the
winter position
SETTING THE ACTUAL TIME
This step can also be taken before
all the others.
Adjust the actual time
using the H buttons.
Make sure that the
switch Pis low, on the
AUTO (automatic)
position
OFF - this keeps the system constantly off or with the antifreeze protection option
enabled, depending on the choice made at the time of installation (see previous page).
ALWAYS ECONOMY - this constantly maintains the economy mode temperature
selected by means of the blue buttons.
ALWAYS COMFORT - this constantly maintains the comfort mode temperature
selected by means of the red buttons.
Programming the Intellitherm C76 is extremely straightforward. All you have to do is change the
color of the sectors on the ring that coincide with the schedules you require, i.e.
- red for the hours when you want the comfort mode temperature
- red and black for the hours when you want the economy mode temperature
- black for the hours when you want the system switched off.
To change the color of the sectors, simply follow the numbered steps below.
Place the switch P high, on
the PROG (programming)
position.
The display will
indicate
00.00
hours.
The flashing cursor on the
ring will automatically come
into position on the first sector
after the 24 hours.
Move the switch S to the program you want to change
(AUTO1 for weekdays or AUTO 2
for weekends and
holidays)
Move the flashing cursor
(forwards or backwards)
around the ring with the
aid of the keys
The sector whose
color you want to
change will flash on the ring
and the corresponding time
will appear on the display.
Press the buttons to color the
sectors on the ring on the display.
Each time you press one of the three buttons, the
sector becomes colored and the cursor moves
forward by half an hour; use:
-the red buttons for red sector
-the blue buttons for red and half black
sector
-theblack buttons for black
sector.
To move the cursor without changing
the color of a sector, use the buttons.
After completing all the changes, bring the
switch P
into the AUTO position.
With Intellitherm C76, you can temporarily cut out the
automatic program at any time, without losing it, in order to
obtain a given temperature (comfort, economy, off)
continuously for an interval ranging from 1 to 240
hours.
Put the switch Son the AUTO 1orAUTO
2 position
Put the switch Pon the AUTO position
Press the red (or blue or black) buttons to establish the
number of hours (shown on the display) during which
time you want to cut out the automatic program and
temporarily "force" the comfort (or economy or off)
mode. The ring on the display will turn the color
corresponding to the temperature you have selected.
After the interval established on the
Intellitherm has elapsed, the automatic
program will be restored.
To reduce the interval or abandon the wild card
option before it has run its course, press a
button corresponding to any color other than
the one on the ring shown on the display.
5
S
C76 - C76B
C76 - C76B
C76 - C76B C76 - C76B
the
the half
the
the
.

This manual suits for next models

1

Other Fantini Cosmi Thermostat manuals

Fantini Cosmi CH110 User manual

Fantini Cosmi

Fantini Cosmi CH110 User manual

Fantini Cosmi C01A User manual

Fantini Cosmi

Fantini Cosmi C01A User manual

Fantini Cosmi CH140GSM User manual

Fantini Cosmi

Fantini Cosmi CH140GSM User manual

Fantini Cosmi CH150RF User manual

Fantini Cosmi

Fantini Cosmi CH150RF User manual

Fantini Cosmi CH193WIFI User manual

Fantini Cosmi

Fantini Cosmi CH193WIFI User manual

Fantini Cosmi CH110 User manual

Fantini Cosmi

Fantini Cosmi CH110 User manual

Fantini Cosmi CH130RR User manual

Fantini Cosmi

Fantini Cosmi CH130RR User manual

Fantini Cosmi Intellicomfort+ CH180RF User manual

Fantini Cosmi

Fantini Cosmi Intellicomfort+ CH180RF User manual

Fantini Cosmi CH180WIFI LITE User manual

Fantini Cosmi

Fantini Cosmi CH180WIFI LITE User manual

Fantini Cosmi C820RQ User manual

Fantini Cosmi

Fantini Cosmi C820RQ User manual

Fantini Cosmi CH123 User manual

Fantini Cosmi

Fantini Cosmi CH123 User manual

Fantini Cosmi CH180WIFI User manual

Fantini Cosmi

Fantini Cosmi CH180WIFI User manual

Fantini Cosmi C61 User manual

Fantini Cosmi

Fantini Cosmi C61 User manual

Fantini Cosmi CH180T3K5 User manual

Fantini Cosmi

Fantini Cosmi CH180T3K5 User manual

Fantini Cosmi O62C User manual

Fantini Cosmi

Fantini Cosmi O62C User manual

Fantini Cosmi Intellitherm C57 User manual

Fantini Cosmi

Fantini Cosmi Intellitherm C57 User manual

Fantini Cosmi Intellitherm C58 User manual

Fantini Cosmi

Fantini Cosmi Intellitherm C58 User manual

Fantini Cosmi CH121 User manual

Fantini Cosmi

Fantini Cosmi CH121 User manual

Fantini Cosmi CH180WIFI LITE User manual

Fantini Cosmi

Fantini Cosmi CH180WIFI LITE User manual

Fantini Cosmi CH140GSM2 User manual

Fantini Cosmi

Fantini Cosmi CH140GSM2 User manual

Fantini Cosmi Intellicomfort CH180 User manual

Fantini Cosmi

Fantini Cosmi Intellicomfort CH180 User manual

Fantini Cosmi Intellitherm C31 User manual

Fantini Cosmi

Fantini Cosmi Intellitherm C31 User manual

Fantini Cosmi CH180-230V User manual

Fantini Cosmi

Fantini Cosmi CH180-230V User manual

Fantini Cosmi C800WIFI User manual

Fantini Cosmi

Fantini Cosmi C800WIFI User manual

Popular Thermostat manuals by other brands

Johnson Controls T26 Series user manual

Johnson Controls

Johnson Controls T26 Series user manual

Kemo Electronic M169A quick start guide

Kemo Electronic

Kemo Electronic M169A quick start guide

Honeywell XE70 Series manual

Honeywell

Honeywell XE70 Series manual

Roth Touchline SL Plus Installation

Roth

Roth Touchline SL Plus Installation

Uponor Comfort E T-87IF manual

Uponor

Uponor Comfort E T-87IF manual

Energate AW000873 installation guide

Energate

Energate AW000873 installation guide

Comfort365 C365T21 Installer manual

Comfort365

Comfort365 C365T21 Installer manual

tado° Smart Thermostat installation guide

tado°

tado° Smart Thermostat installation guide

Vexve AM40 Setup and user guide

Vexve

Vexve AM40 Setup and user guide

Evergreen WT060 instruction manual

Evergreen

Evergreen WT060 instruction manual

White Rodgers 1F97-71 installation instructions

White Rodgers

White Rodgers 1F97-71 installation instructions

eControls Comfort365 C365C32 Installer manual

eControls

eControls Comfort365 C365C32 Installer manual

Danfoss RT 106 installation guide

Danfoss

Danfoss RT 106 installation guide

Salus VS35W Installer's/user's manual

Salus

Salus VS35W Installer's/user's manual

nest Thermostat E installation guide

nest

nest Thermostat E installation guide

Horstmann CentaurStat 1 User operating instructions

Horstmann

Horstmann CentaurStat 1 User operating instructions

McQuay LIA303 Operation & application guide

McQuay

McQuay LIA303 Operation & application guide

Mi-Heat MST1 user manual

Mi-Heat

Mi-Heat MST1 user manual

manuals.online logo
manuals.online logoBrands
  • About & Mission
  • Contact us
  • Privacy Policy
  • Terms and Conditions

Copyright 2025 Manuals.Online. All Rights Reserved.