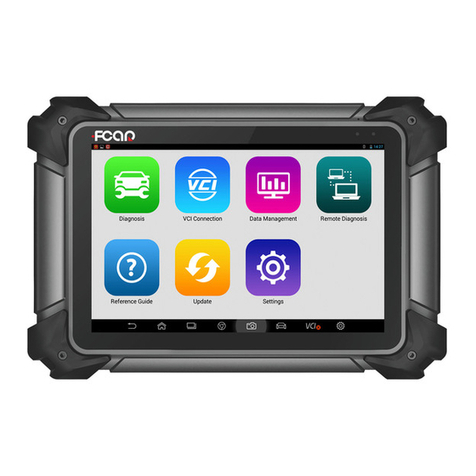
Fcar F5 Series User manual

FCAR Auto Diagnostic Tool
1
Statement
This manual is designed for the use of FCAR automobile diagnostic tool and cannot be copied or
stored in any form (electronic, mechanical, photocopying, recording or otherwise) without prior
written permission being secured by Shenzhen FCAR Technology Co., Ltd.
This manual is intended for professional vehicle repair technicians and provides the operation
methods for using FCAR products. FCAR Technology accepts no responsibility for the consequences
caused by abusing the operation methods on other equipment.
FCAR Technology shall not undertake any responsibility for accidents caused by the user personally
or the other person, or costs and expenses due to equipment damages, equipment loss that are
caused by the user’s abuses, misuses, arbitrary changes or repairs , operations of the equipment
not in accordance with the manual requirements. This manual is written in accordance with the
existing configuration and functions of the product, it’s subject to change without notice if the
product adds new configuration and functions.
FCAR Technology has registered the FCAR trademark in mainland China. The company declares that
the ownership of the registered trademark, service mark, domain name, logo, and company name
in countries which they have not yet been registered belongs to FCAR Technology. The other
products and their company name trademarks mentioned in this manual belong to the original
registered company. The trademarks, service marks, domain names, logos, and company names of
FCAR Technology or other companies mentioned may not be used without prior written permission
of the owner.
Registered Trademark
FCAR Technology has registered the trademark in China and several countries overseas. The
company declares that the ownership of the registered trademark, service mark, domain name, logo,
and company name in countries which they have not yet been registered belongs to FCAR Technology.
The other products and their company name trademarks mentioned in this manual belong to the
original registered company. The trademarks, service marks, domain names, logos, and company names
of FCAR Technology or other companies mentioned may not be used without prior written permission of
the owner.

FCAR Auto Diagnostic Tool
2
FCAR Product Manual Instructions
Please read this manual carefully before using the FCAR product.
This manual is written in accordance with the existing configuration and functions of product and
it’s subject to change without notice if the product adds new configuration and functions. The
new version of the manual can be downloaded from FCAR official website, please pay attention to
"Note", "Remark" and "Instruction" in the manual to make sure the safe and correct use.
Shenzhen FCAR Technology Co., Ltd
Address: N401-N406, No.39, Keji Middle 2nd Rd., Hi-Tech Park,
Nanshan District, Shenzhen, Guangdong, China 518057
Tel: +86-755-82904730
Fax: +86-755-83147605
E-mail: inquiry@fcar.com
Website: www.fcar.com

FCAR Auto Diagnostic Tool
3
Contents
STATEMENT......................................................................................................... 1
1.1 PRODUCT OVERVIEW ................................................................................ 5
1.2 PRODUCT FEATURES.................................................................................. 5
1.3 SERVICE AND MAINTENANCE .................................................................... 6
1.3.1 STORAGE ENVIRONMENT ................................................................................ 6
1.3.2 HOST PROTECTION......................................................................................... 6
1.3.3 SCREEN MAINTENANCE .................................................................................. 7
1.3.4 PRECAUTIONS ............................................................................................... 7
1.3.5 SD CARD MAINTENANCE ................................................................................ 8
1.4 AUTOMOBILE INSPECTION NOTES ............................................................. 8
1.5 PRODUCT HELP ......................................................................................... 9
2.1 HOST HARDWARE INSTRUCTION ............................................................. 10
2.1.1 HOST FRONT DIAGRAM ................................................................................ 10
2.1.2 HOST PARAMETERS ...................................................................................... 12
CHAPTER III OPERATION MANUAL .................................................................. 13
3.1 CONNECTION OF POWER SUPPLY & MAIN TESTING CABLE....................... 13
3.1.1 HOST POWER SUPPLY ................................................................................... 13
3.1.2 WIRING METHOD........................................................................................ 13
3.1.3 START AND SHUTDOWN ................................................................................ 14
3.2 START INTERFACE MENU ......................................................................... 14
3.2.1 START LOGO INTERFACE............................................................................... 14
3.2.2 TOUCH SCREEN CALIBRATION ......................................................................... 15
3.2.3 MAIN INTERFACE ......................................................................................... 16
3.2.4 DIAGNOSTIC INTERFACE ................................................................................ 16
3.2.5 INTERFACE SETTING...................................................................................... 17

FCAR Auto Diagnostic Tool
4
CHAPTER IV PRODUCT REGISTRATION, ACTIVATION, DOWNLOAD & UPDATE... 22
4.1 PRODUCT REGISTRATION ........................................................................ 22
4.2 PRODUCT ACTIVATION ............................................................................ 24
4.3 DOWNLOAD & UPDATE ........................................................................... 27
ANNEX: WARRANTY TERMS & DIAGNOSTIC INTERFACE DEFINITION AND
DESCRIPTION OF STANDARD OBD-II................................................................... 37

FCAR Auto Diagnostic Tool
5
Chapter I Product Introduction
1.1 Product Overview
FCAR automobile diagnostic tool is developed and promoted with emphasis by the Shenzhen FCAR
Technology Co., Ltd. Its comprehensive automobile diagnosis equipment on diesel electric control
system detection are applicable to large, medium and small repair enterprises, training institutions,
automakers, maintenance station and many more.
The product software configuration is all-round with complete vehicle model data and materials. It
fully meets the strict requirements in diagnosis of customers. The software covers almost vehicle model
data, and provides strong repair material and help system that allows users to deal with problems in
practical work easily and quickly so as to improve work efficiency and technical level.
The appearance design is luxury and comfortable with the large TFT touch screen for operations.
Mode setup function for multi working conditions satisfies the working demands in different
circumstances. Adopting flexible drive technology, FCAR automobile diagnostic tool with good scalability
fully meets requirements of various communication bus tests for current automobile electronic control
systems.
1.2 Product Features
All FCAR automobile diagnostic tool core hardware adopts the international advanced modular
design concept with high speed and stabilization, ability to resist high and low temperature difference,
accurate data acquisition and other excellent performances.
FCAR automobile diagnostic tool adopts the open structure design in the program framework. Its
independent operation system allows the system software and diagnostic software to upgrade more
conveniently.
Working power supply is from the automotive batteries, which is widely adapted to the voltage
changes between 9~27V. The internal power supply uses the design of isolated power supply with the
efficient protection of machine from damages when automobile voltage is abnormal.
FCAR automobile diagnostic tool has good scalability and the communication interface adopts the
flexible drive circuit. It not only meets requirements of tests for current automotive bus, but also satisfies
bus automotive tests that may appear in the future. It has built-in high/low speed CAN-BUS and satisfies

FCAR Auto Diagnostic Tool
6
electronic systems which adopt CAN-BUS bus, and it only needs one diagnostic connector to perform the
fault diagnosis on all automobiles that are equipped with CAN-BUS. It also fully supports all OBD-II
protocols.
With a USB port to connect the printer, FCAR automobile diagnostic tool host is convenient for the
maintenance staff to record data and save fault codes and other important information during the
automobile fault diagnosis.
The FCAR automobile diagnostic tool host screen is the general international standard LED TFT
industrial touch screen. It has features such as the characters are clear in the strong sunshine, the
touch-keys are accurate, the interface is broad and the screen’s compressive strength is high and many
other advantages. Its working stability is also advantageously guaranteed while using it in bad
environments.
The FCAR automobile diagnostic tool provides various versions and languages in order to adapt to
the use in different countries and districts.
1.3 Service and Maintenance
1.3.1 Storage Environment
1)Please store in a flat, dry place with suitable temperature when it’s not in use.
2)Please do not put in direct sunlight or places near heating devices.
3)Please do not place in the range of the magnetic field.
4)Please do not put it in places with smoke, water or oil.
5)Please do not put it in places where is dusty, humid and high temperature or easily to be shaken.
6)When the host is dirty, please turn off the power supply immediately, and then wipe the housing
case with a soft wet cloth.
7)Please regularly run the diagnostic tool host to protect it from damp when it is not in use for
extended periods.
1.3.2 Host Protection
1)Please handle the host with care as possible as you can to avoid impacts.
2)When connecting the test cable and the automobile for diagnosis, please plug carefully. And
tighten the fastening screw when it’s in use in order to protect the interface from being damaged in

FCAR Auto Diagnostic Tool
7
the process of movement, please first loosen the screw after use and then unplug the main testing
cable to avoid that the diagnosis interface gets damaged.
3)After using the instrument, put the test cable, connectors and other accessories back to the
assembly case to avoid the missing.
1.3.3 Screen Maintenance
1)The screen surface will absorb dust due to the static electricity. It’s recommended to purchase the
LCD special cleaning cloth to clean the host screen and wipe it gently.
2)Do not wipe the dust with your fingers to avoid leaving fingerprints. Do not use chemical cleaners
to wipe the screen.
3)Please do not place the product near electric equipment that generates electromagnetic wave
interferences so as not to affect the display.
4)Please do not expose the screen in direct sunshine or ultraviolet lighting for long time so as not to
affect the life of the screen.
1.3.4 Precautions
1)It’s prohibited to frequently turn on/off the host, suddenly turn off the power supply or provide
unstable power supply, artificial abnormal power supply.
2)If it’s not in use, please unplug the power supply connector to protect the electrical components
from aging when electrifying for long time.
3)Please don’t unplug the SD card when it’s switched on so as not to damage the data or burn the
card.
4)Please don’t use it in the volatile acid and alkali chemical air environment so as not to corrode the
host hardware.
5)Please do not use chemical reagents such as lacquer thinner, engine cleansing agent, gasoline etc.
to wipe the host.
6)No object can be placed on the display to avoid the touch screen break or internal component
damages due to heavy loads.
7)Please regularly run the diagnostic computer host to protect it from damp when it is not in use for
extended periods.

FCAR Auto Diagnostic Tool
8
1.3.5 SD Card Maintenance
1)Please do not frequently turn on/off the automobile diagnosis tool host.
2)Please take static electricity protection measures so as not to contact the SD card with static
electricity.
3)When upgrading or performing on-line operations, please wait until the data transmission is
finished and then operate on the SD card.
4)Please do not use the electriferous hot plug or plug the SD card by using brute force.
5)Please remember the password if you have encrypted the card content and do not encrypt the data
if possible.
6)Please use good quality data transport devices while connecting the machine. The transmission
distance should not be too long.
7)It’s forbidden to plug the SD card from the host arbitrarily while the diagnosis computer host is
working.
8)It’s forbidden to use cleaning fluid or water to clean the SD card.
9)The insertion direction must be correct when the SD card is inserted (insertion errors can lead to
damage of SD card or SD card slot).
10)Please do not twist or bend the SD card.
1.4 Automobile Inspection Notes
Please perform operations according to automobile repair industry safety rules. Special attention
should be paid to influences and damages caused by acid and alkali, poison gas, high pressure and other
environmental factors.
There is sulfuric acid in the automobile battery, the sulfuric acid is corrosive to the skin and please
avoid direct contacts between the battery and the skin during operations, especially do not splash it into
eyes, and please keep kindling materials far away.
There are various kinds of toxic compounds in the engine exhaust gas, please do not breathe in the
exhaust gas, please park the vehicle in well-ventilated places during operations.
The temperature is relatively high when the engine drives, please do not touch the water tank or
exhaust pipe or other high-temperature components.

FCAR Auto Diagnostic Tool
9
Please apply the handbrake before starting the engine, put the shift lever in the neutral gear
(manual transmission) or P gear position (automatic transmission) to avoid traffic accidents when
starting the engine.
Please apply the parking brake before performing the vehicle maintenance. The transmission is
engaged into the neutral gear or P gear and to lower the driver’s side window glass.
If the engine can be started, please first warm up the vehicle to the normal temperature (the water
temperature is about 80℃), and turn off auxiliary electronic equipments (e.g. A/C, light and audio).
Please find the diagnostic socket on the vehicle, check and confirm that the diagnostic socket cable
is in good condition, and then connect the host to diagnose. Otherwise please do not perform the test in
order to protect the host from damages, or you can use the multimeter to measure the diagnostic socket
voltage if it is necessary.
1.5 Product Help
The FCAR automobile diagnostic tool maintenance is simple and convenient, and support services
go with the host. Our marketing networks all around the country could provide the most convenient and
fastest services in all aspects of purchase, use, upgrade and maintenance.
FCAR Technology also provides online help function for users. If you want to learn our latest
products or automobile diagnostic information, please visit www.fcar.com for comprehensive and
detailed help services.

FCAR Auto Diagnostic Tool
10
Chapter II Product Structure
2.1 Host Hardware Instruction
2.1.1 Host Front Diagram
Front Structure Diagram
Side Structure Diagram

FCAR Auto Diagnostic Tool
11
Rear Structure Diagram
Serial No. Name Application
①
Test Indicator
Light
Test indicator light flashes with the communication to
the vehicle ECU.
②
Power Supply
Indicator Light
Power supply indicator light is normally on after the
machine is switched on.
③Start button
Control system power supply allows the host to start
(long press for 2 or 3 seconds).
④SD Card
Installation interface of SD card ( vehicle testing
diagnosis software is installed in the SD card)
⑤
Main Testing
Cable
Connection interface connects vehicle communication
cable during the vehicle diagnosis.
⑥USB Port It’s used to connect an external printer (spare).

FCAR Auto Diagnostic Tool
12
⑦
Power Supply
Interface
The interface is used to connect the power adapter, cigar
lighter, battery terminal and the host.
⑧Touch Pen
Storage position for the touch pen when the machine is
not used.
⑨Host Holder Support the machine to place on a flat surface.
⑩Product Label
The label includes the product serial number, model
number and other information.
2.1.2 Host Parameters
Hardware Parameter Type / Unit
CPU 400MHZ SAMSUNG 2416X
Host Memory 128M DDR2, 256M FLASH ---
Flash Memory SD card Plug Type
Display 8 inch LED TFT LCD touch screen
Resolution Ratio 800x600 Dot matrix
SD Card Interface --- National Standard
Diagnostic Interface --- DB15
Working Voltage 9~27V V
Working Current <2.0A A
Working Temperature -10℃~45℃℃
Storage Temperature -30℃~85℃℃
Power Supply 12V / 3A DC direct voltage
Color 65535 colors
External Dimension 264*202*55 mm
Net Weight 1408 g

FCAR Auto Diagnostic Tool
13
Chapter III Operation Manual
FCAR series product operatios are similar. Here we take general version as an example and the display
content of the host in practical work shall prevail.
3.1 Connection of Power Supply & Main Testing Cable
3.1.1 Host Power Supply
There are 4 ways to connect supply power and the FCAR mait unit.
① Connect the power adapter (power adapter)
② Connect the main testing cable and connectors with the vehicle diagnostic socket
③ Connect the cigar lighter to the vehicle
④ Connect the battery terminal line with the vehicle battery
3.1.2 Wiring Method
Selection of power supply:
If the diagnostic socket does not have power supply, please choose one power supply connection
method to provide power supply to the host.
If the diagnostic socket has power supply, connection to other power supply cable is not necessary.

FCAR Auto Diagnostic Tool
14
Vehicle necessary conditions:
1. Please confirm the diagnostic socket position and its shape, then check whether it needs external
power supply or not.
2. Please select corresponding connectors according to the vehicle models and the shape of
diagnostic sockets.
3. One end of the main testing cable is connected to the host and the other end is connected to the
diagnostic connector.
4. Please insert the diagnostic connector that has been connected to the main testing cable into the
vehicle diagnostic socket.
5. Please confirm the host power supply is connected and then turn on the machine.
Remark: The automobile diagnostic interface is standard OBD-II interface and two ends of the main
testing cable are separately connected to the OBD-II connector and the automobile diagnostic tool. The
process is completed after inserting the OBD-II connector into the automobile diagnostic socket, please
identify it according to the actual vehicle configuration because not all vehicles are standard OBD-II
connectors.
3.1.3 Start and Shutdown
Start: Connect the host and power supply by any method mentioned above, and then gently click the
power supply button. The host will be started.
Shutdown: After using the device, operate the touch screen and return to the desktop, gently click the
power button to turn off.
Remark: Operation time generally should be 2-3s when users turn on or turn off the machine, pressing
the power button for long time or with brute force would lead to button failure.
3.2 Start Interface Menu
3.2.1 Start LOGO Interface
Connect the power supply, press the power button, the screen shows the FCAR logo first, and then
the start progress bar will roll, now if the touch screen calibration is needed please click the screen
directly and it will enter the screen calibration interface.
If the touch screen clicks are normal, please do not click the screen.

FCAR Auto Diagnostic Tool
15
3.2.2 Touch Screen Calibration
Remark: If you need a touch screen calibration, please click on the screen with the stylus anywhere on
the touch screen to enter the calibration mode. During touch screen calibration, you must use a touch
screen pen to correct.
If touch screen calibration is not needed, do not perform any operation and it will automatically
enter the system desktop after 2 seconds.

FCAR Auto Diagnostic Tool
16
3.2.3 Main Interface
There are differences between models, software systems and menu in FCAR series models. The
actual configuration displayed in the product shall prevail and this manual only takes some models as
examples. The actual interface is subject to product display.
3.2.4 Diagnostic Interface
After connecting to the vehicle diagnostic port and selecting the model series, appropriate models
of testing can be selected. After entering the model, read fault code, erase fault code, read data stream,
actuation test and other advanced functions can be performed.

FCAR Auto Diagnostic Tool
17
3.2.5 Interface Setting
In [Setting] function, various operations can be performed on the host. The followings will introduce
respectively.
1. System Information
You can view product information, serial number, date of an upgrade date.
2. Mechanical Self-test
Host test, open circuit and short circuit test of main testing cable and OBD connector can be
performed. Please operate according to prompt.

FCAR Auto Diagnostic Tool
18
3. Machine Activation
Each FCAR host is not permanent activated when leaving the factory. Only after the purchase of no
abnormality is found in use, you can activate the device. The new shipped host will prompt “You are
using the trial version; you have the opportunity to use XX times” at each time you use before
activation.
Click the [Trial] to continue to use, immediately activate click [Activate].
Each start and connecting as one trial. Once the trial opportunities have reduced to zero, the
machine needs to be activated. When selecting diagnostic program after the host started, the activation
menu will be shown. If you do not activate it, you will unable to use the diagnostic program.
Please visit our official website www.fcar.com, enter [Member Center] and click [Machine
Activation].
4. User Information
Users can fill in personal information on their own after the purchase of equipment and then user
name, contact number, address, and contacts information can be set.

FCAR Auto Diagnostic Tool
19
5. Language Setting
Since the product can support users in different regions, the language can be set according to user’s
purchase. Please note that if the language you want to set does not have permission, the diagnostic
program cannot be used, please set it back.
6. Screen Calibration
If you find that the screen dose not move according to the click or cannot be precisely clicked and
has problem of drifting in use, then screen calibration is needed. Click the four corners sequentially:

FCAR Auto Diagnostic Tool
20
upper left, lower left, lower right, upper right.
7. Screen Brightness
You can set the screen brightness that adapts to different environment.
Table of contents
Other Fcar Diagnostic Equipment manuals
