Ferax FST-550 User manual

1209-13

02 Ferax Ferax 79
Exploded view
1
2
3
4
5
6
7
8
9
10
Fig.1
Fig.2

Ferax 0378 Ferax
Spare parts list
PositionNo. Description No.
4till9,11,22,23 Rollersupport 409365
16 Carbonbrush 409366
17 Stator 409367
18 Ballbearing607ZZ 800607
19 Rotor 409368
20 Ballbearing608ZZ 800608
26 Biggear 409369
31,33till42 Reciprocatingleversupport 409370
45,46 Laser 409371
59 Switch 409372
68,69 Dustadapter 409373
71 Sideguide 407847
B
A
21
3
4
5
6
6
12
B
D
CCC
AE
11
Fig.3a Fig.3b
Fig.4 Fig.5
+
+
++
+
A
BBB
Fig.6 Fig.7


Ferax 75
UK
D
NL
F
E
P
ES
S
SF
N
DK
06 Ferax
job, may signifi cantly reduce the exposure level
Protectyourselfagainsttheeffectsofvibrationbymaintainingthetoolanditsaccessories,
keepingyourhandswarm,andorganizingyourworkpatterns
Packagecontents
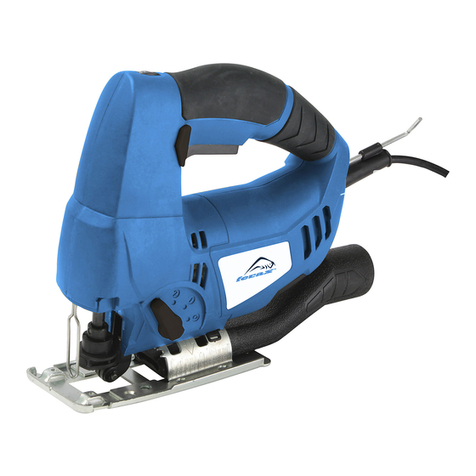
1 Jigsaw
2Sawblades
1 Allenkey
1 Parallelsawguide
1 Vacuumcleaneradapter
1 Usermanual
1 Safetyinstructions
Checkthemachineandaccessoriesfortransportdamage.
Productinformation
Fig. 1
1. Speedcontrol
2. Interlocking
knob
3. Switch
4. Connectionpointvacuumcleaner
5. Allenkey
6. Bottomplate
7. Sawbuckle
8. Pendulum
9. Guard
10. Sawblade
2.SAFETYINSTRUCTIONS
Inthismanualand/oronthemachinethefollowingsymbolsareused:
Denotes risk of personal injury, loss of life or damage to the tool in case of non-
observance of the instructions in this manual.
Denotes risk of electric shock!Always check that the power supply corresponds to
the voltage on the rating plate.
The number of revolution of the machine can be electronically set.
Immediately unplug the plug from the mains electricity in the case that the cord gets
damaged and during maintenance
Caution! Laser beam! Never look into the light beam and never aim the laser
at a person when it is switched on.
GB
D
CZ
H
I
RUS
E
S
SF
N
DK

Ferax 07
Read the users manual.
Wear a dust mask. Working with wood, metals and other materials may produce
dust that is harmful to health. Do not work with material containing asbestos!
Hard materials such as steel, aluminium, plastic.
Soft materials such as wood.
Accuracy.
Faulty and/or discarded electrical or electronic apparatus have to be collected at
the appropriate recycling locations.
Specialsafetyinstructions
Beforeusingtheappliance:
•Checkthefollowingpoints:
• Does the voltage of the motor (230 V) correspond with the mains voltage?
• Are the feeder cable and plug in good condition: sturdy, without loose bits or damage?
• Has the saw blade lost any teeth and is it showing cracks or fractures?
• If so, replace the saw blade immediately.
• Is there enough room under the workpiece so that the saw blade does not come into
contact with the floor or work table as it moves up and down?
•Dotheteethofthesawbladepointupwards?
•Alwayswearprotectivegoggleswhenusingtheappliance.
• Maintaintheappliancecarefully.
• Donotusetheapplianceinawetenvironment.
• Donotusetheapplianceformaterialwhichcontainsasbestos.
• Neverleavethejigsawunattended.
Check that the switch is not interlocked in the ‘On’position
Usingtheappliance
• Clamptheworkpiecethatyouwillbesawinginfirmlyintoplace.
•Removeanywoodresiduethatisnearorstucktothesurfaceofthesawblade;donotuse
yourhandforthis.Switchtheapplianceoffbefore removing any residue!
• Alwaysswitchthejigsawoninidle,i.e.switchthejigsawonbeforebringingitintocontact
withtheworkpiece.
• Whensawingthewoodwatchoutforknots,nails,cracksand/ordirtdeposits.
Thesecancausethesawbladetojamdangerously.Alsowatchoutforthiswithwaste
wood.This often requires less careful sawing, so there is a danger that you may not be
74 Ferax
ES
DK
GB
D
NL
F
E
P
ES
S
SF
N
DK

Ferax 73
Limpieza
Limpieregularmenteelaparatoconunpaño,preferentementedespuésdecadauso.
Asegúresedequelasrejillasdeventilaciónnoposeanpartículasdepolvonisuciedad.
Sihubierasuciedadincrustada,utiliceunpañohumedecidoconaguayjabón.Noutilicejamás
materialesdisolventestalescomogasolina,alcohol,amoniaco,etc.Dichosproductospodrían
dañarelplásticodediferentespiezasdelaparato.
Averías
Sisepresentaunaavería,porejemplo,poreldesgastedeunapieza,póngaseencontactocon
elproveedordeserviciosindicadoenlatarjetadegarantía.Eneldorsodeestemanual
encontraráunamplioresumendelaspartesderecambioquesepuedenordenar.
Usoecológico
Paraprevenirlosdañosduranteeltransporte,elaparatohasidoembalado.Dichoembalaje
estáhecho,enlamedidadeloposible,dematerialreciclable.Lerogamos,porlotanto,que
recicledichomaterial.
Cualquier aparato eléctrico o electrónico desechado y/o defectuoso tiene que
depositarse en los lugares apropiados para ello.
Garantía
Paraconocerlascondicionesdelagarantía,consultelatarjetadegarantíaqueseproporciona
porseparado.
ES
DK
08 Ferax
quitesocarefulaboutwatchingoutforirregularitiesinthewood.
• Donotsawworkpiecesthatarethickerthanthelengthofthesawblade.
• Donottouch metal parts of thejigsawwhen sawing in walls orfloorsin which there could be
electricitycables.Hold the jigsaw tightly withbothhands on the plastic gripsothat you do not
touchpartsthat could become live ifyouaccidentally saw through an electricitycable.
• Whenyouhavefinishedsawing,switchoffthe appliance first and wait until the saw blade
comestoastandstillbeforeremovingitfromtheworkpiece.
• Donotuselongextensioncables.
• Keeptheplasticguardinplacewhilethejigsawisinuse.
Turntheapplianceoffimmediatey in the event of:
• Afaultymains plug, mains flex or flex damage;
• Afaultyswitch;
• Sparkinginthecarbonbrushesorringfireinthecommutator;
• Smokeorsmellfromscorchedinsulation.
Safety tips for the laser beamer
• Never look into the light beam of the laser.
• Never point the light beam of the laser at humans or animals.
•Do not point the light beam of the laser at strongly reflecting material. Hazard from
reflected light.
• Only have repairs made to the laser beamer by qualified personnel / professional
repair specialists.
• Do not insert any hard objects into the laser optics.
• Clean the laser optics with a soft, dry brush.
Electricalsafety
Always check that the mains voltage is the same as on the type plate of the
machine.
The machine is double insulated compliant; therefore, no earth connection is
required.
Replacementofpowercordsorplugs
Immediatelydisposeofoldcordsandplugsoncetheyhavebeenreplaced.Itisdangerousto
plugaloosepowercordintoamainspowersocket.
Useofextensionleads
Onlyeveruseapprovedextensionleadsthataresuitableforthepowerratingofthemachine.
Theminimumcorethicknessis1.5mm2.Wheneverusingareelextensionlead,alwaysfully
unrollthelead.
3.ASSEMBLYINSTRUCTIONS
Selectingthesawblade
GB

Ferax 09
Thejigsawissuppliedwith2sawblades,eachwithdifferentteeth. the profile and the teeth vary
accordingtothematerialthatyouwanttosaw.Afinetooth will give you a smooth and precise
sawcut.Useanarrowprofileifyouwanttosawcurvesorifyouaregoigtosawfigures.
Themaximumsawcapacityinwoodis65mmwiththeenclosedsawblades.
To select the right saw,proceedasfollows:
• Firstofalltryasawbladewithcoarseteeth.
• Ifyoudon'tgetasmoothandprecisesawcut,tryasawbladewithafinertooth.
• Forplastic,aluminiumandsteelalwaysuseasawbladewithaveryfinetooth.
Ingeneralyouwillworkfasterbutlesspreciselywithacoarsetooththanwithafinetooth.
Foranoptimumresultalwaysmakesurethesawbladeissharp.
Thejigsawissuitableforallcommerciallyavailablesawblades).
Sawblade Typeofworkpiece
Coarse Wood
Medium Wood
Fine Plastic,aluminium,steel
Very fine Cutting curves (wood)
Assemblingsawblade
Fig. 2
Before assembling the saw blade check that the mains plug has been
removed from the socket.
To assemble the saw,proceedasfollows:
• Pushthesawbuckleclamp(Fig.2,A)up and hold
• Placethesawinthesawbuckle.Makesurethattheteethpointupwardsandforward.The
smoothsideofthesawmustrestagainstthewheel.
• Pushthesawasfarintothebuckleaspossible.
• Securethesawbygentlyreleasingthesawbuckleclamp.Makesurethat thesawblade
sitscorrectlyinthesawbuckle.Acrookedbladecanresultinanunsatisfactorycut.
• Pushtheguarddown.
Adjustingthebottomplate
Fig. 3a + 3b
Adjusttheangleofthebottomplate(6)asfollows:
A. LoosenthesocketheadscrewswiththeAllen key supplied.
B. Pullthebottomplatebackslightlytounlockit.
C. Turnthebottomplatetotherightorleftinthedesiredsawingangle.
Youcan read this on the protractor (13). The maximum sawing angle is 45º.
D. Pushthebottomplateforwardagaintointerlockit.
E. Tightenthesocketheadscrews(12)again.
Laser beamer
GB
72 Ferax
• Mantengalimpiala placa inferior para quenose produzcan imprecisiones durante elcorte.
• Mantengaelexteriordelasierradevaivénlimpiodemodoquetodaslaspiezasmóviles
puedanmoversedeformaprecisaysindesgaste.
• Mantengalimpiaslasranurasdeventilacióndelmotorparaevitarquesesobrecaliente.
• Silasescobillasdecarbónestángastadas,lasierrafuncionaráhaciendoruidosydeforma
nouniforme.Al final, la sierra dejará de funcionar. Haga sustituir las escobillas de carbón
ensudistribuidor.
• Lubriquelahojadelasierraperiódicamente.
Fallos
• Elmotoreléctricose
calienta.
• Elequiponofunciona.
• Esmuydifícilmoverla
piezadetrabajoalolargo
delahojadecorteen
línearectayelcortedela
hojanoesuniforme.
• Lapiezadetrabajo
empiezaavibrar
violentamenteduranteel
corte.
•Elaparatohaceruidos
y/ofuncionadeformano
uniforme.
• Elsoportenopuede
empujarsehaciaarriba
paraextraerlahojade
sierra
• Elmotorestá
sobrecargándoseporque
laspiezasdetrabajoson
demasiadograndes.
• Elmotorestáaveriado.
• Laconexiónderedseha
interrumpido.
• Elinterruptorestá
dañado.
•Lahojadecorteestá
arqueadaodesafilada.
• Lahojadecorteestá
sobrecalentadao
deformada.
•Lasescobillasdecarbón
estángastadas.
• Silahojadesierraestá
atascada
• Corteaunavelocidad
másbajaparaqueel
motorseenfríe.
• Contacteconelservico
técnicoindicadoenla
tarjetadegarantía
• Compruebelaconexión
deredporsihubiera
fallos.
• Contacteconelservico
técnicoindicadoenla
tarjetadegarantía
• Sustituyalahojadecorte.
• Contactoconel
proveedordeservicios
indicadoenlatarjetade
garantía
• Golpéelasuavementeen
supartefinalconun
martillo
ES
DK

Ferax 71
Aserrado
• Enciendalasierradevaivén.
•Pongalaplacainferiordelequiposobrelapiezadetrabajo.
• Muevalentamentehacialalíneadecortepreviamentemarcadaypresionelasierrade
calarhaciadelantelentamente.
• Presionelaplacainferiorfirmementecontralapiezadetrabajo.Sinolohaceasí,es
posiblequelasierravibreeinclusoquelahojadecorteserompa.
Deje que la sierra haga el trabajo. No presione con demasiada fuerza la sierra de
calar.
Guíaparalelaalahojadecorte
Fig. 8
Sideseahaceruncortequecorraparaleloalbordedelatabla,utilicelaguíaparalelaalahoja
decortesuministrada.Hagalosiguiente:
•Aflojelostornillosdelacabeceraenlapartefrontaldelaplacainferior.
• Deslicelaguíaparaleladelahojaporlasaperturasquehayenellateraldelaplacainferior.
• Determineladistanciaentreelcortedelahojayellateraldelapiezadetrabajo.
• Asegurelaguíaaestadistanciaconlostornillosdelacabecera.Siladistanciarequerida
entreelcortedelahojayellaterales5cm,pongaelindicadoren‘5’enlaguíaexactamente
sobrelahojadecorte.
• Aprietelostornillosdelacabeceranuevamente.
Corteinterno
Fig. 9
Silaposicióninicialdelapiezadetrabajoacortarnoesellateralosinosehataladradoningún
agujero,deberáhaceruncorteinterno.Paraello,procedadelasiguientemanera:
• Pongalahojasobreelfrontalredondeadodelaplacainferior.
•Enciendaelequipoybajelentamentelahojahastaquetoquelapiezadetrabajo.
• Dejequelahojacortelapiezasuavementesinforzarla.
• Cuandohayaterminadoconlapiezadetrabajo,quitelahojadelagujero.
• Pongaelequipoenposiciónnormalenelagujeroaserradoycontinúeconelcorte.
También puede cortar taladrando primero un agujero en la pieza de trabajo. Para hacerlo,
utiliceunabrocaquehagaunagujerosuficientementegrandeparaqueentrelahojadecorte.
Ahorayapuedellevaracabolospasosindicadosenlasección‘Aserrado’.
5.MANTENIMIENTO
Durante el mantenimiento y la limpieza quite siempre el enchufe de red de la toma
de corriente.
Hagafrecuentestrabajosdemantenimientoparaevitarproblemasinnecesarios.Esto
garantizaráqueelequipoestésiempreencondicionesóptimas.
ES
DK
10 Ferax
Laser beamer in use
The leading beam of the laser beamer makes sawing in straight lines much easier:
a) Along a drawn line, or
b) By aligning it to a fixed point marked on the workpiece.
The range of the laser beam, depending on the environmental light, is about 65 cm.
Replacing batteries
Fig.10
• Lock the machine in its highest position
•Unscrew the screw and remove the cover.
• Replace the batteries with new ones. You will need 2 x 1.5 V “Micro/AAA” batteries.
• Never dispose of old/empty batteries with the household refuse, but deposit them
instead at special collection point for batteries or chemical refuse.
• When inserting the batteries, ensure that the +/- terminals are correctly placed, as
shown inside the battery compartment.
• Check that the laser beamer is properly closed by carefully opening the lid straight
upwards. If the lid opens up, repeat the closing procedure, until the lid stays properly
closed.
Adjusting the laser beam
•Transport handling and heavy use can affect the precision of the laser beam.
• The laser beam itself can be easily adjusted.
• Hold the blade of the jig saw against a straightedge or perfectly straight plank.
• Switch the laser on.
• Check whether the laser beam runs parallel along the edge of the straightedge or plank.
Ifthelaserbeamisoutofalignment,proceedasfollows:
• Loosen the two screws on the front side of the laser a few turns.
• Hold the blade of the jig saw against a straightedge or perfectly straight plank.
• Correct the laser such that it runs dead straight along the edge.
• Again tighten the two screws.
4.OPERATION
Operation
Fig. 4
Presstheswitchintoputthejigsawintooperation.The switch can be interlocked with the
interlockingknob.This is done as follows:
A. Presstheswitchin.
B. Keeptheswitchpressedinandpresstheinterlockingknobin.
Thejigsawwillnowcontinuetorun.
Releasetheinterlockingbypressingtheswitchinagain.
Speedcontrol
Fig. 5
Thespeedofthesawbladecanbecontrolledwiththerotaryknobatthetopofthejigsaw.The
GB
Ferax 11
highertheposition,thehigherthespeed.The highest position is 6. The ideal sawing speed will
dependontheprofileandthetoothofthesawbladeandonthematerial youwanttosaw. For
softmaterials,selectareasonablyhighspeedandacoarsetooth.Ifyouwanttosawhard
materials,selectalowerspeedandafinetooth.
Pendulumsetting
Fig. 1 + 6
Foranoptimumsawingresultyoumustsetthewayinwhichtheteethofthesawbladegripthe
material.You do this by adjusting the pendulum (8).
• Softmaterial(wood,plasticsetc.):setthependulumtolevelIIorIII.Forasharpsawcut,
usependulumlevel0orI.
• Medium-hardmaterial(hardwood,aluminiumetc.):setthependulumdependingonthe
application.Forthinmaterialusependulumlevel0,orIifyouareworkingwithraspsor
knives.
• Hardmaterial(steeletc.):setthependulumtolevel0.
• Curves:setpendulumtolevel0.
Youcan adjust the pendulum level while the appliance is in operation.
Dust-collection
Fig. 7
To keep the work surface clean, the jigsaw is equipped with a connection for dust extraction.
Youcan connect your vacuum cleaner to this. Use the vacuum cleaner adapter supplied for
this.
Guard
Thejigsawisfittedwithaguard.Makesurethatthisguardisalwaysmountedcorrectlywhilethe
jigsawisinuse.
Sawing
•Switchonthejigsaw.
• Placethebottomplateoftheapplianceontheworkpiece.
• Moveslowlytowardsthepreviouslydrawnsawinglineandpressthejigsawforwardslowly.
Pressthebottomplatefirmlyagainsttheworkpiece.Ifyoudonotdothisthejigsawislikely
tovibrateandthesawbladewillbreak.
Let the jigsaw do the work. Do not press too hard on the jigsaw.
Parallelsawguide
Fig. 8
Ifyouwanttomakeasawcutthatrunsparalleltotheedgeoftheplank,usetheparallelsaw
guidesupplied.Youdothisasfollows:
• Loosenthesocketheadscrewsonthefrontofthebottomplate.
• Slidetheparallelsawguidethroughtheopeningsatthesideofthebottomplate.
• Determinethedistancebetweenthesawcutandthesideoftheworkpiece.
• Securetheguideatthisdistancewiththesocketheadscrews.
GB
70 Ferax
4.FUNCIONAMIENTO
Bloqueodelinterruptor
Fig. 4
Pulseelinterruptorparaponerenfuncionamientolasierra.Elinterruptorpuedebloquearse
conelbotóndebloqueo.Estosehacedelasiguientemanera:
A. Pulseelinterruptor.
B. Mantengaelinterruptorpulsadoypresioneelbotóndebloqueo.
Ahoralasierradevaivéncontinuaráfuncionando.
C. Suelteambosinterruptores.
Llibereelbloqueopresionandoelinterruptornuevamente.
Controldevelocidad
Fig. 5
Sepuedecontrolarlavelocidaddelasierraconelbotóngiratorioquehayenlapartesuperior
delasierradevaivén.Cuantomásaltasealaposición,mayorserálavelocidad.Laposición
másaltaesla6.Lavelocidaddecorteidealdependerádelperfilydelosdientesdelahoja,así
comodelmaterialquedeseecortar. Para materiales suaves, seleccione una velocidad
razonablementealtayuntipodedientesgruesos.Sideseacortarmaterialesduros,
seleccioneunavelocidadinferioryuntipodedientesmásfinos.
Ajustedelpéndulo
Fig. 1+6
Paraunresultado óptimo del corte, debedeterminarla forma en que losdientesde la hoja de la
sierraentraránen contacto con el material.Estose consigue mediante el ajustedelpéndulo(8).
• Materialblando(madera,plásticos,etc.):fijeelpénduloenelnivelIIoIII.Parauncorte
máspreciso,utiliceelniveldelpéndulo0oI.
•Materialmedianamenteduro(maderadura,aluminio,etc.):ajusteelpéndulosegúnla
aplicación.Enelcasodematerialesfinos,utiliceelniveldelpéndulo0oIsivaatrabajar
conescofinasocuchillas.
• Materialesduros(acero,etc.):pongaelpénduloenelnivel0.
• Curvas:pongaelpénduloenelnivel0.
Puedeajustarelniveldelpéndulomientraselaparatoestáenfuncionamiento.
Recogidadepolvo
Fig. 7
Paramantenerlasuperficiedetrabajolimpia,lasierradecalarcuentaconunaconexiónpara
larecogidadepolvo.Podráconectarunaspiradorconestafinalidad.Utiliceeladaptadordel
aspiradorquesesuministraparaello.
Protección
Lasierradevaivénestáequipadaconunaprotección.Asegúrese de que la protección esté lo
máscerradaposiblecuandolasierraestéenuso.Estoproporcionalamáximaprotección
contraastillasoesquirlasygarantizaunaextraccióndepolvoóptima.
ES
DK

Ferax 69
• Presionehaciaabajoelseguro.
Ajustedelángulodelaplacainferior
Fig. 3a + 3b
Ajusteelángulodelaplacainferior(6)comoseindicaacontinuación:
A. AflojelostornillosdelacabeceraconlallaveAllen suministrada.
B. Tiredelaplacainferiorhaciaatrásligeramenteparadesbloquearla.
C. Girelaplacainferioraladerechaoizquierdaenelángulodecortedeseado.Podráleer
estevaloreneltransportador(12).Elángulodecortemáximoes45º.
D. Empujelaplacainferiorhaciaadelantenuevamenteparabloquearla.
E. Aprietelostornillosdelacabecera(11)nuevamente.
Emisor de láser
Uso del emisor del láser
El haz principal del emisor de láser facilita el aserrado en línea recta:
a) A lo largo de una línea dibujada o
b) Alineándolo con un punto fijo marcado en la el pieza de trabajo.
La densidad del haz del láser, en función de la luz ambiental, es de unos 65 cm.
Cambio de las baterías
Fig.10
• Bloquee la máquina en su posición más alta.
• Afloje los tornillo y retire la tapa.
• Cambie las baterías por unas nuevas. Necesitará 2 baterías de 1,5 V tipo
“Micro/AAA”.
•Nunca se tire las baterías viejas o vacías baterías al cubo de basura de su casa;
deposítelas en los puntos especiales de recogida de baterías o en contenedores de
residuos químicos.
• Cuando inserte las baterías, asegúrese de colocar correctamente que los polos +/-,
tal como se indica en el interior del compartimento de baterías.
• Compruebe que el emisor de láser está cerrado correctamente abriendo con cuidado
la tapa hacia arriba. Si se abre la tapa, repita el procedimiento de cierre hasta que
quede correctamente cerrada.
Ajuste del haz del láser
•El transporte, manejo y uso continuo pueden afectar a la precisión del haz del láser.
•El haz del láser se puede ajustar fácilmente.
• Sujete la cuchilla de la sierra de calar contra una regla o tabla recta.
• Encienda el láser.
• Compruebe si el haz del láser va paralelo a lo largo del borde de la regla o tabla.
Sielhazdelláserestádesalineado,hagalosiguiente:
• Afloje unas vueltas los dos tornillos situados en la parte frontal del láser.
• Sujete la cuchilla de la sierra de calar contra una regla o tabla recta.
• Corrija el láser de forma que quede recto a lo largo del borde.
• Apriete de nuevo los dos tornillos.
ES
DK
12 Ferax
Iftherequireddistancebetweensawcutandsideis5cm,settheindicator‘5’ontheguide
exactlyabovethesawblade.
• Tightenthesocketheadscrewsagain.
Cuttingin
Fig. 9
Ifthestartingpositionoftheworkpiecetobesawnisnottheside,orifnoholehasbeendrilled,
youmustcutin.Todo this, proceed as follows:
• Putthejigsawontheroundedfrontofthebottomplate.
• Switchontheapplianceandslowlylowerthejigsawuntilittouchestheworkpiece.
• Letthejigsawcutintotheworkpiecegentlywithoutforcingit.
• Whenyouarethroughtheworkpiece,takethejigsawoutofthehole.
• Placetheapplianceinthenormalpositioninthesawnholeandcontinuethesawcut.
Youcan also cut in by first drilling a hole in the workpiece. To do this, use a bit that makes a hole
bigenoughforthesawblade.Nowyoucancarryoutthestepsdescribedunder'Sawing'.
5.MAINTENANCE
During maintenance and cleaning always remove the mains plug from the socket.
Never use liquids when cleaning electrical parts of the jigsaw.
Maintainthejigsawregularlytopreventunnecessaryproblems.This will ensure that your
applianceremainsinoptimumcondition.
•Keepthebottomplatecleansothatnoinaccuraciesoccurduringsawing.
• Keeptheoutsideofthejigsawcleansothatallmovingpartscanmoveaccuratelyand
withoutwear.
• Keeptheventilationslotsofthemotorcleansothatthesedonotoverheat.
• Ifthecarbon brushes are worn thejigsawwill run noisily and unevenly.Inthe end the jigsaw
willnolonger work. Have the carbonbrushesreplaced by an authorized servicecentre.
• Lubricatethesawbladeguideregularly.
Malfunctions
•Theelectricmotoris
gettinghot.
• Theappliancedoesnot
work.
•Themotorisbeing
overloadedby
workpiecesthataretoo
big.
• Themotorisdefective.
• Themainsconnection
hasbeenbroken.
• Theswitchisdamaged.
• Sawatalowerspeedso
thatthemotorcancool
down.
• Contacttheservice
addressonthewarranty
card.
• Checkthepowercordfor
damage.
•Contacttheservice
addressonthewarranty
card.
GB

Ferax 13
Cleaning
Regularlycleanthemachinehousingwithasoftcloth,preferablyaftereachuse.Keepthe
ventilationslotsfreefromdustanddirt.Ifthedirtdoesnotcomeoffuse a soft cloth moistened
withsoapywater. Never use solvents such as petrol, alcohol, ammonia water, etc.These
solventsmaydamagetheplasticparts.
Faults
Shouldafaultoccur, e.g. after wear of a part, please contact the service address on the
warrantycard.Inthebackofthismanualyoufindanexplodedviewshowingthepartsthatcan
beordered.
Environment
To prevent damage during transport, the appliance is
deliveredinasolidpackagingwhichconsistslargelyofreusablematerial.Therefore please
makeuseofoptionsforrecyclingthepackaging.
Faulty and/or discarded electrical or electronic apparatus have to be collected at
the appropriate recycling locations.
Warranty
Thewarrantyconditionscanbefoundontheseparatelyenclosedwarrantycard.
• Itisverydifficultto move
theworkpiecealongthe
sawbladeinastraight
lineandthesawcutis
uneven.
• Theworkpieceisstarting
tovibrateviolentlyduring
sawing.
• Theapplianceruns
noisilyand/orvery
unevenly.
• Thesawbucklecannot
bepusheduptoremove
thesawblade
• Thesawbladeiswarped
orblunt.
• Thesawbladeis
overheatedordistorted.
• Thecarbonbrushesare
worn.
• Thesawbladeisstuck
• Replacethesawblade.
• Contacttheservice
addressonthewarranty
card.
• Tap gently on the end of
thesawbladewitha
hammer
GB
68 Ferax
Usodecablesdeextensión
Usesólocablesdeextensiónhomologadosqueseanadecuadosparalapotenciadela
máquina.Elgrosormínimodelnúcleoesde1,5mm2.Cuandoutiliceuncabledeextensiónen
carrete,desenrolleelcablecompletamente.
3.INSTRUCCIONESDEMONTAJE
Seleccióndelasierra
Lasierradecalarsesuministracon2hojasdecorte,condiferentestiposdedientes.Elperfily
losdientesvaríansegúnelmaterialquedeseecortar. Un tipo de diente fino proporcionará un
cortesuaveypreciso.Utiliceunperfilestrechosideseacortarcurvasosivaacortarfiguras.El
grosormáximodelapiezadetrabajoes65mm(paramadera).
Paraseleccionarlahojadecortecorrecta,procedadelaformasiguiente:
• Loprimeropruebeconunahojadedientesgruesos.
• Sinoobtieneuncortecorrectoypreciso,pruebeconunadedientesmásfinos.
• Enelcasodeplásticos,aluminioyacero,utilicesiempreunahojacondientesmuyfinos.
Engeneral,trabajarámejorymásrápidoperodeformamenosprecisaconunahojadedientes
gruesosqueconunadedientesfinos.Paraobtenerresultadosóptimos,asegúresesiempre
dequelahojadelasierraestéafilada.
Lasierradecalaresadecuadaparasuusocontodotipodehojasdecortedisponiblesencomercios.
Hojadesierra Tipode material
Gruesa Madera
Media Madera
Fina Plásticos,aluminio,acero
Muyfina Serrarcurvas(madera)
Instalacióndelacuchillaserrada
Fig. 2
Antes de instalar la cuchilla serrada, compruebe que ha desconectado el enchufe
de alimentación del tomacorriente.
Parainstalarlacuchillaserrada,realicelospasossiguientes:
• Levantelaabrazaderadelahebilladelacuchillaserrada(Fig.2,A) y sujétela en esta
posición.
•Coloquelacuchillaserradaenlahebilla.Compruebequelaspuntasdelosdientesdeésta
miranhaciaarribayhaciaadelante.Elladonoserradodelacuchilladebepermaneceren
contactoconlarueda.
• Insertehastaelfondolacuchillaserrada.
• Fijelacuchillaserradaliberandosuavementelaabrazaderadelahebilla.Compruebeque
lacuchillaserradaseencuentracorrectamentecolocadaenlahebilla.Silacuchillaqueda
torcida,esposiblequeseproduzcauncortenosatisfactorio.
ES
DK


Ferax 15
-die Verwendung des Werkzeugs für andere Anwendungen oder mit anderem oder
schlecht gewartetem Zubehör kann die Expositionsstufe erheblich erhöhen
-Zeiten, zu denen das Werkzeug ausgeschaltet ist, oder wenn es läuft aber eigentlich
nicht eingesetzt wird, können die Expositionsstufe erheblich verringern
Schützen Sie sich vor den Auswirkungen der Vibration durch Wartung des Werkzeugs und
des Zubehörs, halten Sie Ihre Hände warm und organisieren Sie Ihren Arbeitsablauf
InhaltderVerpackung
1 Stichsäge
2 Sägeblätter
1 Innensechskantschlüssel
1 Parallelanschlag
1AdapterfürStaubsaugeranschluss
1Bedienungsanleitung
1 Sicherheitsvorschriften
ÜberprüfenSiedieMaschinesowiedasZubehöraufTransportschäden.
Produkinformation
Abb. 1
1. StellradHubzahlvorwahl
2. Feststellknopf
3. Ein-/Ausschalter
4. Staubsaugeranschluss
5. Innensechskantschlüssel
6. Fußplatte
7. Sägeblattaufnahme
8. Pendelhubeinstellung
9. Berührungsschutz
10. Sägeblatt
2.SICHERHEITSVORSCHRIFTEN
IndieserBetriebsanleitungerscheinenfolgendePiktogramme:
Warnung: Es besteht Verletzungsgefahr, Lebensgefahr oder die Gefahr möglicher
Beschädigungen der Maschine, falls dieAnweisungen in dieser
Gebrauchsanleitung nicht beachtet werden.
Warnung: Elektrische Spannung! Überprüfen Sie immer, ob Ihre Netzspannung
der Eingangsspannung des Geräts entspricht.
Die Drehzahl der Maschine kann elektronisch eingestellt werden.
Ziehen Sie, falls das Kabel beschädigt wird und auch während Wartungsarbeiten,
sofort den Netzstecker.
DE
66 Ferax
¡Cuidado! Por su propia seguridad, lea atentamente estas instrucciones de
uso antes de utilizar la herramienta.
¡Precaución! ¡Rayo láser! Nunca mire directamente el rayo láser y no apunte
a nadie con él cuando esté encendido.
Utilice siempre una máscara cuando utilice la herramienta. Cuando sierre
madera, metal y otros materiales, el polvo que se produce, es perjudicial para
la salud. ¡Recuerde que nunca debe serrar asbesto o material que contenga
asbesto!
Materiales duros como el acero, aluminio y plásticos
Materiales suaves como la madera
Exactitud
Cualquier aparato eléctrico o electrónico desechado y/o defectuoso tiene que
depositarse en los lugares apropiados para ello.
Instruccionesespecialesdeseguridad
Antesdeutilizaresteequipo:
• Compruebe los siguientes puntos:
•¿Corresponde la tensión eléctrica del motor (230 V) con la tensión de la red?
• ¿El cable de alimentación y el enchufe están en buenas condiciones? (robusto, sin
agrietamientos ni daños?
• ¿La sierra ha perdido dientes o muestra agrietamientos o roturas?
• Si así fuera, sustituya la sierra de inmediato.
• ¿Hay espacio suficiente entre la pieza que va a cortar, de modo que la sierra no entre
en contacto con el suelo o la mesa de trabajo mientras se mueve hacia arriba y abajo?
• ¿Los dientes de la sierra apuntan hacia arriba?
•Protéjasesiemprecongafascuandoutiliceesteaparato.
•Mantengaelequipocorrectamente.
• Noloutiliceenunambientehúmedo.
• Noutiliceelequipoconmaterialesquecontenganasbesto.
• Nuncadejelasierradesatendida.
Compruebe que el interruptor no esté bloqueado en la posición ‘on’(encendido)
Usodelequipo
•Sujetelapiezadetrabajoquevayaacortarfirmementeensulugar.
ES
N

Ferax 65
mantenimiento defi ciente, podría aumentar de forma notable el nivel de exposición.
-en las ocasiones en que se apaga la herramienta o cuando está funcionando pero no
está realizando ningún trabajo, se podría reducir el nivel de exposición de forma
importante.
Protéjase contra los efectos de la vibración realizando el mantenimiento de la herramienta
y sus accesorios, manteniendo sus manos calientes y organizando sus patrones de
trabajo.
Contenidodelpaquete
1 Sierradecalar
2Hojasdecorte
1LlaveAllen
1Guíadesierraparalela
1 Adaptadorparaaspirador
1 Manualdeinstrucciones
Compruebequenilamáquinanilosaccesorioshansufridoningúndesperfectoduranteeltransporte.
Informacióndelproducto
Fig. 1
1. Controldevelocidad
2. Botóndebloqueo
3. Interruptor
4. Puntodeconexióndelaspirador
5. LlaveAllen
6. Placainferior
7. Sujecióndelasierra
8. Péndulo
9. Protección
10. Hojadecorte
2.INSTRUCCIONESDESEGURIDAD
Enelpresentemanualseutilizanlossiguientessímbolos:
Precaución: Peligro o daño personal, peligro de vida o posible daño a la
máquina si no se atienden las indicaciones de este manual de usuario.
Precaución: ¡electricidad! Compruebe siempre si el voltaje de entrada del
motor se corresponde con el voltaje que aparece en la placa de identificación.
Se puede establecer el número de revoluciones de la máquina de forma
electrónica
Desenchufe la clavija inmediatamente de la corriente en caso de que el cable
sufra daños y durante la reparación
RU
ES
N
16 Ferax
Vorsicht! Laserstrahl! Blicken Sie nie in den Laserstrahl und richten Sie ihn nie
auf Personen.
Tragen Sie eine Staubschutzmaske. Beim Bearbeiten von Holz, Metallen und
anderer Materialien kann gesundheitsschädlicher Staub entstehen.
Asbesthaltiges Material darf nicht bearbeitet werden!
Harte Materialien wie Stahl,Aluminium, Kunststoff
Weiche Materialien wie Holz
Genauigkeit
Schadhafte und/oder entsorgte elektrische oder elektronische Geräte müssen an
den dafür vorgesehenen Recycling-Stellen abgegeben werden.
SpezifischeSicherheitsvorschriften
Vor dem Gebrauch des Geräts.
•DiefolgendenPunkteüberprüfen:
•Stimmt die Motorspannung (230 V~) mit der Netzspannung überein?
•SindNetzkabelundNetzstecker ingutemZustand,d.h.fest,ohneloseTeileoderSchäden?
•Hat das Sägeblatt Zähne verloren, zeigt Risse oder Brüche?
•In diesen Fällen muss das Sägeblatt sofort ausgewechselt werden.
•Ist der Raum unter dem Werkstück ausreichend, so dass das Sägeblatt während des
Hubs den Boden bzw. den Arbeitstisch nicht berührt?
•Zeigen die Sägezähne nach oben?
•Tragen Sie bei Gebrauch des Geräts immer eine Schutzbrille.
•WartenSiedasGerätsorgfältig.
• BenutzenSiedasGerätnichtinnasserUmgebung.
•BenutzenSiedasGerätnichtfürasbesthaltigeMaterialien.
•LassenSiedieStichsägeniemalsunbeaufsichtigtliegen.
Vergewissern Sie sich, dass der Schalter nicht in eingeschalteter Stellung
verriegelt ist
BeimGebrauchdesGeräts
•SpannenSiedaszusägendeWerkstückfest ein.
•EntfernenSieHolzrestevomSägeblattoderdessenUmgebung.BenutzenSiedazunicht
IhreHand.SchaltenSiedasGerätaus,bevorSieHolzresteentfernen!
•SchaltenSiedieStichsägeimmerimLeerlaufein,d.h.bevordasSägeblattdasWerkstück
berührt.
•BeimSägenvon Holz aufAstlöcher, Risseund/oderSchmutzablagerungen achten. Durch
diesekanndas Sägeblatt auf gefährliche Weisestecken bleiben.Achten Sie darauf auch
beimSägenvon Holzabfällen. Da hier GenauigkeitbeimSägen weniger gefragt ist, besteht
DE


Ferax 63
Неисправности
Вслучае неисправности, напр., после износа какой-либо части, обратитесь по адресу
пункта обслуживания, указанному в гарантийном талоне. Покомпонентное
представление изображения частей, которые можете заказать, вы найдете на
последней странице руководства.
Защитаокружающейсреды
Во избежание транспортных повреждений изделие поставляется в прочной упаковке.
Значительная часть материалов упаковки подлежит утилизации, поэтому просим
передать упаковку в соответствующую специализированную организацию.
Неисправный и/или бракованный электрический или электронный прибор
должен быть утилизирован должным образом.
Гарантия
Для ознакомления с условиями гарантии, прочитайте гарантийный талон на обороте
этой инструкции по эксплуатации.
RU
N
18 Ferax
Auswahldessägeblätts
DieStichsägewirdmit2Sägeblätterngeliefert,dieunterschiedlicheZahnungaufweisen.Je
nachzusägendemMaterialsindBreiteundZahnungdesSägeblattsunterschiedlich.Eine
feineZahnungergibteinenglattenundgenauenSchnitt.Verwenden Sie ein schmales
SägeblattfürkurvigeSchnitteoderzumAussägen von Figuren. Die maximale Schnittleistung
inHolzist65mmmitbeifgefügtenSägeblättern.
GehenSiezurAuswahl des richtigen Sägeblatts wie folgt vor:
• Versuchen Sie es zuerst mit einem Sägeblatt mit grober Zahnung.
• WennSie damit keinen glatten und genauen Schnitt erreichen können, versuchen Sie es
miteinerfeinerenZahnung.
• FürKunststoffe,Aluminium und Stahl muss immer ein Sägeblatt mit sehr feiner Zahnung
verwendetwerden.
ImAllgemeinen ist dieArbeitsgeschwindigkeit mit grober Zahnung höher als bei feiner
Zahnung,dieGenauigkeitistjedochgeringer. Um optimale Ergebnisse zu erzielen, muss das
Sägeblattscharfsein.FürdieStichsägeeignensichallehandelsüblichenSägeblätter.
Sägeblatt ArtdesWerkstücks
Grob Holz
Mittel Holz
Fein Kunststoff,Aluminium, Stahl
Sehrfein SägenvonKurven(Holz)
EinsetzendesSägeblatts
Abb. 2
Bevor Sie das Sägeblatt einsetzen, stellen Sie sicher, dass der Netzstecker
nicht mit der Stromversorgung verbunden ist.
GehenSiebeimEinsetzendesSägeblattswiefolgtvor:
• SchiebenSiedieKlemme(Fig.2,A) nach oben und halten Sie sie in dieser Position.
• PlatzierenSiedasSägeblattinderHalterung.StellenSiesicher, dass die Zähne des
Sägeblattsnachobenundnachvornezeigen.DieglatteSeitedesSägeblattsmussindem
Führungsradeinrasten.
• SchiebenSiedasSägeblattsoweitwiemöglichindieHalterung.
• SichernSiedasSägeblatt,indemSiedieKlemmevorsichtigwiederlösen.Vergewissern
Siesich,dassdasSägeblattordnungsgemäßinderHalterungsitzt.Einschief
eingesetztesSägeblattkannzuungewünschtenSägeergebnissenführen.
• SchiebenSiedieVerriegelung nach unten.
EinstellungdesWinkelsder Fußplatte
Abb. 3a + 3b
StellenSiedenWinkelderFußplatte(6)wiefolgtein:
A. LösenSiedieInnensechskantschraubenmitdemmitgeliefertenSchlüssel.
B. ZiehenSiedieFußplattezurEntriegelungetwasnachhinten.
C. DrehenSie die Fußplattenachrechts oderlinksbis zumgewünschtenSchnittwinkel. Dieser
DE

Ferax 19
kannauf der Winkelskala(12)abgelesen werden.Dermaximale Schnittwinkelbeträgt45°.
D. DrückenSiedieFußplattezurVerriegelung wieder nach vorne.
E. ZiehenSiedieInnensechskantschrauben(11)wiederfest.
Laserbeamer
Verwendung des Laserbeamers
Durch die Strahlführung des Laserbeamers ist gerades Sägen viel einfacher:
a) Entweder an einer gezeichneten Linie entlang
b) Oder durch Ausrichten auf einen auf dem Werkstück markierten festen Punkt.
Abhängig vom Umgebungslicht beträgt die Reichweite des Laserstrahls etwa 65 cm.
Austausch der Batterien
Abb.10
• Sichern Sie die Säge in der höchsten Position.
•Schrauben Sie die Schraube auf und entfernen Sie die Abdeckung
• Ersetzen Sie die alten Batterien durch neue. Sie benötigen 2 x 1,5 V "Micro/AAA"
Batterien.
• Entsorgen Sie alte/leere Batterien niemals im Hausmüll, sondern bringen Sie sie
immer zu speziellen Batterie- oder Sondermüllsammelstellen.
• Achten Sie beim Einsetzen der Batterien auf die im Batteriefach angegebene Polarität
(+ und -).
• Kontrollieren Sie, ob der Laserbeamer richtig geschlossen ist, indem Sie die
Abdeckung vorsichtig nach oben anheben. Lässt sich die Abdeckung öffnen,
wiederholen Sie den Schließvorgang, bis die Abdeckung einwandfrei geschlossen ist.
Einstellung des Laserstrahls
• Der Transport und häufiger Gebrauch können die Präzision des Laserstrahls
beeinträchtigen.
•Der Laserstrahl selbst kann jedoch sehr einfach justiert werden.
• Legen Sie das Sägeblatt der Stichsäge an einen rechten Winkel oder ein absolut
gerades Brett an.
• Schalten Sie den Laser ein.
• Kontrollieren Sie, ob der Laserstrahl zum rechten Winkel oder Brett parallel läuft.
Ist der Laserstrahl nicht mehr richtig justiert, gehen Sie wie folgt vor:
•Lösen Sie die beiden Schrauben auf der Vorderseite des Lasers um einige Umdrehungen.
•Legen Sie das Sägeblatt der Stichsäge an einen rechten Winkel oder ein absolut
gerades Brett an.
• Korrigieren Sie den Laser so, dass er schnurgerade am Winkel entlang läuft.
• Ziehen Sie die beiden Schrauben wieder fest.
4.BEDIENUNG
Verriegelung des Schalters
Abb. 4
DrückenSiedenEin-/Ausschalter, um die Stichsäge einzuschalten. Der Schalter kann mit dem
DE
62 Ferax
Возможныенеисправностииихустранение
Очистка
Поддерживайте чистоту вентиляционных пазов машины для предотвращения
перегрева электродвигателя. Регулярно протирайте корпус машины мягкой тканью,
желательно после каждого использования. Очищайте вентиляционные щели от пыли
игрязи. Стойкие загрязнения удаляйте мягкой тканью, смоченной в мыльной воде.
Растворители, такие как бензин, спирт, аммиачные растворы и т.д., применять
запрещается. Они могут повредить пластмассовые детали.
• Электродвигатель
перегревается.
• Инструмент не
работает при
включении.
• Очень трудно
выдерживать рез
прямым, неровный рез.
• Заготовка при
распиловке начинает
очень сильно
вибрировать.
•Лобзик работает с
повышенным шумом
и/или не плавно.
• Невозможно поднять
карабин крепления
пилы для изъятия
полотна пилы
• Электродвигатель был
перегружен
вследствие тяжелого
режима работы с
крупными деталями.
• Электродвигатель
неисправен.
• Поврежден сетевой
шнур и/или
штепсельная вилка.
• Неисправен
выключатель.
• Полотно погнуто или
затупилось.
•Пильное полотно
перегрето или
деформировано.
• Полотно пилы
заклинено
• Выполняйте
распиловку более
медленно и давайте
электродвигателю
охладиться.
• Свяжитесь с местным
дилером для осмотра
и/или ремонта
инструмента.•
Проверить сетевой
шнур и/или
штепсельную вилку.
• Свяжитесь с местным
дилером для осмотра
и/или ремонта
выключателя.
•Износились угольные
щетки.
• Заменить пильное
полотно.
• Заменить пильное
полотно.
•Свяжитесь с местным
дилером для замены
угольных щеток.
• Слегка постучите
молотком по концу
полотна пилы
RU
N

Ferax 61
указатель в положение "5" точно над полотном пилки.
• Вновь затяните болты со спецголовкой.
Врезкавповерхность
Рис.9
Вслучае если начальное положение резки на заготовке находится не на кромке или
если не просверлено отверстие, то тогда требуется врезка в поверхность. Делается
это следующим образом:
• Опереть лобзик на закругленную переднюю часть подошвы.
• Включить машину и медленно опускать ее, пока пилка не начнет касаться
поверхности заготовки.
• Дайте пилке осторожно самой врезаться в заготовку, не надавливая на нее.
• Когда образуется сквозной пропил, выньте полотно из отверстия.
• Поместите машину в нормальное рабочее положение, опустив пилку в отверстие, и
продолжайте работу.
Другой способ - предварительно просверлить отверстие в заготовке.
Для этогонадо взять сверло с достаточным диаметром, позволяющим пилке пройти в
просверленное отверстие. После чего можно выполнять действия, перечисленные в
разделе "ПИЛЕНИЕ"
5. OБСЛУЖИВАНИЕ
При выполнении технического обслуживания и чистке машины убедитесь в
том,что она не находится под напряжением (вилка вынута из розетки).
Запрещается использовать жидкости для протирки электрических
деталей лобзика.
Регулярно осуществляйте техобслуживание машины во избежание возникновения
ненужных неполадок. Постоянство удовлетворительной работы зависит от
надлежащегоухода и регулярной чистки.
•Поддерживайте чистоту подошвы во избежание возникновения неровностей
(кривого реза) при работе.
• Поддерживайте чистоту корпуса машины для легкого и точного хода всех её
подвижных частей и во избежание преждевременного износа.
• Поддерживайте чистоту вентиляционных пазов мотора во избежание перегрева
последнего.
• Если угольные щетки сработались, то ход вашей машины будет шумным и
неровным, а затем машина вовсе перестанет работать. Поэтому вовремя
заменяйте щетки у вашего местного дилера.
• Регулярно смазывайте направляющую пильного полотна.
RU
N
20 Ferax
Feststellknopfverriegeltwerden.Diesgeschiehtwiefolgt:
A. DrückenSiedenEin-/Ausschalter.
B. HaltenSiedenSchaltergedrücktunddrückenSiegleichzeitigdenFeststellknopf.Lassen
SiebeideSchalterlos.DieStichsägebefindetsichnunimDauerlauf.
DieVerriegelung wird gelöst, indem der Ein-/Ausschalter nochmals gedrückt wird.
Hudzahlvorwahl
Abb. 5
DieHubzahldesSägeblattskannmitdemStellknopfobenaufderStichsägeeingestellt
werden.JehöherdessenZahl,destogrößerdieHubzahl.DiehöchsteEinstellungist6.
DieidealeHubzahlhängtvonderBreiteundderZahnungdesSägeblattsab,wieauchvomzu
sägendenMaterial.BeiweichenMaterialienmüsseneinerelativhoheHubzahlundeinegrobe
Zahnunggewähltwerden.ZumSägenharterMaterialienmüsseneineniedrigereHubzahlund
einefeineZahnunggewähltwerden.
EinstellungderPendelung
Abb. 1+ 6
UmbeimSägeneinoptimalesErgebniszuerzielen,musseingestelltwerden,inwelcherWeise
dieZähnedesSägeblattsindasMaterialeindringensollen.Diesgeschiehtüberdie
EinstellungderPendelung(8).
• WeicheMaterialien (Holz, Kunststoffe, usw.): Pendelstufe II oder III wählen. Für einen
glattenSchnittPendelstufe0oderIwählen.
• MittelharteMaterialien(Hartholz,Aluminium, usw.): Pendelung je nach Bedarf einstellen.
BeidünnenMaterialienPendelstufe0verwenden,bzw. I, wenn Sie mit Raspeln oder
Messernarbeiten.
• HarteMaterialien(Stahlusw.): Pendelstufe 0 wählen.
• KurvigeSchnitte:Pendelstufe0wählen.
DiePendelungkannbeieingeschalteterStichsägeverstelltwerden.
Staubabsaugung
Abb. 7
UmdieArbeitsoberfläche sauber zu halten, verfügt die Stichsäge über einenAnschluss zur
Staubabsaugung.An diesen können Sie Ihren Staubsauger anschließen. Benutzen Sie dazu
denmitgeliefertenStaubsauger-Adapter.
Berührungsschutz
DieStichsägeistmiteinemBerührungsschutzausgerüstet.WährenddieStichsäge
verwendetwird,mussdiesersoweitwiemöglichgeschlossensein.DadurchwirdSchutz
gegenSplitterundeineoptimaleStaubabsaugunggewährleistet.
Sägen
•SchaltenSiedieStichsägeein.
•SetzenSiedieFußplattedesGerätsaufdasWerkstückauf.
•BewegenSiedieSägelangsaminRichtungdervorhergezeichnetenSchnittlinieunddrücken
SiedanndieStichsägelangsamnachvorne.DrückenSiedieFußplattefestgegendas
Werkstück.AndernfallskanndieStichsäge zuvibrierenbeginnenunddas Sägeblattbricht.
DE
Table of contents
Other Ferax Power Tools manuals

Ferax
Ferax BHG-1800 User manual

Ferax
Ferax FVP-2000 User manual

Ferax
Ferax BCT-135 User manual

Ferax
Ferax XAGD50/9040 User manual

Ferax
Ferax FVP-2000E User manual

Ferax
Ferax FHF-1200 User manual

Ferax
Ferax BHG-1800 User manual

Ferax
Ferax BTS-651 User manual

Ferax
Ferax 16 DB User manual

Ferax
Ferax 16 DDB User manual