manuals.online logo
Brands
  1. Home
  2. •
  3. Brands
  4. •
  5. Ferax
  6. •
  7. Power Tools
  8. •
  9. Ferax FPS-280 User manual

Ferax FPS-280 User manual

Other Ferax Power Tools manuals

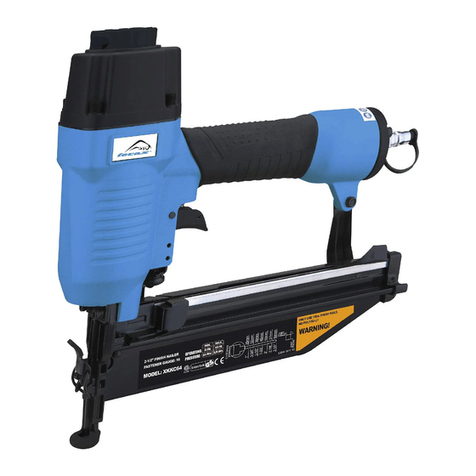
Ferax XKKC64II User manual

Ferax

Ferax XKKC64II User manual

Ferax BJS-600 User manual

Ferax

Ferax BJS-600 User manual

Ferax BHG-1800 User manual

Ferax

Ferax BHG-1800 User manual

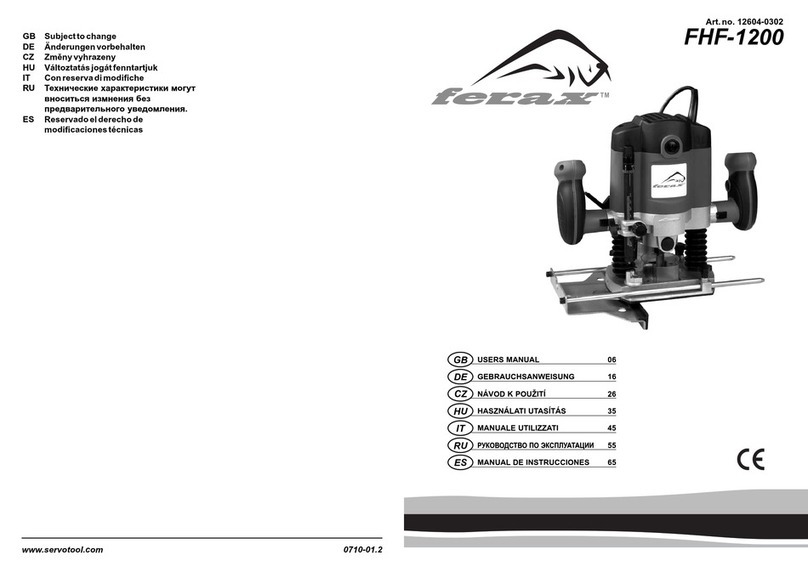
Ferax FHF-1200 User manual

Ferax

Ferax FHF-1200 User manual

Ferax FST-550 User manual

Ferax

Ferax FST-550 User manual

Ferax 16 DDB User manual

Ferax

Ferax 16 DDB User manual

Ferax XAGD50/9040 User manual

Ferax

Ferax XAGD50/9040 User manual

Ferax BJS-600 User manual

Ferax

Ferax BJS-600 User manual

Ferax BHG-1800 User manual

Ferax

Ferax BHG-1800 User manual

Ferax 16 DB User manual

Ferax

Ferax 16 DB User manual

Ferax BTS-651 User manual

Ferax

Ferax BTS-651 User manual

Ferax FVP-2000E User manual

Ferax

Ferax FVP-2000E User manual

Ferax FVP-2000 User manual

Ferax

Ferax FVP-2000 User manual

Ferax BCT-135 User manual

Ferax

Ferax BCT-135 User manual

Popular Power Tools manuals by other brands

ISLAND HOPPER Power Egg HT-309 operating instructions

ISLAND HOPPER

ISLAND HOPPER Power Egg HT-309 operating instructions

Sioux Tools SSR6P25 Instructions-parts list

Sioux Tools

Sioux Tools SSR6P25 Instructions-parts list

Makita HM1317C technical information

Makita

Makita HM1317C technical information

ABB Smart Tool + quick start guide

ABB

ABB Smart Tool + quick start guide

Baumr-AG BMJK-24S user manual

Baumr-AG

Baumr-AG BMJK-24S user manual

Bosch Professional GST 18 V-LI S Original instructions

Bosch

Bosch Professional GST 18 V-LI S Original instructions

Ronix RA-2702 quick start guide

Ronix

Ronix RA-2702 quick start guide

Nordson ProBlue user guide

Nordson

Nordson ProBlue user guide

aoyue int6028 instruction manual

aoyue

aoyue int6028 instruction manual

Hitachi CJ 65VA2 Instruction manual and safety instructions

Hitachi

Hitachi CJ 65VA2 Instruction manual and safety instructions

Makita HM1304 instruction manual

Makita

Makita HM1304 instruction manual

Kurtz Ersa Ersa X-TOOL VARIO operating instructions

Kurtz Ersa

Kurtz Ersa Ersa X-TOOL VARIO operating instructions

SCHUNK KSO 65 Installation and operating instruction

SCHUNK

SCHUNK KSO 65 Installation and operating instruction

Harken LokHead 500 user manual

Harken

Harken LokHead 500 user manual

Senco DuraSpin ExTPro installation instructions

Senco

Senco DuraSpin ExTPro installation instructions

Ferm JSM1020 Original instructions

Ferm

Ferm JSM1020 Original instructions

Milwaukee M12 FUEL 2559-20 Operator's manual

Milwaukee

Milwaukee M12 FUEL 2559-20 Operator's manual

EINHELL BT-CD 12/2 operating instructions

EINHELL

EINHELL BT-CD 12/2 operating instructions

manuals.online logo
manuals.online logoBrands
  • About & Mission
  • Contact us
  • Privacy Policy
  • Terms and Conditions

Copyright 2025 Manuals.Online. All Rights Reserved.

0708-30.2
GB Subjecttochange
DE Änderungenvorbehalten
CZ Změnyvyhrazeny
HU Változtatásjogátfenntartjuk
IT Conreservadimodifiche
RU Комлания Ferax постоянно
совершенству ет выпускаему ю ею
проедукцию. Позтому в техничесие
характеристики могут вноситься
без предварительного
уведомления.
ES Reservadoelderechode
modificacionestécnicas
Art.No. 12608-0506
FPS-280
GB
DE
CZ
HU
IT
RU
ES
USERS MANUAL 03
GEBRAUCHSANWEISUNG 10
NÁVOD K POUŽITÍ 17
HASZNÁLATI UTASÍTÁS 24
MANUALE UTILIZZATI 31
РУКОВОДСТВО ПО ЭКСПЛУАТАЦИИ
37
MANUAL DE INSTRUCCIONES 44
Ferax 51
Exploded view
02 Ferax
Fig. 1
1
10
9
8
11
6
5
4
2
5
Fig. 2
3
Ferax 0350 Ferax
Spare parts list
Position Description No.
6 Switch 403071
20 Carbon brush 403072
22 Stator 403073
24 Rotor 403074
30 till 35 Base plate 403075
36 till 40 Excentric 403076
41 till 43 Dust collector 403077
46 Foam plate 403078
ORBITALSANDER
The numbers in the text refer to the diagrams on pages 2.
For your own safety and that of others, we recommend that you read this instruction
manual carefully before using this saw. Keep this instruction manual and the
documentation provided with the saw for future reference.
Introduction
TheOrbitalsanderFPS-280isdesignedfordrysandingofsurfacesofwood,plasticandfilleras
wellasforpaintersurfaces.
Contents
1. Machineinformation
2. Safetyinstructions
3. Assembly
4. Use
5. Service&maintenance
1.MACHINEINFORMATION
Technical specifications
Contentsofpacking
1 Orbitalsander
1 Sandpaper(grain80)
1 Dustbag
1 Usermanual
1 Safetyinstructions
Features
Fig. 1
1. On/offswitch
2. Handle(behind)
Voltage 230 V~
Frequency 50 Hz
Input power 280 W
Tool class II
No load speed 8000-11000/min.
Sanding surface 115x227mm
Sandpaper size 115x280mm
Weight 2.35 kg
Lpa (Sound pressure level) 70 dB(A)
Lwa (Sound power level) 84 dB(A)
Vibration 3.0 m/s2
GB
Ferax 49
Engrasado
Elaparatononecesitaserengrasado.
Averías
Sisepresentaunaavería,porejemplo,poreldesgastedeunapieza,póngaseencontactocon
elproveedordeserviciosindicadoenlatarjetadegarantía.Eneldorsodeestemanual
encontraráunamplioresumendelaspartesderecambioquesepuedenordenar.
Usoecológico
Paraprevenirlosdañosduranteeltransporte,elaparatohasidoembalado.Dichoembalaje
estáhecho,enlamedidadeloposible,dematerialreciclable.Lerogamos,porlotanto,que
recicledichomaterial.
Cualquier aparato eléctrico o electrónico desechado y/o defectuoso tiene que
depositarse en los lugares apropiados para ello.
Garantía
Leaatentamentelascondicionesdegarantíaindicadasenlatarjetadegarantíaqueaparece
enestemanualdeinstrucciones.
CE DECLARACIÓN DE CONFORMIDAD (ES)
Declaramos bajo nuestra exclusiva responsabilidad que este
FPS-280
cumple con las siguientes normas o documentos normalizados:
EN60745-1, EN60745-2-4, EN55014-1, EN55014-2, EN61000-3-2, EN61000-3-3
de acuerdo con las directivas:
98/37/EC, 73/23/EEC, 89/336/EEC, 2002/95/EC, 2002/96/EC
del 01-01-2007
ZWOLLE NL
J.A. Bakker - van Ingen J. Lodewijk
CEO Quality Manager
Es nuestra política mejorar continuamente nuestros productos y por tanto nos reservamos
el derecho a cambiar las características del producto sin previo aviso.
Servotool BV • Lingenstraat 6 • 8028PM Zwolle • Holanda
04 Ferax
GB
3. Dustbag
4. Paperclamp
5. Handlepaperclamp
6. Ventilating apertures
7. Sandpaper
8. Sandingsole
9. Handle(front)
10. Adjustingwheel
11. Lock-on button for on/off switch
2.SAFETYINSTRUCTIONS
Explanationofsymbols
Read instructions carefully
In accordance with essential applicable safety standards of European directives
Class II machine – Double insulation – You don’t need any earthed plug.
Denotes risk of personal injury, loss of life or damage to the tool in case of non-
observance of the instructions in this manual.
Indicates electrical shock hazard.
The number of revolution of the machine can be electronically set.
Immediately unplug the plug from the mains electricity in the case that the cord gets
damaged and during maintenance
Wear a dust mask
Wear ear and eye protection
Faulty and/or discarded electrical or electronic apparatus have to be collected at
the appropriate recycling locations.
ES
Ferax 05
Specificsafetyinstructions
• Contactorinhalationofdustcomingfreeduringsanding(e.g.leadpaintedsurfaces,
woodsandmetals),canendangerthehealthofoperatorandbystanders.Alwayswear
appropriatepersonalequipmentasadustmaskandusethedustbagduringsanding.
• Checkthattheswitchisnotinthe“ON”positionbeforeconnectingthemachinetothe
mainsvoltage.
• Alwayskeepawaythemainsleadfrommovingpartsofthemachine.
• Whenworkingwiththemachine,alwaysholditfirmlywithbothhandsandprovidefora
securestance.
• Usesafetyglasses,especiallywhensandingaboveyourhead.
Immediatelyswitchoffthemachinewhen:
• Excessivesparkingofthecarbonbrushesandverticiliosisinthecollector.
• Interruptionofthemainsplug,mainsleadormainsleaddamage.
• Defectswitch
• Smokeorstenchofscorchedisolation
Electricalsafety
Whenusingelectricmachinesalwaysobservethesafetyregulationsapplicableinyourcountry
toreducetheriskoffire,electricshockandpersonalinjury. Read the following safety
instructionsandalsotheenclosedsafetyinstructions.
Always check that the power supply corresponds to the voltage on the rating plate.
Class II machine – Double insulation – You don’t need any earthed plug.
Replacingcablesorplugs
Immediatelythrowawayoldcablesorplugswhentheyhavebeenreplacedbynewones.Itis
dangeroustoinserttheplugofaloosecableinthewalloutlet.
Usingextensioncables
Onlyuseanapprovedextensioncablesuitableforthepowerinputofthemachine.The
minimumconductorsizeis1.5mm2.Whenusingacablereelalwaysunwindthereel
completely.
3.ASSEMBLY
Dustcollection
Fig. 2
Thesanderhasbeencarriedoutwithadustbag(3)tokeeptheworkingsurfaceclean.The dust
bagmustbeinstalledonthebacksideofthemachine,ontheopening.Itisnecessarytoempty
thedustbagregularlyforanefficientuse.
GB
48 Ferax
Empuñaduras
Lamáquinalijadoraestáequipadacondosempuñaduras:unaempuñaduraenlapartefrontal
yunaenlapartetrasera.
Sostengasiemprelasempuñadurasconambasmanosparaobtenerelmejorcontrolposible
sobresutrabajodelijado.Además, de esta forma evita el riesgo de entrar en contacto con las
partesenmovimiento.
Consejosparaeloperador
• Paraobtenerlosmejoresresultadosposibles,hagamovimientoslargosyuniformes.
• Lacalidaddelasuperficiedespuésdellijadodependedelcalibredelpapeldelija
seleccionado.
5.SERVICIOYMANTENIMIENTO
Antes de cualquier trabajo de mantenimiento o limpieza saque siempre el enchufe
de la caja de corriente (enchufe de pared). No utilice nunca agua u otros líquidos
para limpiar las partes eléctricas de su pulidora.
LosaparatosdeFeraxhansidodiseñadosparafuncionarcorrectamenteduranteunlargo
periododetiemponecesitandounmantenimientomínimo.Manteniendolimpioelaparatoy
usándolocorrectamente,conseguiráalargarlavidaútildelosaparatos.
Fallos
Acontinuación se indican varias posibles causas y soluciones si lamáquinanofunciona
correctamente:
Las reparaciones y trabajos de mantenimiento deben realizarlas técnicos
cualificados o una compañía de servicios.
Limpieza
Limpieregularmenteelaparatoconunpaño,preferentementedespuésdecadauso.
Asegúresedequelasrejillasdeventilaciónnoposeanpartículasdepolvonisuciedad.Si
hubierasuciedadincrustada,utiliceunpañohumedecidoconaguayjabón.Noutilicejamás
materialesdisolventestalescomogasolina,alcohol,amoniaco,etc.Dichosproductospodrían
dañarelplásticodediferentespiezasdelaparato.
• Elmotoreléctricosecalienta:
• Lamáquinanoextraeelpolvo:
• Elpapeldelijaestállenodeadhesivo,
pinturauotromaterialsimilar:
• Limpielosorificiosdeventilación.
• Labolsaparaelpolvoestállena;vacíela.
• Lapinturaoeladhesivoaúnnoestán
secos.
• Algunaspinturassepeganmásalpapelde
lijaqueotras.Limpieelpapelaintervalos
regulares.
ES
Ferax 47
Elpapeldelijaáspero(50granos)remueve,entérminosgenerales,lamayorpartedel
material.Paraelacabado,usepapeldelijafino(120granos).
Lalijadoraestáprovistadeunaplacalijadorarectangular. Estirando el papel de lija se alarga la
vidaútildelaplaca:
• Abraelsujetadordelpapeldelijadelapartetrasera(4)levantandolaempuñadura(5).
• Coloqueelpapeldebajodelsujetador. Coloque el papel en el centro de la placa y verifique
lasperforacionesdelpapel.Éstasdebencorresponderconlasperforacionesdelaplaca
lijadora,demaneraquepuedapasarelpolvo.
• Vuelvaa colocar la empuñadura en su posición original.
• Repitalaoperaciónparacolocarelpapeldelijaenlapartefrontal.
• Coloqueelpapellomásestiradoposible.
Sustitucióndelaplacalijadora
Antes de sustituir la placa, desconecte la lijadora de la toma de alimentación
eléctrica.
• Retireelpapeldelijadelaplaca.
• Retirelostornillosquesujetanlaplacaalalijadora.
• Retirelaplaca.
• Instalelaplacanuevaenlalijadora.
• Vuelvaa colocar los tornillos bien apretados.
4.USO
Procedimiento
• AprieteelinterruptordeEncendido/Apagado(1)paraponerenmarchalamáquina.
• Mediantelaruedadeajuste(10)puederegularlavelocidad.
• Losorificiosdeventilación(6)delamáquinadebenpermanecerlibresparaasegurarun
óptimoenfriamientodelmotor.
• Muevalalijadorasobrelasuperficieopiezadetrabajo.
• SuelteelinterruptordeEncendido/Apagadoparadetenerelfuncionamientodela
máquina.
• ElinterruptordeEncendido/Apagadosepuedebloquearenlaposición“ON”(encendido)
pulsandoelbotóndebloqueo(11) que se encuentra en un costado de la máquina mientras
sostienepulsadoelinterruptor. La lijadora se puede apagar presionando de nuevo,
brevemente,elinterruptordeEncendido/Apagado.
Evite presionar demasiado la máquina cuando esté lijando. La presión excesiva no
conduce a un aumento de la capacidad de lijado, sino que desgasta la máquina y el
papel de lija.
06 Ferax
Emptyitasfollows:
• Turnthe dust bag slightly and pull it out of the machine’sadapter.
• Emptythedustbaginasuitableplace.
• Pushthedustbagontothemachine’sadapter till it locks into place.
Remember that the dust extraction only works when using perforated sandpaper.
Replacingwornsandingpaper
Before assembly sanding paper always remove the plug from the mains.
Coarsesand-paper(grain50)removesingeneralthebiggerpartofthematerialandfinesand-
paper(grain120)isusedforthefinishing.
Thesandingmachineisprovidedwitharectanglesandingsole.Bytighteningthesandpaperit
doesnotwearoutsofast,soitwillwearwelllonger:
• Openthebackpaperclamp(4)bypullingthehandle(5)up.
• Installthesandpaperundertheclamp.Putthepaperinthemiddleofthesandingsoleand
lookaftertheperforationsinthepaper.Theyhavetocorrespondwiththoseonthesanding
sole,sothatthedustcanbeexhausted.
• Pushthehandlebackintoitsoriginalposition.
• Repeattheoperationtofixthesand-paperonthefrontside.
• Fixthesandpaperastightaspossible.
Replacingthesandingsole
Before replacing the sanding sole disconnect the sander from the mains.
• Removethesandpaperofthesole.
• Removethescrewswhichthesoleisfixedtothesander.
• Removethesole.
• Installthenewsoleonthesander.
• Tightenthe screws well.
4.USE
Operation
• Pushintheon/offswitch (1) to start the machine.
• Byadjustingtheadjustingwheel(10)youcanregulatethespeed.
• Theventilatingapertures(6)onthehousingmustremaincleartoensureoptimumcooling
GB
ES
Ferax 07
ofthemotor.
• Movethesanderoverthesurfaceofyourworkpiece.
• Letloosethesameon/offswitch to stop the machine.
• Theon/offswitch can be blocked in position “ON” by pushing the lock-on button (11)on the
side,whileyoukeeppushingtheon/offswitch.
Themachinecanbestoppedbybrieflypushingtheon/offswitch again.
Prevent pushing too much on the machine during sanding. Excessive sanding
pressure does not lead to increased sanding capacity, but increases wear of the
machine and the sandpaper.
Grips
Thesanderisequippedwithtwogrips:ahandleatthefrontsideandoneonthebackside.
Alwaysholdthesanderwithbothhandsonthehandles,soastogainthebestpossiblecontrol
overyoursandingoperations.Besidesyoudonotrisktobecomeintouchwiththemoving
parts.
Usertips
• Applylonguniformmovementstoyoursandertoobtainthebestpossibleresults.
• Thesurfacequalityaftersandingisdeterminedbytheselectedgrain.
5.SERVICE& MAINTENANCE
Make sure that the machine is not live when carrying out maintenance work on the
motor.
TheFeraxmachineshavebeendesignedtooperateoveralongperiodoftimewithaminimum
ofmaintenance.Continuoussatisfactoryoperationdependsuponpropermachinecareand
regularcleaning.
Malfunction
Shouldthemachinefailtofunctioncorrectly, a number of possible causes and the appropriate
solutionsaregivenbelow:
• Theelectromotorgetshot
• Thedustisnotextracted
• Theabrasivepaperisfilledwith
adhesive/paintorasimilarmaterial
• Cleantheventilatingapertures
• Thedustbagisfull/emptythedustbag
• Paintoradhesiveisnotreallydry.
• Somepaintsstickmoretotheabrasive
paperthanothers/cleantheabrasive
paperatregularintervals
GB
46 Ferax
Cualquier aparato eléctrico o electrónico desechado y/o defectuoso tiene que
depositarse en los lugares apropiados para ello.
Disposicionesdeseguridadespecíficas
• Lainhalaciónoelcontactoconelpolvoquesueltalamáquinacuandoestálijando(p.ej.
superficiestratadasconpinturaconplomo,maderaymetales)puedeafectarlasaluddel
operarioodelaspersonasasualrededor. Use siempre equipo de protección personal
adecuado,p.ej.unamascarilla,yuselabolsapararecogerelpolvomientrasestálijando.
• Verifique que el interruptor no está en la posición “ON” (encendido) antes de conectar la
herramientaalvoltajedelared.
• Mantengasiempreelcabledecorrientealejadodelaspartesenmovimientodela
herramienta.
• Cuandotrabajeconlalijadora,sosténgalafirmementeconambasmanosyadopteuna
posturasegura.
• Usegafasdeseguridad,especialmentecuandovayaalijarunasuperficiesobresu
cabeza.
3.MONTAJE
Recoleccióndelpolvo
Fig. 2
Lalijadorahasidoequipadaconunabolsapararecogerelpolvo(3)afindemantenerlimpioel
lujardetrabajo.Labolsaparaelpolvoseinstalaenlaparteposteriordelaparato,enla
abertura.Esnecesariovaciarlabolsaregularmenteparaasegurarunfuncionamiento
eficiente.
Vaciado de la bolsa
• Gireligeramentelabolsayretíreladeladaptadordelamáquina.
• Viertael contenido de la bolsa en un lugar adecuado.
• Coloquelabolsadenuevoeneladaptadordelamáquina,empujándolahastaquequede
firmeensulugar.
Recuerde que el extractor de polvo sólo funciona si usa papel de lija perforado.
Sustitucióndelahojadepapeldelija
Retire siempre el enchufe de la fuente de alimentación eléctrica antes de colocar la
hoja de papel de lija.
Elpapeldelija(7)sesujetaconVelcro para facilitar la sustitución:
• Simplementeretireelpapeldelija.
• Presionelahojanuevaenelcentrodelaplacalijadora(8).
ES
Ferax 45
Denominacióndelaspartes
Fig. 1
1. InterruptordeEncendido/Apagado
2. Empuñadura(trasera)
3. Bolsapararecogerelpolvo
4. Sujetadordelpapel
5. Empuñaduradelsujetadordelpapel
6. Orificiosparaventilación
7. Papeldelija
8. Placalijadora
9. Empuñadura(frontal)
10. Ruedadeajuste
11. Botón para bloqueo del interruptor de Encendido/Apagado
2.NORMASDESEGURIDAD
Explicacióndelossímbolos
Lea las instrucciones atentamente
Conforme a los estándares europeos CE aplicables en materia de seguridad.
Herramienta de tipo II – Doble aislamiento – No requiere enchufe con conexión a
tierra.
Indica peligro de accidente, de muerte o riesgo de provocar averías en el aparato
en caso de no seguir las instrucciones de este manual.
Indica el peligro de sufrir descargas eléctricas.
Se puede establecer el número de revoluciones de la máquina de forma
electrónica
Desconecte inmediatamente la toma de corriente en caso de que se dañe el cable
de potencia y durante el proceso de mantenimiento
Utilice siempre una máscara
Lleve protectores para los ojos y los oídos
08 Ferax
Repairs and servicing should only be carried out by a qualified technician or service
firm.
Cleaning
Keeptheventilationslotsofthemachinecleantopreventoverheatingoftheengine.
Regularlycleanthemachinehousingwithasoftcloth,preferablyaftereachuse.
Keeptheventilationslotsfreefromdustanddirt.
Ifthedirtdoesnotcomeoffuse a soft cloth moistened with soapy water.Neverusesolvents
suchaspetrol,alcohol,ammoniawater, etc.Thesesolventsmaydamagetheplasticparts.
Lubrication
Themachinerequiersnoadditionallubrication.
Faults
Shouldafaultoccur, e.g. after wear of apart,pleasecontactthe service address on the warranty
card.Inthebackof this manual you find anexplodedviewshowingtheparts that can be ordered.
Environment
Topreventdamageduringtransport,theapplianceisdeliveredinasolidpackagingwhich
consistslargelyofreusablematerial.Therefore please make use of options for recycling the
packaging.
Faulty and/or discarded electrical or electronic apparatus have to be collected at
the appropriate recycling locations.
Warranty
Theguaranteeconditionscanbefoundontheseparatelyenclosedguaranteecard.
GB
ES
Ferax 09
CE DECLARATION OF CONFORMITY (GB)
We declare under our sole responsibility that
FPS-280
is in conformity with the following standards or standardized documents:
EN60745-1, EN60745-2-4, EN55014-1, EN55014-2, EN61000-3-2, EN61000-3-3
in accordance with the regulations
98/37/EC, 73/23/EEC, 89/336/EEC, 2002/95/EC, 2002/96/EC
from 01-01-2007
ZWOLLE NL
J.A. Bakker - van Ingen J. Lodewijk
CEO Quality Manager
It is our policy to continuously improve our products and we therefore reserve the right to
change the product specification without prior notice.
Servotool BV • Lingenstraat 6 • 8028 PM Zwolle • The Netherlands
GB
44 Ferax
LIJADORAORBITAL
Los números que se indican en el siguiente texto hacen referencia a las figuras
contenidas en las páginas 2.
Para su propia seguridad y la de otras personas, le recomendamos leer
atentamente estas instrucciones de uso antes de poner en funcionamiento el
aparato. Conserve este manual del usuario y la demás documentación junto con la
herramienta.
Introducción
LaLijadoraorbitalFPS-280hasidodiseñadaparaellijadoensecodesuperficiesdemadera,
plásticoymasilla,asícomotambiénsuperficiespintadas.
Contenidos:
1. Datostécnicos
2. Normasdeseguridad
3. Montaje
4. Uso
5. Servicioymantenimiento
1.DATOSTÉCNICOS
Característicastécnicas
Contenidodelembalaje
1 Lijadoraorbital
1 Hojadepapeldelija(grano80)
1 Bolsapararecogerelpolvo
1 Manualdelusuario
1 Instruccionesdeseguridad
Voltaje 230 V~
Frecuencia 50 Hz
Potencia de entrada 280 W
Tipo de herramienta II
Velocidad sin carga 8000-11000/min
Placa lijadora 115x227mm
Papel de lija 115x280mm
Peso 2.35 kg
Lpa (Nivel de presión acústica) 70 dB(A)
Lwa (Nivel de potencia acústica) 84 dB(A)
Vibración 3.0 m/s2
ES
Ferax 43
Гарания
Услови я гарантии вы найдёте в отдельно прилагаемом гарантийном талоне.
CE ДЕКЛАРАЦИЯ О СООТВЕТСТВИИ (RU)
Под нашу исключительную ответственность удостоверяем, что данное
FPS-280
удовлетворяет следующим стандартам и нормативным документам:
EN60745-1, EN60745-2-4, EN55014-1, EN55014-2, EN61000-3-2, EN61000-3-3
согласно следующим предписаниям
98/37/EC, 73/23/EEC, 89/336/EEC, 2002/95/EC, 2002/96/EC
от 01-01-2007
ZWOLLE NL
J.A. Bakker - van Ingen J. Lodewijk
CEO Quality Manager
Постоянное улучшение нашей продукции является нашей политикой и, поэтому, мы
оставляем за собой право на изменение технических характеристик продукции без
предварительного уведомления.
Servotool BV • Lingenstraat 6 • 8028 PM Zwolle • Нидерланды
10 Ferax
SCHWINGSCHLEIFER
Die Ziffern im nachstehenden Text verweisen auf die Abbildungen auf Seite 2
Um Ihre eigene Sicherheit und die Sicherheit Anderer zu gewährleisten,
empfehlen wir Ihnen, sich diese Bedienungsanleitung vor der ersten
Inbetriebnahme gründlich durchzulesen. Bewahren Sie diese Anleitung und die
übrige Dokumentation zusammen mit der Maschine auf.
Einführung
DerSchwingschleiferFPS-280istzumtrockenenSchleifenvonHolz,Kunststoffund
SpachtelmassesowielackiertenOberflächenbestimmt.
Inhalt
1. TechnischeDaten
2. Sicherheitsvorschriften
3. Wartungs-und Verschleißteile
4. Bedienung
5. Wartungund Pflege
1.TECHNISCHEDATEN
Gerätedaten
Verpackungsinhalt
1 Schwingschleifer
1 Schleifblatt(Körnung80)
1 Staubbeutel
1 Bedienungsanleitung
1 Sicherheitsvorschriften
Teilebezeichnung
Abb. 1
1. Ein/Aus-Schalter
Spannung 230 V~
Frequenz 50 Hz
Leistungsaufnahme 280 W
Schutzklasse II
Leerlaufdrehzahl 8000-11000/min
Schleifplatte 115x227mm
Schleifblatt 115x280mm
Gewicht 2.35 kg
Lpa (Schalldruckpegel) 70 dB(A)
Lwa (Schallleistungspegel) 84 dB(A)
Vibrationswert 3.0 m/s2
DE
RU