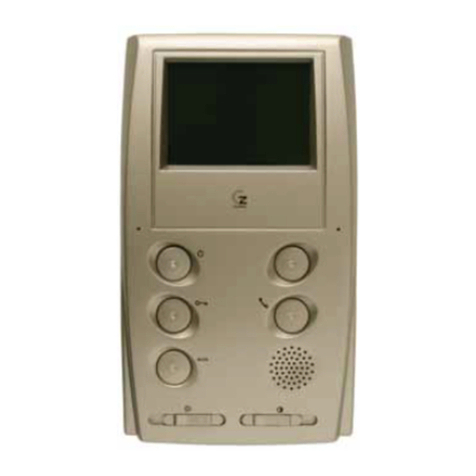
Guinaz M3760 User manual

МОНИТОР TACTILE
СИСТЕМА S2
АРТ.M3760 ИАРТ.M3760E
TACTILE MONITOR
FOR S2 SYSTEM
REF.M3760 AND REF.M3760E
РУКОВОДСТВО ПО УСТАНОВКЕ
INSTALLATION GUIDE

2
G503201 - R00
ХАРАКТЕРИСТИКИ ИРЕЖИМЫ РАБОТЫ. CHARACTERISTICS AND FUNCTIONING.
1. При поступлении вызова, монитор издает двутональный
звуковой сигнал, иизображение появляется мгновенно на
экране. Вто время как пользователь просматривает
посетителя, система не предупреждает оприсутствии,
пока не включается передача аудио.
2. Для установления аудио контакта достаточно нажать
кнопку связи в30 сек. после получения вызова. По
истечении этого времени монитор отключается и
пропускает вызов.
3. Общение прекращается автоматически через 60 сек. с
момента аудио контакта. Также можно завершить
общение, нажав кнопку включения/выключения .
После завершения связи, увас есть 30 сек. чтобы
затем продолжить разговор, нажав кнопку
включения/выключения включив опцию
видеонаблюдения. После включения данной опции,
нажмите кнопку связи .
4. Открытие двери осуществляется спомощью кнопки
открытия двери .
5. Для выполнения видеонаблюдения, нажмите кнопку
включения/выключения иперейдите вменю
видеонаблюдения. Изображение выводится на
монитор. Кроме того, если вы хотите установить
аудио контакт, нажмите кнопку связи . Во время
наблюдения может открыть дверь влюбое время с
помощью кнопки открытия двери . Наблюдения
прекращается автоматически через 60 сек. после его
включения, или повторным нажатием кнопки
включения/выключения . Если вустановке вашего
дома есть дополнительный доступ свидео, вы можете
выбрать изображение доступа, установив нужное
нажимая кнопку " стрелка вверх" .
6.
Есть кнопка для которой можно назначить функцию,
например просмотр дополнительного доступа, или
вызов консьержа (опция действительна, если он
установлен).
7. Для обеспечения адекватного качества изображения
мониторов есть настройки цвета, яркости и
контрастности вменю НАСТРОЙКИ ДИСПЛЕЯ.
Если вустановке подключен консьерж принцип
работы монитора следующий:
1. При поступлении вызова от консьержа, монитор издает
двутональный звуковой сигнал. На экране монитора
появится сообщение "ЗОНОК ОТ КОНСЬЕРЖА". Нажмите
кнопку снятия трубки, чтобы установить аудио связи.
2. Для осуществления вызова
консьержу смонитора, нужно
войти вМЕНЮ ФУНКЦИЙ ВЫЗОВ КОНСЬЕРЖУ, или с
помощью кнопки, если ранее на неё была назначена
эта функция. Вэтом случае могут произойти три вещи:
а) Если Консьерж, свободен, монитор выдает сигналы
вызова, ина дисплее появляется текст: ВЫЗОВ
КОНСЬЕРЖУ.
b) Если линия занята другим пользователем, монитор
воспроизводит звук " занято", ана дисплее появляется
сообщение: СИСТЕМА ЗАНЯТА, ФУНКЦИЯ НЕ ДОСТУПНА.
c) Если Консьерж находится врежиме ОЖИДАНИЯ,
монитор выдает три звуковых сигнала " занято", ина
дисплее появляется текст: КОНСЬЕРЖ НЕ ДОСТУПЕН.
ВЫЗОВ ЗАРЕГИСТРИРОВАН,указывая при этом, что
звонок записан впамять Консьержа.
Все эти устройства предназначены для использования
только вустановках для домофонии GUINAZ. Его установку
необходимо производить, как указано вданном
руководстве.
Внутреннии манипуляции этих продуктов может
выполняться только квалифицированным персоналом, и
всегда при отключенном питании.
Мониторы предназначены для установки впомещении; не
подвергать воздействию воды.
Рекомендуется установить мониторы вместах, из которых
вы услышите вызов во всем доме, иподальше от
источников тепла (отопительные батареи, плиты ит.д) или
агрессивных сред (вкухнях, ит.д.)
1. When a call is received, the image appears immediately on
your monitor. While you see the visitor, he will not be aware
you are at home until audio contact is established.
2. To establish audio contact press the communication button
within 30 sec. following the call. The monitor is
disconnected and the call is lost if this time runs out.
3.The communication will automatically end 60 sec. from the
moment audio contact was established. The communication
can also be ended by pressing the on/off button . Once
the communication has ended, you will have 30 sec. to
continue this by pressing the on/off button and pressing
the button .
4.The door is opened by pressing de door opener pushbutton
.
5.To perform video surveillance, press the on/off button . The
image will appear on the monitor. Press the communication
button if you also want to establish audio contact. The
door can be opened at any time during surveillance by pressing
the door opener button .. Video surveillance will end
automatically 60 sec. after starting, or by pressing the on/off
button once again. If your dwelling installation has more
than one video access, you can select the desired access
image by activating consecutively the up arrow
push-button .
6.Available with an push-button, where functions can be
activated such as auxiliary output activation, or calling the
concierge (valid option if installed).
7.In order to obtain a suitable screen quality, it is possible to set
the contrast, brightness and colour adjustment in the SCREEN
ADJUSTMENT menu.
lf there is a porter's lodge connected to the installation,
functioningwillbe as follows:
1.
When a call is received from the porter's lodge, the monitor
emits a dual tone sound. In the monitor screen a "CALLING
CONCIERGE" message is shown. Press the communication
button to establish audio communication.
2.
To make a call from the dwelling monitor to the concierge's
office, you can access the FUNCTIONS MENU CALL
CONCIERGE, or by the push-button if this function has
been previously assigned to the same. Once arrived at this
point, three things can happen:
a)If the concierge's office is free, the monitor will issue ringing
tones and the following text is shown: CALLING CONCIERGE. b)If
the bus is occupied by another user, an occupied ringing
will
be heard by the monitor and the following text is shown:
SYSTEM BUSY. FUNCTION NOT AVAILABLE.
c)
If the concierge's office is in STAND-BY mode, the monitor
will
issue three occupied ringing tones and the following text
is
shown: CONCIERGERY NOT ACTIVE. CALL SAVED,
indicating that the call has been memorised at the concierge's
office.
All these devices are for exclusive use in facilities of video door
entry sistems of GUINAZ. The installation must be made such
as it is specified in this guide and is applied the effective
regulation.
The product must be handle only by especialized personnel,
and always with the disconnected equipment of the feeding.
The monitors should be installed indoors; not be exposed to
water droplets or projections.
Installing the monitor in places where calls can be heard all
around the dwelling and far from heat sources (radiators, heaters,
etc.) or aggressive environments (kitchens, etc.) is
recommended.
G503201 - R00
3
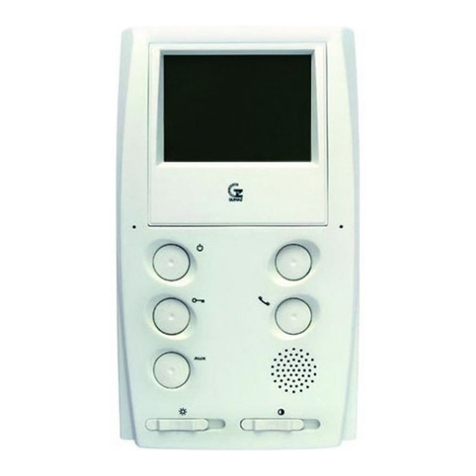
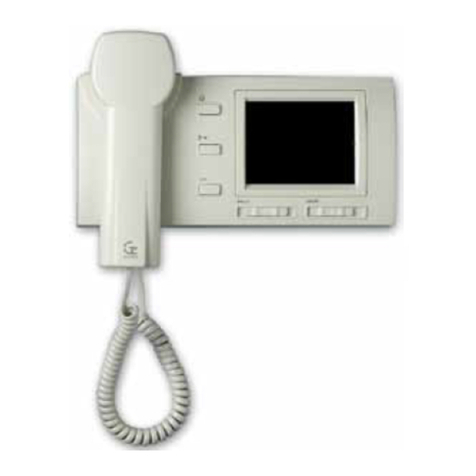
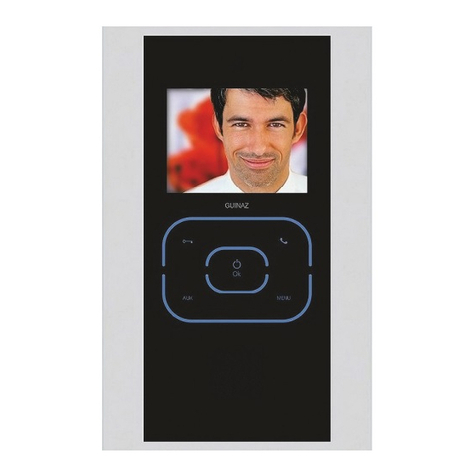
ОПИСАНИЕ МОНИТОРА M3760.
DESCRIPTION OF THE M3760 MONITOR.
1.
Кнопка включения/выключения
. Используется для
подключения иотключения монитора. Если меню
активен, его функция - "ОК" соответствующий выбор в
меню.
On/off push-button
. Used to connect and disconnect
the monitor. Inside the menu, it is used to access different
options.
2.
Кнопка открытия двери
Служит для открытия двери.
Door opener push-button
. This is pressed to open
the door.
3.
Дополнительная кнопка
. Используется для
дополнительных функций монитора (вызов консьержа,
освещение лестницы, открывание второй двери....).
Supplementary push-button .
Used for functions
other than those of the video entryphone installation (lighting
of stairs, opening a second door...).
4.
Стрелка вверх
. Для перемещения вверх по меню,
или увеличить числовое значение настройки. Кроме
того, для переключения камеры, когда
видеонаблюдение активно.
Up arrow
. To move upwards within the menus, or increase
the numerical value of the adjustments. Additionally it
changes from camera when the video surveillance is active.
5.
Стрелка вниз
. Для прокрутки вниз вменю или для
уменьшения числовых значений параметров
.
Down arrow
. To move downwards within the menus, or
decrease the numerical value of the adjustments
6.
Кнопка связи
. Служит для аудио связи между
вызывной панелью имонитором, при ранее включеном
мониторе.
Communication push-button .
This is used to establish
audio communication between the street panel and the
monitor, as long as the monitor has been previously turned
on.
7.
Кнопка меню.
Если монитор включен ине
находится вменю служит для доступа кнему. Если
меню активно, для выхода из него
.
Push-button menu "MENU"
. If the monitor is switched-
on and the menu is not active, it will access the same. If the
menu is active, it will leave the same.

4
G503201 - R00
НАСТРОЙКА СОПРОТИВЛЕНИЯ ОКОНЧНИЯ ЛИНИИ.
LINE ENDING RESISTANCE CONFIGURATION.
Сопротивление завершения линии настраивается спомощью двух переключателей (SW1), расположенных на главной
плате монитора M3760 / M3760E.
The line ending resistance is set by two switches (SW1) located on the main board of the monitor M3760 / M3760E.
Конфигурация, когда монитор не является последним всвоей линии распространения. Т.е.
кабель входит ивыходит из настенной базы на другой монитор.
Configuration when the monitor is not the last along the distribution line. That is to say, the cable enters
and exits the wall base towards another monitor.
Конфигурация, когда монитор является последним всвоей линии распространения. Т.е. кабель
только входит внастенную базу.
Configuration when the monitor being the last along the distribution line. That is to say, the cable only
enters the wall base panel.
ПРОВОДКА КАРТЫ ПОДКЛЮЧЕНИЯ МОНИТОРА M3760 / M3760E.
WIRING OF THE CONNECTION CARD MONITOR M3760 / M3760E.
Соединения производятся на плате разводки монитора
.
Connections are made on the card terminal's monitor.
IN OUT OUT IN IN
BUS BUS 16 ST VDCGND
Клавиша 2° тона. Pushbutton for 2° tone..
Блок
питания 1
Дополнительн.
2
F1330 ó F1334
Auxiliary Power
Supply F1330 or
F1334
Дополнительный выход (11Vdc ± 1V/
100mA).
OutputAuxiliary(max11Vdc
±
1V/max100mA).
IN ST
OUT 16
IN VDC
GND
M3760
M3760E
Кабель 2 нити
2-wire cable
Кследующему монитору.
To the following monitor.
BUS IN
BUS OUT

G503201 - R00
5
ВАЖНО:
а) Ни вкоем случае не должны соединяться
провода шины напрямую. Чтобы продлить
шины после одного монитора, необходимо
использовать клеммы BUS OUT карты
подключения монитора.
b) Если используются вустановке
многопаровые провода, можно использовать
только одну из пар, иникогда не объединять
несколько пар, чтобы удвоить сечение.
C) Если кабель используется, является
многополярным, можно использовать только
два провода, иникогда не соединить несколько
проводов, чтобы удвоить разделе.
КАРТА ПОДКЛЮЧЕНИЯ. ОПИСАНИЕ
КОНТАКТОВ.
lMPORTANT;
a)
ln no case should join bus cables directly. To
extend
the bus after a monitor, you should use the BUS
OUT terminal of the connection board of the
monitor.
b)
lf the multipair cable is used in the installation,
you
can only use one pair, and never more than a
couple
unite to bend section.
c)
lf the cable used has several wires, you can
only
use two wires, and never must unite several
cables
to bend section.
CONNECTION CARD. DESCRIPTION OF
THE TERMINAL BLOCK.
К
леммная колодка ST: функционирование 2-ого тона
Вводя сигнал 1M через клеммная колодка ST (как показано
на рисунке на стр. 4) активируется приложение для
установки, вкоторых требуется воспроизведение другого
сигнала вызова на мониторе при нажатии кнопки вне
установки домофона (например прямой звонок для входа в
дом).
Чтобы различать, откуда произошел вызов, 2
ой
сигнал
имеет звук, отличный от воспроизводимого при вызове с
вызывной панели системы видеодомофонии.
2-йтон не включает изображение на мониторе. На экране
отображается текст, где указано, что совершен 2-йтон.
Если монитор находится ваудио связи или
видеонаблюдении, вызов 2-ого тона будет более низким.
Клеммная колодка 16: ВСПОМОГАТЕЛЬНЫЙ ВЫХОД
2 (выход 15Vdc ± 1V / 3OmA)
Через колодку 16 на карте подключения, монитор подает
сигнал 15Vdc ± 1 Вимаксимальным током 30 мА втечение
времени, настроенного вменю АКТИВАЦИЯ ВЫХОДОВ,
времени AUX 2. Можно настроить так, чтобы он был
активен вдиапазоне от 1 до 60 секунд.
Этот сигнал относительно массы системы (кабель 2М) и
может быть использован для активации функций, не
относящихся кустановке домофона.
Клемная колодка IN VDC: ВХОД ВСПОМОГАТЕЛЬНОГО
ИСТОЧНИКА ПИТАНИЯ
Монитор можно питать от источника питания вне системы.
Для этого нужно использовать артикулы F1330 или F1340
от GUINAZ. Сигнал, который распространяют эти источники
+17Vdc, инеобходимо соединиться сполярностью,
указанной на рисунке, стр. 4.
TERMlNAL BLOCK ST: FUNCTlONlNG OF THE 2nd TONE.
The way to connect the 2° tone is described on page 4. Wiring
of the conection card monitor M3750.
Application for installations requiring a call tone to be heard from
the monitor when a pushbutton not belonging to the video
entryphone is pressed (for example, bell for direct entry to the
dwelling).
This 2nd tone has a different sound from that generated when
calling from the street panel of the video entryphone system in
order to differentiate where the call is from.
The 2nd tone does not turn on the monitor. If the monitor is in
audio communication or in video surveillance mode, the volume
of the call with the 2nd tone will be lower.
TERMlNAL BLOCK 16: OUTPUT AUX 2
(output15Vdc±1V/30mA)
Through the terminal block 16 of the connection card, the
monitor supplies a signal of 15Vdc
±
1V and a maximum current
of 30mA, configured in the OUTPUT ACTIVATION menu, time
AUX 2. It can be configured to be active between 1 and 60
seconds.
This signal is referred to the system ground (cable 2M) and can
be used to activate functions beyond the video door entry
systems.
TERMlNAL BLOCK lN VDC: AUXlLlARY POWER lNPUT
It is possible to power the monitor from an external power
supply to the system. For this, can be used F1330 or F1340
power supplies of GUINAZ. The signal provided by these
power supplies is +17Vdc, and must be connected with the
polarity indicated in the figure on page 4.

6
G503201 - R00
4
Крепеж монитора:
Assembly of the monitor:
Screw the monitor on the wall panel.
5
Чтобы снять монитор
B)Подтолкнуть
Наружу
Disassembly the
monitor.
A)Screw
loosening.
B)Move UP and then out wards.
B
B
A
B
1
1600мм
приблиз.
1600мм
приблиз.
УСТАНОВКА НАСТЕННОЙ БАЗЫ ИМОНИТОРА M3760.
INSTALLATION OF WALL BASE AND MONITOR M3750.
Разместить настенную базу на
стене спомощью 4 шурупов и
подключить карту подключений.
ПРИМЕЧАНИЕ: можно
прикрепить на универсальную
коробку спомощью 3 винтов.
Assemble this wall base panel on
the wall using 4 sleeper-screws
and connect it to the connection
card.
NOTE: It is possible to secure the
universal box by means of 3 lag
screws.
2
Настроить соединение базы, как указано на
стр. 4 иподключить кразъему монитора.
Configure the connection card of the wall base
panel as indicated on page 4 and connect
the
monitor connector.
3
Установить монитор:
A;B) Вставить внастенную базу
C) Нажать до щелчка.
Assembly of the monitor:
A)
Assemble on the wall panel
B)
Press down until it clips in.
Привентить монитор кнастенной базе.
A)Открутить винты.
вверх ипотом
Рекомендуется устанавливать
мониторы вместах, из
которых вы услышите вызов
во всем доме, иподальше от
источников тепла
(отопительные батареи, плиты
ит.д) или агрессивных сред (в
кухнях, ит.д).
Installing the monitor in places
where calls can be heard all
around the dwelling and far from
heat sources (radiators,
heaters, etc.) or aggressive
environments (kitchens, etc.)
is recommended.

G503201 - R00
7
ОПИСАНИЕ ФУНКЦИЙ МЕНЮ
ЯЗЫКИ
Для выбора языка текста, которые появляются на
экране монитора, необходимо зайти вГЛАВНОЕ
МЕНЮ НАСТРОЙКИ ЯЗЫКА, иможно выбрать
один из четырех языков: Русский, Английский,
Французский или Португальский.
УСТАНОВКА МОНИТОРА.
Чтобы включить монитор, нажмите кнопку ВКЛ./ВЫКЛ OK.
Если монитор ранее не был настроен, вам будет предложено
выбрать язык, на котором отображаются тексты. Выберите
подходящий язык спомощью клавиши OK.
После выбора языка, вы будете перенаправлены
автоматически вМЕНЮ УСТАНОВКИ.
Если ваш монитор уже настроен, ивы хотите изменить любые
его параметры, войдите вэто меню следующим образом: в
ГЛАВНОМ МЕНЮ УСТАНОВКА.
Вэтом меню вы можете настроить номер монитора, как
тип терминала, который вы собираетесь установить:
РЕЖИМ РУЧНОЙ УСТАНОВКИ.
Если вы уже знаете "N° монитора", который требуется
установить, и"тип терминала", перейдите спомощью
клавиши ОК на параметр НОМЕР. Монитор предложит
ввести пароль. Он всегда тот же исоответствует
последовательности клавиш:
+OK(для
подтверждения).
После правильного ввода ключа выбранный параметр (в
данном случае НОМЕР) отображается на красном фоне.
Измените номер, который будет запрограммирован
монитор спомощью кнопок . . Чтобы проверить
номер, достаточно нажать кнопку OK еще раз.
Монитор предложит подтвердить изменения, выберите
опцию ДА инажмите OK. Если вы хотите также изменить
"тип терминала", перейдите вопции ТЕРМИНАЛ и
нажмите OK. Появится выбранный вариант на красном
фоне, имы можем выбрать ОСНОВНОЙ или
ВТОРОСТЕПЕННЫЙ спомощью клавиш . Если есть
несколько мониторов на один итот же номер, только один
должен быть, как ОСНОВНОЙ, аостальные как
ВТОРОСТЕПЕННЫЕ. Нажмите ДА иподтвердите ОК
Монитор предложит подтвердить изменения, выберите
опцию ДА помощи кнопок иинажмите OK.
РЕЖИМ УСТАНОВКИ ПОСЛЕДНЕГО ЗВОНКА.
Этот параметр позволяет настроить монитор, не зная
заранее номер, который вы должны назначить.
Выберите ПОСЛЕДНИЙ ВЫЗОВ инажмите OK. При
инициировании вызова спанели улице отображается на
дисплее, номер монитора на который был сделан
последний звонок. Для того, чтобы назначить этот номер,
инажмите кнопку OK.
Если вы ранее не входили вменю установки, монитор
запросит пароль, который, как мы уже объясняли ранее,
реагирует на комбинацию клавиш:
+
OK (для подтверждения).
Монитор предложит подтвердить изменения, выберите
опцию ДА инажмите OK.
При отображении номера монитора, при последнем звоноке,
отображается дополнительная информация, такая как:
- Номер уже назначен на другой монитор: ЗАНЯТО.
- Номер монитора который увас настроен: ТЕКУЩИЙ.
- Если не отображается ни один из двух предыдущих
текстов, номер свободен.
Если выбран параметр ЗАВОДСКИЕ НАСТРОЙКИ монитору
будет назначены значениями по умолчанию: Number=0 /
Terminal=Основной. Этот параметр также настраивает по
умолчанию настройки цвета, яркости иконтрастности, звонка
ивспомогательные выходы, которые являются
настраиваемыми
.
DESCRIPTION OF FUNCTIONS MENU.
LANGUAGES
To select the language of the text displayed in the screen monitor,
you must access MAIN MENU CONFIGURATION
LANGUAGE, and from there its possible to select between 4
languages: Spanish, English, French o Portuguese.
MONlTOR lNSTALLATlON.
To switch-on the monitor, press the switch-on/ switch-off OK
key. If the monitor has not been previously programmed, it will
ask to select the language first. Select the correct language by
using the OK key.
Once the language has been selected, the INSTALLATION
MENU will automatically appear.
If the monitor has been already configured and you want to
access some of the parameters, you must access the menu
from the following way: MAIN MENU INSTALLATION.
From this menu, you can configure the number of the monitor,
as well as the type of terminal to be installed:
MANUAL INSTALLATION MODE.
If you already know the "Monitor number" and the "Terminal
type" to be installed, you can access the OK key through the
NUMBER option. The monitor will ask you to input the password.
It is always a fixed one, and corresponds to the key sequence:
+ OK (to accept).
Once having input the correct password, the selected option
(in this case NUMBER) is shown on a red background. Modify
the number of the monitor to program through the and
keys. To validate the number, press the OK push-button again.
The monitor will ask you to confirm the modification, select the
option YES and press OK. If you also want to modify the
"Terminal type", move to the option TERMINAL and press OK.
The selected option appears again on a red background and
we can choose the MAIN or AUXILIARY option through the
and keys. If there are several monitors with the same number,
there must be only one as the MAIN number and the rest as
AUXILIARY.
Press YES and then OK.
The monitor will ask you to confirm the modification, select the
YES option through the and keys and press OK.
LAST CALL INSTALLATION MODE.
This option allows to configure the monitor without knowing
previously the number that must be assigned.
Select the option LAST CALL and press OK. When sending a
call from the street panel the number of the monitor to which
the last call has been made is shown.
To assign this number to the monitor, press OK.
If you have not entered previously in the installation menu, you
are requested to enter the password through the key sequence:
+ OK (to accept).
The monitor will ask you to confirm the modification, select the
YES option and press OK.
When viewing the monitor number of the last call, an additional
help information is displayed if:
-
The number is already assigned to another monitor:
RESERVED.
-
The number is the one configured in the monitor: PRESENT.
If none of the previous text is displayed, then the number is
free.
If the option FACTORY SETTINGS is selected, the monitor will
be programmed with the default values: Number=0 /
Terminal=Main. This option also configures the colour, brightness
and contrast adjustments by default, as well as the ring and
auxiliary outputs which are configurable.

8
G503201 - R00
ОПИСАНИЕФУНКЦИЙМЕНЮ
НАСТРОЙКИ ДИСПЛЕЯ
Можно изменить настройки изображения монитора.
Войдите ГЛАВНОЕ МЕНЮ НАСТРОЙКИ ЭКРАНА,
можно отрегулировать яркость, контрастность ицвет.
После того, как вы вошли водин из этих параметров
автоматически появляется изображение стелекамеры
видеонаблюдения (если не занято), чтобы подтвердить
изменения.
Для увеличения (стрелка ввер) или уменьшения (стрелка
ввниз) процента от этого значения. Для проверки
изменения,
нажмите кнопку OK. Для отмены нажмите
кнопку MENU.
НАСТРОЙКИ ЗВОНКА
Этот монитор имеет различные настройки как для звука
гланого звонка, так извука второго тона. Эти настройки
можно найти вменю ниже:
ГЛАВНОЕ МЕНЮ НАСТРОЙКИ ЗВОНОК
.
Настройки, которые можно изменить это длительность,
громкость итип звонка.
АКТИВАЦИЯ ВЫХОДОВ
Также можно изменить время активации каждого из выходов
по раздельности. В
ГЛАВНОМ МЕНЮ НАСТРОЙКИ
АКТИВАЦИЯ ВЫХОДОВ
Можно настроить время срабатывания от 1 до 60 секунд.
Вспомогательному выходу 1 соответствует колодка №18 и
Вспомогательному выходу 2 соответствует колодка N° 16.
РЕЖИМ ВКЛЮЧЕНИЯ
Включение монитора настраивается. При его активации вы
можете войти ВМЕНЮ ФУНКЦИИ, или непосредственно на
"видеонаблюдение".
Вменю: ГЛАВНОЕ МЕНЮ НАСТРОЙКИ
РЕЖИМ ВКЛЮЧЕНИЯ
Вы можете выбрать:
• СТАРТОВОЕ МЕНЮ. При включении монитора
появляется МЕНЮ ФУНКЦИЙ.
•ВИДЕОНАБЛЮДЕНИЕ. При включении монитора
напрямую обращается к"видеонаблюдению". Вэтом
случае, чтобы вызвать меню, нажмите клавишу MENU.
ФУНКЦИЯ КЛАВИШИ AUX
Можно настроить клавиши AUX, взависимости от
потребностей каждой установки.
ВГЛАВНОМ МЕНЮ НАСТРОЙКИ
ФУНКЦИЯ
КЛАВИШИ AUX, можно назначить этой клавише иодну из
следующих функций:
• Активировать вспомогательный выход 1.
• Активировать вспомогательный выход 2.
• Вызов консьержа.
Таким образом, вы можете пользоваться одной из этих
функций без необходимости входа вМЕНЮ ФУНКЦИЙ.
МЕНЮ ФУНКЦИЙ
Это меню которое первое появляется на экране, что
позволяет пользователю легко активировать прямые
функции:
• Видеонаблюдение
• Вызов консьержа
• Активация выхода AUX1
• Активация выхода AUX2
Чтобы активировать нужную функцию, выберите
параметр спомощью стрелок вверх ивниз инажмите
на кнопку OK.
Сэтого экрана можно попасть вменю, выбрав пункт
ГЛАВНОГО МЕНЮ.
DESCRIPTION OF FUNCTIONS MENU.
SCREEN ADJUSTMENT
It is possible to modify the image adjustments of the monitor.
Inside the MAIN MENU
SCREEN ADJUSTMENT, the
brightness, contrast and colour of the image can be adjusted.
Once one of these adjustments has been accessed, the image
of the video surveillance telecamara will be displayed automatically
(if the system is not occupied) to verify the modifications.
You can increase (up arrow) or decrease (down arrow) the
percentage of this value. To validate the modification, activate
the OK push-button. To cancel, activate the menu push-button.
RING ADJUSTMENTS
This monitor has different adjustments available for the ring call
tone as well as the second tone sound. These adjustments are
found inside the following menu:
MAIN MENU CONFIGURATION RING.
The adjustments that can be performed are the duration, the
volume and the type of ring.
OUTPUT ACTlVATlON
It is also possible to modify independently the activation time
of each of the outputs. Inside the MAIN MENU
CONFIGURATION OUTPUT ACTIVATION it is possible to
configure the activation time between 1 and 60 seconds.
Auxiliary Output 1 corresponds to the terminal block 18 and
Auxiliary Output 2 corresponds to the terminal block 16.
SWlTCHlNG-ONMODE
Switching-on the monitor is configurable. When activating the
same, one can access to the FUNCTIONS MENU, or directly
to "video surveillance".
Inside the menu: MAIN MENU
CONFIGURATION
SWITCHING-ON MODE
It is possible to select:
• MAIN MENU. When switching-on the monitor the
FUNCTIONS MENU is displayed.
• VIDEO SURVEILLANCE. When switching-on the monitor
the "video surveillance" is directly displayed. In this case, to
activate the menu, press the MENU key.
AUX KEY FUNCTlON
It is possible to configure the AUX key, depending on the
necessity of each installation.
Inside the MAIN MENU CONFIGURATION AUX KEY
FUNCTION, the following functions can be assigned to this key:
•
Activate auxiliary output 1.
•
Activate auxiliary output 2.
•
Call the concierge.
This way it is possible to activate one of these functions without
needing to enter the FUNCTIONS MENU.
FUNCTlONSMENU
This is the first menu that is displayed in the screen, which
allows the user to easily activate the direct functions:
•
Video surveillance
•
Call the concierge
•
Activate output AUX1
•
Activate output AUX2
To activate the desired function select the option with the up-
arrow or down-arrow keys and press OK.
From this screen one can access to the rest of menus selecting
the MAIN MENU option.

9
G503201 - R00
M
ENU FUNCIONES
MENU PRINCIPAL
VIDEO VIGILANCIA
LLAMAR A CONSERJE
ACTIVA AUX1
ACTIVA AUX2
SALIR
M
ENU PRINCIPAL
AJUSTES DE PANTALLA
IDIOMA I LANGUAJE
CONFIGURACION
INSTALACION
VOLVER
A
JUSTES DE
P
ANTALL
A
BRILLO
CONTRASTE
COLOR
VOLVER
I
D
IOM
A
/
LANGUAJE
ESPAÑOL
ENGLISH
FRANCAIS
PORTUGES
VOLVER
C
ONFIGURACION
TIMBRE
ACTIVACION DE SALIDAS
MODO DE ENCENDIDO
FUNCION TECLA AUX
VOLVER
3
ТАБЛИЦАМЕНЮ
TABLE OF MENUS.
МЕНЮ ФУНКЦИЙ
Это меню которое первое появляется на экране. Можно
активировать несколько функции или перейти вглавное
меню.
Главное меню Можно попасть вглавное меню.
Видеонаблюдение Контроль видеонаблюдения.
Позвонить Консьержу Звонит консьержу, если он есть вустановке.
Активировать AUX 1 Активный выход AUX 1. Клеммная колодка №18.
Активировать AUX 2 Активный выход AUX 2. Клеммная колодка №16
.
FUNCTlONS MENU
First menu accessed. Several functions can be carried out
or access the main menu.
Main menu Accedes to the main menu.
Video surveillance Activatesthevideo
-
surveillance.
Call concierge Calls the concierge if it exists in the installation.
Activating AUX 1 Activates output AUX 1. Terminal block 18.
Activating AUX 2 Activates output AUX 2. Terminal block 16.
ГЛАВНОЕ МЕНЮ
2
Дисплей Регулировка яркости / контрастности / цвета.
Язык/language Устанавливает язык:Русский/Англ./Французский/Португальский
Настройка Настройка звонка/активации выходов/режим питания/
присваивает функции на клавишу AUX
Установка Устанавливает количество итип монитора вустановке.
Вернуться
MAlN MENU
Screen adjustment Adjusts brightness / contrast / colour.
Language Configures the language Spanish / English / French / Portuguese
Configuration Configures the ring / the output activation / the switching-on mode /
assigns function to the AUX key
Installation Configures the number and type of monitor in the installation.
Return
НАСТРОЙКИ ДИСПЛЕЯ
Настройка параметров изображения.
Яркость
Контрастность
Цвет
Вернуться
SCREEN ADJUSTMENT
Adjusts the image values to
Brightness
Contrast
Colour
Return
ЯЗЫК / LANGUAGE
Настройте язык, на котором отображаются
тексты TFT.
Русский
English
Francais
Portugues
Вернуться
LANGUAGE
Configures the language of the text displayed in the TFT.
Español
English
Francais
Portugues
Return
ПАРАМЕТРЫ
Звонок Настройте параметры звонка.
Активация выходов Время активации выходов.
Режим включения Режим включения монитора
Функции клавиши AUX Назначает функцию на кнопку AUX.
Вернуться
CONFlGURATlON
Ring Adjusts the ring values.
Output activation Activation time of outputs.
Switching-ON mode Switching-on mode of the monitor
AUX key function Assigns a function to the AUX key.
Return

T
IMBRE
VOLUMEN
DURACION TIMBRE
SONIDO DE LLAMADA
SONIDO 2° TONO
VOLVER
V
OLUMEN
ALTO
MEDIO
BAJO
VOLVER
S
ONIDO LLAM
A
DA
MELODIA 1
MELODIA 2
MELODIA 3
MELODIA 4
VOLVER
S
ONIDO 2º TONO
MELODIA 1
MELODIA 2
MELODIA 3
MELODIA 4
VOLVER
1
2 3 4
ЗВОНОК
Настройка параметров звонка монитора.
Громкость громкость может быть: Высокий/Средний/Низкий
Продолжительность Регулировка от 1 до 10 сек. время, которое будет
длиться звонок вдверь.
Звук вызова 4 различных мелодии при вызове спанели.
Звук 2° тона 4 различные мелодии при вызове скнопки AUX.
Вернуться
RlNG
Adjusts the ring values in the monitor.
Volume The volume cam be: High / Medium / Low
Ring duration Adjusts from 1 to 10 sec. The time the ring will be
ringing.
Calling sound 4 different melodies when calling from the street panel.
2 tone sound 4 different melodies when calling from the auxiliary
push-button.
Return
ГРОМКОСТЬ
Выберите спомощью кнопки ОК
5
громкость которую Вы хотите для
В
ысокий звонка
Средний
Низкий
Вернуться
VOLUME
Select with the OK push-button the
desired volume of the call sound
High
Medium
Low
Return
DURACION TIMBRE
SEGUNDOS
2
ПРОДОЛЖИТЕЛЬНОСТЬ
ЗВОНКА
Регулировка от 1 до 10 сек. время звучания
звонка
.
RlNG DURATlON
Adjusts from 1 to 10 sec. The time the ring
will be ringing.
МЕЛОДИЯ ВЫЗОВА
Выберите спомощью кнопки OK мелодию
для звонка свызывной панели
Мелодия 1
Мелодия 2
Мелодия 3
Мелодия 4
Вернуться
CALLlNG SOUND
Select with the OK push-button the melody
of the call sound from the street panel.
Melody 1
Melody 2
Melody 3
Melody 4
Return
МЕЛОДИЯ 2º ТОНА
Выберите спомощью кнопки OK мелодию,
которую вы хотите на мелодию 2° сигнала
.
Мелодия 1
Мелодия 2
Мелодия 3
Мелодия 4
Вернуться
2 TONE SOUND
Select with the OK push-button the melody of the
2° call sound.
Melody 1
Melody 2
Melody 3
Melody 4
Return
10 G503201 - R00

A
CTI
V
ACION DE SALIDAS
ACTIVA AUX 1
ACTIVA AUX 2
VOLVER
M
ODO DE ENCENDIDO
MENU INICIAL
VIDEO VIGILANCIA
VOLVER
NCION TECL
A
A
UX
ACTIVA AUX 1
ACTIVA AUX 2
LLAMAR A CONSERJE
VOLVER
1
2 3
4
АКТИВАЦИЯ ВЫХОДОВ
Время, втечение которого будут
находиться открыты дополнительные
выходы.
Время AUX 1 Регулировка от 1 до 60 сек. Время, которое будет
активна AUX 1. Клеммная колодка №16.
Время AUX 2 Регулировка от 1 до 60 сек. Время, которое будет
активна AUX 2. Клеммная колодка №18.
Вернуться
OUTPUT ACTlVATlON
Time when auxiliary outputs are active.
AUX 1 Time Adjustment from 1 to 60 sec. The time that AUX 1 is
active. Terminal block 16.
AUX 2 Time Adjustment from 1 to 60 sec. The time that AUX 2 is
active. Terminal block 18.
Return
РЕЖИМ ВКЛЮЧЕНИЯ
Включение монитора, вы можете настроить двумя
способами
:
Начальное меню Монитор входит вменю функций
Видеонаблюдение Монитор включает функцию видеонаблюдения.
Вернуться
SWITCHING-ON MODE When switching-on the monitor it can be done
in two ways:
Startup menu The monitor accedes to the functions menu.
Video surveillance The monitor directly performs the video-surveillance
function.
Return
ФУНКЦИИ КЛАВИШИ AUX
На кнопку AUX, можно назначить следующие
U
функции
.
Активирует AUX 1 Включается выход AUX 1. Клеммная колодка №16.
Активирует AUX 2 Включается выход AUX 2. Клеммная колодка №18.
Позвонить Консьержу Звонок консьержу, если он есть вустановке.
Вернуться
AUX KEY FUNCTlON
To the AUX key, the following functions can be assigned.
Active AUX 1 Activates output AUX 1. Terminal block 16.
Active AUX 2 Activates output AUX 2. Terminal block 18.
Call concierge Calls the concierge if it exists in the installation.
Return
INSTALACION
NUMERO : 2
TERMINAL: PRINCIPAL
VALORES DE FABRICA
ULTIMA LLAMADA
VOLVER
CONFIRMAR SI
CAMBIO NO
УСТАНОВКА
Номер Номер терминала внутри установки.
Заводские настройки По умолчанию
Последний вызов. Отображается код монитора, на который была выполнена
последний Звонок.
Вернуться Может случиться, что монитор уже существует: или нет
Number Terminal number inside the installation.
Terminal. Main or auxiliary.
Factory settings By default:
Last call The monitor code is displayed of the last call.
Return It can happen that the monitor already exists: or not:
G503201 - R00 11

Guinaz SL
P El Escapar P2 31350 Peralta Navarra SPAIN
www.guinaz.com
Other manuals for M3760
1
This manual suits for next models
1
Table of contents
Other Guinaz Intercom System manuals

Guinaz
Guinaz M2710D User manual

Guinaz
Guinaz PDV501SIP User manual

Guinaz
Guinaz T1150 User manual

Guinaz
Guinaz M1725V2 User manual

Guinaz
Guinaz KC001 User manual

Guinaz
Guinaz G1250 User manual

Guinaz
Guinaz PDV501SIP User manual

Guinaz
Guinaz M3780 User manual

Guinaz
Guinaz KA001LA User manual

Guinaz
Guinaz M3750 User manual
Popular Intercom System manuals by other brands

Audiovox
Audiovox VE103IM owner's manual

Federal Signal Corporation
Federal Signal Corporation ez1 echo installation instructions

Aiphone
Aiphone JF-1FD Installation & operation manual

Fysic
Fysic FDC-250 user manual

Gewiss
Gewiss Chorus ANTAS GW19061 user manual

Vip-Vision
Vip-Vision Apartment Series installation manual