manuals.online logo
Brands
  1. Home
  2. •
  3. Brands
  4. •
  5. Festo
  6. •
  7. Control Unit
  8. •
  9. Festo CAMC-G-S3 User manual

Festo CAMC-G-S3 User manual

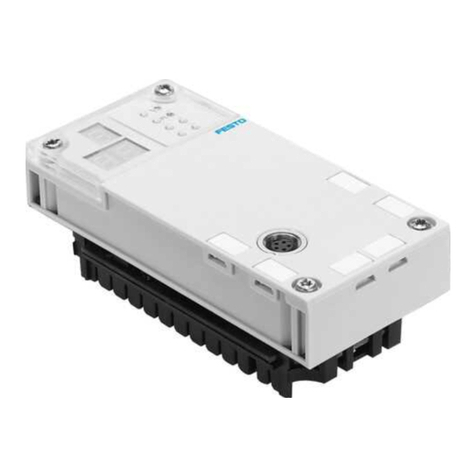
CAMC-G-S3
Safety module
Festo SE & Co. KG
Ruiter Straße 82
73734 Esslingen
Deutschland
+49 711 347-0
www.festo.com
Brief instruction | Safety function, Advanced Safety
8179168
2022-07b
[8179170]
Translation of the original instructions
© 2022 all rights reserved to Festo SE & Co. KG
1Applicable documents
All available documents for the product è www.festo.com/sp.
This brief description refers to the following versions:
–Safety module CAMC-G-S3, from revision 01 (overall revision 1.1).
–Motor controller CMMP-AS-…-M3, firmware from version 4.0.1501.2.1.
–FCT plug-in CMMP-AS from version 2.4.x.x with SafetyTool from version 1.0.x.x
Version
EN 61800-5-1:2007 + A1:2017 EN ISO 13849-1:2015
EN 61800-5-2:2017 EN 60204-1:2006 + A1:2009 + AC:2010
Tab. 1: Standards specified in the document
2Safety
2.1 General safety instructions
–Also always observe the general safety regulations for the motor controller
CMMP-AS-...-M3.
The general safety regulations for the CMMP-AS-...-M3 can be found in the hard-
ware documentation GDCP-CMMP-M3-HW-....
NOTICE
Loss of the safety function!
The safety functions might fail if you do not comply with the parameters required
for the surroundings and connections.
•Observe the specified environmental and connection conditions, in particular
the input voltage tolerances è 12 Technical data.
NOTICE
Incorrect handling may damage the safety module or motor controller.
Incorrect handling may cause damage.
• Switch off the power supply before mounting and installation work. Do not
switch on the supply voltages until mounting and installation work is com-
pletely finished.
• Never unplug or plug the module from/into the motor controller when powered!
• Observe the handling specifications for electrostatically sensitive devices.
2.2 Intended use
The safety module CAMC-G-S3 serves exclusively as an extension of the motor
controller CMMP-AS-...-M3 to achieve the STO, SS1, SS2, SOS, SLS, SSR, SSM,
SBC safety functions in accordance with EN 61800-5-2.
The motor controller CMMP-AS-...-M3 with safety module CAMC-G-S3 is a product
with safety-related functions and intended for installation in machines or automa-
tion systems and to be used as follows:
–in excellent technical condition,
–in its original condition, without unauthorised modifications,
–within the limits of the product defined by the technical data è 12 Technical
data,
–in an industrial environment.
NOTICE
In the event of damage caused by unauthorised manipulation or use other than
the intended use, the guarantee will be invalidated and the manufacturer will not
be liable for damages.
2.3 Foreseeable misuse
The following are examples of foreseeable misuse and are not approved as
intended use:
–use in a device other than the CMMP-AS-…-M3,
–use outdoors,
–use in non-industrial areas (residential areas),
–use outside the limits of the product defined in the technical data,
–unauthorised modifications.
NOTICE
• The STO function must not be used as the sole safety function for drives subject
to permanent torque (e.g. suspended loads).
• Safety devices must not be bypassed.
• Repairs on the module are prohibited!
The STO (Safe Torque Off) function does not provide protection from electric
shock, only from hazardous movements!
2.4 Achievable safety level, safety function in accordance with
EN ISO 13849/EN 61800-5-2
The safety module fulfils the basic test requirements of
–Category 4, PL e in accordance with EN ISO 13849-1
–SIL CL 3 in accordance with EN 62061
and can be used in applications up to cat. 4/PL e in accordance with
EN ISO 13849-1 and up to SIL 3 in accordance with EN 62061/IEC 61508.
The achievable safety level depends on the other components used to implement
a safety function.
3Requirements for product use
–Make the complete documentation available to the design engineer, installer
and personnel responsible for commissioning the machine or system in which
this product is used.
–Take into account the legal regulations applicable for the location as well as:
–Instructions and standards,
–Regulations of testing organisations and insurers,
–national specifications.
3.1 Technical prerequisites
General information on correct and safe use of the product, which must be
observed at all times:
–Observe the connection and ambient conditions of the safety module (è 12
Technical data), the motor controller and all connected components as speci-
fied in the technical data.
Only compliance with the limit values and/or load limits will enable operation
of the product in accordance with the relevant safety directives.
–Observe the notes and warnings in this documentation.
3.2 Qualification of the specialist technicians (requirements for staff)
The device may only be set into operation by a qualified electrical technician who
is familiar with:
–the installation and operation of electrical control systems,
–the applicable instructions for operating safety engineering systems,
–the applicable instructions for accident prevention and occupational safety
–the documentation for the product
3.3 Diagnostic coverage (DC)
Diagnostic coverage depends on the integration of the motor controller with
safety module into the control loop system, the motors/position encoders used
and the implemented measures for diagnostics.
If a potentially dangerous malfunction is recognised during diagnostics, appro-
priate measures must be taken to maintain the safety level.
3.4 Range of application and approvals
The motor controller with integrated safety module is a safety device. For details
of the safety-oriented standards and test values that the product complies with
and fulfils, see è 12 Technical data.
The product-relevant directives are listed in the declaration of conformity
è www.festo.com/sp.
Product conformity
in accordance with EU EMC Directive
in accordance with EU Machinery Directive
in accordance with EU RoHS Directive
to UK EMC Regulations
to UK Supply of Machinery Regulations
to UK RoHS Regulations
Tab. 2: Product conformity
4 Product description
4.1 Supported devices
The safety module CAMC-G-S3 can be used in motor controllers exclusively in
accordance with section 2.2. The motor controllers CMMP-AS-…-M3 are supplied
without a safety module or switch module in the Ext3 slot.
Fig. 1: Safety module for slot Ext3
4.2 Operating elements and connections
1
2
3
4
5
6
7
Fig. 2: Control section and connections
CAMC-G-S3
1
Motor controller CMMP-AS-...-M3
2
7-segment display
3
Safety module CAMC-G-S3
4
I/O interface [X40A]/[X40B]
5
LED (operating status indicator)
6
DIL switch
7
Functional earth connection (flat plug
6.3 mm)
5Function and application
The following figure shows a typical drive system with integrated functional safety
engineering, comprising the following components:
–Motor controller CMMP-AS-...-M3,
–Safety module CAMC-G-S3,
–Synchronous servo motor, e.g. from the Festo series EMMS-AS/EMME-AS,
–Linear axis with second measuring system, e.g. Festo EGC-...-M...,
–Safe clamping unit.
Fig. 3: Safety module functional principle
6 Mounting/removal
The motor controller must be disconnected from any live cables before installing
and removing the safety module.
WARNING
Danger of electric shock if the safety module is not mounted.
Touching live parts causes severe injuries and may cause death.
Before touching live parts during maintenance, repair and cleaning work and
when there have been long service interruptions:
• Switch off power to the electrical equipment at the main switch and lock the
switch to prevent reactivation.
• After switch-off, wait at least 5 minutes discharge time and check that there is
no power before accessing the controller.
NOTICE
Incorrect handling may damage the safety module or motor controller.
• Switch off the power supply before mounting and installation work. Do not
switch on the supply voltages until mounting and installation work is com-
pletely finished.
• Never unplug a module from, or plug a module into, the motor controller when
powered!
• Observe the handling specifications for electrostatically sensitive devices. Do
not touch the printed circuit board and the pins of the terminal strip in the
motor controller. Hold the safety module only by the front plate or the edge of
the PCB.
Mounting the safety module
1. Insert the safety module CAMC-G-S3 into the empty Ext3 slot for safety mod-
ules so the PCB is in the lateral guides of the slot è Fig. 1.
2. Carefully push in the safety module. Make sure that it does not jam. When
you have reached the rear contact strip within the motor controller, carefully
press it into the contact strip until it stops.
3. Then screw the safety module to the front of the motor controller housing
with the two screws. Tighten the screws to 0.4 Nm ± 10%.
Removing the safety module
1. Unscrew the screws on the safety module.
2. Loosen the safety module by a few millimetres by gently levering in the
recesses on the upper right and lower right corner of the front panel or grasp
the safety module by the attached mating plug.
3. Pull the safety module out of the slot.
7 Electrical installation
7.1 Safety instructions
The requirements of EN 60204-1 must be fulfilled in the installation.
WARNING
Danger of electric shock from voltage sources without protective measures.
• Only use PELV circuits in accordance with EN 60204-1 (Protective Extra-Low
Voltage, PELV) for the electrical logic supply.
Also take into account the general requirements for PELV circuits in accordance
with EN 60204-1.
The cables are connected with two plugs. As a result, the cables can remain
plugged into the plugs when replacing the safety module, for example.
•Make sure that no bridges etc. can be used parallel to the safety wiring.
ESD protection
Damage may be caused to the device or to other system parts at unassigned
plugs as a result of ESD (electrostatic discharge). Earth the system parts prior to
installation and use appropriate ESD equipment (e.g. shoes, earthing straps etc.).
7.2 Connection [X40]
The safety module CAMC-G-S3 has a combined interface for control and feedback
via the plug [X40].
Pin Designation Plugs Pin Designation
1 DIN40A X40A X40B 13 DIN41A
2 DIN40B 14 DIN41B
3 DIN42A 15 DIN43A
4 DIN42B 16 DIN43B
5 DOUT40A 17 DOUT41A
6 DOUT40B 18 DOUT41B
7 DIN44 19 DOUT42A
8 DIN45 20 DOUT42B
9 DIN46 21 C1)
10 DIN47 22 C2)
11 DIN48 23 GND24
12 DIN49 24 +24 V
Tab. 3
8 Commissioning
WARNING
Loss of the safety function!
Absence of safety function can result in serious, irreversible injuries, e.g. due to
unintentional movements of the connected actuator technology.
•Operate the safety module only:
• if it is installed and
• if all protective measures have been initiated.
• Validate the safety function to complete commissioning.
Commissioning in accordance with the EC Machinery Directive is the first intended
use of the machine by the end customer. This is the commissioning performed by
the manufacturer during mounting of the machine.
è Incorrect circuitry, incorrect configuration, use of an incorrect safety module
or external components that have not been selected in accordance with the safety
category result in failure of the safety function.
• Carry out a risk assessment for your application and select the circuitry,
configuration and components accordingly.
8.1 Prior to commissioning
Carry out the following steps in preparation for commissioning:
1. Make sure that the safety module is correctly mounted.
2. Check the electrical installation (connecting cables, contact assignment è 7
Electrical installation). All PE conductors connected?
8.2 DIL switch setting
• Set the DIP switches as described in the hardware documentation GDCP-
CMMP-AS-M3-HW-... or the documentation for the fieldbus.
8.3 Parameterisation with the parameterisation software for the CMMP-AS
The motor controller must be completely parameterised prior to parameterisation
of the safety module using the SafetyTool. Additional information on commis-
sioning of the motor controller can be found in the parameterisation software
help or, possibly, in the functional description (firmware) for the CMMP-AS-...-M3,
GDCPCMMP- M3-FW-...
Accepting the safety module
If an engineering change is detected, e.g. a module replacement, a non-acknowl-
edgeable error is triggered. The engineering change must be explicitly accepted
or confirmed in order to be able to place the application with the motor controller
back in operation. Every replacement of a safety module CAMC-G-S3, regardless
of with an identical safety module or a different module type (switch module
CAMC-DS-M1, safety module CAMC-G-S1) must always be confirmed.
The factory supplies the safety module in the “delivery status”:
–The safety module is “validated as a whole” with the parameterisation of
the factory setting and is thus functional. The motor controller can be commis-
sioned, and the power stage and controller enable can be set.
–All error messages caused by differences in parameterisation of the basic
unit and safety module are suppressed. Hence, you can perform basic commis-
sioning of the motor controller independently of complex safety-engineering
peripherals.
Minimum circuitry in the delivery status:
–The safety functions STO and SBC are requested via DIN40.
–DIN49 terminates the safety functions, DIN48 acknowledges errors.
Wiring must not be bypassed and must be validated in the machine. The delivery
status can also be recognised without parameterisation software or SafetyTool by
the green-red flashing LED of the safety module (if DIN40 is switched on and no
safety function is requested).
8.4 Parameterisation of the safety module with the SafetyTool
The safety module is then parameterised with special software, the SafetyTool.
The SafetyTool is called up from the included parameterisation software. For
additional information è SafetyTool help.
8.5 Function test, validation
NOTICE
The safety functions must be validated after installation and after any changes to
the installation.
This validation must be documented by the person who commissions the device.
Examples of check lists as an aid to commissioning are included in the description
of CAMC-G-S3-...
9 Diagnostics and fault clearance
9.1 Status display
Status and malfunctions are displayed directly by the two-colour LED of the safety
module.
Status display on the safety module
The safety module has an LED on the front to indicate the status of the safety
function. The status LED displays the operating status of the safety module. The
display is exclusively for diagnostics and must not be used in a safety-oriented
way.
LED Status Internal status
flashing red “System Fault” The entire system is in the “System Error” or
“Communication Error” status.
red light “Safety Condition Violated”,
error response initiated
Violation of at least one of the currently required
safety functions.
yellow light “Safe State Reached” Requested safety functions are in the status
“Safe State Reached”.
flashing
yellow
"Safety Function Requested" At least one safety function requested.
flashing red/
green
“Delivery Status” Delivery status è 8.3 Parameterisation with the
parameterisation software for the CMMP-AS
flashing green “Service” status No parameters present, parameters invalid or
parameterisation session is running.
green light “Ready” Operational, no safety function requested, no
errors.
off “Initialisation Running” Initialisation 1: load parameters, initialisation
2: communication setup.
Tab. 4: LED display
Display of safety functions on the 7-segment display
STO S t O SOS S O S
SS1 S S 1 USF0
(...1, 2. 3)
U S F 0
SS2 S S 2 SBC S b C
Tab. 5: 7-segment display
9.2 Malfunction messages
The motor controller displays malfunctions cyclically in the seven-segment display
on the front of the motor controller. Error messages are displayed by “E” (for
Error), a main index (xx) and a sub-index (y), e.g. E 5 1 0. Warnings have the same
number, but are shown with bars before and after, e.g. - 1 7 0 -. The following
table lists the error messages that are relevant for functional safety in the context
of the safety module.
è The complete list of error messages can be found in the hardware documenta-
tion GDCP-CMMP-M3-HW-... of the motor controller used.
Error number
Main index Error type/class
Basic device error
51-x Control signals from the safety module, module type/identifier not OK
52-x Error in control sequence with the safety module
Error of the safety module
53-x Violation of a safety function
54-x Violation of a safety function
55-x System error: actual value recording/position encoder not OK
56-x System error: position recording/comparison not OK
57-x System error: inputs and outputs or internal test signals not OK
58-x System error: external/internal communication not OK
59-x System error of the firmware/hardware error of the safety module
Tab. 6: Error numbers
10 Operation and use
10.1 Obligations of the operator
The functionality of the safety device must be tested at appropriate intervals. It is
the responsibility of the operator to choose the type and frequency of the checks
within the specified time period. The manner in which the test is conducted
must make it possible to verify that the safety device is functioning perfectly in
interaction with all components.
10.2 Maintenance and care
The safety module is maintenance-free.
11 Repair, replacement of the safety module
11.1 Repair
è Repair or maintenance of the safety module is not permissible. If necessary,
replace the entire safety module.
–Always replace the safety module in case of a defect.
–Send the unchanged, faulty safety module with a description of the error and
the application back to Festo for analysis. Please contact your technical consul-
tant to clarify the modalities of the return.
11.2 Replacement of the safety module
If a safety module fails and has to be replaced, organisational measures must be
taken to ensure that an unsafe status is not created. To do this,
–that the safety module is not replaced by another module type without safety
functionality (switch module).
–that the safety module is not replaced by another module type with less func-
tion range (CAMC-G-S3 for CAMC-G-S1).
–the revision status of the new safety module must match or be compatible with
that of the old safety module.
–the parameterisation of the new safety module must match the parameterisa-
tion of the faulty safety module.
Observe required organisational measures to avoid errors when replacing the
module. For example, you must always generate a new validation report due to
the different serial number of the safety module.
Disassembly and installation
Before a module is replaced, the compatibility between the safety module and
basic unit must be checked.
Information on removing and installing the safety module è 6 Mounting/removal.
Accept safety module
After replacing the module, you must first accept the new safety module again
è 8 Commissioning.
Recommissioning with the SafetyTool
After accepting the replaced safety module, you must transfer the desired param-
eterisation to the safety module and then validate it. To do this, you must
first start the SafetyTool in online mode. You then have the following options,
depending on the data present from the safety module that is to be replaced:
a) Reliable parameter set available for the safety module that is to be replaced:
–Open the parameter set in the SafetyTool and upload it to the safety module.
The basic information of the basic unit must match the parameter set.
b) Stored SafetyTool project is available that conforms to the parameterisation:
–Set the safety module to the factory setting if necessary.
–Open the SafetyTool project.
–Adjust basic information to the basic unit if they don't match.
–Then validate parameter screens and upload them to the safety module.
c) If there is no data stored for the safety module that is to be replaced:
–Set the safety module to the factory setting if necessary.
–Continue as with initial commissioning.
Regardless of variant a), b) or c), you must generate a new validation report with
a new validation code and new serial number for the safety module. If there is
no stored SafetyTool project, it should be supplied by the machine manufacturer.
After a replacement, a functional test is always required as well as validation
based on the validation plan provided by the machine manufacturer.
11.3 Decommissioning and disposal
Observe the information for removal of the safety module è 6 Mounting/removal.
Disposal
Observe the local regulations for environmentally appropriate disposal of elec-
tronic modules. The safety module is RoHS-compliant.
The material used in the packaging has been specifically chosen for its recycla-
bility.
12 Technical data
Approval information, safety engineering
CE
Type-examination The functional safety engineering of the product has been cer-
tified by an independent testing body, see EC-type examination
certificate è www.festo.com/sp
Certificate issuing authority TÜV Rheinland, Certification Body of Machinery, NB 0035
Certificate no. 01/205/5165.02/19
UKCA
Type-examination The functional safety engineering of the product has been
certified by an independent body, see UK-type examination
certificate è www.festo.com/sp
Certificate issuing authority TUV Rheinland UK Ltd, Approved Body for Machinery, No. 2571
Certificate no. 01/205U/5165.02/19
Tab. 7: Approval information, safety engineering
Safety engineering
Safety reference data
Safety functions STO, SS1, SS2, SOS, SLS, SSR, SSM, SBC in accordance with EN 61800-5-2
SIL SIL 31) Safety integrity level in accordance with EN 61800-5-2,
EN 61508 and EN 62061
Category 41) Category in accordance with EN ISO 13849-1
Performance Level PL e1) Performance level in accordance with EN ISO 13849-1
MTTFd[years] 8700 Mean time to dangerous failure in accordance with
EN ISO 13849-1
PFH [h-1]9.5 x 10⁻⁹ Probability of a dangerous random hardware failure per hour
in accordance with EN 61800-5-2, EN ISO 13849-1, EN 62061
and EN 61508
DC [%] 97.5 Diagnostic coverage in accordance with EN 61800-5-2,
EN 61508 and EN ISO 13849-1 and EN 62061
HFT 1 Hardware fault tolerance in accordance with EN 61800-5-2,
EN 62061 and EN 61508
SFF [%] 99.5 Safe failure fraction in accordance with EN 61800-5-2,
EN 62061 and EN 61508
T [years] 20 Proof test interval in accordance with EN 61800-5-2, EN 61508
and EN 62061
TM[years] 20 Service life in accordance with EN ISO 13849-1
Safety specifications
Well-tried component Yes
1) Maximum achievable classification, limitations dependent on the safety function as well as circuitry and
the encoders.
Tab. 8: Safety engineering
General
Certificates, declaration of con-
formity
è www.festo.com/sp
The device is intended for use in an industrial environment. Measures for interference suppression
may be required in residential areas.
Dimensions [mm] 112.2 x 99.1 x 28.7 (L x W x H)
Weight [g] approx. 220
Note on materials RoHS-compliant
Tab. 9: General
Operating and environmental conditions
Transport
Permissible tempera-
ture range
[°C] –25 … +70
Humidity [%] 0 … 95, at max. 40 °C ambient temperature
Maximum transporta-
tion duration
[weeks] Maximum 4 in the total product lifecycle
Storage
Permissible tempera-
ture range
[°C] –25 … +55
Humidity [%] 5 … 95, non-condensing/protected against condensation
Permissible altitude [m] < 3000 (above sea level)
Operating and environmental conditions
Ambient conditions CMMP-AS-...-M3 with safety module CAMC-G-S3 in Ext3
CMMP-AS-... C2-3A-M3 C5-3A-M3 C5-11A-P3-M3 C10-11A-P3-M3
Ambient temperature [°C] 0 … +35 0 … +40 0 … +40 0 … +40
Ambient temperature
with power reduction
[°C] +35 … +40 +40 … +50 +40 … +50 +40 … +45
Humidity [%] 0 … 90 (non-condensing). No corrosive media permitted in the
environment of the device.
Permissible setup altitude above mean sea level
–at nominal power [m] 1000
–with power reduc-
tion
[m] 1000 … 2000
Degree of protection IP20 (mounted in the CMMP-AS-...-M3).
Vibration/shock Requirements of EN 61800-5-1 and EN 61800-2 are fulfilled.
Electrical operating conditions
Galvanically isolated
potential areas
Control voltage of the basic unit
24 V control voltage (all inputs and outputs)
Potential-free signal contact C1/C2
System voltage [V] < 50 (24 V PELV power supply in accordance with EN 60204-1)
Overvoltage category in accord-
ance with EN 61800-5-1
3
Pollution degree
in accordance with
EN 61800-5-1
2
It must always be ensured by taking appropriate measures,
e.g. by installation in a control cabinet.
EMC operating conditions
Immunity to interfer-
ence
Requirements for “second environment” in accordance with
EN 61800-3 (PDS of category C3)
Requirements in accordance with EN 61326-3-1
Interference emission Requirements for “first environment with restricted availa-
bility” in accordance with EN 61800-3 (PDS of category C2)
Tab. 10: Operating and environmental conditions
Electrical data
Digital inputs DIN40A/B to DIN43A/B and DIN44 to DIN49
Input Type 3 in accordance with IEC 61131-2
Nominal voltage [V DC] 24
Permissible voltage
range
[V] –3 … 30
Digital outputs DOUT40A/B to DIN42A/B
Output High-side switch with pull-down
Voltage range [V DC] 18 … 30
Permissible output
current IL,nom
[mA] < 50
Signal contact C1/C2
Design Relay contact, N/O contact
Voltage range [V DC] 18 … 30
Output current IL,nom-
inal
[mA] < 200
Short circuit/overcur-
rent protection
Not short-circuit-proof, overvoltage-proof up to 60 V
Service life of feed-
back contact
[nop]10 x 106 (at 24 V and Icontact = 10 mA, the service life is reduced
with higher load currents)
24 V auxiliary power supply
Design Logic supply voltage routed via the motor controller (fed in at
[X9], not additionally filtered or stabilised). Protected against
reverse polarity, overvoltage-proof up to 60 V DC
Nominal voltage [V] 24
Output current IL,nom-
inal
[mA] 100 (nominal current)
Cabling [X40]
Max. cable length [m] < 30
Shielding Use shielded cable for wiring outside the control cabinet.
Guide shielding into the control cabinet/attach to the side of
the control cabinet
Conductor cross section (flexible conductors, wire end sleeve with insulating collar)
–one conductor [mm2]0.25 … 0.5
–two conductors [mm2]2 x 0.25 (with twin wire end sleeves)
Tightening torque of
mating plug
[Nm] 0.22 … 0.25
Tab. 11: Electrical data

Other manuals for CAMC-G-S3

3

Other Festo Control Unit manuals

Festo ZSB-1/8-B User manual

Festo

Festo ZSB-1/8-B User manual

Festo VZWP-L-M22C-P4 Series User manual

Festo

Festo VZWP-L-M22C-P4 Series User manual

Festo VOFA-L26-T32C-M-G14-1C1 Series User manual

Festo

Festo VOFA-L26-T32C-M-G14-1C1 Series User manual

Festo MPPES-...-010 Series User manual

Festo

Festo MPPES-...-010 Series User manual

Festo VZBA-x-63-32x-x-V4V4T Series User manual

Festo

Festo VZBA-x-63-32x-x-V4V4T Series User manual

Festo DeviceNet CMGA-E1-DN User manual

Festo

Festo DeviceNet CMGA-E1-DN User manual

Festo DG Series User manual

Festo

Festo DG Series User manual

Festo JMFH...D...C-EX Series Use and care manual

Festo

Festo JMFH...D...C-EX Series Use and care manual

Festo MS6-SV-E User manual

Festo

Festo MS6-SV-E User manual

Festo CTEU-EP User manual

Festo

Festo CTEU-EP User manual

Festo HMP-x-B Series User manual

Festo

Festo HMP-x-B Series User manual

Festo Compact Performance CP-FB6-E User manual

Festo

Festo Compact Performance CP-FB6-E User manual

Festo Compact Performance Series Owner's manual

Festo

Festo Compact Performance Series Owner's manual

Festo CPX-E-EC User manual

Festo

Festo CPX-E-EC User manual

Festo DLP-VSE-x-ASI eries User manual

Festo

Festo DLP-VSE-x-ASI eries User manual

Festo MH1 Series Parts list manual

Festo

Festo MH1 Series Parts list manual

Festo CMGA-E1 User manual

Festo

Festo CMGA-E1 User manual

Festo ZSB-1/8 User manual

Festo

Festo ZSB-1/8 User manual

Festo VPCB T22Series User manual

Festo

Festo VPCB T22Series User manual

Festo VIFB13 Series User manual

Festo

Festo VIFB13 Series User manual

Festo CP-FB8 Parts list manual

Festo

Festo CP-FB8 Parts list manual

Festo EHMD-40-RE Series User manual

Festo

Festo EHMD-40-RE Series User manual

Festo EXCM-10 User manual

Festo

Festo EXCM-10 User manual

Festo CAMC-G-S1 User manual

Festo

Festo CAMC-G-S1 User manual

Popular Control Unit manuals by other brands

Tecnoma Novatec Isobus Operating handbook

Tecnoma

Tecnoma Novatec Isobus Operating handbook

National Instruments 9759 user manual

National Instruments

National Instruments 9759 user manual

Cavli Wireless C10QM user manual

Cavli Wireless

Cavli Wireless C10QM user manual

Graco EM5 Series Instructions-parts list

Graco

Graco EM5 Series Instructions-parts list

Argo-Hytos SR1A-B2 INSTRUCTIONS FOR PRODUCT USE

Argo-Hytos

Argo-Hytos SR1A-B2 INSTRUCTIONS FOR PRODUCT USE

Blain Hydraulics L10 manual

Blain Hydraulics

Blain Hydraulics L10 manual

Omnitronic ALT-105 user manual

Omnitronic

Omnitronic ALT-105 user manual

Ebyte E01-2G4M01S1B user manual

Ebyte

Ebyte E01-2G4M01S1B user manual

Flow-Tek M1 Series Installation, operation and maintenance manual

Flow-Tek

Flow-Tek M1 Series Installation, operation and maintenance manual

AKO V Series operating manual

AKO

AKO V Series operating manual

Silicon Laboratories EMBER EM358 series Reference manual

Silicon Laboratories

Silicon Laboratories EMBER EM358 series Reference manual

STATUS SCIENTIFIC CONTROLS LC Series Installation and Hardware Configuration Manual

STATUS SCIENTIFIC CONTROLS

STATUS SCIENTIFIC CONTROLS LC Series Installation and Hardware Configuration Manual

H3C SecPath M9000 NSQM1MBFEA0 quick start guide

H3C

H3C SecPath M9000 NSQM1MBFEA0 quick start guide

Siemens SIMATIC NET CP 1243-1 DNP3 Configuration manual

Siemens

Siemens SIMATIC NET CP 1243-1 DNP3 Configuration manual

Edwards CTM Installation sheet

Edwards

Edwards CTM Installation sheet

Audio Technica ATND8734a user manual

Audio Technica

Audio Technica ATND8734a user manual

Moxa Technologies NPort Z2150 Quick installation guide

Moxa Technologies

Moxa Technologies NPort Z2150 Quick installation guide

Bray KUGELHAHN MULLER KM20 Installation, operation and maintenance manual

Bray

Bray KUGELHAHN MULLER KM20 Installation, operation and maintenance manual

manuals.online logo
manuals.online logoBrands
  • About & Mission
  • Contact us
  • Privacy Policy
  • Terms and Conditions

Copyright 2025 Manuals.Online. All Rights Reserved.