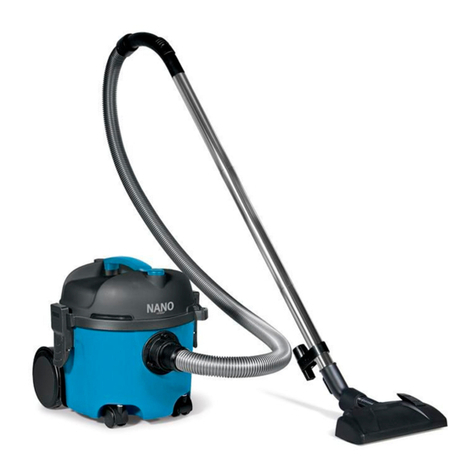
Fimap FV20.1 WD User manual

ORIGINAL INSTRUCTIONS DOC. 10117554 - Ver. AA - 07-2022
USE AND MAINTENANCE MANUAL
FV20.1 WD
COMMERCIAL VACUUM CLEANERS
The design elements and contents of this manual, including its structure, texts, graphics, images and logo, are the exclusive property of FIMAP S.P.A..
They are protected, both collectively and individually, by the current regulations regarding intellectual property (including copyright laws), and cannot be either wholly or partially copied or imitated. Any
reproduction, reprocessing, distribution or dissemination is strictly prohibited.


Page 3 of 24
1
4
7
10
2
11
5
8
3
6
9
12
1
5
8
6
2
2
6
9 10
7
7
3
3
4

Page 4 of 24
15
13
18
20
16
22
14
17
2119
11
15
16
12
12
14
14
13
13

CONTENTS
CONTENTS......................................................................................................... 5
DEFINITION OF LEVELS OF WARNING........................................................... 6
GENERAL SAFETY REGULATIONS ................................................................. 6
GENERAL DESCRIPTION ................................................................................. 6
SYMBOLS USED IN THE MANUAL........................................................................................ 7
TARGET GROUP .................................................................................................................... 7
PURPOSE AND CONTENT OF THE USER AND MAINTENANCE MANUAL ....................... 7
STORING THE USE AND MAINTENANCE MANUAL ............................................................ 8
ON DELIVERY OF THE APPLIANCE ..................................................................................... 8
TECHNICAL DESCRIPTION................................................................................................... 8
INTENDED USE...................................................................................................................... 8
SAFETY................................................................................................................................... 8
SERIAL NUMBER PLATE ....................................................................................................... 9
TECHNICAL DATA ............................................................................................. 9
PREPARING THE APPLIANCE........................................................................ 10
HANDLING THE PACKED APPLIANCE ............................................................................... 10
HOW TO UNPACK THE APPLIANCE................................................................................... 10
HOW TO TRANSPORT THE APPLIANCE............................................................................ 10
APPLIANCE SAFETY.............................................................................................................11
INSERTING THE FILTER - COLLECTION BAG (OPTIONAL) ..............................................11
WORK PREPARATION CHECKLIST............................................................... 12
STARTING WORK (DRY VACUUM CLEANER) .............................................. 13
STARTING WORK (WET VACUUM CLEANER).............................................. 13
AT THE END OF THE WORK........................................................................... 14
EMPTYING THE COLLECTION TANK ................................................................................. 15
ROUTINE MAINTENANCE............................................................................... 16
EXTRAORDINARY MAINTENANCE................................................................ 17
REPLACING THE CARTRIDGE FILTER .............................................................................. 17
SELECTION AND USE OF THE ACCESSORY ............................................... 18
DISPOSAL ........................................................................................................ 19
TROUBLESHOOTING...................................................................................... 19
EC DECLARATION OF CONFORMITY ........................................................... 20
UKCA DECLARATION OF CONFORMITY ...................................................... 21
Page 5 of 24
DEFINITION OF LEVELS OF WARNING
DANGER: indicates an imminent dangerous situation that, unless avoided, will result in death or serious
injuries.
WARNING: Indicates a potentially dangerous situation that, unless avoided, could cause death of serious injury.
ATTENTION: Indicates a potentially dangerous situation that, unless avoided, could cause slight or moderate
injuries.
N.B.: instructs the reader to pay particular attention to the topic that follows.
GENERAL SAFETY REGULATIONS
Before using the machine, please read the following document
carefully and follow the instructions contained herein, along
with the instructions in the document supplied with the machine
itself, “GENERAL SAFETY REGULATIONS W-D VACUUM
CLEANERSx” (document number 10064394).
The descriptions contained in this document are not binding. The company therefore reserves the right to make
any modications at any time to elements, details, or accessory supply, as considered necessary for reasons of
improvement or manufacturing/commercial requirements. The reproduction, even partial, of the text and drawings
contained in this document is prohibited by law.
The company reserves the right to make any technical and/or supply modications. The images are for
reference purposes only, and are not binding in terms of design and supply.
This document contains important information regarding the safety of the appliance, as well as a quick
guide. Before using the appliance for the rst time, this entire instruction manual must be read carefully.
Keep hold of the instructions for future reference. More information on the appliance is available on our
website at www.map.com.
For any additional questions, please contact your nearest FIMAP service representative, or send an email to
service@map.com.
GENERAL DESCRIPTION
Page 6 of 24

SYMBOLS USED IN THE MANUAL
Open book symbol with an “i”:
Indicates the need to consult the instruction manual.
Open book symbol:
Tells the operator to read the user manual before using the device.
Covered place symbol:
The operations preceded by this symbol must always be carried out in a dry, covered area.
Information symbol:
Indicates additional information for the operator, to improve the use of the device.
Warning symbol:
Carefully read the sections preceded by this symbol meticulously following the instructions indicated
for the safety of the operator and the device.
Symbol indicating the compulsory use of protective gloves:
Indicates that the operator should always wear protective gloves, to avoid the risk of serious injury to
his hands from sharp objects.
Recycling symbol:
Tells the operator to carry out the operations in compliance with environmental regulations in force in
the place where the appliance is being used.
Disposal symbol:
Carefully read the sections marked with this symbol for disposing of the appliance.
TARGET GROUP
This manual is aimed at operators and qualied technicians responsible for appliance maintenance.
Operators must not perform operations that should be carried out by qualied technicians.
The manufacturer is not liable for damages resulting from failure to comply with this veto.
PURPOSE AND CONTENT OF THE USER AND MAINTENANCE MANUAL
The aim of this document is to provide customers with all the information needed to use the appliance in the safest,
most appropriate and most autonomous way.
It includes information concerning technical aspects, safety, operation, appliance downtime, maintenance, spare
parts and scrapping.
Operators and qualied technicians must read the instructions in this manual carefully before carrying out any
operation on the appliance.
If in doubt about the correct interpretation of instructions, contact your nearest FIMAP Customer Service Centre to
obtain the necessary clarications.
Page 7 of 24

STORING THE USE AND MAINTENANCE MANUAL
The following document must be stored in its special pouch close to the appliance, protected from liquids and
anything else that could compromise its legibility.
If the document is lost or becomes illegible with wear, contact the nearest FIMAP service centre to obtain
a new one.
ON DELIVERY OF THE APPLIANCE
When the appliance is delivered to the customer, an immediate check must be performed to ensure all the material
mentioned in the shipping documents has been received, in addition to checking that the equipment has not been
damaged during transportation.
If this is the case, the shipping agent must ascertain the extent of the damage at once, and notify the nearest
FIMAP service centre.
It is only by prompt action of this type that the missing material can be obtained, and compensation for damage
successfully claimed.
TECHNICAL DESCRIPTION
FV20.1 WD is a wet & dry vacuum cleaner which uses the vacuum created in the collection tank by the fan
(enabled by the electrical motor) to pick up dust and dry solid elements measuring up to 2cm at ambient
temperature, as the accessories brush against the oor and furnishings.
The vacuum hose channels the air into the collection tank, where the dust and solid residues are trapped by lters.
The appliance must only be used for this purpose.
INTENDED USE
This wet& dry vacuum cleaner was designed and built to be used by a qualied operator to clean smooth, compact
ooring in the commercial, residential and industrial sectors, in proven safety conditions.
The wet & dry vacuum cleaner is only suitable for use in indoor, or in covered areas.
ATTENTION: the appliance is not suitable for use in the rain, or under jets of water.
ATTENTION: IT IS FORBIDDEN to use the appliance for picking up dangerous dusts or inammable liquids in
places with an explosive atmosphere. In addition, it is not suitable as a means of transport for people or objects.
SAFETY
Operator cooperation is paramount for accident prevention. No accident prevention programme can be eective
without the full co-operation of the operator who is directly responsible for machine operation. The majority of
occupational accidents that happen either in the workplace or whilst moving are caused by failure to respect
the most basic safety rules. An attentive, careful operator is most eective guarantee against accidents and is
fundamental in order to implement any prevention programme.
Page 8 of 24

SERIAL NUMBER PLATE
1
2
3
4
56
7
9
8
The serial number plate is located at the rear of the vacuum
head, near the hole for inserting the extension tube support.
The serial number plate contains the following information:
1. The commercial name of the appliance and the agent's
address.
2. The identication code of the appliance.
3. The serial number of the appliance.
4. The year in which the appliance was manufactured.
5. Graphic symbol identifying the double electrical insulation
of the appliance.
6. The country of import of the appliance.
7. The dry weight of the appliance (expressed in kg).
8. The electrical values of the suction motor tted on board
the appliance.
9. The commercial name of the appliance.
TECHNICAL DATA
TECHNICAL DATA UM
[SI] FV20.1 WD
Rated voltage
[IEC 60335-2-72; IEC 62885-9] V 220/240
Rated frequency
[IEC 60335-2-72; IEC 62885-9] Hz 50/60
Nominal input power
[IEC 60335-2-72; IEC 62885-9] KW 1,2
Gross weight GVW
[IEC 60335-2-72; IEC 62885-9] Kg 7,2
Appliance dimensions during working phase
(length; height width) mm
357
497
357
Operator station sound pressure level (LpA)
[IEC 60335-2-72; IEC 62885-9; ISO 11201] dB (A) 70
Uncertainty KpAdB (A) ±1.5
N.B.: for all other technical data, contact the FIMAP service department by writing to service@map.com,
or visit the website www.map.com.
Page 9 of 24

HOW TO UNPACK THE APPLIANCE
The procedure for unpacking the appliance is as follows:
N.B.: it is recommended that all the packaging components be kept for any future transportation of the
appliance.
CAUTION: it is recommended to wear the appropriate PPE (Personal Protective Equipment), suitable for the
work to be carried out.
1. Place the lower part of the outer packaging in contact with the oor.
ATTENTION: use the pictograms printed on the box as a reference.
2. Open the outer box.
3. Remove the accessories from the box and carefully lay them on the ground.
4. Remove the appliance from the box using the handle, being careful not to damage either during the operation,
laying it gently on the ground.
5. Remove the appliance from the protective bag using the handle designed for this purpose.
6. Insert the pivoting wheels (1) into the holes in the lower part of the tank (Fig.01).
7. Free the vacuum head unit from the collection tank by releasing the hooks (6) on the side of the collection tank
(Fig. 05).
8. Using the handle (7) on the vacuum head unit, remove the vacuum head unit from the collection tank (Fig.06).
9. Gently lay the vacuum head on the ground.
10. Remove the protective lm that is wrapped around the cartridge lter.
HANDLING THE PACKED APPLIANCE
The overall weight of device, including packaging, is 8.5 kg.
The external dimensions of the package are: width 380mm; length 380mm and height 465mm.
HOW TO TRANSPORT THE APPLIANCE
To safely transport the appliance, proceed as follows:
DANGER: before starting any task, make sure the current regulations concerning safe transport in the
country of use of the appliance are strictly observed.
CAUTION: it is recommended to wear the appropriate PPE (Personal Protective Equipment), suitable for the
work to be carried out.
1. Follow all steps to ensure the appliance is in a safe condition. Please see “APPLIANCE SAFETY” on page 11.
2. Remove the vacuum hose from the vacuum nozzle (03) on the collection tank; before pulling the vacuum hose,
turn the sleeve (02) clockwise (Fig.02).
3. Insert the appliance into the protective bag, taking care not to damage either during this operation.
4. Insert the appliance into the carton, taking care not to damage either during this operation.
N.B.: Remember to place the stop for the wheels of the appliance at the bottom of the carton; position the
stops around the collection tank to prevent damage during transportation.
5. Insert the accessories support and the head block inside the carton.
6. Place the accessories in the carton.
PREPARING THE APPLIANCE
Page 10 of 24

APPLIANCE SAFETY
The procedure to be followed for securing the appliance is as follows:
CAUTION: it is recommended to wear the appropriate PPE (Personal Protective Equipment), suitable for
the work to be carried out.
1. Set the main switch (4) to the rest position; turn it to “0” (Fig.03).
2. Disconnect the plug (5) of the power cable from the mains supply socket (Fig.04).
DANGER: to prevent damaging the mains socket, disconnect power cable by pulling the plug directly,
and not the cable.
DANGER: never touch the power plug with wet hands.
3. Make sure the debris tank is empty, otherwise empty it completely. Please see “EMPTYING THE
COLLECTION TANK” on page 15.
INSERTING THE FILTER - COLLECTION BAG (OPTIONAL)
The procedure for inserting the lter - collection bag is as follows:
CAUTION: it is recommended to wear the appropriate PPE (Personal Protective Equipment), suitable for the
work to be carried out.
1. Follow all steps to ensure the appliance is in a safe condition. Please see “APPLIANCE SAFETY” on page 11.
2. Free the vacuum head unit from the collection tank by releasing the hooks (6) on the side of the collection tank
(Fig. 05).
3. Using the handle (7) on the vacuum head unit, remove the vacuum head unit from the collection tank (Fig.06).
4. Gently lay the vacuum head on the ground.
5. Insert the lter - collection bag (8) inside the collection tank (Fig.07).
6. Insert the cardboard support (9) into the nozzle (10) (Fig.08), taking care not to damage it.
N.B.: The lter - collection bag should only be used for collecting solid dry waste.
7. Using the handle (7) on the vacuum head assembly, position the vacuum hood over the collection tank (Fig.09)
and secure it using the hooks (6) (Fig.10).
7. Close the carton.
ATTENTION: when transporting the appliance on vehicles, secure it rmly in place in accordance with the
directives in force in the country of use so that it cannot slide or tip over.
Page 11 of 24

WORK PREPARATION CHECKLIST
Before connecting the appliance to the electricity
socket, make sure the electrical information on
the serial number plate corresponds to that of the
mains supply.
In the event that the electrical power supply current has
dierent electrical characteristics to those stated on the
serial number plate, do not use the appliance for the
work you want to carry out.
Before connecting the appliance to the power socket,
check the maximum permissible mains network
impedance value for the electrical connection point.
Please contact your electrical energy supplier if you
have any doubts concerning mains impedance on the
connecting point.
Before connecting the appliance to the power
socket, check the elements that will make up the
electrical circuit between the appliance and the mains
power supply.
We recommend connecting the appliance via a residual
current circuit breaker.
We recommend arranging the electrical components
(sockets, plugs and connection devices) and laying
the extension cable so that the protection class is
maintained.
We recommend using watertight connectors, power
cable connection devices and extension cables.
We recommend only using the version of extension
cable specied by the manufacturer (or one of a higher
quality); please contact the FIMAP service centre.
Regularly check that the cable connecting to the mains
is not damaged, for example with signs of ageing or
cracks.
If damage is found, the cable should be replaced before
using the appliance again. Please contact the FIMAP
service centre.
Before each use, check for any damage to the power
supply socket.
If the socket is damaged, immediately contact
a technician in order to restore normal functioning.
Before use, make sure that the appliance and the work
equipment are intact and in perfect working order.
If this is not the case, the appliance should not be used;
contact the FIMAP service centre.
If the work to be carried out involves using the
appliance as a dry vacuum cleaner, check that
the cartridge lter is correctly positioned inside the
vacuum head.
If the cartridge lter is missing from the vacuum head
or is not correctly positioned, please read.
If the work to be carried out involves using the
appliance as a wet vacuum cleaner, check that the
cartridge lter is removed from the vacuum head.
If the cartridge lter is present in the suction head,
remove it, please read.
If the work to be carried out involves using the
appliance as a dry vacuum cleaner and you want to use
the lter - collection bag (optional), check that the lter -
collection bag is correctly positioned inside the tank.
If the lter - collection bag is missing from inside the
collection tank or is not correctly positioned, please
read “INSERTING THE FILTER - COLLECTION BAG
(OPTIONAL)” on page 11.
Page 12 of 24

STARTING WORK (DRY VACUUM CLEANER)
The procedure to be followed in order to start work is as follows:
CAUTION: it is recommended to wear the appropriate PPE (Personal Protective Equipment), suitable for the
work to be carried out.
1. Check that the main switch (4) is in the rest position; if this is not the case, turn it to “0” (Fig.03).
2. Insert the vacuum pipe into the nozzle (3) in the collection tank; to secure the vacuum pipe inside the nozzle,
turn the sleeve (03) clockwise (Fig.11).
3. Assemble the steel extension tube (Fig.12).
4. Insert the extension tube into the vacuum hose (Fig.13).
5. Insert the most suitable accessory for the job into the extension tube (Fig.14), please read “SELECTION AND
USE OF THE ACCESSORY” on page 18.
6. Insert the plug of the power supply cable (5) into the mains socket (Fig.04).
7. Switch on the machine by setting the main switch (4) to “I” (Fig. 03).
N.B.: If during the work you notice that the vacuum accessory is sticking too much to the surface on which
it is being used, adjust the air ow inside the vacuum hose using the lever (11) on the grip (Fig. 15) and free
the accessory.
DANGER: if the work to be carried out involves vacuuming dry solid waste, never use the appliance
without the lter supplied with the machine (CARTRIDGE FILTER) or the optional lter (FILTER -
COLLECTION BAG).
DANGER: vacuuming hazardous materials can cause serious or even fatal
injuries. The vacuum cleaner must not be used for vacuuming:
• dangerous powders
• hot materials (lit cigarettes, hot ash, etc.)
• ammable, explosive or corrosive liquids (e.g. petrol, solvents, acids,
alkalis, etc.)
• ammable or explosive dusts (e.g. magnesium powder, aluminium, etc.)
STARTING WORK (WET VACUUM CLEANER)
The procedure to be followed in order to start work is as follows:
CAUTION: it is recommended to wear the appropriate PPE (Personal Protective Equipment), suitable for the
work to be carried out.
1. Check that the main switch (4) is in the rest position; if this is not the case, turn it to “0” (Fig.03).
2. Free the vacuum head unit from the collection tank by releasing the hooks (6) on the side of the collection tank
(Fig. 05).
3. Using the handle (7) on the vacuum head unit, remove the vacuum head unit from the collection tank (Fig.06).
4. Gently lay the vacuum head on the ground.
5. Remove the cartridge lter (13) from the oat support (14) (Fig.17); before pulling the lter out, remove the
retainer (12) by turning it anticlockwise (Fig.16).
6. Using the handle (7) on the vacuum head assembly, position the vacuum hood over the collection tank (Fig.09)
and secure it using the hooks (6) (Fig.10).
Page 13 of 24

7. Insert the vacuum pipe into the nozzle (3) in the collection tank; to secure the vacuum pipe inside the nozzle,
turn the sleeve (03) clockwise (Fig.11).
8. Assemble the steel extension tube (Fig.12).
9. Insert the extension tube into the vacuum hose (Fig.13).
10. Insert the most suitable accessory for the job into the extension tube (Fig.14), please read “SELECTION AND
USE OF THE ACCESSORY” on page 18.
11. Insert the plug of the power supply cable (5) into the mains socket (Fig.04).
12. Switch on the machine by setting the main switch (4) to “I” (Fig. 03).
N.B.: The appliance is equipped with a oat system that shuts o the air ow into the appliance one the
maximum liquid level is reached. You will hear a noticeable change in the sound produced by the motor of
the appliance, accompanied by a reduction in vacuum power. When this occurs, switch o the appliance.
Unplug the appliance from the electrical socket. Never vacuum liquids without the oat body in place.
DANGER: if the work to be carried out involves vacuuming wet solid waste or vacuuming liquids, never
operate the appliance without the oat body in place.
DANGER: Never use the appliance to collect ammable liquids. Before
collecting liquids:
• always remove the lter - waste collection bag
• check that the water level limiting oat is working correctly.
• If foam appears, stop work immediately and empty the tank.
• Regularly clean the water level limitation device and check it for the
signs of damage.
AT THE END OF THE WORK
At the end of the work, and before carrying out any type of maintenance, perform the following operations:
CAUTION: it is recommended to wear the appropriate PPE (Personal Protective Equipment), suitable for the
work to be carried out.
1. Carry out the steps necessary to secure the machine, see paragraph “APPLIANCE SAFETY” on page 11.
2. Take the appliance to the designated location for maintenance and emptying of the collection tank.
WARNING: the place designated for this operation must comply with current regulations concerning safety
at work and current environmental protection regulations.
3. Proceed with emptying the collection tank, please see “EMPTYING THE COLLECTION TANK” on page 15.
4. Take the appliance to the designated machine storage place.
WARNING: park the appliance in an enclosed place, on a at surface; near the appliance there must be no
objects that could either damage it, or be damaged through contact with it.
5. Wrap up the power cable, beginning with appliance.
N.B.: the power supply cable can be attached to the hook (15) positioned at the rear of the vacuum hood
(Fig.18).
Page 14 of 24

EMPTYING THE COLLECTION TANK
The procedure for emptying the collection tank after a dry vacuum job is as follows:
CAUTION: it is recommended to wear the appropriate PPE (Personal Protective Equipment), suitable for the
work to be carried out.
N.B.: the place designated for this operation must comply with current environmental protection regulations.
1. Follow all steps to ensure the appliance is in a safe condition. Please see “APPLIANCE SAFETY” on
page 11.
2. Free the vacuum head unit from the collection tank by releasing the hooks (6) on the side of the collection tank
(Fig. 05).
3. Using the handle (7) on the vacuum head unit, remove the vacuum head unit from the collection tank (Fig.06).
4. Gently lay the vacuum head on the ground.
5. Empty the collection tank, removing the waste inside.
6. Clean the inside of the collection tank with a damp cloth.
7. Remove the cartridge lter (13) from the oat support (14) (Fig.17); before pulling the lter out, remove the
retainer (12) by turning it anticlockwise (Fig.16).
8. Clean the cartridge lter.
N.B.: To clean the cartridge lter, it can be shaken, brushed or washed. Wait until dry before using again.
9. Repeat the operations in reverse order to reassemble all the parts.
The procedure for emptying the collection tank after a wet vacuum job or after vacuuming liquids is as
follows:
CAUTION: it is recommended to wear the appropriate PPE (Personal Protective Equipment), suitable for the
work to be carried out.
N.B.: the place designated for this operation must comply with current environmental protection regulations.
1. Follow all steps to ensure the appliance is in a safe condition. Please see “APPLIANCE SAFETY” on page 11.
2. Free the vacuum head unit from the collection tank by releasing the hooks (6) on the side of the collection tank
(Fig. 05).
3. Using the handle (7) on the vacuum head unit, remove the vacuum head unit from the collection tank (Fig.06).
4. Gently lay the vacuum head on the ground.
5. Empty the collection tank, removing the waste inside.
6. Clean the inside of the collection tank with a damp cloth.
7. Using a damp cloth or a brush with soft bristles, clean the oat inside the oat support to remove any residual
dirt (Fig.20).
6. Remove the vacuum accessory from the extension (Fig.14), clean it under a stream of running water and
place it inside the accessory holder at the rear of the collection tank.
7. Remove the extension tube from the vacuum hose (Fig.13).
8. Remove the vacuum hose from the vacuum nozzle (03) on the collection tank; before pulling the vacuum hose,
turn the sleeve (02) clockwise (Fig.02).
9. Insert the hook (16) on the extension tube into the slot at the rear of the vacuum hood (Fig.19).
Page 15 of 24

N.B.: To remove dirt particles from the oat, use a brush with soft bristles. Wait until dry before using again.
DANGER: the vacuum hood of the appliance contains live electrical
components; touching these components can cause serious or even fatal
injury. Never spray water on the vacuum hood.
8. Repeat the operations in reverse order to reassemble all the parts.
The procedure for replacing the lter - collection bag is as follows:
CAUTION: it is recommended to wear the appropriate PPE (Personal Protective Equipment), suitable for the
work to be carried out.
N.B.: the place designated for this operation must comply with current environmental protection regulations.
1. Follow all steps to ensure the appliance is in a safe condition. Please see “APPLIANCE SAFETY” on page
11.
2. Free the vacuum head unit from the collection tank by releasing the hooks (6) on the side of the collection tank
(Fig. 05).
3. Using the handle (7) on the vacuum head unit, remove the vacuum head unit from the collection tank (Fig.06).
4. Gently lay the vacuum head on the ground.
5. Take the lter - collection bag out of the tank, taking care not to damage the cardboard support inside the
bag itself.
6. Discard the lter - collection bag according to the regulations in force in the country in which the appliance is
being used.
7. Clean the inside of the collection tank with a damp cloth.
8. Remove the cartridge lter (13) from the oat support (14) (Fig.17); before pulling the lter out, remove the
retainer (12) by turning it anticlockwise (Fig.16).
9. Clean the cartridge lter.
N.B.: To clean the cartridge lter, it can be shaken, brushed or washed. Wait until dry before using again.
10. Repeat the operations in reverse order to reassemble all the parts.
ROUTINE MAINTENANCE
Before carrying out any routine maintenance operations, proceed as follows:
1. Take the device to the dedicated maintenance area.
N.B.: the place designated for this operation must comply with current environmental protection regulations.
2. Carry out the steps necessary to secure the machine, please see “APPLIANCE SAFETY” on page 11
.
CAUTION: it is recommended to wear the appropriate PPE (Personal Protective Equipment), suitable for the
work to be carried out.
3. Remove the vacuum hose from the vacuum nozzle (03) on the collection tank; before pulling the vacuum hose,
turn the sleeve (02) clockwise (Fig.02).
4. Clean the inside of the vacuum hose with a jet of air.
5. Remove the vacuum attachment from the extension (Fig.14).
6. Clean the inside of the extension tube with a jet of air.
Page 16 of 24

7. Clean the vacuum accessory rst with a jet of air, and then with a damp cloth.
8. Free the vacuum head unit from the collection tank by releasing the hooks (6) on the side of the collection tank
(Fig. 05).
9. Using the handle (7) on the vacuum head unit, remove the vacuum head unit from the collection tank (Fig.06).
10. Gently lay the vacuum head on the ground.
11. If there is waste in the collection tank, remove it.
12. Clean the inside of the collection tank with a damp cloth.
13. Remove the cartridge lter (13) from the oat support (14) (Fig.17); before pulling the lter out, remove the
retainer (12) by turning it anticlockwise (Fig.16).
14. Clean the cartridge lter, and replace if necessary.
N.B.: To clean the cartridge lter, it can be shaken, brushed or washed. Wait until dry before using again.
15. Using a damp cloth or a brush with soft bristles, clean the oat inside the oat support to remove any residual
dirt (Fig.20).
N.B.: To remove dirt particles from the oat, use a brush with soft bristles. Wait until dry before using again.
DANGER: the vacuum hood of the appliance contains live electrical
components; touching these components can cause serious or even fatal
injury. Never spray water on the vacuum hood.
16. Repeat the operations in reverse order to reassemble all the parts.
EXTRAORDINARY MAINTENANCE
Before carrying out any extraordinary maintenance operations, proceed as follows:
1. Take the device to the dedicated maintenance area.
N.B.: the place designated for this operation must comply with current environmental protection regulations.
2. Carry out the steps necessary to secure the machine, please see “APPLIANCE SAFETY” on page 11
.
CAUTION: it is recommended to wear the appropriate PPE (Personal Protective Equipment), suitable for the
work to be carried out.
REPLACING THE CARTRIDGE FILTER
The procedure to be followed in order to replace the cartridge lter is as follows:
1. Free the vacuum head unit from the collection tank by releasing the hooks (6) on the side of the collection tank
(Fig.05).
2. Using the handle (7) on the vacuum head unit, remove the vacuum head unit from the collection tank (Fig.06).
3. Gently lay the vacuum head on the ground.
4. Remove the worn cartridge lter (13) from the oat support (14) (Fig.15); before pulling the lter out, remove
the retainer (12) by turning it anticlockwise (Fig.14).
5. Insert the new cartridge lter (13) into the oat support (14) (Fig.21).
N.B.: Take care to position the positioning pins on the oat support inside the holes present on the
cartridge lter.
Page 17 of 24

SELECTION AND USE OF THE ACCESSORY
Brush with bristles: for removing solid waste from surfaces where you want to not only vacuum
but also dust.
Flexible vacuum hose: for connecting the extensions to the collection tank.
Combined brush - bristle insert: for vacuuming solid waste on hard surfaces.
Combined brush - carpet insert: for vacuuming solid waste on hard or soft surfaces like
carpets or rugs.
Brush for liquids: to be used for removing liquid substances only.
Steel extensions: Three chromed steel pipes to support the accessories and control handle.
Cartridge lter: the lter of the vacuum motor. It must always be used, for every type of
machine use.
Paper lter/collection bag (disposable): for collecting solid waste. Facilitates waste disposal.
6. Secure the cartridge lter (13) to the oat support (14) using the retainer (12); to lock the cartridge lter in
place, turn the retainer clockwise (Fig.22).
7. Using the handle (7) on the vacuum head assembly, position the vacuum hood over the collection tank (Fig.09)
and secure it using the hooks (6) (Fig.10).
Page 18 of 24

DISPOSAL
Fimap is committed to creating its products by respecting the environment, investing in the
development of sustainable solutions and technologies, seeking materials that can easily be
recycled, and ensuring that the entire production process has a low environmental impact.
At the end of the machine's life cycle, FIMAP oers the RECYCLING MANUAL (which can be
downloaded from the link https://www.map.com/it/map/ambiente/33/riciclabilita.html), in order
to provide some simple information on how to dispose of the materials that make up your
scrubbing machine.
Before proceeding with disposal, it is essential to contact your nearest authorised
collection centres directly, in accordance with the legislation in force in the country
in which the machine is being used.
TROUBLESHOOTING
This chapter lists the most common problems linked with the use of the appliance. If you are unable to resolve the
problems with the information given here, please contact your nearest assistance centre.
PROBLEM POSSIBLE CAUSE SOLUTION
THE APPLIANCE
DOES NOT
SWITCH ON
The main switch is not activated. Place the main switch on “I”.
The plug on the appliance's power cable has
not been correctly inserted into the mains
socket.
Connect the plug on the appliance's power
cable to the mains socket.
The electrical specications of the appliance
do not match the electrical specications of
the power supply network.
Check that the technical data on the
appliance serial number plate match the
data of the mains supply, please read
“SERIAL NUMBER PLATE” on page 9.
The power cable is damaged. Contact the FIMAP service centre.
INSUFFICIENT
VACUUM POWER -
EXCESSIVE DUST
PRODUCTION
(DRY VACUUM
CLEANER)
The vacuum hose is not connected correctly
to the nozzle on the collection tank.
Insert the sleeve in the vacuum hose all the
way into the nozzle in the collection tank;
turn the sleeve clockwise to stop it from
moving.
The vacuum hose is not connected correctly
to the extension hose.
Connect the vacuum hose correctly to the
extension hose.
The vacuum accessory is not properly
connected to the extension tube.
Connect the vacuum accessory correctly
to the extension tube.
The vacuum circuit is blocked (vacuum
hose; extension hose; vacuum accessory).
Remove the obstruction in the vacuum circuit.
The components of the vacuum circuit
(vacuum pipe; extension hose; vacuum
accessory) are damaged.
Proceed with replacing them, contact the
FIMAP service centre.
There are impurities clogging the cartridge
lter.
Remove the impurities in the cartridge lter,
please see “ROUTINE MAINTENANCE” on
page 16.
The collection tank is too full.
Empty the collection tank, please see
“EMPTYING THE COLLECTION TANK” on
page 15.
Page 19 of 24

PROBLEM POSSIBLE CAUSE SOLUTION
FOAM COMING
OUT FROM THE
VACUUM HOOD
(WET VACUUM
CLEANER)
The collection tank is too full.
Empty the collection tank, please see
“EMPTYING THE COLLECTION TANK” on
page 15.
EC DECLARATION OF CONFORMITY
The undersigned company:
FIMAP S.p.A.
Via Invalidi del Lavoro, 1
37059 Santa Maria di Zevio (VR)
declares under its sole responsibility that the products
WET & DRY VACUUM CLEANER mod. FV20.1 WD
comply with the requirements of the following Directives:
• 2014/35/EU: Low Voltage Directive.
• 2014/30/EU: Electromagnetic compatibility directive.
• 2011/65/EU: RoHS
They also comply with the following standards:
• EN 60335-1:2012/A1:2019/A2:2019/A14:2019
• EN 60335-2-2:2010+A11:2012+A1:2013
• EN 62233:2008/AC:2008
• EN 61000-3-2:2014
• EN 61000-3-3:2013
• EN 55014-1:2017
• EN 55014-2:2015
The person authorized to compile the technical le:
Mr. Giancarlo Ruo
Via Invalidi del Lavoro, 1
37059 Santa Maria di Zevio (VR) - ITALY
Santa Maria di Zevio (VR), 11/07/2022
FIMAP S.p.A.
Legal representative
Giancarlo Ruo
Manufacturer:
Zhejiang Yili Cleaning Appliances Co., LTD.
No. 8 Building, No. 111, Lingxiu Road
Luoxing Street, Jiashan County, Zhejiang Province,
P.R. China
Phone:0086-573-84809000
Fax:0086-573-84837222
E-mail: [email protected]
Website: www.yili-biz.com
Agent:
FIMAP S.p.A.
Via Invalidi del Lavoro, 1
37059 - Santa Maria di Zevio (VR) - Italy
Phone: 0039 045 6060411
Fax.: 0039 045 6060417
E-mail: service@map.com
Website: www.map.com
Page 20 of 24
Table of contents
Other Fimap Vacuum Cleaner manuals

Fimap
Fimap FA15+ 230V Operation instructions

Fimap
Fimap INV 2.60 User manual

Fimap
Fimap FV10 ECO ENERGY User manual

Fimap
Fimap Fv30 WD User manual

Fimap
Fimap NANO 230V User manual

Fimap
Fimap P611WD User manual

Fimap
Fimap FV13.1 + HEPA User manual

Fimap
Fimap FV9 User manual

Fimap
Fimap FV P65.2 WDM S User manual

Fimap
Fimap FE A65.2 DP User manual

Fimap
Fimap INV 1.25 User manual

Fimap
Fimap FV-CART User manual

Fimap
Fimap ECO ENERGY HEPA FA 15 Plus User manual

Fimap
Fimap NANO User manual

Fimap
Fimap FV P65.2 WDB User manual

Fimap
Fimap FV9+ User manual

Fimap
Fimap FE P35.1 WD User manual

Fimap
Fimap FV XP110.2 WD User manual

Fimap
Fimap UP36 User manual

Fimap
Fimap FV9 User manual