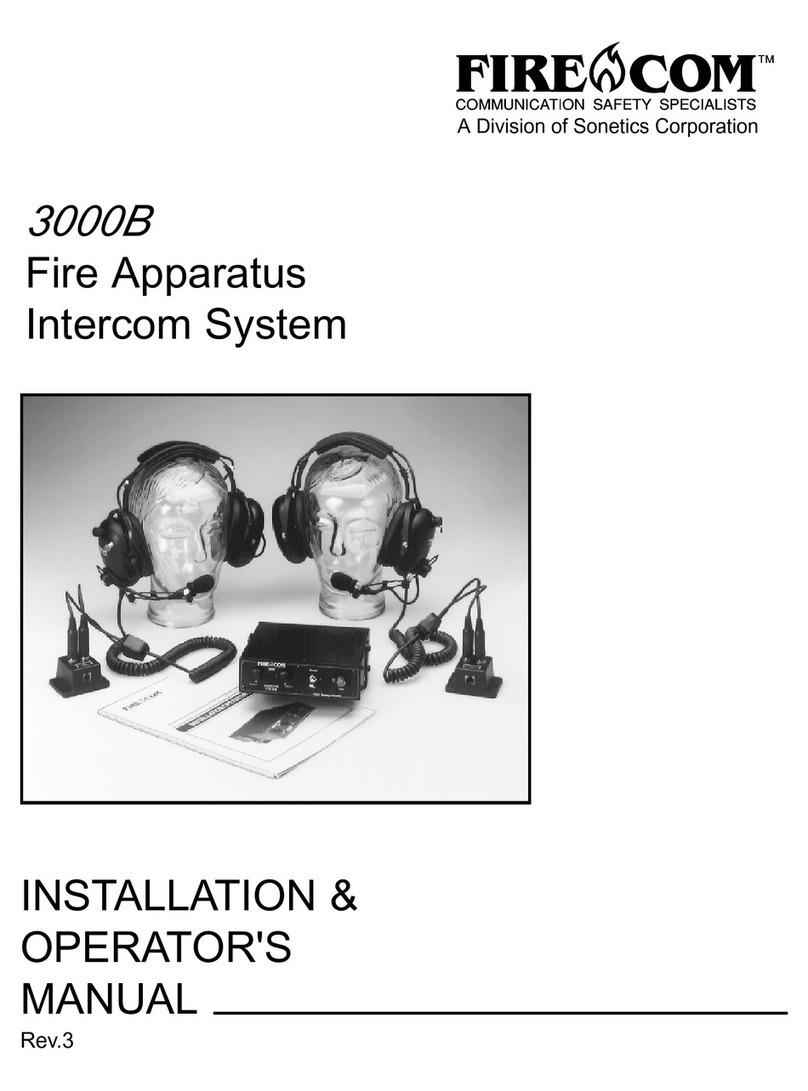
Firecom 3000A Administrator Guide

A Division of Sonetics Corporation
3000A
Fire Apparatus
Intercom System
INSTALLATION &
OPERATOR'S
ANUAL
Rev.3

3000A
TABLE OF CONTENTSTABLE OF CONTENTS
TABLE OF CONTENTSTABLE OF CONTENTS
TABLE OF CONTENTS
Intercom 3000A shown with
optional Dual Radio Interface
Optional “Behind-the-Helmet” Headset
CO PONENT IDENTIFICATION ..................................................... 1
SYSTE DESCRIPTION ................................................................. 2
PRE-INSTALLATION ........................................................................ 2
Determine System ounting Locations
INSTALLATION
odular Cables ......................................................................... 3
Interface Connections ............................................................... 3
Intercom Unit ............................................................................ 3
Headset odule/H -1 .............................................................. 5
TYPICAL CONFIGURATION ............................................................ 4
OPERATION
Headsets .................................................................................. 5
Headset Adjustments................................................................ 5
Headset Volume ....................................................................... 6
Intercom Unit ............................................................................ 6
Digital essage Recorder (D RT ) .......................................... 6
SYSTE SETUP & TEST ................................................................ 6
TROUBLESHOOTING ..................................................................... 7
TECHNICAL DATA
Installation Requirements ......................................................... 8
Alternator Whine and other Distracting Noises ......................... 9
Technical Notes ........................................................................ 9
SPECIFICATIONS ...........................................................................10
Warranty ..................................................................................10
OPTIONS and ACCESSORIES....................................................... 11
EXTENDED TROUBLESHOOTING ................................................12
©1994 Sonetics Corporation. All Rights Reserved. PRINTED IN U.S.A.
The information in this document is subject to change without notice.
No part of this document may be copied or reproduced in any form without
prior written consent of Sonetics Corporation.
Sonetics Corporation
7340 SW Durham Rd. • Portland, Oregon 97224
1-800/527-0555 • 503/684-6647
www.firecom.com
Please Read this Manual CompletelyPlease Read this Manual Completely
Please Read this Manual CompletelyPlease Read this Manual Completely
Please Read this Manual Completely
Before Starting nstallationBefore Starting nstallation
Before Starting nstallationBefore Starting nstallation
Before Starting nstallation

3000A
odular Cable and Plug
Headset odule showing headset modular
cable input from intercom
Radio Transmit Headset showing red
radio transmit button
at top of ear dome. Jumpseat showing black
intercom transmit button
at top of ear dome
COMPONENT COMPONENT
COMPONENT COMPONENT
COMPONENT dentificationdentification
dentificationdentification
dentification
1

3000A
OVEROVER
OVEROVER
OVERV EWV EW
V EWV EW
V EW
The FIRECO system is designed specifically for Fire
Apparatus use. It improves voice communications be-
tween apparatus personnel and provides hearing pro-
tection from high noise levels. It also augments normal
radio communications by interfacing directly to the ap-
paratus radio(s). Six headset connections are provided,
and three have radio transmit capabilities.
NSTNST
NSTNST
NSTALLAALLA
ALLAALLA
ALLAT ON OF TH S SYSTEM S MODULAR!T ON OF TH S SYSTEM S MODULAR!
T ON OF TH S SYSTEM S MODULAR!T ON OF TH S SYSTEM S MODULAR!
T ON OF TH S SYSTEM S MODULAR!
NO wire tangles...NO soldering..EASY to followNO wire tangles...NO soldering..EASY to follow
NO wire tangles...NO soldering..EASY to followNO wire tangles...NO soldering..EASY to follow
NO wire tangles...NO soldering..EASY to follow
step-by-step instructionsstep-by-step instructions
step-by-step instructionsstep-by-step instructions
step-by-step instructions
VO CE VO CE
VO CE VO CE
VO CE ACT VACT V
ACT VACT V
ACT VAA
AA
ATED with Noise CancellationTED with Noise Cancellation
TED with Noise CancellationTED with Noise Cancellation
TED with Noise Cancellation
The Intercom 3000A includes a state-of-the-art squelch
circuit which cancels background noise until you speak.
This circuit quickly activates to include the first spoken
syllable. In addition, the audio signal is processed to
reduce wind, siren, horn, and engine noise. ic muffs
are included with headsets to aid in wind noise reduc-
tion.
COMPCOMP
COMPCOMP
COMPAA
AA
AT B L TYT B L TY
T B L TYT B L TY
T B L TY
The Intercom 3000A is compatible with all UHF/VHF Fire
service radios, including 24 volt applications.
CONT NUOUS RAD O MON TCONT NUOUS RAD O MON T
CONT NUOUS RAD O MON TCONT NUOUS RAD O MON T
CONT NUOUS RAD O MON TOR NGOR NG
OR NGOR NG
OR NG
All personnel on the intercom will hear the radio traffic
regardless of other intercom activity.
NTERCOM CONTROL FUNCT ONSNTERCOM CONTROL FUNCT ONS
NTERCOM CONTROL FUNCT ONSNTERCOM CONTROL FUNCT ONS
NTERCOM CONTROL FUNCT ONS
Squelch:
Adjusts for a wide range of background
noise levels.
Volume Control:
Easily adjusts to varying micro-
phone/headset sensitivities with ample reserve
volume. Volume control does not affect appara-
tus radio volume.
DUAL-RAD O NTERFDUAL-RAD O NTERF
DUAL-RAD O NTERFDUAL-RAD O NTERF
DUAL-RAD O NTERFACEACE
ACEACE
ACE
If you need to interface the intercom to more than one
radio in a vehicle, FIRECO can provide a solution
through our Dual Radio Interface. For more information,
please contact our technical staff at:
1-800/527-0555
Digital Message Recorder Digital Message Recorder
Digital Message Recorder Digital Message Recorder
Digital Message Recorder (D RT )
The “Digital essage Recorder”, a one megabit voice
memory card, provides up to 32 seconds of voice re-
cording. You can record radio or intercom communica-
tions and play them back immediately. FIRECO tech-
nology provides you with unlimited instantaneous replays
of incident address, apparatus assignments, and other
critical information.
SYSTEM DESCR PT ONSYSTEM DESCR PT ON
SYSTEM DESCR PT ONSYSTEM DESCR PT ON
SYSTEM DESCR PT ON
DETERM NE SYSTEM MOUNT NG LOCADETERM NE SYSTEM MOUNT NG LOCA
DETERM NE SYSTEM MOUNT NG LOCADETERM NE SYSTEM MOUNT NG LOCA
DETERM NE SYSTEM MOUNT NG LOCAT ONST ONS
T ONST ONS
T ONS
When locating the system installation, consider areas
which will provide ease of operation. (See illustrated
examples of typical installations on page 4.)
CAUT ON CAUT ON
CAUT ON CAUT ON
CAUT ON
When mounting the system components, verify that
drilling through surfaces ill not cause damage to
adjacent iring or equipment.
When selecting your intercom unit location, be sure to
leave at least three inches behind it for cable clearance.
The mounting surface should be flat, fixed, and without
excessive vibration. The surfaces should be able to ac-
cept #8 sheet metal screws.
The Intercom 3000A is provided with a mounting bracket
for dashboard, center console, or overhead mounting.
The mounting bracket slots permit limited rotation of the
Intercom Unit.
Behind-the-head or over-the-shoulder mounting of the
headset modules is usually most convenient. Locate a
flat area that permits surface mounting for each module.
It will be useful to mount a hook or hanger nearby for
storage when the headset is not in use.
PRE- NSTPRE- NST
PRE- NSTPRE- NST
PRE- NSTALLAALLA
ALLAALLA
ALLAT ONT ON
T ONT ON
T ON
3 inches
INTERCOM
UNIT
25-Pin
Connector
Modular
Cables
Intercom Rear Spacing Diagram
TOP VIEW
The FIRECO Digital
essage Recorder
Board is a solid-state
device with no moving
parts.
2

3000A
If you wish to have an uncovered plug-in module near a
pump panel, for example, FIRECO has a waterproof en-
closure available. The modular connectors used in the
system are gold-plated to resist corrosion. The cabling
may be installed on the surface, or you may choose to hide
it behind panels, headliners, door sills, etc. Protect any
cabling run through bulkheads or other sheet metal by use
of grommeted holes to prevent damage to the cables.
Prior to securing the system components in place, verify
the layout for:
• Control accessibility
• Headset storage
• Headset cable reach
• Interconnect cable length
• Ease of installation
Stow any excess cable length behind panels or other out-
of-the-way locations. Additional interconnect cables may
be ordered from FIRECO if needed.
NOTENOTE
NOTENOTE
NOTE
Headset modules may be daisy-chained to the same
intercom connection, but multiple headsets on one
chain may reduce the received audio. This permits
multiple location use of each intercom channel.
NSTNST
NSTNST
NSTALLAALLA
ALLAALLA
ALLAT ONT ON
T ONT ON
T ON
W W
W W
WARN NGARN NG
ARN NGARN NG
ARN NG
To avoid damage or injury, al ays turn OFF the
apparatus master s itch before orking on circuitry.
MODULAR CABLESMODULAR CABLES
MODULAR CABLESMODULAR CABLES
MODULAR CABLES
Cables are fabricated at the factory in set lengths. Do
not cut these cables unless you are familiar with phone
plug crimping techniques and have the proper tools.
Additional cables may be ordered from FIRECO if
needed.
NOTENOTE
NOTENOTE
NOTE
Read the Pre-Installation section before attempting
installation. All cables should be installed prior to final
placement of other system components. Be sure to have
all system component locations pre-selected and
marked.
Observe that there are three INTERCO /TRANS IT
ports and three INTERCO ONLY ports at the rear of
the Intercom 3000A (see photo). In a typical installation
this would allow the Officer, Engineer/Driver, and Pump
Panel positions to be connected to the INTERCO /
TRANS IT side and the jumpseat positions to the IN-
TERCO ONLY side.
NTERFNTERF
NTERFNTERF
NTERFACE CONNECT ONACE CONNECT ON
ACE CONNECT ONACE CONNECT ON
ACE CONNECT ON
The Intercom 3000A includes a 25-pin connector and
interface cable for connection to the fire apparatus. Con-
nections to power and to the radio are made through this
cable. We recommend that these connections be made
by a qualified radio technician.
NOTENOTE
NOTENOTE
NOTE
See the section on Technical Information for specific
details on ire and pin locations and assignments
NTERCOM UN TNTERCOM UN T
NTERCOM UN TNTERCOM UN T
NTERCOM UN T
After selecting your mounting location, mark where you
want to set the mounting bracket.
NOTENOTE
NOTENOTE
NOTE
Be sure to observe the location criteria mentioned in
the section on PRE-INSTALLATION.
1. Remove the mounting bracket and set the intercom
unit aside
2. Set the mounting bracket in the place marked and
mark the location for the mounting screw holes.
3. Drill two holes for the #8 sheet metal screws.
4. ount the bracket.
5. Attach the intercom to the mounting bracket and in-
stall all the cables. Be sure to tighten the screws on
the 25-pin interface connector.
Sheet Metal
Screws
Intercom
Bracket
Intercom ounting Bracket
3

3000A
TYP CAL CONF GURA-TYP CAL CONF GURA-
TYP CAL CONF GURA-TYP CAL CONF GURA-
TYP CAL CONF GURA-
Tailboard
(Apparatus
Backup
Assist)
Pump Panel
Officer
& Driver
Jump
Seat(s)
Dashboard Installation
TOP VIEW OF APPARATUS CAB TOP VIEW OF APPARATUS CAB
Overhead Installation
Pump
Panel
Pump Panel
Driver Officer
Firefighter
Officer
Driver
Headset
Jack Module
Intercom
Firefighter
4

3000A
HEADSET MODULEHEADSET MODULE
HEADSET MODULEHEADSET MODULE
HEADSET MODULE
Note that the modular cables plug into each module on
the side below the label. The connector on the opposite
side is for daisy-chaining. Headset modules may be
daisy-chained to the same intercom connection, but only
one headset may be used at a time on each chain.
Do a final location check to ensure that the headset cable
lengths and mounting clearances are adequate before
securing the modules.
Reminder: Reminder:
Reminder: Reminder:
Reminder: HM-1 Headset Modules should be placed in
the cab ith the follo ing in mind.
→→
→→
→
Locate the modules close enough to the side window
to enable the driver and engineer to have an unobstructed
view out the windows without putting a strain on the
cables.
→→
→→
→
If possible, locate the modules so that the jacks face
in the direction of exit from the cab. This can prevent
damage if the headset wearer inadvertently forgets to
remove the headset when exiting.
1. ark the desired location of the module mounting
holes.
2. Drill two holes and secure the modules using two #8
sheet metal screws (provided).
3. Plug unused, exposed connections with silicone
sealant to avoid problems from salt air or excessive
moisture.
Headset modules mounted in exposed locations such
as a pump panel should be contained in a water proof
enclosure. Waterproof enclosures containing headset
modules with cables attacked are available from Fire-
com.
Label
Plug Socket
Plug
Cable from
Intercom
Headset
Jacks
Mounting
Hole(2)
Plug Socket for Daisy Chain
Headset odule
TOP VIEW
OPERAOPERA
OPERAOPERA
OPERAT ONT ON
T ONT ON
T ON
JumpseatJumpseat
JumpseatJumpseat
Jumpseat
Radio TRadio T
Radio TRadio T
Radio Transmitransmit
ransmitransmit
ransmit
Jumpseat Headset:Jumpseat Headset:
Jumpseat Headset:Jumpseat Headset:
Jumpseat Headset: This headset receives both inter-
com and radio communications at all times, but it is not
radio transmit capable. It is typically located at the
jumpseat position. Due to the higher ambient noise level
at this location (engine noise, etc.) it is not voice-acti-
vated. When you wish to speak over the intercom, de-
press and hold the BLACK BLACK
BLACK BLACK
BLACK PTT button.
HEADSET ADJUSTMENTSHEADSET ADJUSTMENTS
HEADSET ADJUSTMENTSHEADSET ADJUSTMENTS
HEADSET ADJUSTMENTS
All “FH” headsets have adjustable headbands with slide
mechanisms located at each side above the ear domes.
Adjust for a comfortable fit. If the adjustment slides be-
come loose, gently tighten the self-locking hex nuts. All
“UH” (Under-the-Helmet) headsets have an adjustable
velcro head strap. Adjust either type of headset to posi-
tion the liquid-filled ear seals for best noise reduction and
comfort. Washable cloth covers are provided to absorb
moisture. Replacement covers are available from Fire-
com.
Radio TRadio T
Radio TRadio T
Radio Transmit Headset:ransmit Headset:
ransmit Headset:ransmit Headset:
ransmit Headset: This headset receives both
intercom and radio communications at all times. It is
also hands-free, voice-activated to the intercom. When
you wish to transmit over the radio, simply depress and
hold the RED RED
RED RED
RED Push-To-Talk (PTT) button. This headset
is typically located at the Driver, Officer, and Pump Panel
positions.
HEADSETSHEADSETS
HEADSETSHEADSETS
HEADSETS
The FIRECO system offers two types of headsets:
Radio Transmit Headset and Jumpseat Headset. Refer
to photos on page 1. Other optional headsets may also
be supplied.
All headsets must be plugged into a Headset odule for
operation.
5

3000A
A mic muff on each headset microphone is provided to
help reduce wind noise.
Each headset has two plugs of different size which cor-
respond to the appropriate connectors on the Headset
odule.
HEADSET VOLUMEHEADSET VOLUME
HEADSET VOLUMEHEADSET VOLUME
HEADSET VOLUME
Preset each headset volume to the highest setting (full
clockwise). Set the radio volume to a level above the
normal comfortable listening level but at a level which
does not cause distortion. Reset the individual headset
volume for best listening level.
NTERCOM 3000ANTERCOM 3000A
NTERCOM 3000ANTERCOM 3000A
NTERCOM 3000A
Volume: This is a master intercom volume control to all
headsets on the system. Adjust it to match the radio
volume adjusted above.
Squelch: This control is adjusted from the Driver or Of-
ficer position, while wearing a Radio Transmit Headset.
Adjust it with the apparatus engine running, so that “nor-
mal” background noise is present. Start with this control
fully clockwise; then slowly rotate counterclockwise until
the background noise is no longer heard. Do not set this
control any further than necessary. Once set correctly,
additional adjustment should not be required.
NOTENOTE
NOTENOTE
NOTE
These controls do not affect the radio
squelch control setting.
D G TD G T
D G TD G T
D G TALAL
ALAL
AL MESSAGE RECORDER MESSAGE RECORDER
MESSAGE RECORDER MESSAGE RECORDER
MESSAGE RECORDER (D RT )
To record, set the toggle switch to RECORD, and press
the START button. The red LED confirms you are set to
the recording mode. The yellow LED indicates the D RT
has been started. To make a new recording, switch to
PLAY and back to RECORD, and press the START but-
ton. A new recording replaces any previous one. To
stop recording before the 32 second time limit is reached,
simply set the toggle switch to PLAY.
1/8"
from mouth
MPORTMPORT
MPORTMPORT
MPORTANT NOTE!ANT NOTE!
ANT NOTE!ANT NOTE!
ANT NOTE!
This is a Noise-cancelling MicrophoneNoise-cancelling Microphone
Noise-cancelling MicrophoneNoise-cancelling Microphone
Noise-cancelling Microphone. It compares
outside noise level to voice level. To operate properly,
it must be positioned at the corner of your mouth and
no more than 1/8 inch from your lips.no more than 1/8 inch from your lips.
no more than 1/8 inch from your lips.no more than 1/8 inch from your lips.
no more than 1/8 inch from your lips.
To playback, set the toggle switch to PLAY, and press
the START button. The recording will be replayed each
time you press the START button, as many times as de-
sired. To stop the playback before the message is com-
pleted, set the toggle switch to RECORD and quickly back
to PLAY again. The message will not be erased unless
the START button is pressed while in the RECORD mode.
Disconnecting power will erase the recording.
The D RT may be left idle and ready in either RECORD
or PLAY mode.
The Intercom 3000A radio transmit level has been pre-
set to a nominal level at the factory. In most installations,
satisfactory performance is obtained without having to
re-adjust this level. However, if it is necessary, optimal
RF carrier modulation level may be set by adjusting the
“Transmit Level Adjustment” potentiometer. This control
is located on the interface circuit board of the System
3000A Intercom and can be accessed by removing the
top metal case of the System 3000A Intercom. See in-
terface Circuit Board layout below.
This adjustment should be performed by a qualified ra-
dio technician with access to a suitable RF communica-
tions test set.
Power OnPower On
Power OnPower On
Power On
1. Turn on the Intercom 3000A at the apparatus mas-
ter switch
2. Confirm that power is applied to the system by plac-
ing the RECORD/PLAY switch to RECORD and
observing that the red LED illuminates.
3. Install a Radio Transmit Headset at the Officer’s or
Driver’s H -1 position.
Adjust headset(s)Adjust headset(s)
Adjust headset(s)Adjust headset(s)
Adjust headset(s)
4. Adjust the headset headband for a comfortable fit.
Intercom 3000A
Internal Circuit Board
Transmit Level Adjust
Intercom 3000A Interface Circuit Board Layout
SYSTEM SETUP & TESTSYSTEM SETUP & TEST
SYSTEM SETUP & TESTSYSTEM SETUP & TEST
SYSTEM SETUP & TEST
6

3000A
5. Adjust the microphone boom to place the micro-
phone at the corner of your mouth and approximately
1/8” from your lips.
6. Speak into the microphone to confirm intercom op-
eration. You should hear yourself through the head-
set.
Adjust VAdjust V
Adjust VAdjust V
Adjust Volumeolume
olumeolume
olume
7. Preset the headset volume and the Intercom Unit
squelch controls fully clockwise.
8. Adjust intercom volume for a comfortable listening
level.
9. Test radio communications by pressing the Push-
To-Talk button on your headset and speaking into
the microphone. Adjust your headset volume con-
trol for best listening volume while monitoring radio
traffic.
TT
TT
Test Digital Message Recorderest Digital Message Recorder
est Digital Message Recorderest Digital Message Recorder
est Digital Message Recorder
10. With the RECORD/PLAY switch in RECORD (red
LED on), press the START button (yellow LED on)
and speak into the microphone. Stop the recording
by placing the RECORD/PLAY switch to PLAY. Press
the START button and listen for a recording of what
you just said/
Repeat at Other StationsRepeat at Other Stations
Repeat at Other StationsRepeat at Other Stations
Repeat at Other Stations
11. Check the intercom and radio functions at each In-
tercom/Transmit station as above.
12. Connect a Jumpseat Headset at an intercom only
station.
13. Adjust the headset for a comfortable fit and micro-
phone position.
14. Press the Push-To-Talk button and verify intercom
operation by listening to your own voice.
15. Test the intercom function at each intercom only sta-
tion.
System Dynamic TSystem Dynamic T
System Dynamic TSystem Dynamic T
System Dynamic Testest
estest
est
16. Start the apparatus engine.
17. At an Intercom/Transmit station, located close to the
Intercom Unit, check the operation of the intercom
and radio functions.
NOTENOTE
NOTENOTE
NOTE
If static or noise is present on the circuit, it may be due
to improper grounding.
(See the Technical Data section)
18. With the radio volume adjusted to the desired level,
adjust your headset volume for best listening level.
19. Adjust the intercom Volume for best level in the in-
tercom mode while speaking into the microphone.
TROUBLESHOOT NGTROUBLESHOOT NG
TROUBLESHOOT NGTROUBLESHOOT NG
TROUBLESHOOT NG
20. Adjust the intercom Squelch Control counterclock-
wise just until the engine noise cannot be heard. Do
not over-adjust, or you may not be able to hear the
normal intercom traffic.
Final adjustment of these controls will be required under
actual apparatus operating conditions.
f Unit Doesn’t Wf Unit Doesn’t W
f Unit Doesn’t Wf Unit Doesn’t W
f Unit Doesn’t Work as Expected:ork as Expected:
ork as Expected:ork as Expected:
ork as Expected:
√√
√√
√Check that apparatus master switch is on.
√√
√√
√Check fuse or circuit breaker
√√
√√
√Check system wiring and interconnections
√√
√√
√Check that the headphones are plugged in all the
way
√√
√√
√Check intercom and headset control settings
√√
√√
√Check for corrosion on headset plugs
√√
√√
√Check that the headsets are plugged into the cor-
rect headset modules. A Radio Transmit Head-
set must be plugged into an Intercom/Transmit
headset location in order to transmit. A Jumpseat
Headset will not transmit under any circumstances
and is designed to be plugged into an Intercom
Only location.
Excessive Static or Noise:Excessive Static or Noise:
Excessive Static or Noise:Excessive Static or Noise:
Excessive Static or Noise:
→→
→→
→See the section on Technical Data.
TROUBLESHOOT NG?TROUBLESHOOT NG?
TROUBLESHOOT NG?TROUBLESHOOT NG?
TROUBLESHOOT NG?
If you have a problem or just a question,
call our Technical Support Staff
1-800/527-05551-800/527-0555
1-800/527-05551-800/527-0555
1-800/527-0555
7

3000A
TECHN CALTECHN CAL
TECHN CALTECHN CAL
TECHN CAL DA DA
DA DA
DATT
TT
TAA
AA
A
NSTNST
NSTNST
NSTALLAALLA
ALLAALLA
ALLAT ON REQU REMENTS:T ON REQU REMENTS:
T ON REQU REMENTS:T ON REQU REMENTS:
T ON REQU REMENTS:
The FIRECO System uses only seven wires for total apparatus/radio connection. The signals required are: ic HI,
Spkr HI, Spkr LO, Radio PTT, Radio PTT Ref, Power, and GND. These signals provide easy connection to a wide variety
of apparatus radios whose input and output circuits are referenced to ground (or other system reference via A-). See
Functional Block Diagram belo .
Connector Pin # Wire Color System Function System Connection
10 Orange Radio PTT Ref. Connect to radio PTT Ref
8 Black Transmitter Key Connect to radio PTT input
17 White Transmit Audio Connect to radio ic HI
21 Green Receive Audio Connect to Radio Speaker HI
13 Blue Receive Audio Connect to Radio Speaker LO
20 Red Power Supply Connect to switched and fused +12V to + 24VDC
Use 1/2 amp fast blow fuse (See System Specifications)
1 Shield System GND Connect this wire to radio signal GND
to minimize E I/RFI problems.
WW
WW
Wires & Connections ires & Connections
ires & Connections ires & Connections
ires & Connections Are dentified Are dentified
Are dentified Are dentified
Are dentified As Follows:As Follows:
As Follows:As Follows:
As Follows:
PTT
Squelch Volume
TX Audio
Adjust
PTT1
A+
A-
HEADSET PTT
PTT REF (10)
PTT TO RADIO (8)
TX HEADSET IC
TX AUDIO HI (17)
(1) SIGNAL GROUND
(20) 12-24 VDC
HEADSET AUDIO
(21) SPEAKER HI
(FRO RADIO)
(13) SPEAKER LO
(FRO RADIO)
Functional Block Diagram: Intercom 3000A
8

3000A
TECHN CALTECHN CAL
TECHN CALTECHN CAL
TECHN CAL DA DA
DA DA
DATT
TT
TA-A-
A-A-
A-
cont.cont.
cont.cont.
cont.
ALAL
ALAL
ALTERNATERNA
TERNATERNA
TERNATT
TT
TOR WH NEOR WH NE
OR WH NEOR WH NE
OR WH NE
AND OTHER D STRACT NG NO SESAND OTHER D STRACT NG NO SES
AND OTHER D STRACT NG NO SESAND OTHER D STRACT NG NO SES
AND OTHER D STRACT NG NO SES
Because of the level of ambient noise present with the
apparatus motor running, alternator whine and other
noises may not be noticed in the communications sys-
tems until an intercom is added. A noisy system will al-
ways be apparent, however, once an intercom is installed.
Alternator whine and other noises on the communica-
tions circuit are due to two main causes:
→→
→→
→Improper installation.
→→
→→
→A faulty alternator.
Generally, the problem is not caused by the alternator. It
is usually the result of a difference in signal potential be-
tween the apparatus radio signal ground and the inter-
com signal ground. Additional sources may also exist in
the apparatus electrical system
TT
TT
To reduce or eliminate alternator whine, performo reduce or eliminate alternator whine, perform
o reduce or eliminate alternator whine, performo reduce or eliminate alternator whine, perform
o reduce or eliminate alternator whine, perform
the following:the following:
the following:the following:
the following:
❑Connect the apparatus radio to the cleanest power
source possible; a source without motors (e.g., heat-
ers, windshield wipers, etc.), sirens, strobes, or flash-
ers.
❑Use the same precautions when connecting the in-
tercom power.
❑Ensure that all radio power and ground connections
are clean and tight.
❑Ensure that the radio power and ground wires are of
sufficient gauge to prevent a signal developing
across them.
❑Keep all battery connections clean and free from
dirt and corrosion.
❑Use noise filters on radio and intercom power if
needed.
TECHN CALTECHN CAL
TECHN CALTECHN CAL
TECHN CAL
ASS STASS ST
ASS STASS ST
ASS STANCEANCE
ANCEANCE
ANCE
Our technical staff is just a phone call away. Contact us
at 1-800/527-0555.
TECHNICAL NOTES:
9

3000A
SPEC F CASPEC F CA
SPEC F CASPEC F CA
SPEC F CAT ONST ONS
T ONST ONS
T ONS
INTERCO
Size ..................... 7-3/8”L x 6-1/2”W x 2-3/8”H with mounting bracket
Weight .......................................................................................... 48 oz
Output ............................................... 375 milliwatts into each of up to
...................................... six 150 ohm headsets. Sound level remains
............... constant regardless of the number of headsets connected.
Power Requirements ........................ .016 amps, 12-24 VDC external
Fuse ......................................................... 1/2 amp fast blow type 3AG
HEADSET/All FH- and UH- models
Sensitivity .............. 104 dB re .0002 microbar @ 1000 Hz 1 mW
Frequency Response .......... 150-5,000 Hz + 5 dB in 6cc coupler
Impedance ............ 600 ohms nominal, 150 to 1200 ohm source
Weight ..................................................................................19 oz
Shielding ........................ Full floating shield w/independent gnd.
Noise Reduction Rating ...................................................... 24 dB
ICROPHONE/Part No: A-7A
DC Bias Supply ..................... 8 to 16 volts, not polarity sensitive
Source Resistance .......................................... 220 to 2200 ohms
Output Voltage ............ 370 mV @ 114 dB spl re .0002 microbar
Frequency Response ...................... Optimized for speech clarity
and noise reduction
ax. Amb. Noise Level ................. 125 dB spl re .0002 microbar
Weight ..................................................................................02 oz
NOISE REDUCTION DATA
125 250 500 1000 2000 3000 4000 6300 8000
EAN ATTENUATION IN dB 19.3 24.7 32.7 37.2 31.3 35.3 37.5 33.9 32.3
EAN DEVIATION IN dB 3.1 4.1 3.5 2.5 2.9 3.6 3.7 3.7 4.4
NRR = 24 Use this laboratory-derived data for comparison only. The amount of protection afforded in field
use is often significantly lower depending on how the headset is fitted and worn.
One-YOne-Y
One-YOne-Y
One-Year Limited Wear Limited W
ear Limited Wear Limited W
ear Limited Warranty to Original Purchaserarranty to Original Purchaser
arranty to Original Purchaserarranty to Original Purchaser
arranty to Original Purchaser
Sonetics Corporation warrants to the original purchaser of its products, that they will be free from defects in materials and
workmanship, under normal and proper use, for the period of one year from date of purchase. Sonetics Corporation will repair
or replace, at its option, any parts showing factory defects during this warranty period, subject to the following provisions. This
warranty applies only to a new product which has been sold through authorized channels of distribution. All work under warranty
must be performed by Sonetics Corporation. All returned products must be shipped to our address, freight prepaid, accompa-
nied by a dated proof of purchase. The purchaser voids this warranty if he or others attempt to repair, service or alter the product
in any way. This warranty does not apply in the event of accident, abuse, improper installation, unauthorized repair, tampering,
modification, fire, flood, collision, or other damage from external sources, including damage which is caused by user replaceable
parts (leaking batteries, etc.). This warranty does not extend to any other equipment or apparatus to which this product may be
attached or connected. The foregoing is your sole remedy for failure in service or defects. Sonetics Corporation shall not be
liable under this or any implied warranty for incidental or consequential damages, nor for any installation or removal costs or
other service fees. This warranty is in lieu of all other warranties, express or implied, including the warranty of merchantability or
fitness of use, which are hereby excluded. To the extent that this exclusion is not legally enforceable, the duration of such implied
warranties shall be limited to one year from date of purchase. No suit for breach of express or implied warranty may be brought
after one year from date of purchase.
10

3000A
OPT ONS OPT ONS
OPT ONS OPT ONS
OPT ONS andand
andand
and ACCESSOR ES ACCESSOR ES
ACCESSOR ES ACCESSOR ES
ACCESSOR ES
Headsets:Headsets:
Headsets:Headsets:
Headsets:
FH-1:FH-1:
FH-1:FH-1:
FH-1:
Headset ith Radio Transmit PTT
. A high quality
adjustable headset with 24dB noise reduction, liquid filled
ear seals, adjustable microphone boom, electret micro-
phone and volume control.
FH-2:FH-2:
FH-2:FH-2:
FH-2:
Intercom Only Headset
. Specially designed for
jump seat positions.
UH-1:UH-1:
UH-1:UH-1:
UH-1:
Under the Helmet Radio Transmit Headset
. In-
corporates all the features of the standard Radio Trans-
mit Headset/FH-1 Headset, but is specially designed for
wearing under the helmet.
UH-2:UH-2:
UH-2:UH-2:
UH-2:
Under the Helmet Jumpseat Headset.
Incorpo-
rates all the features of the standard Jumpseat Headset/
FH-2 Headset, but is specially designed for wearing un-
der the helmet.
FH-1S:FH-1S:
FH-1S:FH-1S:
FH-1S:
Single Ear Radio Transmit Headset.
Same as
the Radio Transmit Headset/FH-1 except has only one
earphone with an over-the-head band.
FH-2:FH-2:
FH-2:FH-2:
FH-2:
Single Ear Jumpseat Headset.
Same as the
Jumpseat Headset/FH-2 except has only one earphone
with an over-the-head band.
Headset Modules and AccessoriesHeadset Modules and Accessories
Headset Modules and AccessoriesHeadset Modules and Accessories
Headset Modules and Accessories
HM-1:HM-1:
HM-1:HM-1:
HM-1:
Headset Module.
Provides a convenient location
for connecting headsets into the intercom system. Non-
waterproof.
PP-2:PP-2:
PP-2:PP-2:
PP-2:
Pump Panel Headset Modules, aterproof.
A
waterproof headset module designed for use in environ-
ments subject to weather and water spray. (Includes an
attached modular cable.)
CA*:CA*:
CA*:CA*:
CA*:
Modular Cable.
Interconnect cables used to pro-
vide signal paths between a headset module and the In-
tercom Unit. Standard lengths include 6, 12, and 20 feet.
They may also be custom ordered to any length.
(* insert cable length in place of *.)
HE-15:HE-15:
HE-15:HE-15:
HE-15:
Headset Extension, 15 foot coiled cord.
A coiled
cord providing extended length between the headset
module and the headset.
FS-1:FS-1:
FS-1:FS-1:
FS-1:
Heavy Duty PTT Foot S itch.
Used when
handsfree transmit capability is desired.
HH-Series:HH-Series:
HH-Series:HH-Series:
HH-Series:
Hand-held Radio-to-headset Interface.
Check for availability of radio model interface.
Consumable and Replacement temsConsumable and Replacement tems
Consumable and Replacement temsConsumable and Replacement tems
Consumable and Replacement tems
CC-1:CC-1:
CC-1:CC-1:
CC-1:
Cloth Comfort Covers.
Cloth covers with elastic
bands which slip over the headphone ear seals provid-
ing comfort and hygiene for the wearer.
MM-1:MM-1:
MM-1:MM-1:
MM-1:
Microphone Muff.
A foam muff used over the
microphone providing wind noise reduction.
A-7A:A-7A:
A-7A:A-7A:
A-7A:
Replacement Microphone for all FH and UH se-
ries headsets.
11

3000A
EXTENDED TROUBLESHOOT NGEXTENDED TROUBLESHOOT NG
EXTENDED TROUBLESHOOT NGEXTENDED TROUBLESHOOT NG
EXTENDED TROUBLESHOOT NG
f Things Go Wf Things Go W
f Things Go Wf Things Go W
f Things Go Wrongrong
rongrong
rong
The FIRECO Apparatus Intercom System, when in-
stalled properly and adjusted according to specifications,
will perform to industry standards and offer you the finest
in hearing protection and enhanced communication.
However, occasionally you might experience a malfunc-
tion.
The following recommendations cover potential trouble
areas.
Find the symptom which you are experiencing and fol-
low the trouble-shoot steps in the sequence given.
If the symptoms you are experiencing are not covered in
this document, call the FIRECO Customer Service
Department at 1-800-527-0555.
Definitions:Definitions:
Definitions:Definitions:
Definitions:
Intercom unit 3000A Intercom with or without
the D R.
Radio Interface Port 25 pin d sub jack on the rear of
the intercom unit.
Radio Interface Cable Cable which mates with the ra-
dio interface port.
Intercom Port Any one of six modular jacks on
the rear of the intercom unit.
Intercom/Tx Port One of the three intercom ports
capable of keying and transmit-
ting over the apparatus radio
through the Radio Interface
Port.
H -1 Black plastic module with a
speaker jack and a smaller mi-
crophone jack used to connect
headsets into the intercom sys-
tem
PP-2 A mic jack and a speaker jack
in a water resistant enclosure.
CA Cable Flat six conductor cable with six-
wide modular plugs on each end
used to make connections be-
tween H -1’s or PP-2’s and the
intercom unit
Headset Location Any combination of “CA” cables
and H -1’s or PP-2’s con-
nected to a single port on the
rear of the intercom unit.
How to verify that a headset location has a badHow to verify that a headset location has a bad
How to verify that a headset location has a badHow to verify that a headset location has a bad
How to verify that a headset location has a bad
component and troubleshoot to either a badcomponent and troubleshoot to either a bad
component and troubleshoot to either a badcomponent and troubleshoot to either a bad
component and troubleshoot to either a bad
headset, bad cable or bad HM-1headset, bad cable or bad HM-1
headset, bad cable or bad HM-1headset, bad cable or bad HM-1
headset, bad cable or bad HM-1
(A) Examine the headset’s label to determine if the head-
set is a jumpseat type or a radio transmit type head-
set.
1. If the headset is a radio transmit type, the speak-
ers should always be active. The mic should al-
ways be active. Pressing the red PTT button on
the eardome should key the radio only if that head-
set location is plugged into an intercom/tx port,
otherwise the PTT button will have no effect.
2. If the headset is a jumpseat type headset, the
speakers should always be active. The mic should
be active only when the black PTT button on the
eardome is pressed. The headset should never
cause the radio to key once installed in any head-
set location.
(B) Unplug the headset location from the intercom unit
and exchange intercom ports with a known good
headset location. If the headset fails to perform prop-
erly, the headset location has a faulty component
and you should continue troubleshooting the head-
set location
(C) Plug the headset into another good headset loca-
tion. If the headset fails to perform properly in the
new location, the headset is faulty and needs to be
repaired.
(D) If the headset is not at fault, check the H -1 by ex-
changing it with a known good one from another
headset location, and checking for proper operation
of the headset location. Check the modular plug of
the H -1 for bent or stuck pins. If the pins look
good and the H -1 fails to perform properly, it will
need to be replaced.
(E) If the H -1 is not at fault, check the intercom port
the headset location is connected to by plugging a
known good headset location into that port. If the
new headset location operates properly, the cable
of the original headset location is bad and will need
to be replaced. It is possible that the problem with
the cable will be at the modular connector and that a
new one could be crimped on and thus solve the
problem with the headset location. A modular cable
crimping tool is required to attach new modular ends.
12

3000A
EXTENDED TROUBLESHOOT NGEXTENDED TROUBLESHOOT NG
EXTENDED TROUBLESHOOT NGEXTENDED TROUBLESHOOT NG
EXTENDED TROUBLESHOOT NG
TT
TT
Troubleshooting an intercom system that hasroubleshooting an intercom system that has
roubleshooting an intercom system that hasroubleshooting an intercom system that has
roubleshooting an intercom system that has
been working properly but has failedbeen working properly but has failed
been working properly but has failedbeen working properly but has failed
been working properly but has failed
(A)(A)
(A)(A)
(A) There is no sound in the headset from either in-There is no sound in the headset from either in-
There is no sound in the headset from either in-There is no sound in the headset from either in-
There is no sound in the headset from either in-
tercom or radio.tercom or radio.
tercom or radio.tercom or radio.
tercom or radio.
1. Check the headset location for proper orientation
and replace any faulty components.
2. If the headset location checks good, verify that
power is present at pin 20 and that ground is
present at pin 1 by verifying a voltage of at least
11.5 volts between those two pins. If power is
present the red LED on the intercom faceplate
will light when the toggle switch is in the RECORD
position (the green LED will always light on an
intercom without a D R). If power is not present,
check the wiring to the intercom and any switches,
fuses, or circuit breakers in the power circuits to
the intercom and correct any faults.
3. If there is power to the intercom and it doesn’t
work, the intercom unit is bad. Remove it for re-
pair. Contact F RECOMF RECOM
F RECOMF RECOM
F RECOM
for return authorization.
(B) There is no sound in the headset from the radio, but
the intercom is okay.
1. Verify that the receive audio is present by listen-
ing to the radio’s speaker. If there is no audio
from the radio’s speaker, disconnect the radio in-
terface port connector from the back of the inter-
com unit. If there still is no audio from the radio’s
speaker, the radio or wiring is at fault.
2. If the radio is putting out receive audio, check the
connections to pins 13 and 21 of the intercom.
An open will cause no receive audio.
3. If no wiring fault is found, try swapping the inter-
com unit with a known good one to verify that the
problem is not the wiring. If no fault can be found
in the wiring, then the intercom unit is bad and
should be removed for repair.
(C)(C)
(C)(C)
(C) There is no sound in the headset from the inter-There is no sound in the headset from the inter-
There is no sound in the headset from the inter-There is no sound in the headset from the inter-
There is no sound in the headset from the inter-
com, but the radio is okaycom, but the radio is okay
com, but the radio is okaycom, but the radio is okay
com, but the radio is okay..
..
.
1. Verify that the headset location is good, replace
any faulty headset location components.
2. If the headset location checks good, the fault must
lie in the intercom unit. Remove it for repair.
(D)(D)
(D)(D)
(D) There is no sound in one earThere is no sound in one ear
There is no sound in one earThere is no sound in one ear
There is no sound in one ear..
..
.
1. The headset is faulty. Remove it for repair.
(E)(E)
(E)(E)
(E) YY
YY
You can hear others on the intercom but theyou can hear others on the intercom but they
ou can hear others on the intercom but theyou can hear others on the intercom but they
ou can hear others on the intercom but they
cannot hear you.cannot hear you.
cannot hear you.cannot hear you.
cannot hear you.
1. If the headset is a jumpseat type headset, be sure
that the black PTT button is fully depressed when
trying to talk on the intercom.
2. Verify that the headset location is good. If it ap-
pears that the headset is the faulty component,
check the phillips head set screws on the mic el-
ement for proper tightness before removing the
headset for repair.
(F)(F)
(F)(F)
(F) YY
YY
You can’t hear others on the intercom but theyou can’t hear others on the intercom but they
ou can’t hear others on the intercom but theyou can’t hear others on the intercom but they
ou can’t hear others on the intercom but they
can hear you.can hear you.
can hear you.can hear you.
can hear you.
1. Verify that the headset location is good. Replace
any faulty headset location components.
2. If the headset location checks good, the fault must
lie in the intercom unit. Remove it for repair.
(G)(G)
(G)(G)
(G) There is a loud squeal in the intercom systemThere is a loud squeal in the intercom system
There is a loud squeal in the intercom systemThere is a loud squeal in the intercom system
There is a loud squeal in the intercom system
when intercom volume is turned up.when intercom volume is turned up.
when intercom volume is turned up.when intercom volume is turned up.
when intercom volume is turned up.
1. Check for an open mic too near the speakers of a
headset. Feedback problems are often fixed by
turning the intercom volume down, moving the mic
away from the headset speakers, or unplugging
the smaller jack on the headset’s com-cable when
not in use.
2. If the problem persists, unplug the headset loca-
tions one at a time from the rear of the intercom
unit until the squeal stops. ost likely there is a
short in that location’s cabling. The cable should
be unplugged from both its H -1 and the inter-
com unit and checked for shorts between con-
ductors. If any are found, the cable will need to
be replaced.
(H)(H)
(H)(H)
(H) The radio receive is weak.The radio receive is weak.
The radio receive is weak.The radio receive is weak.
The radio receive is weak.
1. Check the setting of the radio’s volume control.
The radio’s volume control is the only adjustment
for receive audio level in the intercom systems.
2. Verify proper connection of radio interface pins
13 and 21.
3. If no fault is found and another intercom unit is
available, try swapping a known good intercom
with the suspect one. If the problem goes away,
the fault is in the suspect intercom unit. Remove
it for repair. If the problem persists, call F RE-F RE-
F RE-F RE-
F RE-
COM COM
COM COM
COM technical support for assistance.
13

3000A
( )( )
( )( )
( ) The radio keys but has no transmitter audio (car-The radio keys but has no transmitter audio (car-
The radio keys but has no transmitter audio (car-The radio keys but has no transmitter audio (car-
The radio keys but has no transmitter audio (car-
rier but no audio).rier but no audio).
rier but no audio).rier but no audio).
rier but no audio).
1. Verify radio interface pin 17 (transmit audio) for
proper connection.
2. If pin 17 is properly connected, verify that the trans-
mit audio adjustment inside the intercom unit is
not set for zero output by setting it to mid-range.
3. If no fault is found and another intercom unit is
available, try swapping a known good intercom
with the suspect one. If the problem goes away,
the fault is in the suspect intercom unit. Remove
it for repair. If the problem persists, call F RE-F RE-
F RE-F RE-
F RE-
COM COM
COM COM
COM technical support for assistance.
(J)(J)
(J)(J)
(J) The radio doesn’t keyThe radio doesn’t key
The radio doesn’t keyThe radio doesn’t key
The radio doesn’t key..
..
.
1. Verify that the headset location is good. Replace
any faulty headset location components.
2. If the headset location checks good, verify proper
connection of radio interface pins 8 and 10.
3. If no fault is found and another intercom unit is
available, try swapping a known good intercom
with the suspect one. If the problem goes away,
the fault is in the suspect intercom unit. Remove
it for repair. If the problem persists, call F RE-F RE-
F RE-F RE-
F RE-
COM COM
COM COM
COM technical support for assistance.
(K)(K)
(K)(K)
(K) Alternator and/or strobe noise is present in trans-Alternator and/or strobe noise is present in trans-
Alternator and/or strobe noise is present in trans-Alternator and/or strobe noise is present in trans-
Alternator and/or strobe noise is present in trans-
mit audio onlymit audio only
mit audio onlymit audio only
mit audio only..
..
.
1. Verify that radio interface pin 1 is connected to
mic low and all connections are clean and tight.
2. Verify that the intercom transmit audio level ad-
justment is not set too high. Too much gain here
will cause excessive background noise to be
transmitted along with the voice. In the worst case,
the voice will be somewhat distorted when trans-
mitting from a quiet place and will become un-
readable in the presence of background noise.
(L) Alternator and/or strobe noise is present in all(L) Alternator and/or strobe noise is present in all
(L) Alternator and/or strobe noise is present in all(L) Alternator and/or strobe noise is present in all
(L) Alternator and/or strobe noise is present in all
intercom audio.intercom audio.
intercom audio.intercom audio.
intercom audio.
1. Review the set up and operation of the intercom
volume and squelch controls. Possibly the inter-
com volume is set too high.
2. Inspect the headset microphones, making sure
that all the slots on both sides of the mic are clean
and unobstructed. Obstruction of these slots will
hamper the noise cancelling characteristics of the
mics.
3. Disconnect any exterior mounted headset loca-
tions. If the noise stops, inspect that location for
water or other contamination is present, contact
F RECOMF RECOM
F RECOMF RECOM
F RECOM
for return of the unit.
(M)(M)
(M)(M)
(M) Engine noise and sirens are present in transmitEngine noise and sirens are present in transmit
Engine noise and sirens are present in transmitEngine noise and sirens are present in transmit
Engine noise and sirens are present in transmit
audio.audio.
audio.audio.
audio.
1. Verify that the intercom transmit audio level ad-
justment is not set too high. Too much gain here
will cause excessive background noise to be
transmitted along with the voice. In the worst case,
the voice will be somewhat distorted when trans-
mitting from a quiet place and will become un-
readable in the presence of background noise.
(N)(N)
(N)(N)
(N) ntercom volume control has no effect.ntercom volume control has no effect.
ntercom volume control has no effect.ntercom volume control has no effect.
ntercom volume control has no effect.
1. Call F RECOM F RECOM
F RECOM F RECOM
F RECOM technical support for assistance
or return authorization
(O)(O)
(O)(O)
(O) ntercom squelch has no effect.ntercom squelch has no effect.
ntercom squelch has no effect.ntercom squelch has no effect.
ntercom squelch has no effect.
1. Call F RECOM F RECOM
F RECOM F RECOM
F RECOM technical support for assistance
or return authorization
(P)(P)
(P)(P)
(P) Cannot seem to set the squelch level (squelchCannot seem to set the squelch level (squelch
Cannot seem to set the squelch level (squelchCannot seem to set the squelch level (squelch
Cannot seem to set the squelch level (squelch
is too touchy).is too touchy).
is too touchy).is too touchy).
is too touchy).
1. First review the set up and operation of the squelch
control. Note that is important to speak in a loud
clear voice and keep the mic very close to the
speaker’s mouth.
2. Call F RECOM F RECOM
F RECOM F RECOM
F RECOM technical support for assistance
or return authorization
(Q)(Q)
(Q)(Q)
(Q) DMR does not workDMR does not work
DMR does not workDMR does not work
DMR does not work
1. Review proper operation of D R switches
2. Call F RECOM F RECOM
F RECOM F RECOM
F RECOM for return authorization.
(R)(R)
(R)(R)
(R) DMR has a noisy playback.DMR has a noisy playback.
DMR has a noisy playback.DMR has a noisy playback.
DMR has a noisy playback.
1. Call F RECOM F RECOM
F RECOM F RECOM
F RECOM for return authorization.
(S)(S)
(S)(S)
(S) DMR playback is weak.DMR playback is weak.
DMR playback is weak.DMR playback is weak.
DMR playback is weak.
1. Call F RECOM F RECOM
F RECOM F RECOM
F RECOM for return authorization.
EXTENDED TROUBLESHOOT NGEXTENDED TROUBLESHOOT NG
EXTENDED TROUBLESHOOT NGEXTENDED TROUBLESHOOT NG
EXTENDED TROUBLESHOOT NG
14

3000A
EXTENDED TROUBLESHOOT NGEXTENDED TROUBLESHOOT NG
EXTENDED TROUBLESHOOT NGEXTENDED TROUBLESHOOT NG
EXTENDED TROUBLESHOOT NG
Use this section to check out items identifiedUse this section to check out items identified
Use this section to check out items identifiedUse this section to check out items identified
Use this section to check out items identified
as bad before sending them out for repairas bad before sending them out for repair
as bad before sending them out for repairas bad before sending them out for repair
as bad before sending them out for repair..
..
.
Bad headset:Bad headset:
Bad headset:Bad headset:
Bad headset:
Bad mic circuit -
1. Using a #0 phillips screwdriver, check that the set
screws in the mic element are snug.
2. Exchange mic elements with a working headset
to check that the mic element is not bad.
3. If neither of these solves the problem, call for a
return authorization and send the headset in for
repair.
Bad speaker or PTT circuit:Bad speaker or PTT circuit:
Bad speaker or PTT circuit:Bad speaker or PTT circuit:
Bad speaker or PTT circuit:
1. Send the headset in for repair.
Bad intercom:Bad intercom:
Bad intercom:Bad intercom:
Bad intercom:
1. Check all intercom ports for bent or stuck pins.
Bad HM-1 or PP-2:Bad HM-1 or PP-2:
Bad HM-1 or PP-2:Bad HM-1 or PP-2:
Bad HM-1 or PP-2:
1. Send H -1 or PP-2 in for repair.
Bad CA CableBad CA Cable
Bad CA CableBad CA Cable
Bad CA Cable
1. If tools are available, try replacing the modular
plug on both ends of the CA cable. Note that
there is one correct way to assemble these cables.
The order of the wire colors must be opposite at
each end.
15

Sonetics Corporation
7340 SW Durham Rd. • Portland, Oregon 97224
1-800/527-0555 • 503/684-6647
www.firecom.com • [email protected]
©1995 Sonetics Corporation. All Rights Reserved. PRINTED IN U.S.A.
Table of contents
Other Firecom Intercom System manuals
Firecom
Firecom CONNECT User manual
Firecom
Firecom 210 Series User manual
Firecom
Firecom 3010R Series User manual
Firecom
Firecom 5000D Series User manual
Firecom
Firecom 3025R User manual
Firecom
Firecom panther CCS User manual
Firecom
Firecom pantherC Series User manual

Firecom
Firecom 3010 Series Owner's manual
Firecom
Firecom 5000D Series User manual
Firecom
Firecom 3000C User manual
