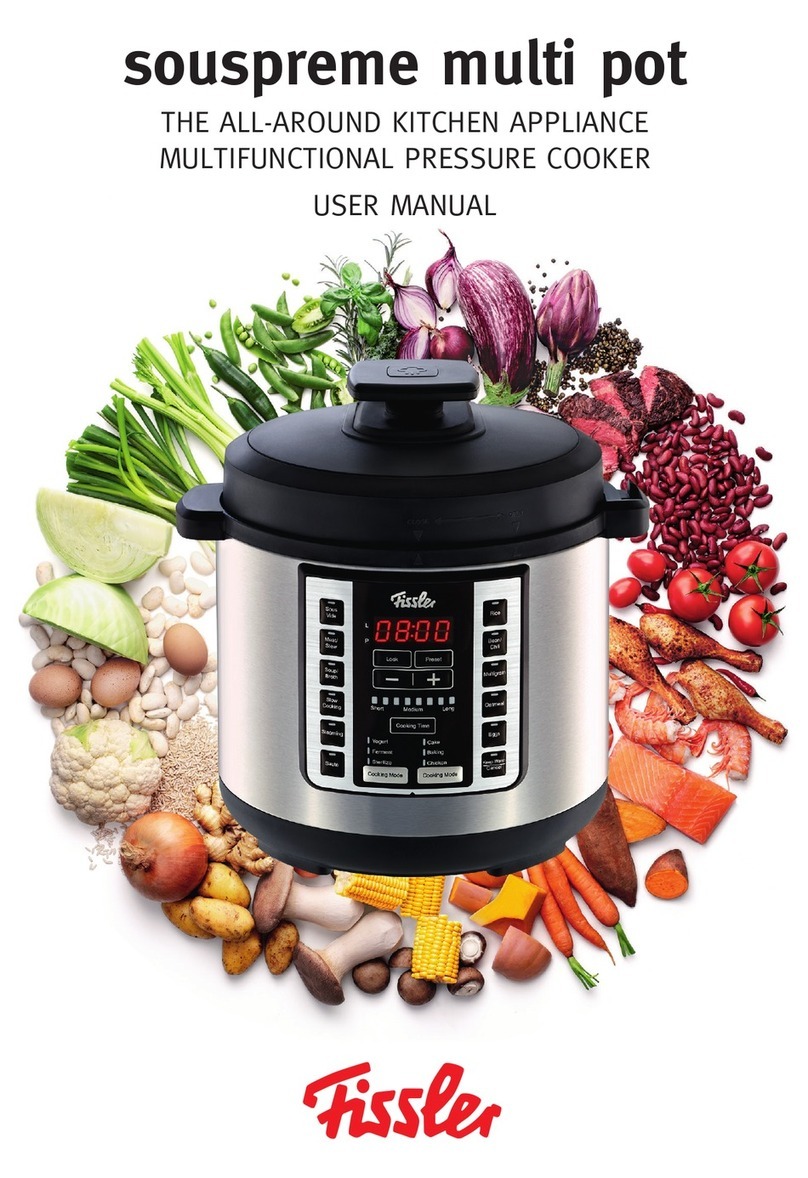
Fissler souspreme multi pot User manual

souspreme multi pot
USER MANUAL
THE ALL-AROUND KITCHEN APPLIANCE
MULTIFUNCTIONAL PRESSURE COOKER

souspreme multi pot - user manual
Version 2.0
Contents
Important Safeguards
Cord Options
Before First Use
Product Features
Safe Lid Opening
Operating Instructions
General Cooking Instructions
Cooking Programs
Cleaning and Maintenance
Troubleshooting
IMPORTANT SAFEGUARDS
When using electric appliances, always follow basic safety precautions, including the following:
1. Read all instructions.
2. Do not touch hot surfaces. Use handles or knobs.
3. To protect against electrical shock, do not immerse cord, plug or appliance in water or any other liquid.
If the unit accidentally falls or gets immersed in water, unplug it from the wall outlet immediately. Do not
reach into the water.
4. Close supervision is necessary when any appliance is used near children.
5. This multi pot is not intended for use by children.
6. Unplug from electrical outlet when not in use and before cleaning. Allow cooling before putting on or
taking o parts. If the multi pot begins to malfunction during use, immediately unplug the cord. Do not
use or attempt to repair it.
7. Do not operate any appliance with a damaged cord or plug, or aer appliance malfunctions or has been
damaged in any manner. Contact Fissler customer service at cs@sslerusa.com.
8. The use of accessory attachments that are not recommended by the appliance manufacturer may cause
injuries.
9. Always operate this appliance on a stable surface.
10. Do not use outdoors. Household use only.
11. Do not let the cord hang over the edge of a table or counter or touch hot surfaces.
12. Do not place on or near a hot gas or electric burner, or in a heated oven.
13. Extreme caution must be used when moving an appliance containing hot oil or any other hot liquid.
14. Never immerse the housing or base in water.

15. Always attach plug to appliance rst, then plug cord into the wall outlet. To disconnect, turn any control
to o, then remove the plug from the wall outlet.
16. Do not use the appliance for anything other than its intended use.
17. CAUTION: Risk of electric shock. Cook only in the removable cooking pot.
18. This appliance cooks under pressure. Improper use may result in scalding injury. Make sure that unit is
properly closed before operating. See “General Operating Instructions.”
19. Do not ll the unit over “Max line” marked in the removable cooking pot. When cooking foods that
expand during cooking such as rice, beans or dried vegetables, do not ll unit over 1/2 (half) full. See
“General Operating Instructions”. Overlling the pressure cooker may cause clogging, which builds up
excess pressure inside and may be dangerous.
20. We do not recommend cooking certain foods with a closed lid, such as applesauce, cranberries, pearl
barley, split peas, noodles, macaroni, rhubarb or spaghetti. These foods tend to foam, froth and sputter
and may block the pressure exhaust vent. Recipes that use any of these ingredients must be carefully
followed to avoid problems
21. Always check the pressure release valve for clogging before use. Always make sure that the exhaust valve
is installed correctly before use. Incorrect assembly may prevent the multi pot from building up pressure
or allowing steam to come out from the sides of the lid.
22. Do not use this multi pot for pressure frying with oil.
23. Do not open the multi pot until all internal pressure has been released. If dicult to open, this indicates
that the multi pot is still pressurized.
24. Never force the multi pot open. Any pressure built up in the cooker can be hazardous. Refer to the
instructions in section “Open the lid” and follow them carefully. Always and most importantly, when
opening the lid, protect your skin from any contact with escaping steam. Once all the pressure has been
released, li lid carefully away from you to avoid skin contact with any the remaining heat or steam.
25. This multi pot generates heat and escaping steam during use. CAUTION, HOT SURFACES: All necessary
precautions should be followed to avoid re, burns, or other personal injury during its operation. Never
use or place the unit near flammable materials such as dish towels, paper plates, napkins, curtains,
paper towels, etc. Allow sucient space around all sides of the unit, including top and bottom, to ensure
proper airflow.
26. This appliance is not intended for use by persons with reduced physical, sensory or mental capabilities,
or lack of experience and knowledge, unless they are under the supervision of a responsible person
or have been given proper instruction in using the appliance. This appliance is not intended for use by
children. Children should be supervised to ensure that they do not play with the appliance. Any person
who has not fully read and understood all operating and safety instructions contained in this user manual
is not qualied to operate or clean this multi pot.
27. Never use your multi pot without adding water into the pot, this would seriously damage it. The only
functions allowed without any additional water usage are: Chicken, Cake, Baking, Fermenting, Sterilize &
Yogurt.
28. When cooking doughy food, gently shake the cooker before opening the lid to avoid food ejection.
29. The heating plate is subject to residual heat aer use.
30. The appliance is not intended to be operated by means of an external timer or a separate remote-control
system.
31. Do not spill any liquids on the power cable, power connectors or any other electronic parts of the device.
32. Always wipe the surfaces with a dry towel. Do not use cleaning liquids on the product.
33. WARNING: Serious injuries can happen from misuse of the product.
34. If the supply cord/ power cord is damaged, it must be replaced by a special cord. Please contact Fissler
customer service at 704-842-9608 or cs@sslerusa.com.
35. If you have any questions, contact Fissler customer service via text / call at 704-842-9608 or cs@
sslerusa.com.
SAVE THESE INSTRUCTIONS
HOUSEHOLD USE ONLY
Cord Options:
A short cord is provided to reduce safety hazards of entanglement or tripping over a longer cord. Longer
cords and extension cords are available and may be used, if the marked electrical rating of the longer cord
if care is taken to arrange the longer cord so that it will not drape over the countertop or table where it can
be pulled on by children or tripped over accidentally. The cord set or extension cord should be a grounding-
type-3-wire cord
Precautions:
• Before each use, make sure to check the anti-block shield, float valve and pressure release valve for
obstructions; wipe the surface of the removable cooking pot and heating plate to conrm they are clean,
and make sure the pressure release valve is in the sealing position.
• Aer cooking, release the pressure using the pressure release valve. Use extreme caution when opening
the lid. Serious burns can result from steam inside the unit.
• If a part such as a wire or plug is damaged, stop using it immediately and contact Fissler customer
service. If the multi pot malfunctions, consult the Troubleshooting and Warranty Service sections on
pages 19-20.
• Insert the plug into the socket rmly. Incomplete insertion may cause electric shock or short circuit.
• Any dirt or water attached to the removable cooking pot shall be removed as it may cause re.
When not in use, unplug the cord from the power outlet.
• Care must be taken on the rubber gasket to avoid deformation. Fail to do so may prevent the multi pot
from working properly. rubber gasket
Product Specications:
Modell number: 035-200-06-000/0 Power supply: 120v 60Hz
Power: 1000w Volume: 6qt
Working pressure: 0-11.6 psi (0-80kpa)
Steam release pressure limit: 13.05-15.22psi (90-105kpA)
Working temperature at full pressure in F and C: 0-329°F, 0-165°C Maximum Keep Warm function: 24hours
Maximum Slow Cook function: 10 hours
Temperature for the Sauté function: 165°C
Maximum yogurt function (time) and working temperature: Max time: 12 hours, working temperature: 40°C
Before First Use
• Before rst use, please remove all accessories from packaging and read this user manual carefully. Pay
attention to operational instructions and cautions to avoid any injury or property damage.
• Prior to each use, inspect to make sure the rubber gasket and anti-block shield are mounted in the lid.
Aer use, remove and thoroughly clean the rubber gasket and anti-block shield.
• Keep clean to avoid odors.
• Never pull the rubber gasket by force, since deforming its shape may aect proper sealing and pressure.
A damaged rubber gasket should not be used and should returned for replacement. Contact Fissler
customer service.

Getting Started:
Step 1: Remove the foil from the front panel.
Step 2: Remove the safety sticker from the pressure release valve. Refer to the chart on page 8 for
identication of all product features.
Step 3: Please check if the pre-installed condensation collector is in place. If not, please install the
condensation collector.
Step 4: Plug in the power cord.
Step 5: Make sure the anti-block shield is correctly assembled.
Step 6: Insert the removable cooking pot into multi pot.
We recommend boiling water before rst-time use:
1. Place the removable cooking pot in the multi pot.
2. Fill the removable cooking pot with 6 cups of water, or up to the 2qt line inside, and put the lid on top.
Close the lid completely in a counter-clockwise direction.
3. Turn the pressure release valve to the Seal position.
4. Press Soup/Broth button on the front panel and wait a few minutes until the le circular motion LED turns
into a zero.
5. Press the Instant Pressure Release Button for a few seconds to release the rst hot steam.
6. Once the steam stops releasing, turn the pressure release valve to the release position.
7. Turn o the multi pot by pressing Cancel, and then wait until it has cooled o.
8. Your Souspreme multi pot is now ready to use.

Product Features
Sous
Vide
Sauté
Steaming
Slow
Cooking
Soup/
Broth
Meat/
Stew
Rice
Keep Warm
Cancel
Eggs
Oatmeal
Multigrain
Bean/
Chili
Cooking Mode Cooking Mode
Yogurt
Ferment
Sterilize
Cake
Baking
Chicken
Cooking Time
Lock Preset
L
P
Condensation Collector
Power Cord
Removable CookingPot
Floating Valve
Pressure Release Valve
Instant Pressure Release Button
Stationary Pot
Pot Handle
Heating Plate
Base
Housing
Anti-Block Shield
Front Panel
Measuring cup
Spoon
Rubber Gasket
Push Rod

Safe Lid Opening Instructions
1. Disconnect the power or the power plug.
2. Release pressure by pressing the pressure release valve. Wait until the floating valve drops down to
indicate that pressure has been released before opening the lid.
3. Open the lid: Hold the lid handle, turn the lid clockwise to the unlock position, and carefully li the lid to
open.
Caution:
• Do not open the lid until the pressure inside the pot is completely released.
• Never pull the pressure release valve when it is releasing pressure.
• For fluid foods (thin, thick and sticky liquids), do not slide the pressure release valve for releasing
pressure when cooking has just nished. If you do that, the hot food fluid may spill from the pressure
release valve and may cause burns. Be sure to disconnect the power supply.
• When a large quantity of food is cooked, do not try to release the pressure immediately aer cooking. Let
the multi pot cool rst.
• We recommend letting the food cool down for a while before releasing the pressure.
WARNING:
Do not hold the pressure release valve. Hot steam/liquid may be ejected. Keep hands and face away from
steam, use pot holders when removing the removable cooking pot or touching any hot items, and never
force the lid open. The lid will only open once the pressure is released. Remove the lid by liing it away from
you to avoid being burned by the steam.
Operating Instructions
1. Open the lid: Hold the lid handle, turn the lid clockwise to the unlock position and carefully li the lid up
to open.
2. Take out the removable cooking pot, put food and water in it. NEVER ll cooker more than 4/5 or less
than 1/5 full. This is indicated on the upper line on the inside of the cooker identied with the word
“FULL”. For rice and vegetables that expand during cooking, DO NOT ll over the MAX RICE line.
3. Make sure to dry the removable cooking pot and heating plate before putting the cooking pot into the
stationary pot. Do not put anything except the removable cooking pot into the stationary pot and heating
plate. Please rotate the cooking pot slightly to ensure good contact with the heating plate.
4. Close the lid: Make sure the silicone gasket is completely seated properly inside the lid. Hold the lid
handle and put the lid on the cooker; rotate the lid counter-clockwise approximately 30 degrees until the
lid is aligned with the “CLOSED” mark on the pot handle.
5. Make sure the condensation collector is installed.
6. Put the pressure release valve into position; set it to the “Seal” position and make sure the float valve is
in the down position before heating.
7. Connect to the power. The LED display shows “00:00” and switches to standby mode.
8. Choose the corresponding button according to your food recipe. A light will conrm your choice.Connect
the power cord. To ensure safety, we recommend connecting the power cord to the cooker rst and then
connect the plug to the power outlet.

Cooking Instructions
1. Lock
2. Preset (delay start)
3. Reduce cooking time
4. Add cooking time
5. Cooking Programs (sous vide, meat/stew, soup/broth, slow cooking, steaming, sauté, rice, bean/chili,
multigrain, oatmeal, eggs, keep warm)
6. Cooking Mode (to active the Yogurt, Ferment or Sterilize program)
7. Cooking Mode (to active the Caking, Baking or Chicken program)
8. Cooking Time (time presets)
Sous
Vide
Sauté
Steaming
Slow
Cooking
Soup/
Broth
Meat/
Stew
Rice
Keep Warm
Cancel
Eggs
Oatmeal
Multigrain
Bean/
Chili
Cooking Mode Cooking Mode
Yogurt
Ferment
Sterilize
Cake
Baking
Chicken
Cooking Time
Lock Preset
L
P

General Cooking Instructions:
1. Connect the power cord. To ensure safety, it is recommended to connect to the power cord to the
stationary pot rst and then connect the plug to the power outlet.
2. Select a cooking program function key. Once a function key is pressed, the indicator of the corresponding
function will show the default pressure time (e.g. rice function shows 00:12). Cooking and cooling time
may vary depending on the dierent cooking program selections. Cooking time may vary slightly with
the quantity of food and liquid and textures of food. The cooking timetable (SPECIFICATION) below is for
reference only. 3. Cooking will start 3 seconds aer the selection of a pre-programmed function.
Cooking
Program
default
time
Preset Cooking Time Time Ad-
justment
Tempera-
ture (F)
Pressure
(PSI)
Delay Start
(Preset)
short medium long
SousVide 4 >Hour No Preset Cooking Time
To Choose 1-24 H 113°-194° No Pressure no
Meat/Stew 30 Min. 25 Min. 30 Min. 35 Min. 1-59 Min. 329° 7,25-8,70 Yes
1-24 hours
Soup/Broth 25 Min. 20 Min. 25 Min. 30 Min. 1-59 Min. 329° 7,25-8,70 Yes
1-24 hours
Slow
Cooking 4 Hour No Preset Cooking Time
To Choose 2-10 H 212° No Pressure Yes
1-24 hours
Steaming 10 Min. 5 Min. 10 Min. 15 Min. 1-59 Min. 329° 7,25-8,70 Yes
1-24 hours
Saute 15 Min. No Preset Cooking Time
To Choose 1-59 Min. 329° 7,25-8,70 no
Rice 12 Min. 10 Min. 12 Min. 15 Min. 1-59 Min. 329° 7,25-8,70 Yes
1-24 hours
Bean/Chili 35 Min. 30 Min. 35 Min. 40 Min. 1-59 Min. 329° 7,25-8,70 Yes
1-24 hours
Multigrain 20 Min. 15 Min. 20 Min. 25 Min. 1-59 Min. 329° 7,25-8,70 Yes
1-24 hours
Oatmeal 2 Min. No Preset Cooking Time
To Choose 1-59 Min. 329° 7,25-8,70 Yes
1-24 hours
Eggs 15 Min. No Preset Cooking Time
To Choose 1-59 Min. 194° No Pressure Yes
1-24 hours
Yogurt 10 Hour No Preset Cooking Time
To Choose 6-12 H 104° No Pressure no
Ferment 3 Hour No Preset Cooking Time
To Choose 2-7 H 104° No Pressure no
Sterilize 2 Min. No Preset Cooking Time
To Choose 1-59 Min. 329° No Pressure Yes
1-24 hours
Cake 48 Min. No Preset Cooking Time
To Choose 1-59 Min. 329° No Pressure Yes
1-24hours
Baking 30 Min. No Preset Cooking Time
To Choose 1-59 Min. 329° No Pressure Yes
1-24 hours
Chicken 13 Min. No Preset Cooking Time
To Choose 1-59 Min. 329° No Pressure Yes
1-24 hours
Keep Warm 24 Hour No Preset Cooking Time
To Choose No 140° No Pressure Yes
1-24 hours

• For the next 3 seconds aer pressing a program function key, you can select other function keys to
adjust the cooking time (and temperature within the sous-vide program). The cooking process will start 3
seconds aer the nal selection.
• Within the 3 seconds you can choose between various pre-dened cooking times. Press Cooking Time
aer the selection of a program function key and choose between short, medium and long. You can
always adjust by pressing the “+” or “-” key.
• During the operation, you can cancel current cooking program in progress and return to standby model
by pressing the “Keep Warm/Cancel” key.
• Within 3 seconds, a long audible beep will sound to indicate the cooking process has started. A circular
motion LED display indicates the pre-heating is in progress.
• As the pressure increases inside the cooker, the floating valve will pop up.
• Once the pressure/temperature inside the cooker reaches the desired level, the circular display on LED
panel will change to the cooking time display. The cooking time counts down to indicate the remaining
time in minutes.
• While the cooking is in progress, you can cancel the current cooking program and return to standby mode
by pressing the “Keep Warm/Cancel” key.
• During operation, the pot may make low clicking sound. This is a normal operation of the unit controlling
the power cycle.
• When cooking with a small quantity of food, the removable cooking pot may appear to be stuck on the lid
by pressure when the lid is opened. In this case, shake the lid slightly, and then remove the lid aer the
removable cooking pot falls back into its position.
• When cooking is complete, the corresponding function indicator goes out and the cooker will make an
audible beep. The cooker starts the keep warm function automatically.
• The “Keep Warm” indicator is on to show the cooker is in the keeping warm function. It is not
recommended to leave the cooked rice in “Keep Warm” state for too long as it may aect the cooking
result.
Sous Vide
1. Fill the removable cooking pot with a minimum 3qt of water and place it in the multi pot.
2. Close the lid, then secure it by turning it counter-clockwise to lock it in place. Turn the Pressure Release
Valve (see Product Features) to RELEASE.
3. On the multi pot, press the Sous Vide button. It starts out at a temperature of 122 F. Press the Sous
Vide button again within 3 seconds to set a dierent temperature. Each time you press the button, the
temperature setting will increase by one degree. You can set the temperature anywhere from 113 F to
194F (45 C to 90 C). Sous Vide steps will be determined and based on Celsius. So please refer to the table
on the next page. The steps in Fahrenheit are predetermined and cannot be changed.
4. Then, press the plus and minus buttons (+/-) to set the cooking time. Each time you press the (+) or (-)
buttons, the cooking time will increase by one minute. Hold buttons down to increase or decrease the
cooking time by 10 minutes. You can set the cooking time anywhere from 1 minute to 24 hours.
5. When the water has reached the desired temperature, the multi pot will beep 3 times. You can now open
the lid and place your food in the water. Do not forget to close the lid turn it counter-clockwise to lock it in
place and set the Pressure Release Valve (see Product Features) to RELEASE.

Sous Vide Time and Temperature Table
Rib Eye, Sirloin & Porterhouse Steak
Rare 122°F 1 to 6 hours
Medium Rare 129°F 1 to 6 hours
Medium 140°F 1 to 6 hours
Medium Well 151°F 1 to 6 hours
Well Done 156°F 1 to 6 hours
Tenderloin Steak (Filet Mignon)
Medium Rare 129°F 1 to 6 hours
Medium 140°F 1 to 6 hours
Medium Well 151°F 1 to 6 hours
Well Done 156°F 1 to 6 hours
Prime Rib Roast
Medium Rare 129°F 6 to 10 hours
Medium 136°F 6 to 10 hours
Medium Well 144°F 6 to 10 hours
Short Ribs 167°F 24 to 36 hours
Tenderloin Roast 131°F 3 to 6 hours
Brisket 140°F 24 to 48 hours
Conversion Table
Celcius Fahrenheit Celcius Fahrenheit Celcius Fahrenheit Celcius Fahrenheit Celcius Fahrenheit
45° 113° 55° 131° 65° 149° 75° 167° 85° 185°
46° 115° 56° 133° 66° 151° 76° 169° 86° 187°
47° 117° 57° 135° 67° 153° 77° 171° 87° 189°
48° 118° 58° 136° 68° 154° 78° 172° 88° 190°
49° 120° 59° 138° 69° 156° 79° 174° 89° 192°
50° 122° 60° 140° 70° 158° 80° 176° 90° 194°
51° 124° 61° 142° 71° 160° 81° 178°
52° 126° 62° 144° 72° 162° 82° 180°
53° 127° 63° 145° 73° 163° 83° 181°
54° 129° 64° 147° 74° 165° 84° 183°

Meat/Stew
1. Prepare your recipe. Then, place the food in the removable cooking pot and place the pot in the multi
pot.
2. Close the lid, then secure it by turning it counter-clockwise to lock it in place. Turn the Pressure Release
Valve (see Product Features) to Seal.
3. Press the MEAT/STEW button on the multi pot. P30 (30 minutes) will show on the LED display. Press the
plus and minus buttons (+) and (-) or the Cooking Time button to set the cooking time. Each time you
press the (+) or (-) buttons, the cooking time will increase by one minute. Hold buttons down to increase
or decrease the cooking time by 10 minutes.
4. When cooking is complete, the multi pot will beep. You can either wait to let the pressure release on its
own, or you may press the Instant Pressure Release Button for a quick release. Do not hold the Pressure
Release Valve (see Product Features) open.
Safety Note: Using the quick release method will release extremely hot steam into the air. This can cause
burns. Please use oven mitts to protect your hands and arms, and keep all body parts, including the face,
away from the steam vent.
5. Once the steam is released, carefully turn the lid clockwise to unlock it. Remove the removable cooking
pot using oven mitts for safety.
Safety Note: Never force the lid open. The lid will only release when the pressure is fully released.
6. If you do not remove the lid, the multi pot will automatically switch to KEEP WARM (66). You can press the
CANCEL button to turn the multi pot o.
Soup/Broth
1. Prepare your recipe. Then, place the food in the removable cooking pot and place the pot in the multi
pot.
2. Close the lid, then secure it by turning it counter-clockwise to lock it in place. Turn the Pressure Release
Valve (see Product Features) to SEAL on the multi pot.
3. Press the SOUP/BROTH button on the multi pot when the indicator light is flashing. P25 (25 minutes)
will show on the LED display. Press the plus and minus buttons (+) and (-) to set the cooking time. Each
time you press the (+) or (-) buttons, the cooking time will increase by one minute. Hold buttons down to
increase or decrease the cooking time by 10 minutes.
4. When cooking is complete, the multi pot will beep. You can either wait to let the pressure release on its
own, or you may press the Instant Pressure Release Button for a quick release. Do not hold the Pressure
Release Valve (see Product Features) open.
Safety Note: Using the quick release method will release extremely hot steam into the air. This can cause
burns. Please use oven mitts to protect your hands and arms, and keep all body parts, including the face,
away from the steam vent.
5. Once the steam is released, carefully turn the lid clockwise to unlock it. Remove the cooking pot using
oven mitts for safety.
Safety Note: Never force the lid open. The lid will only release when the pressure is fully released.
6. If you do not remove the lid, the multi pot will automatically switch to KEEP WARM (66). You can press the
CANCEL button to turn the multi pot o.
Slow Cooking
1. Prepare your recipe. Then, place the food in the removable cooking pot and place the pot in the multi
pot.
2. Close the lid, then secure it by turning it counter-clockwise to lock it in place. Turn the Pressure Release
Valve (see Product Features) to SEAL.

3. Press the SLOW COOKING button on the multi pot. 04:00 (4 hours) will show on the LED display. Press
the plus and minus buttons (+) and (-) to set the cooking time. Each time you press the (+) or (-) buttons,
the cooking time will increase by 0.5 hours. Maximum cooking time: 10 hours.
4. When cooking is complete, the multi pot will beep.
Note: Slow Cooking is limited to one temperature preset.
Steaming
1. Prepare your recipe. Fill your removable cooking pot with minimum 4 cups of water or until the integrated
measurements scale is lled up until 1 quarts of water.
2. Place your food into a stainless-steel steaming basket (not included) and place it into the removable
cooking pot Close the lid, then secure it by turning it counter-clockwise to lock it in place. Turn the
Pressure Release Valve (see Product Features) to SEAL.
3. Press the STEAMING button on the multi pot. P10 (10 minutes) will show on the LED display. Press the
plus and minus buttons (+) and (-) to set the cooking time. Each time you press the (+) or (-) buttons, the
cooking time will increase by one minute. Hold buttons down to increase or decrease the cooking time by
10 minutes.
4. When cooking is complete, the multi pot will beep. You can either wait to let the pressure release on its
own, or you may press the Instant Pressure Release Button for a quick release. Do not hold the Pressure
Release Valve (see Product Features) open.
Safety Note: Using the quick release method will release extremely hot steam into the air. This can cause
burns. Please use oven mitts to protect your hands and arms, and keep all body parts, including the face,
away from the steam vent.
5. Once the steam is released, carefully turn the lid clockwise to unlock it. Remove the removable cooking
pot/or the optional used steaming insert with oven mitts for safety.
Safety Note: Never force the lid open. The lid will only release when the pressure is fully released.
6. If you do not remove the lid, the multi pot will automatically switch to KEEP WARM (66). You can press the
CANCEL button to turn the multi pot o.
Sauté
1. Place the removable cooking pot in the multi pot. Do not close the lid.
2. Press the SAUTÉ button when the indicator light is flashing. P15 (minutes) will show on the LED display.
Press the plus and minus buttons (+) and (-) to change the time setting. The multi pot will beep 3 times
when it has reached the desired temperature setting.
3. Once the multi pot has reached the correct temperature and has beeped 3 times, place the food into the
removable cooking pot. Now, the timer will start counting down.
Rice
1. Measure the rice and water and place into the cooking pot. The maximum cooking capacity is 4 cups of
rice with 4 cups of water. Do not exceed this amount.
2. Close the lid, then secure it by turning it counter-clockwise to lock it in place. Turn the Pressure Release
Valve (see Product Features) to SEAL.
3. Press the RICE button. P12 (12 minutes) will show on the LED display. Press the plus and minus buttons
(+) and (-) to change the time setting. Then, wait 3 seconds. It will start cooking and the time will start
counting down.

4. When cooking is complete, the multi pot will beep. You can either wait to let the pressure release on its
own, or you may press the Instant Pressure Release Button for a quick release. Do not hold the Pressure
Release Valve (see Product Features) open.
Safety Note: Using the quick release method will release extremely hot steam into the air. This can cause
burns. Please use oven mitts to protect your hands and arms, and keep all body parts, including the face,
away from the steam vent.
5. Once the steam is released, carefully turn the lid clockwise to unlock it. Remove the cooking pot using
oven mitts for safety.
Safety Note: Never force the lid open. The lid will only release when the pressure is fully released.
6. If you do not remove the lid, the multi pot will automatically switch to KEEP WARM (66). You can press the
CANCEL button to turn the multi pot o.
Beans/Chili
1. Prepare your recipe. Then, place the food in the removable cooking pot and place the pot in the multi
pot.
2. Close the lid, then secure it by turning it counter-clockwise to lock it in place. Turn the Pressure Release
Valve (see Product Features) to SEAL.
3. Press the BEANS/CHILI button. P35 (35 minutes) will show on the LED display. Press the plus and minus
buttons (+) and (-) to change the time setting. Then, wait 3 seconds. It will start cooking and the time will
Safety Note: Using the quick release method will release extremely hot steam into the air.This can cause
burns. Please use oven mitts to protect your hands and arms, and keep all body parts, including the face,
away from the steam vent.
5. Once the steam is released, carefully turn the lid clockwise to unlock it. Remove the cooking pot using
oven mitts for safety.
Safety Note: Remember to never force the lid open. The lid will only release when the pressure is fully
released.
6. If you do not remove the lid, the multi pot will automatically switch to KEEP WARM (66). You can press the
CANCEL button to turn the multi pot o.
Multigrain
1. Prepare your recipe. Then, place the food in the removable cooking pot and place the pot in the multi
pot.
2. Close the lid, then secure it by turning it counter-clockwise to lock it in place. Turn the Pressure Release
Valve (see Product Features) to Seal.
3. Press the MULTIGRAIN button. P20 (20 minutes) will show on the LED display. Press the plus and minus
buttons (+) and (-) or the Cooking Time button to change the time setting. Then, wait 3 seconds. It will
start cooking and the time will start counting down.
4. When cooking is complete, the multi pot will beep. You can either wait to let the pressure release on its
own, or you may press the Instant Pressure Release Button for a quick release. Do not hold the Pressure
Release Valve (see Product Features) open.
Safety Note: Using the quick release method will release extremely hot steam into the air.This can cause
burns. Please use oven mitts to protect your hands and arms, and keep all body parts, including the face,
away from the steam vent.
5. Once the steam is released, carefully turn the lid clockwise to unlock it. Remove the cooking pot using
oven mitts for safety.
Safety Note: Remember to never force the lid open. The lid will only release when the pressure is fully
released.
6. If you do not remove the lid, the multi pot will automatically switch to KEEP WARM (66). You can press the
CANCEL button to turn the multi pot o.

Oatmeal
1. Add water to the removable cooking pot and place the pot in the multi pot. Do not close the lid.
2. Press the OATMEAL button. 00:05 (5 minutes) will show on the LED display. Press the plus and minus
buttons (+) and (-) to change the time setting. Then, wait 3 seconds. It will start warming up and the time
will start counting down.
3. Place the dry oatmeal into the cooking pot.
4. When cooking is complete, the multi pot will beep.
Eggs
1. If you are boiling the eggs, ll the removable cooking pot with enough water to immerse the eggs and
place the eggs in the water. Or, if desired, you can steam the eggs by placing them on a stainless steel
steaming basket with approximately one inch of water in the bottom of the cooking pot. Then, place the
pot in the multi pot.
2. Close the lid, then secure it by turning it counter-clockwise to lock it in place. Turn the Pressure Release
Valve (see Product Features) to Seal.
3. Press the EGGS button. 00:15 (15 minutes) will show on the LED display. Press the plus and minus
buttons (+) and (-) to change the time setting. Then, wait 3 seconds. It will start cooking and the time will
start counting down. A cooking time of 15 minutes will result in hard boiled eggs if you prefer so-boiled
eggs please set the time to 8 minutes.
4. When cooking is complete, the multi pot will beep. You can either wait to let the pressure release on its
own, or you may press the Instant Pressure Release Button for a quick release. Do not hold the Pressure
Release Valve (see Product Features) open.
Safety Note: Using the quick release method will release extremely hot steam into the air. This can cause
burns. Please use oven mitts to protect your hands and arms, and keep all body parts, including the face,
away from the steam vent.
5. Once the steam is released, carefully turn the lid clockwise to unlock it. Remove the cooking pot using
oven mitts for safety.
Safety Note: Remember to never force the lid open. The lid will only release when the pressure is fully
released.
6. If you do not remove the lid, the multi pot will automatically switch to KEEP WARM (66). You can press the
CANCEL button to turn the multi pot o.
Yogurt
1. Prepare your yogurt recipe in the removable cooking pot, or in yogurt cups and place the pot in the
pressure cooker.
2. Secure the lid onto the unit, turn it anti-clockwise to lock it properly in place. Turn the Pressure Release
Valve (see Product Features) to SEAL. Press the COOKING MODE button until the YOGURT function is
selected. 10:00 will show on the LED display to indicate 10 hours. You may press the (+) and (-) button
to reach the desired time. Aer 3 seconds, it will start the program. It will start counting down aer the
target temperature has been reached.
NOTE: This function can only be used to make Yogurt
Ferment
1. Prepare the dough and put it in the removable cooking pot and place it in the multi pot.
2. Secure the lid onto the unit, turn it anti-clockwise to lock it properly in place. Turn the Pressure Release
Valve (see Product Features) to RELEASE.

3. Press the COOKING MODE button until the FERMENT function is selected. 3:00 will show on the LED
display to indicate 3 hours. Aer 3 seconds, it will start fermenting. It will start counting down aer the
target temperature has been reached.
NOTE: This function can only be used to Ferment dough, kimchi and sauerkraut
Sterilize
HIGH TEMPERATURE STERILIZATION (WITHOUT WATER)
IMPORTANT NOTE: This function is limited only for all stainless-steel cutlery or tableware. (NO PLASTICS OR
SILICONE)
1. Place the items you want to sterilize in the removable cooking pot and place it into the multi pot.
2. Close the lid, then secure it by turning it counter-clockwise to lock it in place. Turn the Pressure Release
Valve (see Product Features) to SEAL.
3. Press the COOKING MODE button until the STERILIZE function is selected.
P02 (2 minutes) will show on the LED display. Press the plus and minus buttons (+) and (-) to change the
time setting. Aer 3 seconds, it will start heating up and the time will start counting down when the target
temperature is reached ((120C (248F).))
NOTE: THIS IS HIGH TEMPERATURE STERILIZATION. DO NOT PUT WATER DURING THIS PROCESS. DO NOT
STERELIZE MATERIALS OTHER THAN STAINLESS STEEL INCLUDING BUT NOT LIMITED TO: PLASTIC, WOOD
OR SILICONE. THIS PROGRAM DOES NOT MEET THE STANDARTS FOR MEDICAL STERILIZATION.
4. When the sterilization process is complete, the multi pot will beep. Do not hold the Pressure Release
Valve (see Product Features) open.
5. Once the temperature falls, carefully turn the lid clockwise to unlock it. Remove the cooking pot using
oven gloves to protect hands, arms, face and other body parts against high heat.
Safety Note: Remember to never force the lid open.
6. If you do not remove the lid, the multi pot will automatically switch to KEEP WARM (66). You can press the
CANCEL button to switch the multi pot o.
Cake
1. Prepare your cake recipe and place it in the removable cooking pot. Place the cooking pot in the multi
pot
2. Close the lid, then turn it counter-clockwise to lock it in place. Turn the Pressure Release Valve (see
Product Features) to SEAL.
3. Press the COOKING MODE button until the CAKE function is selected. P48 (48minutes) will show on the
LED display. Press the plus and minus buttons (+) and (-) to change the time setting. Aer 3 seconds, it
will start heating up and once the target temperature is reached, time will start counting down.
4. When the cake is done baking, the multi pot will beep.
NOTE: This function can be only used with well-mixed batters.
Baking
1. Prepare your baking recipe and place it in the removable cooking pot. Place the pot in the multi pot.
2. Close the lid, then turn it counter-clockwise to lock it in place. Turn the Pressure Release Valve (see
Product Features) to SEAL.
3. Press the COOKING MODE button until the BAKING function is selected. P30 (30 minutes) will show on
the LED display. Press the plus and minus buttons (+) and (-) to change the time setting. Aer 3 seconds,
it will start heating up and once the target temperature is reached, the time will start counting down.
5. When baking is completed, the multi pot will beep.
NOTE: This function can be only used with well-mixed batters.

Chicken
IMPORTANT NOTE: DO NOT USE THIS PROGRAM WITH EXESSIVE LIQUIDS
1. This is a fast and easy way to bake chicken. Prepare your recipe and place it in the removable cooking
pot. Place the removable cooking pot in the multi pot.
2. Close the lid, then turn it counter-clockwise to lock it in place. Turn the Pressure Release Valve (see
Product Features) to SEAL.
3. Press the COOKING MODE button until the CHICKEN function is selected. P13 (13 minutes) will show on
the LED display. Press the plus and minus buttons (+) and (-) to change the time setting. Aer 3 seconds.
It will start cooking and once the target temperature is reached, the time will start counting down.
4. When cooking is complete, the multi pot will beep
Safety Note: Please use oven mitts to protect your hands and arms, and keep all body parts, including
the face, away from the steam vent.
5. Once the steam is released, carefully turn the lid clockwise to unlock it. Remove the cooking pot using
oven mitts for safety.
6. If you do not remove the lid, the multi pot will automatically switch to KEEP WARM (66). You can press the
CANCEL button to turn the multi pot o.
Delay Time Setting Instructions “PRESET BUTTON”
The multi pot has a delay timer function of up to 24 hours. Timer is recommended to be set to less than 12
hours. In case of a longer programmed delay time, perishable foods may not stay fresh.
1. This function can be used to delay the start of the cooking time from 1/2 hour to 24 hours by repeatedly
pressing the “+” / “-“buttons to adjust the preset time.
2. Example: If you wish to switch on the multi pot automatically in 3 hours, press the PRESET button,
pressing “+” until the LEC screen displays 03:00. The time interval is 0.5 hour. The maximum delay time is
24 hours.
3. Once the timer and program are selected, waiting for 3 seconds, the program button will illuminate, and
the unit will start counting down.
CAUTION: Perishable foods such as meat, poultry, sh, cheese and other dairy products cannot be le at
room temperature for more than 2 hours or no longer than 1 hour if the room temperature is above 89ºF
(32ºC).
Cooking Time Setting Instructions
The cooking time is the amount of time the pot cooks the food aer the inside pressure reaches the desired
level. The “Cooking Time” button oers you the option to further customize the cook time depending on the
quantity of food and fluid in the pot. The cooking time can also be set based on your own preference for the
desirable texture and the tenderness of the food. Generally, the more quantity of food and fluid are put in the
pot, the more time it requires to fully cook.
1. Follow the steps listed in Operating Instructions.
2. Press the “Cooking Time” button to set the cooking time. Every time the “+” or “-” button is pressed, the
cooking time is increased or decreased by 1 minute. Repeatedly press the “+” or “-” button until it reaches
the desirable amount of time in minutes.
If the delayed time function is required, press the “Preset” button to set the delay time value within 5
seconds of the last time the button was pressed. Refer to delay time instructions for setting the delay
time.
3. Cooking completed. There is an audible beep when cooking is completed, the red “Cooking Time”
indicator light comes o, and the yellow indicator light on the “Keep Warm” button comes on. The cooker
automatically goes into keep warm state. If keep warm is not needed, press the “Keep Warm/Cancel”
button to cancel the “Keep Warm” function. Open the lid according to the Safe Lid Opening Instructions.
Refer to Safe Lid Opening Instructions.

“Keep Warm” Function
Aer cooking, the selected cooking function indicator light (red) will come o and the cooker will give an
audible beep. The yellow “Keep Warm” indicator light will turn on to indicate that the cooker started the
“Keep Warm” function. In standby mode, the “Keep Warm” function can be started by pressing the “Keep
Warm/Cancel” button. The “Keep-Warm” state temperature is 140-176ºF (60-80ºC). Keeping the food warm
for a long time is not recommended, as it may negatively aect the texture or the taste of the food.
Lock Function
Use this function to lock all buttons to prevent children from using the multi pot. Press the LOCK button one
time to lock it. Unlock by holding down the LOCK button for 3 seconds.
Cleaning and Maintenance
1. Unplug the power cord before cleaning.
2. Clean the outer body with a so cloth such as a paper towel or microber cloth. Do not immerse the
outer body in water or pour water into it.
3. Remove and clean the condensation collector, then re-install it. Clean the center ring with a wet towel.
4. Rinse the underside of the lid with water including the rubber gasket, pressure release valve, anti-block
shield, air escape, and float valve. Dry completely.
5. To clean the cooking pot by hand, use a sponge or a so non-metal brush and wipe. Regular care or
maintenance is essential in ensuring that this product is safe for use.
Warranty
Fissler customer service is happy to answer any product usage or warranty questions:
E-mail: cs@sslerusa.com or text/call (704) 842-9608.
Please reach out to us rst before contacting your retailer/store where you bought the product.
Fissler America, Inc.
Tel: 704 842-9608
Email: cs@sslerusa.com
Limited 12 Month Warranty: Householduse only
Validity
The Warranty does not cover damage to the product resulting from accident, alteration, abuse, or misuse.
The warranty will be considered invalid if:
Product has not beewwell.)
• any attachments not recommended by the manufacturer have been used on the product.
• product is used for other than family household use or subjected to any voltage and waveform other than
120V/60Hz.

Indicator code Indicator code Reasons
E1 Broken circuit of the sensor
E2 Short circuit of the sensor
E3 Over heating
E4 Pressure switch malfunction
S/N Symptom Possible Reasons Solutions
1 Lid does not lock
The rubber gasket is not properly
installed Reinstall the rubber gasket
The Floating Valve is seized by the
push rod Push the rod with your hands
2
Cannot open
the lid aer air
exhaust
The Floating Valve is still open Press the Floating Valve down
3Air escapes from
the rim of the lid
rubber gasket was not installed Install the rubber gasket
Food residue on rubber gasket Clean the rubber gasket
Rubber gasket worn out Replace the rubber gasket
Lid not locked properly Rotate the lid fully
4Air escapes from
the float valve
Food stuck on the rubber gasket of the
float valve Clean the rubber gasket
The rubber gasket on the float valve
worn out
Replace the rubber gasket
5The float will not
rise
Not enough food and water Check recipe for proper
quantity
Air escaping from the rim of the lid and
the pressure limit valve
Call the Consumer Service
Center
When the following circumstances take place Solutions
Power cord and plug suer from expansion,
deformation, discoloration, damages, etc.
Stop using the product immediately; contact Fissler
customer service.
A portion of power cord or the plug gets hotter
than usual.
Electric pressure cooker heats abnormally,
emitting a burnt smell.
Power cord and plug suer from expansion,
deformation, disco- loration, damages, etc.
There is dust or dirt on the plug or socket. Remove dust or dirt with a dry brush.
Troubleshooting
Warning: Any other servicing should be performed by an authorized service

souspreme multi pot
USER MANUAL
Fissler America, Inc.
103 Paradise Hills Circle, Mooresville, NC 28115 USA
Tel: 704 842-9608, Email: cs@sslerusa.com
Other manuals for souspreme multi pot
1
Table of contents
Other Fissler Electric Pressure Cooker manuals

Fissler
Fissler vitaquick User manual

Fissler
Fissler Vitavit Edition Design User manual

Fissler
Fissler vitacontrol User manual

Fissler
Fissler blue-point User manual

Fissler
Fissler souspreme multi pot User manual

Fissler
Fissler vitavit User manual

Fissler
Fissler Vitavit Royal User manual

Fissler
Fissler blue-point User manual