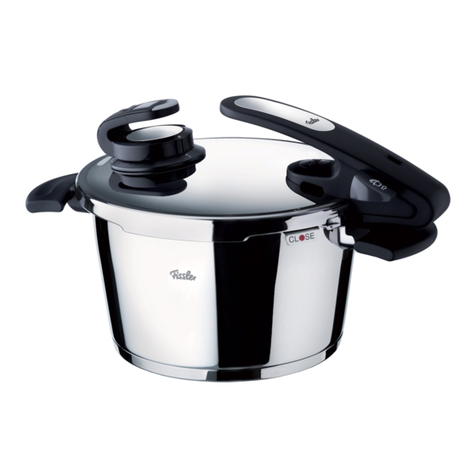
Fissler vitacontrol User manual

Freu dich aufs Kochen.
vitacontrol
vitacontrol
Fissler vitacontrol Fissler vitacontrol
Fissler GmbH, Harald-Fissler-Str.1, 55743 Idar-Oberstein, Germany
Tel. +49 6781-403-0, Fax. +49 6781-403-321
www.fissler.de, www.fissler.com
0610/10/BAST
148 mm
A
DGebrauchsanleitung Seite 1-13
GInstructions for Use Page 14-26
FMode d’emploi Page 27-39
nHandleiding Pagina 40-52
IIstruzioni per l’uso Pagina 53-65
EInstrucciones de uso Página 66-78
PManual de utilização Página 79-91
g92-104
TKullanım kılavuzu Sayfa 105-117
q118-130
SBruksanvisning Sidan 131-143
kInstrukcja obsługi Strona 144-156
aNávod k použití Seznam 157-169
a184-172
CZ
ARA
2–ﺔﻣﻼﺴﻟا تادﺎﺷرإ
ماﺪﺨﺘﺳﻻا ﻞﻴﻟد
1-ﻂﻐﻀﻟا ﺔﻠﺣ ماﺪﺨﺘﺳا ﻞﺒﻗ ﻞﻣﺎﻜﻟﺎﺑ تادﺎﺷرﻹا ﻊﻴﻤﺟو ماﺪﺨﺘﺳﻻا ﻞﻴﻟد ةءاﺮﻗ ءﺎﺟﺮﺑvitavit®
ماﺪﺨﺘﺳﻻا نأ ﻚﻟذ ،
ﻟﻖﺑﺎﻄﻤﻟا ﺮﻴﻏأثوﺪﺣ ﻰﻟإ يدﺆﻳ ﺪﻗ تﺎﻤﻴﻠﻌﺘﻠراﺮﺿ.
2–ﺺﺨﺷ يﻷ ﻂﻐﻀﻟا ﺔﻠﺣ كﺮﺘﺗ ﻻﻞﺒﻗ ﻦﻣ ماﺪﺨﺘﺳﻻا ﻞﻴﻟد ﻰﻠﻋ ﻊﻠﻄﻳ ﻢﻟ.
3–ﻻﻲﻄﻌﺗماﺪﺨﺘﺳﻻا ﻞﻴﻟد ﻊﻣ ﻻإ ﺮﻴﻐﻠﻟ ﻂﻐﻀﻟا ﺔﻠﺣ.
مﺪﺨﺘﺴﺗ
ﻒﻠﺘﻠﻟ ضﺮﻌﺘﺗﻞﻌﻔﺑﺟردتﺎﺔﻴﻟﺎﻌﻟا ةراﺮﺤﻟا.
7–ًﺎﻤﺋاد ﻂﻐﻀﻟا ﺔﻠﺣ ﻲﻓ مﺎﻌﻄﻟا ﻲﻠﻗ ﺐﺠﻳﻊﺿو نوﺪﺑءﻞﻣ ﻢﺘﻳ نأ ﻰﻠﻋ ،ءﺎﻄﻐﻟاﻒﺼﻧﺔﻠﺤﻟاﺑنﻮهﺪﻟﺎﻰﺼﻗأ ﺪﺤﺑ.
ﻂﻐﺿ ﺖﺤﺗ ًا ﺪ ﺑ أ مﺎﻌﻄﻟا ﻲﻠﻘﺑ ﻢﻘﺗ ﻻ.
8–ﻂﻐﻀﻟا ﻞﻠﺣ ماﺪﺨﺘﺳا زﻮﺠﻳ ﻻﻳأ ﻲﻓﺔًﺔﺻﺎﺧو ،ﺔﻴﺒﻃ ضاﺮﻏأﺑﻖﻠﻌﺘﻳ ﺎﻤﻴﻓﺎﻬﻣاﺪﺨﺘﺳﺎةادﺄآًا ﺮ ﻈ ﻧ ﻚﻟذو ،ﻢﻴﻘﻌﺘﻠﻟ
نﻷﻂﻐﻀﻟا ﻞﻠﺣﺔﻤﻤﺼﻣ ﺮﻴﻏﻟﺗ ﻲﻜﺐﺳﺎﻨﺘﻊﻣدﺔﻣزﻼﻟا ﻢﻴﻘﻌﺘﻟا ةراﺮﺣ ﺔﺟر.
9–رﻮﻴﺒﻟا حﺎﻔﺘﻟا ﺮﻴﻀﺤﺗ زﻮﺠﻳ ﻻتﻮﺒﻤﻜﻟاو ﻪﻳﻂﻐﻀﻟا ﺔﻠﺣ ﻲﻓﺪﻗ ﻲﺘﻟا رﺎﺨﺒﻟا تﺎﻋﺎﻘﻓ ﻦﻣ ةﺮﻴﺒآ ﺔﻴﻤآ نﻮﻜﺘﻟ ًا ﺮ ﻈ ﻧ ،
رﻮﻔﺗﻟا ﺢﺘﻓ ﺪﻨﻋﺔﻠﺤﻞﺑﺪﻗوﺗﻰﻟإ ًﺎ ﻀ ﻳ أ يدﺆقوﺮﺤﺑ ﺔﺑﺎﺻﻹا.
10–ﺪﻠﺠﻟﺎﺑ ﻢﺤﻠﻟا ﻲﻬﻄﺑ ﺖﻤﻗ اذإ)لﺎﺜﻤﻟا ﻞﻴﺒﺳ ﻰﻠﻋ:نﺎﺴﻟﻟارﻮﺜ(ﺒﻓ ،ﻂﻐﻀﻟا ﺮﻴﺛﺄﺗ ﺖﺤﺗ ﺦﻔﺘﻨﻳ ﺪﻗ يﺬﻟاومﺪﻋ ءﺎﺟﺮ
ﺧﺎﻔﺘﻧا ﺪﻨﻋ ﻢﺤﻠﻟا ﺰﺧوقوﺮﺤﺑ ﺔﺑﺎﺻﻺﻟ ﺖﺿﺮﻌﺗ ﻻإو ،ﻪ.
ﺔﻧﺎﻴﺼﻟاو ﺔﻣﻼﺴﻟا
11–ﺮﻴﻏو ﺔﻴﻔﻴﻇو ةءﺎﻔﻜﺑ ﻞﻤﻌﺗو ﺔﻔﻟﺎﺗ ﺮﻴﻏو ﺔﻤﻴﻠﺳ ﺔﻣﻼﺴﻟا تاﺰﻴﻬﺠﺗو تﺎﻣﺎﻤﺼﻟا ﻊﻴﻤﺟ نأ ماﺪﺨﺘﺳا ﻞآ ﻞﺒﻗ ﺪآﺄﺗ
ﺔﺨﺴﺘﻣ.ﻪﻧأ ﺚﻴﺣﻚﻟذ ﻦﻣ كﺪآﺄﺘﺑ ﻻإ ﺔﻨﻣﻵا ﻞﻤﻌﻟا ﺔﻘﻳﺮﻃ نﺎﻤﺿ ﻦﻜﻤﻳ ﻻ.تاذ تﺎﻣﻮﻠﻌﻤﻟا ﻰﻠﻋ عﻼﻃﻻا ﻚﻨﻜﻤﻳ
ﻲﻓ ﺔﻠﺼﻟاﺲﻣﺎﺨﻟا ﻞﺼﻔﻟا.
12-ﺑﻢﻘﺗ ﻻﻂﻐﻀﻟا ﺔﻠﺣ ﻰﻠﻋ تﻼﻳﺪﻌﺗ ﺔﻳأ ءاﺮﺟﺈ.ﻲﻓ ﻻإ صﻮﺼﺨﻟا ﻪﺟو ﻰﻠﻋ نﺎﻣﻷا تاﺰﻴﻬﺠﺗ ﻊﻣ ﻞﻣﺎﻌﺘﺗ ﻻو
ماﺪﺨﺘﺳﻻا ﻞﻴﻟد ﻲﻓ ﺎﻬﻴﻠﻋ صﻮﺼﻨﻤﻟا ﺔﻧﺎﻴﺼﻟا تاءاﺮﺟإ ءﻮﺿ.وتﺎﻣﺎﻤﺼﻟا ﻢﻴﺤﺸﺘﺑ ﻢﻘﺗ ﻻ.
13–لﺪﺒﺘﺳاﺮﺴﺘﻟا ﻊﻨﻣ ﺔﻘﻠﺣ ﻞﺜﻣ ﺔﻔﻟﺎﺘﻟا ءاﺰﺟﻷابﻴﻃﺎﻄﻤﻟا ءاﺰﺟﻷاوةرﻮﺼﺑ ﺔﻴﻠﺻﻷا ﺮﻠﺴﻓ رﺎﻴﻏ ﻊﻄﻘﺑ ىﺮﺧﻷا ﺔ
ﻲﻟاﻮﺣ ﺪﻌﺑ ﺔﻤﻈﺘﻨﻣ400ماﺪﺨﺘﺳﻻا ﻦﻣ ﻦﻴﻣﺎﻋ روﺮﻣ ﺪﻌﺑ ﺮﻳﺪﻘﺗ ﻰﺼﻗأ ﻰﻠﻋ وأ ﻲﻬﻄﻟا ﻦﻣ ةﺮﻣ.ﺎﻣأءاﺰﺟﻸﻟ ﺔﺒﺴﻨﻟﺎﺑ
بﻮﻴﻋ ﻰﻠﻋ يﻮﺘﺤﺗ ﻲﺘﻟاةﺮهﺎﻇ)لﺎﺜﻤﻟا ﻞﻴﺒﺳ ﻰﻠﻋ:تﺎهﻮﺸﺗ وأ ناﻮﻟﻷا ﻲﻓ ﺮﻴﻐﺗ وأ تﺎﻗﺰﻤﺗ(ﻻﻲﺘﻟا وأﻦﻜﻤﻳ
ﺖﺑﺎﺛ ﻞﻜﺸﺑ ﺎﻬﻌﺿورﻮﺼﺑ،ﺔﺤﻴﺤﺻ ةرﻮﻔﻟا ﻰﻠﻋ ﺎهﺮﻴﻴﻐﺗ ﺐﺠﻳ.يدﺆﻳ فﻮﺳ ،تﺎﻤﻴﻠﻌﺘﻟا ﻩﺬﻬﺑ ماﺰﺘﻟﻻا مﺪﻋ ﺔﻟﺎﺣ ﻲﻓو
ﻰﻟإ ﻚﻟذﺑ راﺮﺿﻹاﻟﺔﻴﻔﻴﻇﻮﻟا ةءﺎﻔﻜﻟﺎﻂﻐﻀﻟا ﺔﻠﺤﺎﻬﺘﻣﻼﺳو.
14
–ﺔﻴﻠﺻﻷا ﺮﻠﺴﻓ رﺎﻴﻏ ﻊﻄﻗ ىﻮﺳ رﺎﻴﻏ ﻊﻄﻗ ﺔﻳأ مﺪﺨﺘﺴﺗ ﻻ.ﺲﻔﻧ ﻦﻣ ءﺎﻄﻐﻟاو ﺔﻠﺤﻟا ماﺪﺨﺘﺳا ًﺎﻀﻳأ ﺐﺠﻳ ﺎﻤآ
ﻮﺼﺨﻟا ﻪﺟو ﻰﻠﻋ ﻞﻳدﻮﻤﻟاﺬآو ،صﻚﻟﻟﺔﺒﺴﻨﻟﺎﺑ نﺄﺸﻟاﻢﻜﺑ ﺔﺻﺎﺨﻟا ﺔﻠﺤﻟا ﻞﻳدﻮﻣ ﻲﻓ ىﺮﺧﻷا رﺎﻴﻐﻟا ﻊﻄﻘ.)ﺮﻈﻧا
ﺮﺸﻋ ﻲﻧﺎﺜﻟا ﻞﺼﻔﻟا(
English ﻲﺑﺮﻋ
1
١
2 ٢
7 ٧
8 ٨
9 ٩
10 ١٠
11 ١١
12 ١٢
13 ١٣
14 ١٤
15 ١٥
16 ١٦
17 ١٧
18 ١٨
19 ١٩
20 ٢٠
21 ٢١
22 ٢٢
23 ٢٣
24 ٢٤
25 ٢٥
26 ٢٦
27 ٢٧
28 ٢٨
29 ٢٩
30 ٣٠
-
English ϲΑήϋ
1 ˺
2 ˻
3 ˼
4 ˽
5 ˾
6 ˿
7
8
9
10 ˺˹
11 ˺˺
12 ˺˻
13 ˺˼
14 ˺˽
15 ˺˾
16 ˺˿
17 ˺
18 ˺
19 ˺
20 ˻˹
21 ˻˺
22 ˻˻
23 ˻˼
24 ˻˽
25 ˻˾
26 ˻˿
27 ˻
28 ˻
29 ˻
30 ˼˹
English ϲΑήϋ
1 ˺
2 ˻
3 ˼
4 ˽
5 ˾
6 ˿
7
8
9
10 ˺˹
11 ˺˺
12 ˺˻
13 ˺˼
14 ˺˽
19 ˺
20 ˻˹
21 ˻˺
22 ˻˻
23 ˻˼
24 ˻˽
25 ˻˾
26 ˻˿
27 ˻
28 ˻
29 ˻
30 ˼˹
12
3
4
56
100544fissler timer SKT Um.indd 1 08.06.10 14:09

Fissler vitacontrol Fissler vitacontrol Fissler vitacontrol
B C
F G
D E
HI
L M
J K
NO
P Q
Fissler vitacontrol
Dieses Produkt erfüllt dieVorgaben der EG-Richtlinie über die Elek-
tromagnetischeVerträglichkeit und der entsprechenden Normen:
2004/108/EG
DIN EN 55014-1
DIN EN 55014-2
Die Konformität mit diesen Regelungen wird durch das CE-Kennzei-
chen bestätigt.
This product complies with the provisions of the harmonized EC Directive
for electromagnetic compatibility and the appropriate standards:
2004/108/EG
DIN EN 55014-1
DIN EN 55014-2
The conformity to this regulations is indicated by the CE-marking.
100544fissler timer SKT Um.indd 2 08.06.10 14:10

14
We are delighted that you have
chosen this product from Fissler.
The electronic cooking assistant is ideal
for use with the vitavit®premium and
vitavit®edition pressure cookers.When
placed on the cooker, it monitors the
position of the traffic light indicator to
obtain important information about how
the cooking process is going.The Fissler
cooking assistant, with an additional visual
and audible signal, helps you to
control your stove and therefore adjust
the cooking temperature.The integra-
ted timer starts automatically once the
desired cooking temperature is reached
and tells you when the food is ready.The
functions of the Fissler cooking assistant
are described in detail below.
Contents
1. Safety notes
2. Description of the cooking
assistant
3. Before first use
4. Using the cooking assistant
5.Additional functions
6. Notes on care, spare parts and
disposal
7. Questions and answers
8.Warranty and service
GInstructions for use
100544fissler_02_timer_SKT_gb.indd 14 02.06.2010 13:13:38 Uhr

15
DGB
F
NLIEPGRTRRUSSPLCZARA
1. Safety notes
• Beforeusingthisproductforthersttime,pleasereadtheseinstructionsforuse
through carefully, paying particular attention to the safety notes. If you are giving
the cooking assistant to anyone else to use, please ensure you also give them
these instructions for use.
• Keepthecookingassistantoutofthereachofchildren(riskofswallowingthe
battery).
• IftheLCdisplaybecomesdamaged,takecaretoavoidinjuryfromglasssplinters.
Ensure that the liquid crystals do not come into contact with the skin, eyes or
mouth.
• Thebatterysuppliedisnotrechargeable.Whenchangingthebattery,ensure
that you do not injure yourself on the battery contacts. Batteries can leak. If
battery fluid should come into contact with your hands or clothes, wash the
affected areas with water immediately. If you should get battery fluid into your
eyes, rinse the eyes immediately with water and seek medical advice. Batteries
must never be damaged, pierced or thrown onto an open fire. Batteries must
only be replaced with batteries of the type described in these instructions for
use.
• Whenmounting,usingandremovingthecookingassistant,beawarethatthe
surfaces of your pressure cooker become hot during operation! Only touch the
handles and control elements.
Important information
Do not use the Fissler cooking assistant near magnetic fields, since these can inter-
fere with its function.The cooking assistant can be used on induction hobs without
problems.
Safety notes
100544fissler_02_timer_SKT_gb.indd 15 02.06.2010 13:13:38 Uhr
16
Description of the cooking assistant
2. Description of the cooking assistant
Figure A
1. LED field
-Indicatesreadinessforoperation(ashingblue)
-Displayswhenthestoveneedstobeturneddown(ashingyellow)
- Displays when the desired cooking temperature has been reached
(ashinggreen)
-Warnswhenthetemperatureinthecookeristoohigh(ashingred)
2. Display
- Displays the set and remaining cooking time
- Displays a flashing clock symbol when the timer is running
- Displays a battery symbol when the battery needs to be changed
- Displays a service symbol when the pressure cooker’s gaskets need to
be replaced
3. Operating buttons /
- For setting the cooking time
4. Operating button
- For switching the cooking assistant on and off
- For starting and stopping the timer
- For cancelling the audible signals
5. Battery compartment
- For inserting a suitable button cell battery
6. Clamping arm
- For securing the cooking assistant onto the control valve
100544fissler_02_timer_SKT_gb.indd 16 02.06.2010 13:13:39 Uhr

17
DGB
F
NLIEPGRTRRUSSPLCZARA
3. Before first use
First insert the enclosed battery as described in section 6.
The Fissler cooking assistant switches on and the display shows: .
You can now use the and buttons to specify the type of stove you have.The
following settings are possible:
=Electricstovewithceramicglasspanel(radiant/halogen)
= Gas or induction hob
= Solid hotplate
Conrmtheselectionbypressingthebutton.
Note:
This setting changes the time of the signal to reduce the heat of the stove
(LEDs flashing yellow).The default setting (1) is optimised for ceramic glass hobs.The
“solid hotplate” setting (3) emits a signal earlier, since the retained heat of the hotplate
is very high and the response time is therefore slower.The “gas / induction” setting (2)
emits the signal later, since these systems can respond very quickly.
You can change the stove type setting at any time by removing the battery, waiting
around 15 seconds and then re-inserting it.
Before first use
100544fissler_02_timer_SKT_gb.indd 17 02.06.2010 13:13:40 Uhr

18
4. Using the cooking assistant
Figure B
Switch on the cooking assistant by holding the button down.
The display shows .
FigureC
You can now use the and buttons to set the desired cooking time
(maximum99minutes).Holdingthebuttondownactivatesquickmode.
Note:
You can change the cooking time at any point until the timer is started.
If you wish to change the cooking time after the timer has started, you must first stop
the timer by pressing the button.You can then change the cooking time and restart
the timer by pressing the button again.
You can also use the cooking assistant without specifying a cooking time. In these
situations, only the signals for controlling the stove will be displayed.
Figure D
Fasten the cooking assistant onto your pressure cooker.To do this, push the
clamping arm sideways onto the control valve.
Using the cooking assistant
100544fissler_02_timer_SKT_gb.indd 18 02.06.2010 13:13:41 Uhr

19
DGB
F
NLIEPGRTRRUSSPLCZARA
Note:
With the cooking assistant positioned on the pressure cooker, move the lid carefully and
do not turn it upside down.
Figure E
TheblueashingLEDsindicatethatthecookingassistanthasdetectedthe
pressure cooker’s traffic light indicator and is ready for operation.
Note:
If you now heat your pressure cooker (see your pressure cooker’s instructions for use,
section 6), pressure builds up and the traffic light indicator begins to rise.
Figure F
TheyellowashingLEDs,alongwithtwoshortsinglebeeps(repeating)indicate
that the desired cooking temperature has almost been reached, and that the
stoveshouldnowbeturneddown(toaround1/3ofitspower.Seeyourpressure
cooker’s instructions for use, section 5).
Figure G
GreenashingLEDs,alongwithtwolongsinglebeeps,indicatethatthedesired
cooking temperature has been reached and that the cooking time is starting.The
timer is started automatically, which can be recognised from the flashing symbol
in the display.
Note:
The cooking time counts down in minutes, so that the display always shows the
remaining cooking time.The last minute is displayed in seconds.
Using the cooking assistant
100544fissler_02_timer_SKT_gb.indd 19 02.06.2010 13:13:42 Uhr

20
As soon as the timer starts, the Fissler cooking assistant can also be removed from the
pressure cooker and will continue to display the remaining cooking time and end of
cooking time.The cooking assistant can only emit the signals for controlling the stove
when it is positioned on the pressure cooker, however.
FigureH
Shouldthetemperatureinthecookerexceedthedesiredcookingtemperature,
thisisindicatedbytheLEDsashingred,alongwithfourshortsinglebeeps(re-
peating). Please reduce the heat on the stove further.
Note:
If the temperature continues to rise, the safety valve will automatically start to release
steam and limit the temperature.
By reducing the heat on your stove in good time and to a sufficient degree, you can
avoid this situation, which causes liquid and energy, as well as possible nutrients and
flavours, to be lost.
Figure I
Oncethecookingtimeiscomplete,thisisindicatedbyalongsinglebeep(re-
peating).The display shows and the symbol stops flashing.
Holdingthe, button down switches the cooking assistant off. Otherwise, the
device will switch itself off automatically after 15 minutes.
Figure J
Remove the cooking assistant before releasing the pressure and opening the pres-
sure cooker.To do this, slide it off the control valve.
Using the cooking assistant
100544fissler_02_timer_SKT_gb.indd 20 02.06.2010 13:13:43 Uhr

21
DGB
F
NLIEPGRTRRUSSPLCZARA
Using the cooking assistant
Note:
If you only place the Fissler cooking assistant on the pressure cooker once the cooking
process has started, or if you wish to enter several different cooking times one after the
other for cooking a whole meal, please note the following:
The timer will only start automatically if the cooking assistant has been placed on
the pressure cooker and a cooking time has been set BEFORE the desired cooking
temperature (green ring on the traffic light indicator or green flashing LEDs) has been
reached.
If the desired cooking temperature has already been reached and the cooking assistant
is only placed on the pressure cooker at that point, or if the cooking time is changed or
reset, the timer can be started manually by pressing the button.
Once the set cooking time has expired, pressing the button takes you back to the
setting mode for the cooking time timer and you can enter a new cooking time.
100544fissler_02_timer_SKT_gb.indd 21 02.06.2010 13:13:44 Uhr

22
Additional functions
5. Additional functions
Battery display
FigureK
If the display shows the symbol, the battery’s remaining power is only
sufficient for a few more cooking operations.The battery should be replaced with
anewonebeforethedeviceisnextused.
Service display
FigureL
If the display shows the symbol, the silicone gasket and other rubber parts
ofyourpressurecookermustbereplaced(seeyourpressurecooker’sinstructions
for use, section 12).This reminder is issued every 400 cooking operations or by no
later than 2 years after the Fissler cooking assistant was used for the first time.
Figure M
Once maintenance has been completed, the service display can be reset by
simultaneously pressing the and buttons for 5 seconds.The display
disappears.
Setting the audible signals
All audible signals can be prematurely halted by pressing the button.The signals
can however also be completely disabled or their volume modified.
100544fissler_02_timer_SKT_gb.indd 22 02.06.2010 13:13:45 Uhr

23
DGB
F
NLIEPGRTRRUSSPLCZARA
Figure N
By simultaneously pressing the and buttons for around one second, you can
activate mute mode. appears in the display for around 2 seconds as
confirmation.
Figure O
The audible signals can be re-enabled by simultaneously pressing the and
buttons again. appears in the display for around 2 seconds.
Note:
The volume can be adjusted by simultaneously pressing the and buttons for longer.
First, the display appears for around 2 seconds as confirmation that the audible
signals are activated, then the volume default setting appears. Holding both buttons
down for longer starts the scrolling through the possible volume settings from 1 to 10
(10 = maximum volume). Releasing the buttons enables you to select the volume
setting currently being displayed.
Adaptation of the reduce heat signal to the type of cooker
See the section entitled “Before first use”
Use as a kitchen timer
The Fissler cooking assistant can also be used as a kitchen timer separately from
the pressure cooker.
The device is switched on and the cooking time set in the same way as described
above.The timer start is confirmed manually by pressing the button.The end
ofthesetcookingtimeisindicatedbyalongsinglebeep(repeating).Noneofthe
other audible and visual signals described above are displayed.
Additional functions
100544fissler_02_timer_SKT_gb.indd 23 02.06.2010 13:13:46 Uhr

24
6. Notes on care, spare parts and disposal
Care
• TheFisslercookingassistantissplashproof,butnotwaterproof!Neverwashthe
device in water, under running water or in the dishwasher. If water is sprayed
onto the surface, wipe it off immediately.
• Donotuseanyabrasiveoraggressivecleaningagents.To clean,simplywipewith
a damp cloth.
• DonotexposeyourFisslercookingassistanttodust,steam,strongsunlight,high
temperature or severe shocks.
Changing the battery
If the symbol appears on the display, the battery needs to be replaced. Only
conventionallithiumbuttoncellsoftypeCR2450,3Volt,shouldbeused(no
rechargeable batteries).
Figure P + Q
The battery compartment is located on the front of the cooking assistant.To open
the battery compartment cover, push it upwards at the fluted area and remove it.
When inserting the battery, always ensure it is inserted the right way round.Then
replace the battery cover from the top.
Spare parts
The button cells detailed above can be obtained from specialist electrical and
electronics shops.The battery compartment cover is also available as a spare part
from dealers stocking Fissler products or directly from Fissler customer services.
Article number: 620-000-00-473
Disposal
Do not dispose of spent batteries or the Fissler cooking assistant in your
normal domestic waste, but rather at the public collecting points intended
for this purpose.
Notes on care, spare parts and disposal
100544fissler_02_timer_SKT_gb.indd 24 02.06.2010 13:13:47 Uhr

25
DGB
F
NLIEPGRTRRUSSPLCZARA
7. Questions and answers
Problem Possible cause Remedy
Display is blank, no blue
lights(whenmountedon
the pressure cooker)
The cooking assistant is
not switched on
The battery is flat
The battery has not been
inserted properly, no
proper contact
Switch on the device with the
button
Replace the battery as per the
instructions
Reposition the battery correctly
Display shows symbols,
but there are no visual
signals(whenmounted
on the pressure cooker)
The cooking assistant is
notpositioned(correctly)
on the control valve
Checkthepositionofthedevice
Visual/audiblesignalsdo
not match the traffic light
indicator
The cooking assistant is
notpositioned(correctly)
on the control valve
The cooking assistant is
close to the operating
range of a magnetic field
Checkthepositionofthedevice
Remove the magnetic field
No audible signals Mute mode activated Disable mute mode as per the
instructions
Other problems / troub-
leshootingdoesn’txthe
problem
Componentfault Take the device to an authorised
dealer or send it to Fissler custo-
mer services
Questions and answers
100544fissler_02_timer_SKT_gb.indd 25 02.06.2010 13:13:47 Uhr

26
8. Warranty and service
Every Fissler product is made with care from high-quality materials. Right up until
production, the quality of our products is monitored several times and a final
thorough check carried out.
This is why we offer a 3-year warranty for this product from its date of purchase.
If you have any complaints, please return the entire device, together with your till
receipt, to your dealer or package it well and send it to Fissler customer services
(seebelowfortheaddress).
The battery is not included in the warranty.
No warranty is provided for damage caused as a result of the following:
- Incorrect and inappropriate use
- Incorrect or negligent handling
- Openingofthedevice(exceptforthebatterycompartment)
- The installation of spare parts that do not match the original design
- Chemicalorphysicalinuencesonthesurfaceoftheproduct
- Non-compliance with these instructions for use
Customer Service address
FisslerGmbH
CustomerServicesDepartment
Harald-Fissler-Str.10
D-55768Hoppstädten-Weiersbach
Phone:+496781403556
For additional information, go to www.fissler.co.uk / www.fissler.com
Warranty and service
100544fissler_02_timer_SKT_gb.indd 26 02.06.2010 13:13:48 Uhr
Table of contents
Other Fissler Electric Pressure Cooker manuals

Fissler
Fissler souspreme multi pot User manual

Fissler
Fissler Vitavit Edition Design User manual

Fissler
Fissler blue-point User manual

Fissler
Fissler vitavit User manual

Fissler
Fissler Vitavit Royal User manual

Fissler
Fissler vitaquick User manual

Fissler
Fissler blue-point User manual

Fissler
Fissler souspreme multi pot User manual
Popular Electric Pressure Cooker manuals by other brands

Elba
Elba EPC-6000SS user manual

Paula Deen kitchen electrics
Paula Deen kitchen electrics PDPC8 Instruction manual & recipes

Cosori
Cosori premium pressure cooker Owner reference guide

Gourmia
Gourmia GPC-965 user manual

Cuchen
Cuchen WHA-LX0601iDUS Series user manual

Lakeland
Lakeland 70053 Instruction booklet