CM-6405/CM-6408 QIG Rev 110
This document does not contain any export-controlled information.
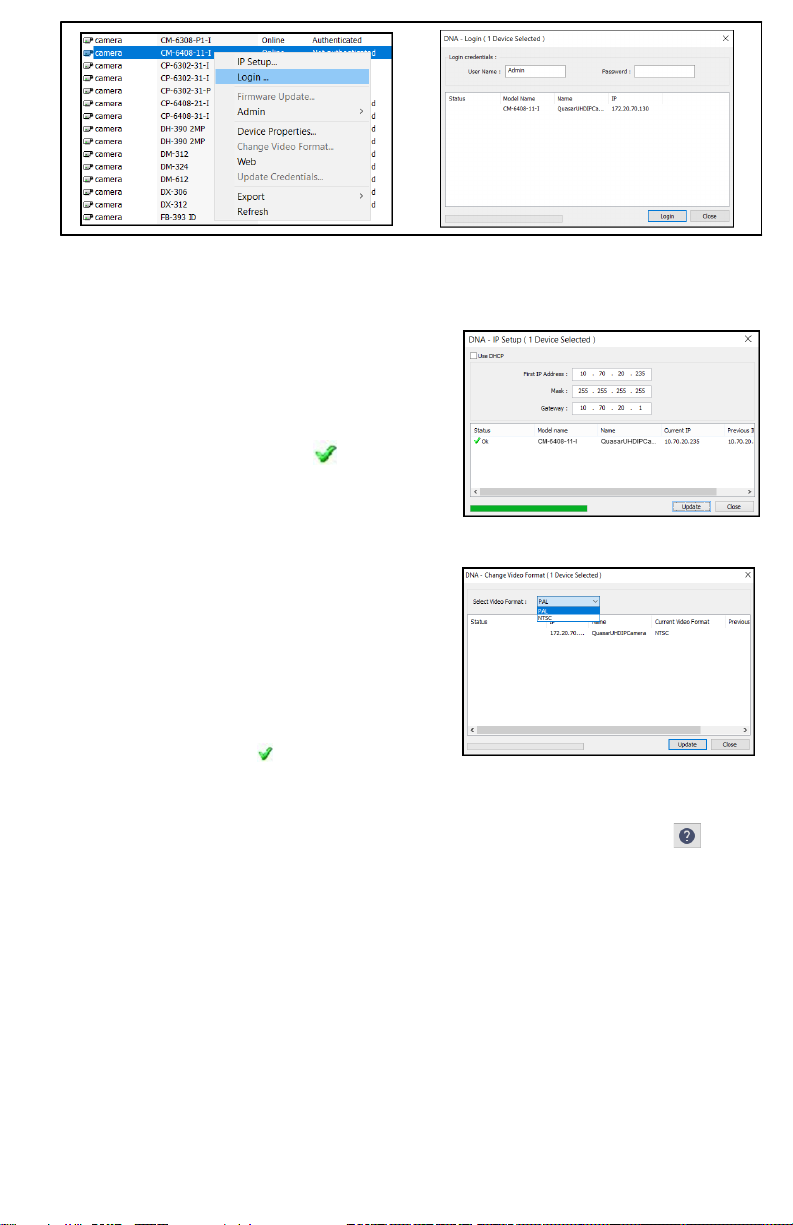
In the DNA Discover List, verify that the camera's status is Authenticated.
c. Change the camera’s IP address.
Right-click the camera and select IP Setup.
In the DNA - IP Setup window, clear Use
DHCP and specify the camera's IP
address. You can also specify the Mask
(default: 255.255.255.0) and Gateway.
Then, click Update, wait for Ok status
to appear, and then click Close.
4.5 Change Video Format (Optional)
By default, NTSC is the camera's video format.
To change the camera's video format to
PAL using the DNA tool:
a. In the DNA Discover List, right-click the
camera and select Change Video Format.
b. In the Change Video Format window,
select PAL.
c. Click Update, wait for Ok status to
appear, and then click Close.
For more information about using the DNA tool to configure one or more cameras,
see the DNA User Guide. While the software is open, click the Help icon
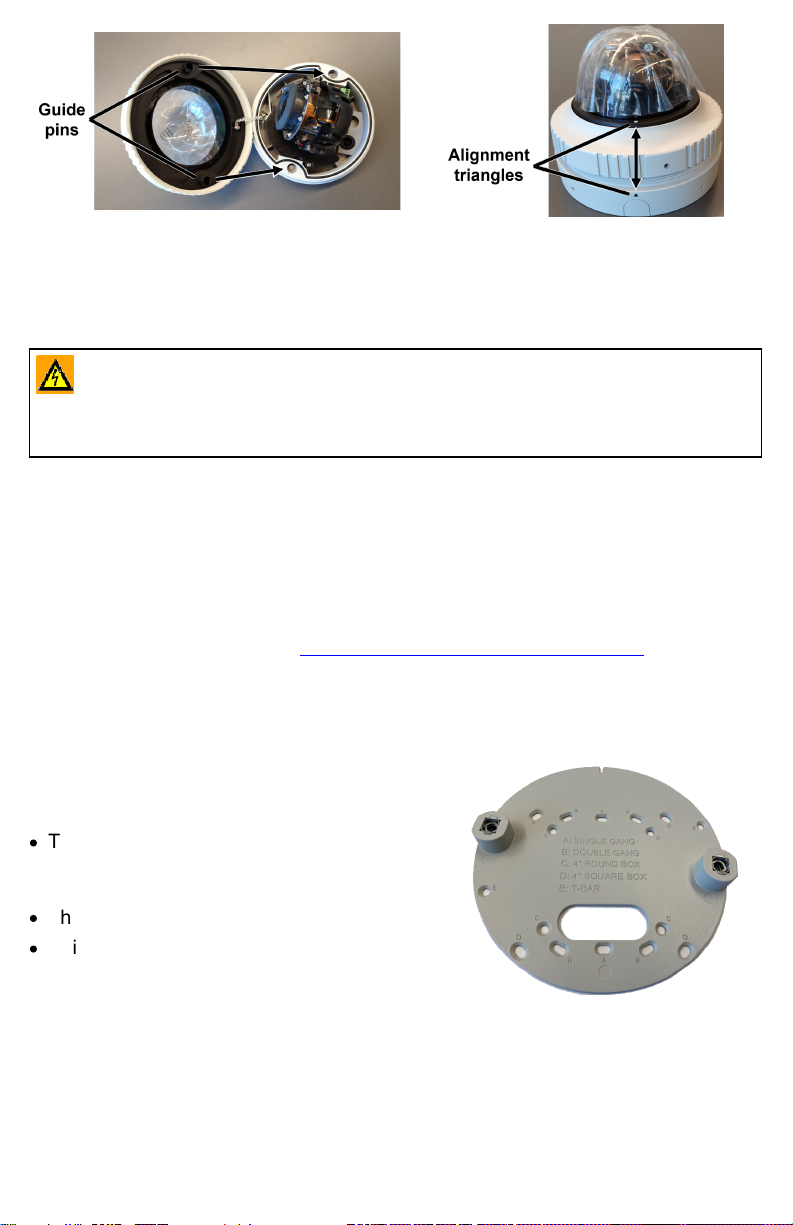
4.6 Re-attach Dome Cover
To prevent damaging the camera's internal components while moving it from the
bench or lab to its mounting location, re-attach the dome cover to the base and
then remove it again at the mounting location.
Before doing so, you can re-attach the camera base to the mounting bracket. Use
a screwdriver to tighten the two twist-lock screws securing the camera and its
base to the mounting bracket. If you do not re-attach the camera base to the
mounting bracket, remember to bring the screwdriver to the mounting location.
To re-attach the dome cover:
a. Using the two guide pins on the dome cover and the triangles on the cover and
on the base, carefully align and position the dome cover onto the base.