manuals.online logo
Brands
  1. Home
  2. •
  3. Brands
  4. •
  5. FLOS
  6. •
  7. Home Lighting
  8. •
  9. FLOS NOCTAMBULE F User manual

FLOS NOCTAMBULE F User manual

REV. 1
DATE 30/06/2021
1
NOCTAMBULE F
Designed by Konstantin Grcic, 2019
F0269000
©2021 Flos -All rights reserved -www.flos.com
Flos reserves the right to introduce any changes to its own models, without prior notice.
EN
2
©2021 Flos -All rights reserved -www.flos.com
Flos reserves the right to introduce any changes to its own models, without prior notice.
01. F0260000A –Cone glass
04. RF0254100 –Fixing screws kit
05. RF27498 –Ring led diffuser
06. F0257000A –High cylinder
07. RF3320400 –Black plug kit & driver
08. RF27549 –Switch dimmer 48V PMW 500Hz
09. F0261030A –Small base
REV. 1
DATE 30/06/2021
NOCTAMBULE F
F0269000
01
04
05
06
07
08
09
05
EN
3
WARNING! When installing and whenever acting on the appliance, ensure that the power supply has been switched off.
For the installation of the spare-part, it is necessary to consult a qualified electrician.
©2021 Flos -All rights reserved -www.flos.com
Flos reserves the right to introduce any changes to its own models, without prior notice.
REV. 1
DATE 30/06/2021
F0260000A
CONE GLASS
NOCTAMBULE F F0269000
4
WARNING! When installing and whenever acting on the appliance, ensure that the power supply has been switched off.
For the installation of the spare-part, it is necessary to consult a qualified electrician.
©2021 Flos -All rights reserved -www.flos.com
Flos reserves the right to introduce any changes to its own models, without prior notice.
EN
Remove the base from the cylinder.
Fig.1
Fig.2
Disconnect the dimmer from the electrical cable.
Carefully place the lamp in a horizontal position by
resting it on the cylinder packages.
Unscrew the screws from the base.
REV. 1
DATE 30/06/2021
F0260000A
CONE GLASS
x3
NOCTAMBULE F F0269000
5
WARNING! When installing and whenever acting on the appliance, ensure that the power supply has been switched off.
For the installation of the spare-part, it is necessary to consult a qualified electrician.
©2021 Flos -All rights reserved -www.flos.com
Flos reserves the right to introduce any changes to its own models, without prior notice.
EN
Disconnect the cylinder from the cone (Fig. 4).
Remove the old cone and place the new one.
Now Connect the cylinder to the new cone.
Tighten the screws to the new cone.
Carefully place the lamp in a vertical position.
Connect the base to the cylinder .
Tighten the screws of the base.
Connect the dimmer to the electrical cable.
Fig.3
Fig.4
Carefully place the lamp in a vertical position.
Unscrew the screws from the cone (Fig. 3).
REV. 1
DATE 30/06/2021
F0260000A
CONE GLASS
NOCTAMBULE F F0269000
x3 MAX
6
WARNING! When installing and whenever acting on the appliance, ensure that the power supply has been switched off.
For the installation of the spare-part, it is necessary to consult a qualified electrician.
©2021 Flos -All rights reserved -www.flos.com
Flos reserves the right to introduce any changes to its own models, without prior notice.
EN
Carefully place the lamp in a vertical position.
Unscrew the screws from the cone and disconnect
the cylinder from the cone ( like Fig. 4 page 5).
Remove the old cone and place the new one.
Now Connect the cylinder to the new cone.
Tighten the screws to the new cone.
Carefully place the lamp in a vertical position.
Connect the cylinder to the other one (3) and
tighten the screws to the cylinder (1-2)
Connect the base to the cylinder .
Tighten the screws of the base.
Connect the dimmer to the electrical cable.
Fig.5
Fig.6
Figure 5 and 6 (only for 2/3 cylinders version)
Disconnect the dimmer from the electrical cable.
Carefully place the lamp in a horizontal position by
resting it on the cylinder packages.
Unscrew the screws from the base.
Remove the base from the cylinder.
Unscrew the screws from the cylinder (1-2).
Disconnect the cylinder from the other one (3).
REV. 1
DATE 30/06/2021
F0260000A
CONE GLASS
2
1
3
NOCTAMBULE F F0269000
EN
7
RF0254100
FIXING SCREWS KIT
WARNING! When installing and whenever acting on the appliance, ensure that the power supply has been switched off.
For the installation of the spare-part, it is necessary to consult a qualified electrician.
©2021 Flos -All rights reserved -www.flos.com
Flos reserves the right to introduce any changes to its own models, without prior notice.
REV. 1
DATE 30/06/2021
NOCTAMBULE F F0269000
EN
8
RF27498
RING LED DIFFUSER
WARNING! When installing and whenever acting on the appliance, ensure that the power supply has been switched off.
For the installation of the spare-part, it is necessary to consult a qualified electrician.
©2021 Flos -All rights reserved -www.flos.com
Flos reserves the right to introduce any changes to its own models, without prior notice.
REV. 1
DATE 30/06/2021
NOCTAMBULE F F0269000
EN
9
F0257000A
HIGH CYLINDER
WARNING! When installing and whenever acting on the appliance, ensure that the power supply has been switched off.
For the installation of the spare-part, it is necessary to consult a qualified electrician.
©2021 Flos -All rights reserved -www.flos.com
Flos reserves the right to introduce any changes to its own models, without prior notice.
REV. 1
DATE 30/06/2021
NOCTAMBULE F F0269000
x3
10
WARNING! When installing and whenever acting on the appliance, ensure that the power supply has been switched off.
For the installation of the spare-part, it is necessary to consult a qualified electrician.
©2021 Flos -All rights reserved -www.flos.com
Flos reserves the right to introduce any changes to its own models, without prior notice.
EN
Remove the base from the cylinder.
Fig.1
Fig.2
Disconnect the dimmer from the electrical cable.
Carefully place the lamp in a horizontal position by
resting it on the cylinder packages.
Unscrew the screws from the base.
REV. 1
DATE 30/06/2021
F0257000A
HIGH CYLINDER
NOCTAMBULE F F0269000
11
WARNING! When installing and whenever acting on the appliance, ensure that the power supply has been switched off.
For the installation of the spare-part, it is necessary to consult a qualified electrician.
©2021 Flos -All rights reserved -www.flos.com
Flos reserves the right to introduce any changes to its own models, without prior notice.
EN
Figure 3 and 4 (only for 2/3/4 cylinders version)
Disconnect the cylinder from the other one (3).
Unscrew the screws from the cylinder (1-2).
Replace the old cylinder with the new one.
Now assemble all the components, please
proceed in reverse order.
Connect the cylinder to the other one (3).
Tighten the screws to the cylinder (1-2).
Connect the base to the cylinder .
Tighten the screws of the base.
Connect the dimmer to the electrical cable.
Fig.3
Fig.4
X4 MAX
3
2
1
REV. 1
DATE 30/06/2021
F0257000A
HIGH CYLINDER
NOCTAMBULE F F0269000
EN
12
RF3320400
BLACK PLUG & KIT DRIVER
WARNING! When installing and whenever acting on the appliance, ensure that the power supply has been switched off.
For the installation of the spare-part, it is necessary to consult a qualified electrician.
©2021 Flos -All rights reserved -www.flos.com
Flos reserves the right to introduce any changes to its own models, without prior notice.
REV. 1
DATE 30/06/2021
NOCTAMBULE F F0269000
Captain
Flint
p.05
Noctambule
F
p.15
Sawaru
p.03
Superloon
p.13
Taccia
Led
p.13
Arco Led
p.03
EN
13
RF3320400
BLACK PLUG & KIT DRIVER
WARNING! When installing and whenever acting on the appliance, ensure that the power supply has been switched off.
For the installation of the spare-part, it is necessary to consult a qualified electrician.
©2021 Flos -All rights reserved -www.flos.com
Flos reserves the right to introduce any changes to its own models, without prior notice.
Fig.1
Insert the plug (E) into the power unit (B). By using the guides, snap the plug inside its apposite slot (use the correct
type of plug for the country in which the device must be installed).
B
E
REV. 1
DATE 30/06/2021
NOCTAMBULE F F0269000
EN
14
RF27549
SWITCH DIMMER 48V PMW 500Hz
WARNING! When installing and whenever acting on the appliance, ensure that the power supply has been switched off.
For the installation of the spare-part, it is necessary to consult a qualified electrician.
©2021 Flos -All rights reserved -www.flos.com
Flos reserves the right to introduce any changes to its own models, without prior notice.
REV. 1
DATE 30/06/2021
NOCTAMBULE F F0269000
15
WARNING! When installing and whenever acting on the appliance, ensure that the power supply has been switched off.
For the installation of the spare-part, it is necessary to consult a qualified electrician.
©2021 Flos -All rights reserved -www.flos.com
Flos reserves the right to introduce any changes to its own models, without prior notice.
EN
Connect the plug (C) to the power unit (B) locking it
in by rotating it 90°clockwise.
Fig.1
Fig.2
Connect the plug (P) to the push button switch (Q)
locking it by turning it 90º clockwise.
RF27549
SWITCH DIMMER 48V PMW 500Hz
Q
P
C
B
REV. 1
DATE 30/06/2021
NOCTAMBULE F F0269000
EN
16
F0261030A
SMALL BASE
WARNING! When installing and whenever acting on the appliance, ensure that the power supply has been switched off.
For the installation of the spare-part, it is necessary to consult a qualified electrician.
©2021 Flos -All rights reserved -www.flos.com
Flos reserves the right to introduce any changes to its own models, without prior notice.
REV. 1
DATE 30/06/2021
NOCTAMBULE F F0269000
17
WARNING! When installing and whenever acting on the appliance, ensure that the power supply has been switched off.
For the installation of the spare-part, it is necessary to consult a qualified electrician.
©2021 Flos -All rights reserved -www.flos.com
Flos reserves the right to introduce any changes to its own models, without prior notice.
EN
Remove the base from the cylinder.
Now reconnect the New base to the cylinder.
Tighten the screws of the base.
Fig.1
Fig.2
Disconnect the dimmer and the driver from the
electrical cable.
Carefully place the lamp in a horizontal position by
resting it on the cylinder packages.
F0261030A
SMALL BASE
REV. 1
DATE 30/06/2021
NOCTAMBULE F F0269000
EN
18
WARNING! When installing and whenever acting on the appliance, ensure that the power supply has been switched off.
For the installation of the spare-part, it is necessary to consult a qualified electrician.
©2021 Flos -All rights reserved -www.flos.com
Flos reserves the right to introduce any changes to its own models, without prior notice.
Fig.3
Place the lamp in vertical position.
Connect the dimmer and the driver to the electrical cable.
F0261030A
SMALL BASE
1x 2x 3x
100%10%
REV. 1
DATE 30/06/2021
NOCTAMBULE F F0269000

Other manuals for NOCTAMBULE F
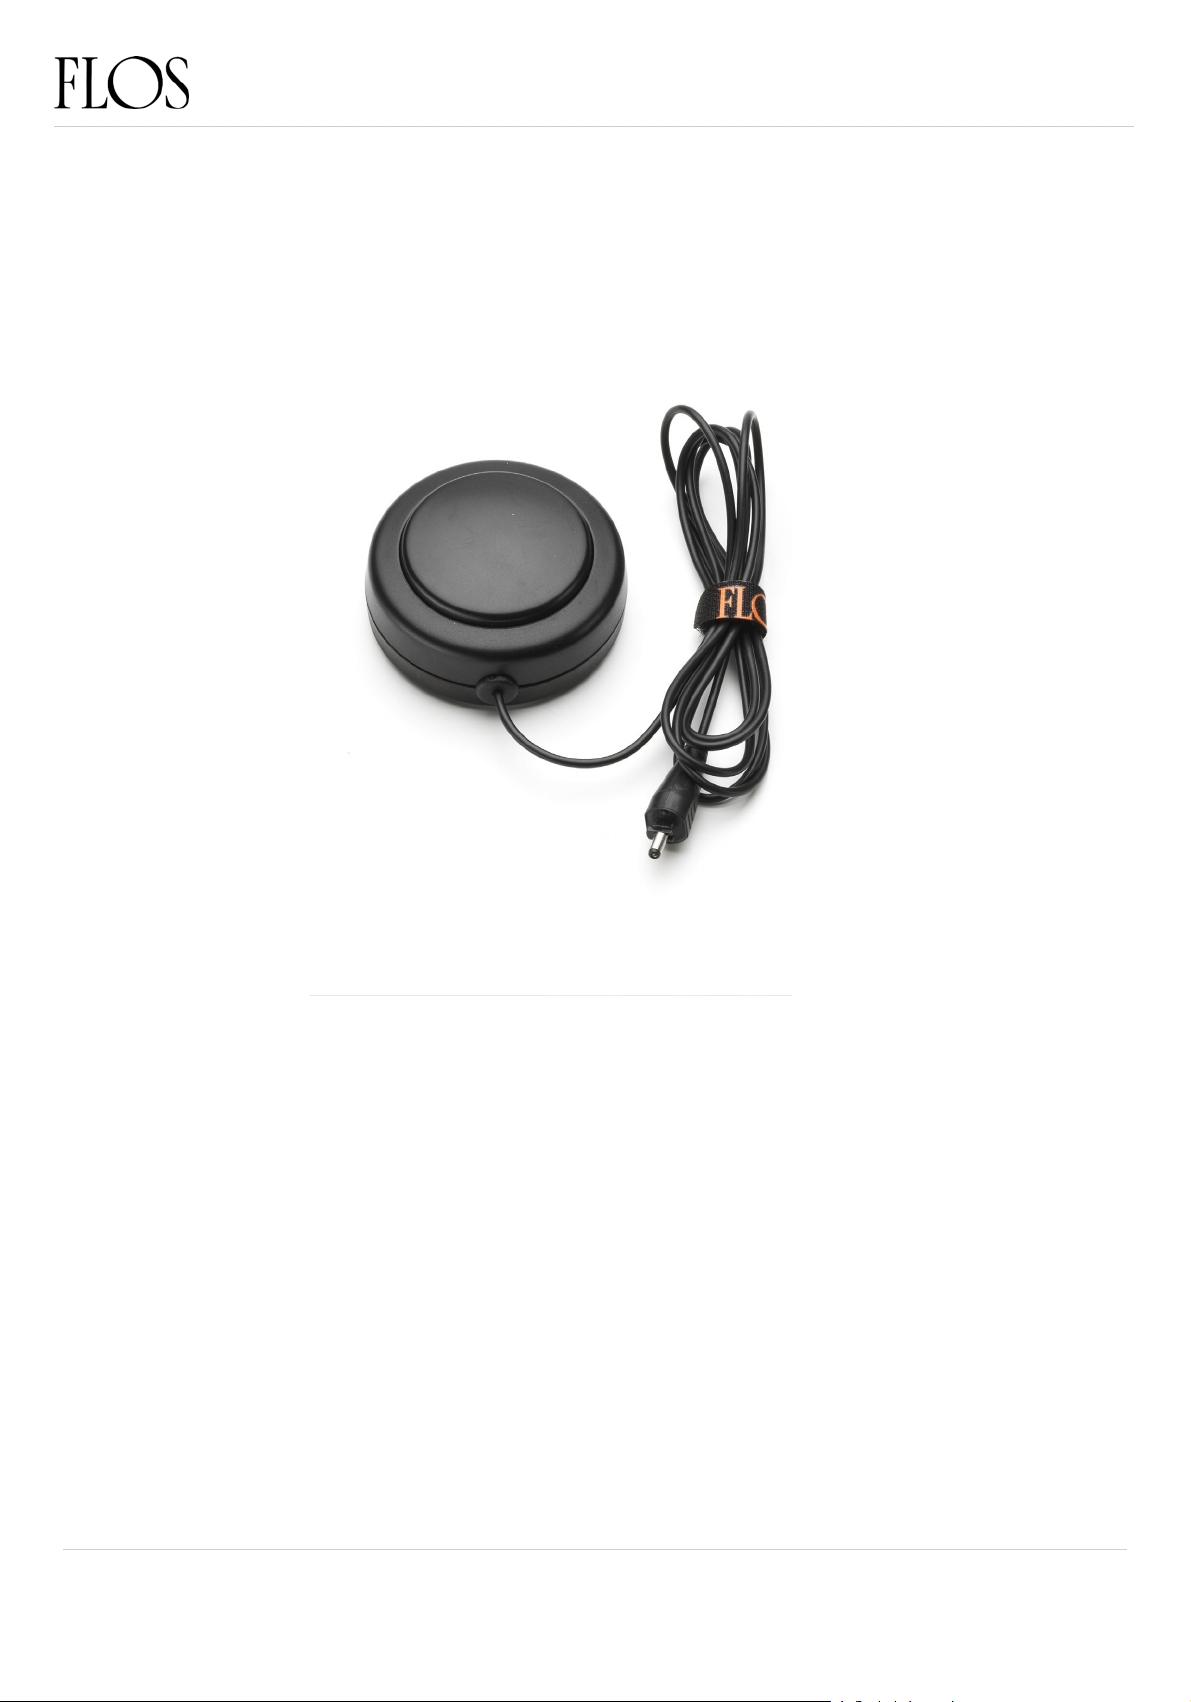
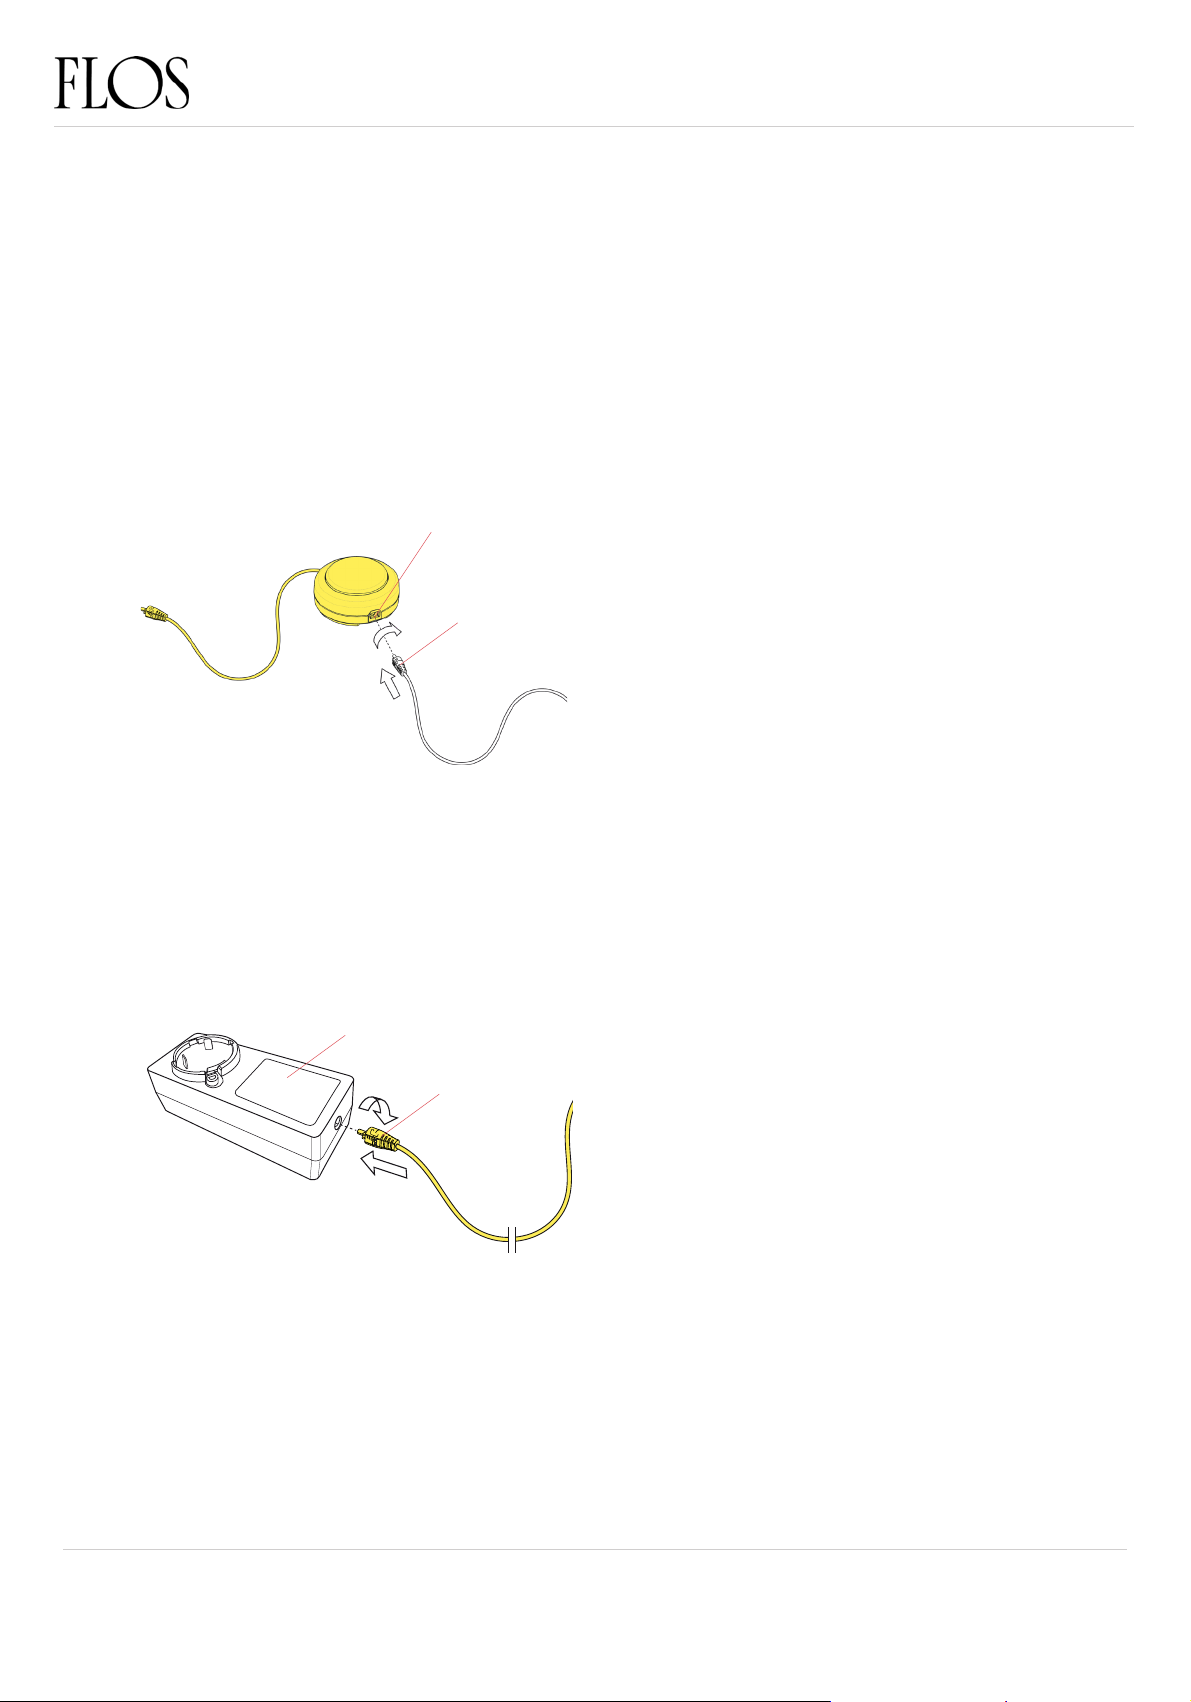
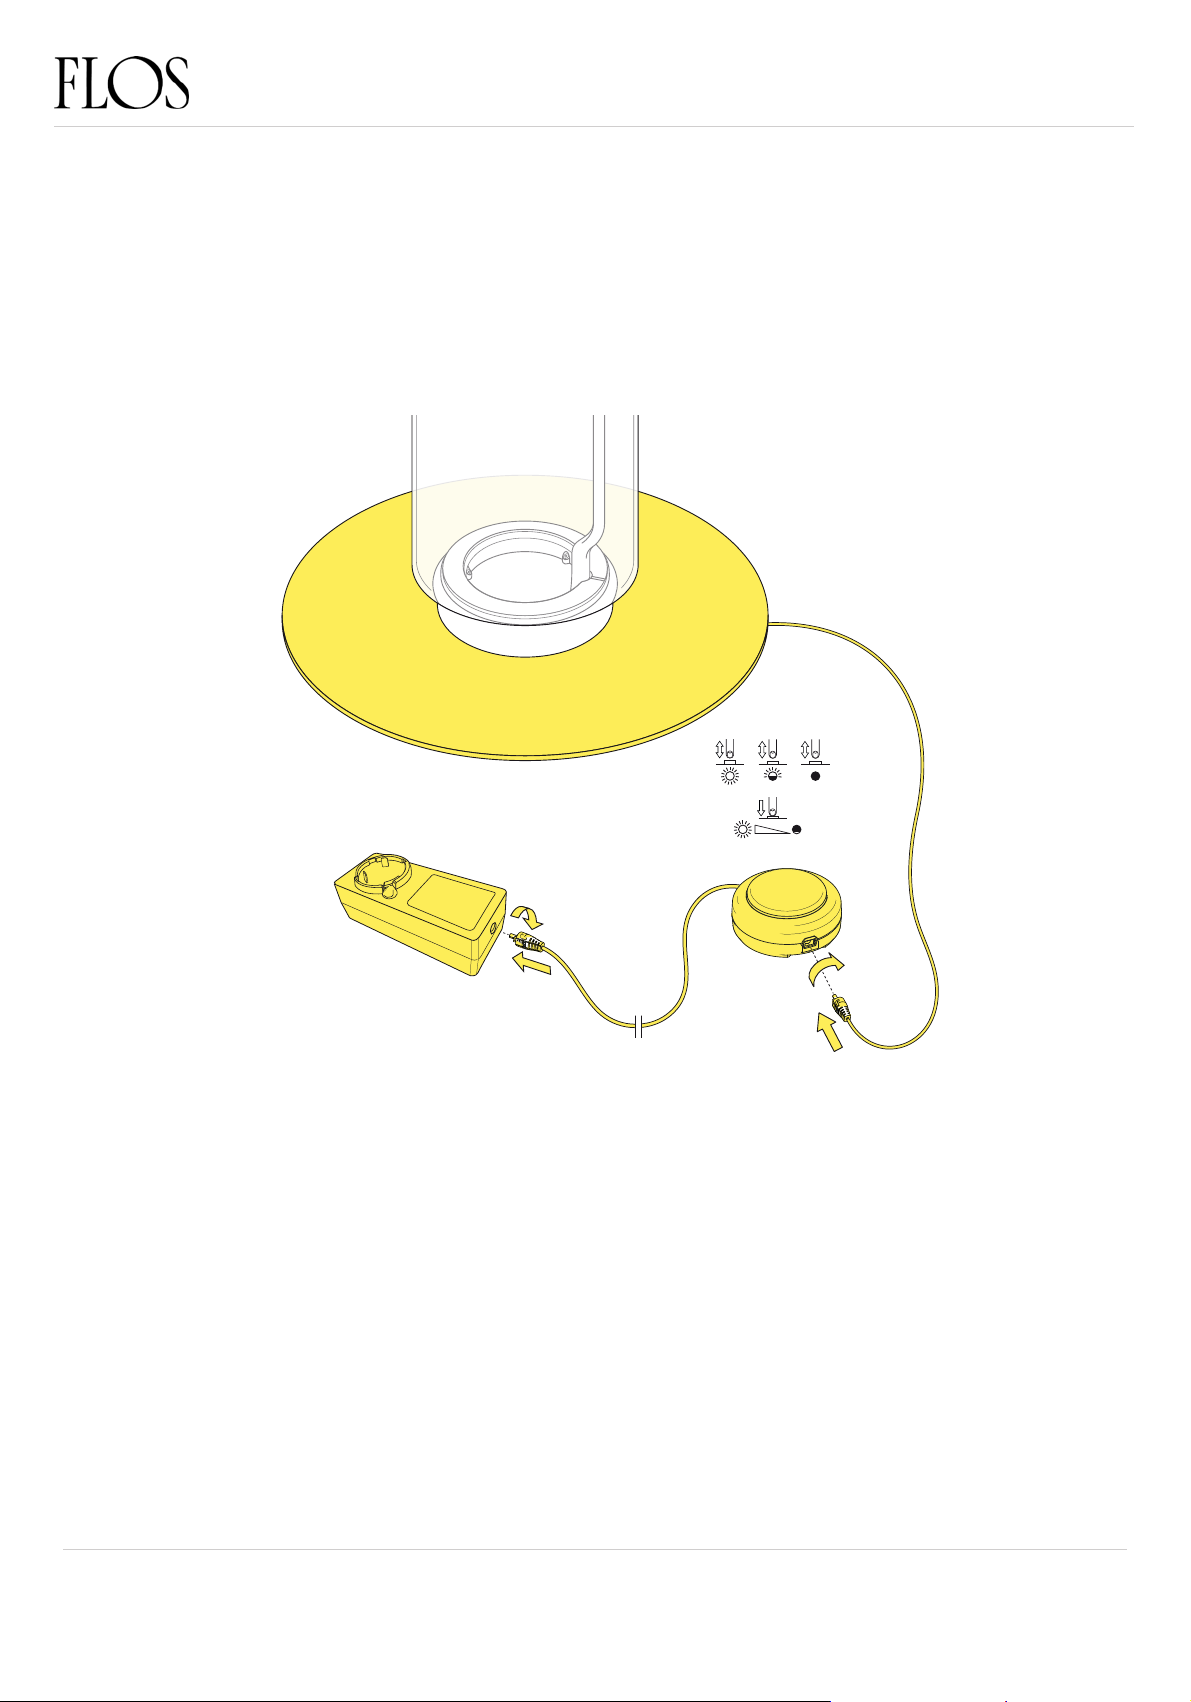
3

This manual suits for next models

1

Other FLOS Home Lighting manuals

FLOS RF26676 User manual

FLOS

FLOS RF26676 User manual

FLOS MISS SISSI User manual

FLOS

FLOS MISS SISSI User manual

FLOS IC C/W2 User manual

FLOS

FLOS IC C/W2 User manual

FLOS F1530059 User manual

FLOS

FLOS F1530059 User manual

FLOS WireRing User manual

FLOS

FLOS WireRing User manual

FLOS GOLDMAN User manual

FLOS

FLOS GOLDMAN User manual

FLOS SUPERLOON F6630030 User manual

FLOS

FLOS SUPERLOON F6630030 User manual

FLOS KELVIN LED GM User manual

FLOS

FLOS KELVIN LED GM User manual

FLOS ZEPPELIN 2 User manual

FLOS

FLOS ZEPPELIN 2 User manual

FLOS IC C/W1 User manual

FLOS

FLOS IC C/W1 User manual

FLOS TAB T LED User manual

FLOS

FLOS TAB T LED User manual

FLOS WIRERING F9512020 User manual

FLOS

FLOS WIRERING F9512020 User manual

FLOS WireRing User manual

FLOS

FLOS WireRing User manual

FLOS Philippe Starck BON JOUR UNPLUGGED User manual

FLOS

FLOS Philippe Starck BON JOUR UNPLUGGED User manual

FLOS ROSY ANGELIS User manual

FLOS

FLOS ROSY ANGELIS User manual

FLOS ROMEO SOFT T1 User manual

FLOS

FLOS ROMEO SOFT T1 User manual

FLOS NOCTAMBULE F User manual

FLOS

FLOS NOCTAMBULE F User manual

FLOS RF1035109 User manual

FLOS

FLOS RF1035109 User manual

FLOS STYLOS RF6330000 User manual

FLOS

FLOS STYLOS RF6330000 User manual

FLOS IC C/W1 User manual

FLOS

FLOS IC C/W1 User manual

FLOS BIAGIO User manual

FLOS

FLOS BIAGIO User manual

FLOS Extra Table F2130046 User manual

FLOS

FLOS Extra Table F2130046 User manual

FLOS 548 User manual

FLOS

FLOS 548 User manual

FLOS F6430009 User manual

FLOS

FLOS F6430009 User manual

Popular Home Lighting manuals by other brands

Philips Ecomoods 30185/11/16 user manual

Philips

Philips Ecomoods 30185/11/16 user manual

JONATHAN Y Orian manual

JONATHAN Y

JONATHAN Y Orian manual

Verilux Planet Light PL01 user manual

Verilux

Verilux Planet Light PL01 user manual

Philips Ledino 33604/31/16 Specifications

Philips

Philips Ledino 33604/31/16 Specifications

Santa & Cole CESTITA BATERIA quick start guide

Santa & Cole

Santa & Cole CESTITA BATERIA quick start guide

Elumen8 MS550 user manual

Elumen8

Elumen8 MS550 user manual

Bert Frank STS0030US instructions

Bert Frank

Bert Frank STS0030US instructions

ArtFox Matrix 360 manual

ArtFox

ArtFox Matrix 360 manual

Philips GuideLight 69112-34-PH Instruction leaflet

Philips

Philips GuideLight 69112-34-PH Instruction leaflet

ACME LP-TS100 CW user manual

ACME

ACME LP-TS100 CW user manual

IKEA VARMBLIXT manual

IKEA

IKEA VARMBLIXT manual

Dale Tiffany TT90492 Assembly instructions

Dale Tiffany

Dale Tiffany TT90492 Assembly instructions

Costway EU10002US user manual

Costway

Costway EU10002US user manual

Philips ecoMOODS 34613/48/16 Specifications

Philips

Philips ecoMOODS 34613/48/16 Specifications

Villeroy & Boch SEOUL operation instruction

Villeroy & Boch

Villeroy & Boch SEOUL operation instruction

Safavieh LIT4156 quick start guide

Safavieh

Safavieh LIT4156 quick start guide

Novolink SLWA-C9-25 quick start guide

Novolink

Novolink SLWA-C9-25 quick start guide

Qazqa Hero TL 24 instruction manual

Qazqa

Qazqa Hero TL 24 instruction manual

manuals.online logo
manuals.online logoBrands
  • About & Mission
  • Contact us
  • Privacy Policy
  • Terms and Conditions

Copyright 2025 Manuals.Online. All Rights Reserved.