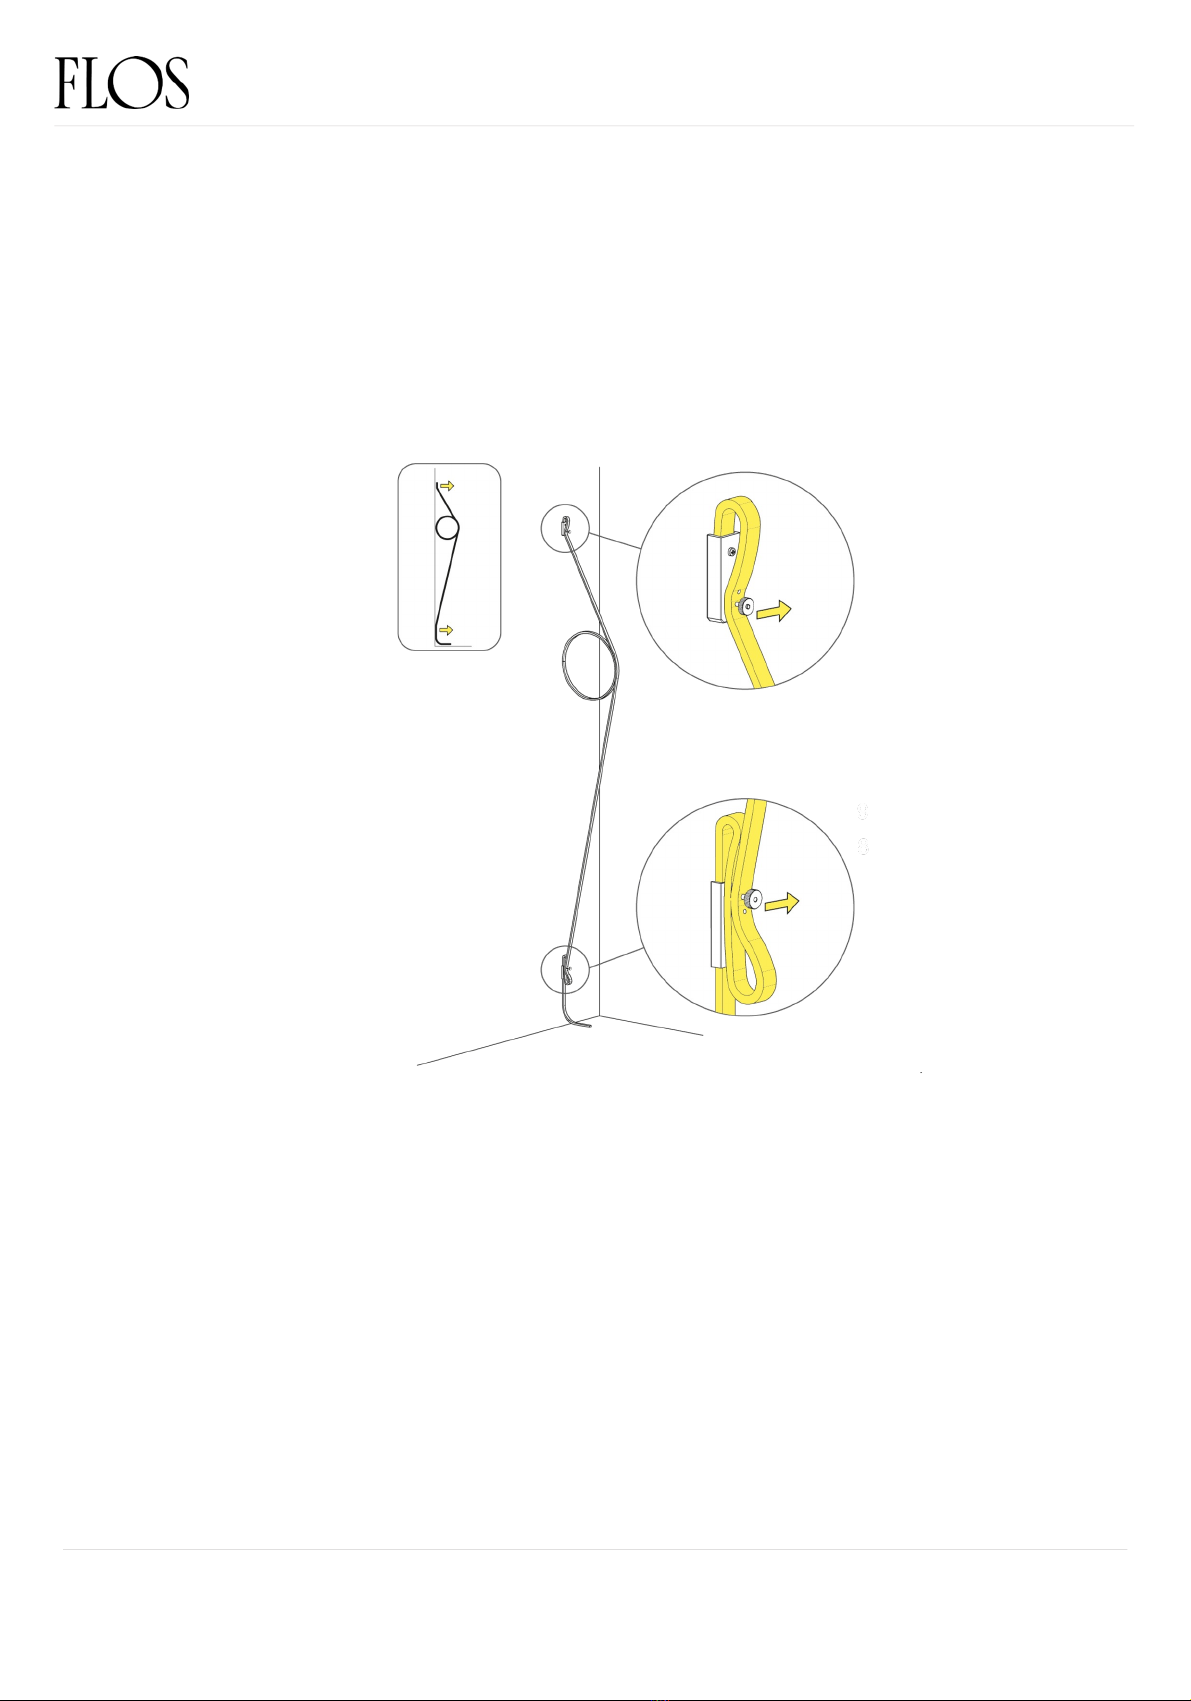
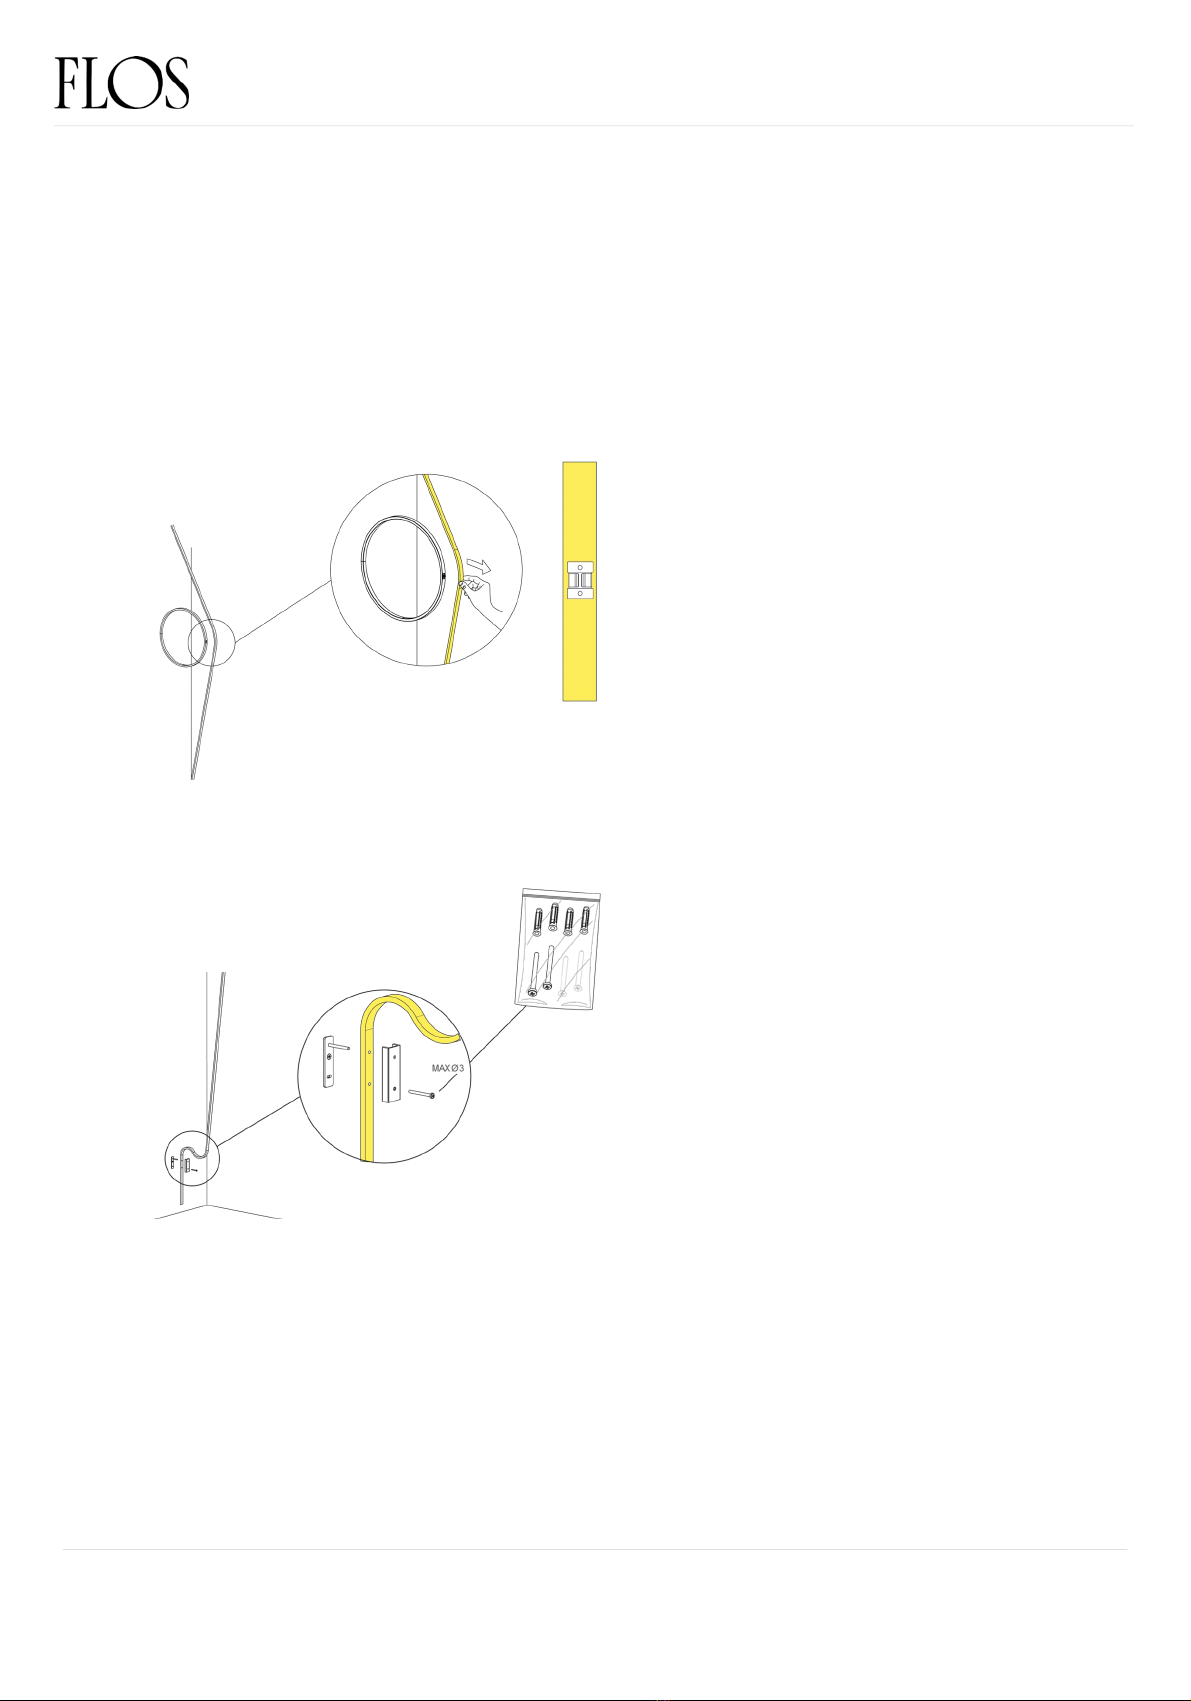
FLOS WireRing User manual


Other manuals for WireRing
3
This manual suits for next models
5
Other FLOS Home Lighting manuals

FLOS
FLOS TAB T LED User manual

FLOS
FLOS COPYCAT User manual

FLOS
FLOS TOIO LED F7630009 User manual

FLOS
FLOS TOIO F7600009 User manual

FLOS
FLOS NOCTAMBULE F User manual

FLOS
FLOS KELVIN LED F F3305033 User manual

FLOS
FLOS TAB T LED User manual

FLOS
FLOS TACCIA LED F6602004 User manual

FLOS
FLOS Michael Anastassiades COPYCAT User manual

FLOS
FLOS RF1035109 User manual

FLOS
FLOS WIRERING F9512020 User manual

FLOS
FLOS FU317935 User manual

FLOS
FLOS F1037046 User manual

FLOS
FLOS ARCHIMOON SOFT User manual

FLOS
FLOS ROMEO MOON T1 User manual

FLOS
FLOS BON JOUR UNPLUGGED OPTIC User manual

FLOS
FLOS KELVIN EDGE User manual

FLOS
FLOS ROMEO SOFT F User manual

FLOS
FLOS Tatou F User manual

FLOS
FLOS F6430009 User manual


Popular Home Lighting manuals by other brands

LIVARNO LUX
LIVARNO LUX 54972 Assembly, operating and safety instructions

LIVARNO LUX
LIVARNO LUX 292043 Operation and safety notes

LIVARNO LUX
LIVARNO LUX 14118006L Operation and safety notes

LIVARNO LUX
LIVARNO LUX 101510 Operation and safety notes

LIVARNO LUX
LIVARNO LUX 8000.010.090 Operation and safety notes

Homebase
Homebase 632681 instruction manual

LIVARNO LUX
LIVARNO LUX 102733 Operation and safety notes

LIVARNO LUX
LIVARNO LUX 62338 Assembly and Safety Advice

LIVARNO LUX
LIVARNO LUX Z31711A Operation and safety notes

Safavieh Lighting
Safavieh Lighting PORT ROBERT LIT4506A manual

Ballard Designs
Ballard Designs LA182 Assembly instructions

Safavieh
Safavieh LIT4045 manual


