FLY DS107D Installation and operation manual


-1-
Content
1General Information.............................................................................................................3
1.1 Profile ......................................................................................................................................3
1.2 Safety Information....................................................................................................................3
1.3 Safety warning and Attentions ..................................................................................................3
2Your phone.............................................................................................................................6
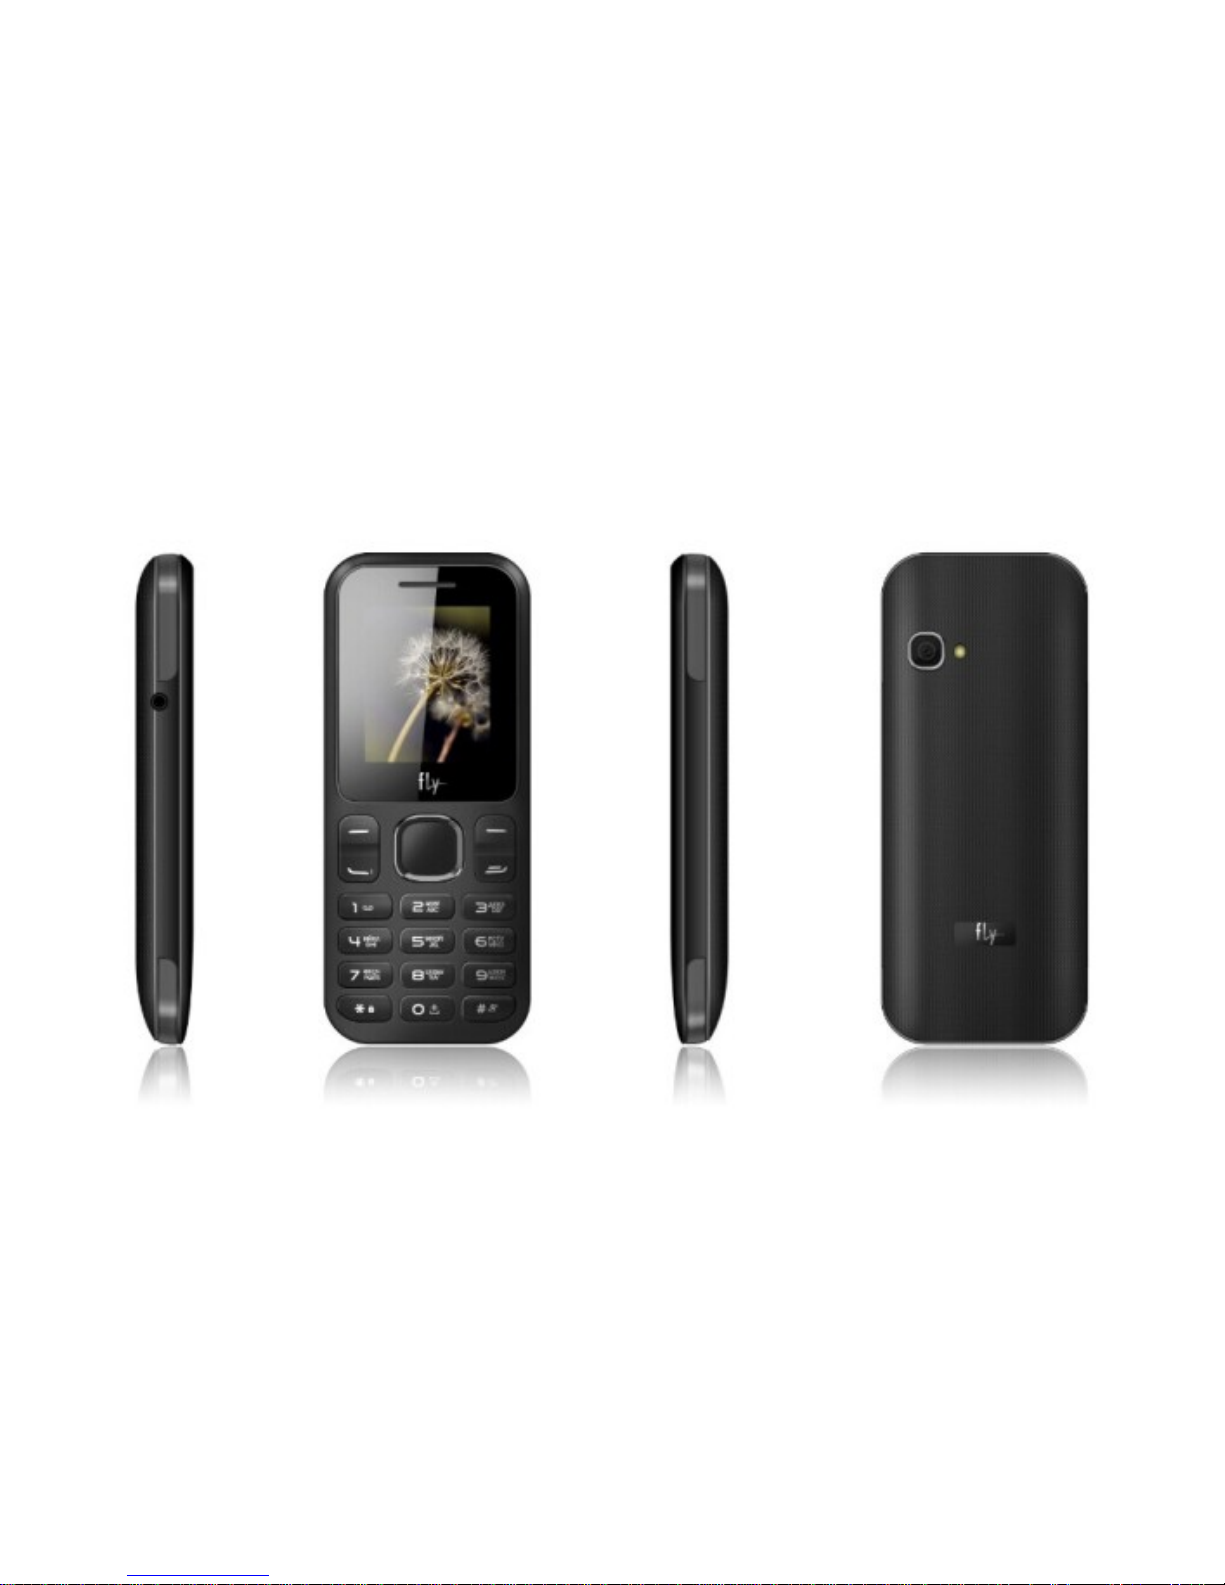
2.1 Phone overview .......................................................................................................................6
2.2 Functions of Keys ....................................................................................................................7
3Getting started .......................................................................................................................8
3.1 Installing the SIM Cards and the Battery...................................................................................8
3.2 Installing T-Flash Card .............................................................................................................9
3.3 Charging the Battery ..............................................................................................................10
3.4 Powering On/Off the Mobile Phone ........................................................................................12
3.5 Linking to the Network............................................................................................................12
3.6 Dialing Calls...........................................................................................................................12
3.7 Using the Headset .................................................................................................................13
4Input method ........................................................................................................................14
4.1 Icons for Input Methods..........................................................................................................14
4.2 To Shift Entry Methods ...........................................................................................................14
4.3 Numeric Input ........................................................................................................................14
4.4 English input and numeric input:.............................................................................................14
4.5 Inserting a Symbol .................................................................................................................15
5Using the Menus ..................................................................................................................16

-2-
5.1 Call logs.................................................................................................................................16
5.2 Names...................................................................................................................................16
5.3 Fun and Games .....................................................................................................................17
5.4 Multimedia .............................................................................................................................17
5.5 Message ................................................................................................................................18
5.6 Settings .................................................................................................................................19
5.7 Internet ..................................................................................................................................21
5.8 My files ..................................................................................................................................21
5.9 Tools......................................................................................................................................22
6Appendix ..............................................................................................................................23

-3-
1 General Information
1.1 Profile
Please read this pamphlet carefully in order to make your phone in perfect condition.
Our company may change this mobile phone without prior written notice and reserves the final right to
interpret the performance of this mobile phone.
Due to different software and network operators, display on your phone may be different, refer to your
phone for details.
1.2 Safety Information
If your phone has lost or been stolen, notify the telecommunication office the SIM card is disabled
(network support is required). This can avoid economic loss caused by unauthorized use.
Please take measures as following to avoid your phone being unauthorized use:
·Set PIN code of SIM card
·Set phone password
1.3 Safety warning and Attentions
Safety warning
ROAD SAFETY COMES FIRST
Do not use a hand-held phone while driving. Use hands-free fittings when calls are unavoidable while
driving. In some countries, dialing or receiving calls while driving is illegal!
SWITCH OFF IN AIRCRAFT
Wireless devices can cause interference in aircraft. Using a mobile phone in flight is illegal and risky.
Please make sure that your mobile phone is powered off in flight.
SWITCH OFF BEFORE ENTERING RISKY AREAS

-4-
Strictly observe the relevant laws, codes, and regulations on the use of mobile phones in risky areas. Turn
off your mobile phone before entering a place susceptible to explosion, such as an oil station, oil tank,
chemical plant or a place where a blasting process is under way.
OBSERVE ALL SPECIAL REGULATIONS
Follow any special regulations in force in any area such as hospitals and always switch off your phone
whenever it is forbidden to use it or, when it may cause interference or danger. Properly use your mobile
phone near medical apparatuses, such as pacemakers, hearing aids and some other electronic medical
devices, as it may cause interference to such apparatuses.
INTERFERENCE
The conversation quality of any mobile phone may be affected by radio interference. An antenna is built
inside the mobile phone and located below the microphone. Do not touch the antenna area during a
conversation, lest that the conversation quality deteriorate.
QUALIFIED SERVICE
Only qualified personnel may install or repair phone equipment. Installing or repairing the mobile phone on
your own may bring great danger and violates the warranty rules.
ACCESSORIES AND BATTERIES
Use only approved accessories and batteries.
USE SENSIBLY
Use only in a normal and proper manner.
EMERGENCY CALLS
Ensure the phone is switched on and in service, enter the emergency number, e.g. 112, then press the
Dial key. Give your location and state your situation briefly. Do not end the call until told to do so.
Note: Just like all other mobile phones, this mobile phone does not necessarily support all the features

-5-
described in this manual due to network or radio transmission problems. Some networks even do not
support the emergency call service. Therefore, do not rely solely on the mobile phone for critical
communications such as first aid. Please consult the local network operator.
Precautions
This mobile phone is well designed with fine art. Please exercise special care when using it. The following
suggestions will help your mobile phone survive the warranty period and extend its service life:
Keep the mobile phone and all its fittings beyond children's reach.
Keep the mobile phone dry. Keep away from rain, moisture, liquid or other substances that may
corrode electronic circuits.
Do not use or store the mobile phone in dusty places, lest that active parts of the mobile phone be
damaged.
Do not store the mobile phone in a high-temperature place. High temperature will shorten the life of
electronic circuits and damage the battery and some plastic parts.
Do not store the mobile phone in a chilly place. Otherwise, moistures will be formed inside the mobile
phone to damage electronic circuits when the mobile phone is moved to a constant temperature place.
Do not throw, knock or shock the mobile phone, as that will destroy the internal circuits and
high-precision components of the mobile phone.

-6-
2 Your phone
2.1 Phone overview

-7-
2.2 Functions of Keys
The mobile phone provides the following keys:
Left and right soft key
The bottom line on the screen displays the functions of the Left and Right soft key.
Dial key
Press it to originate a call by entering the called number or selecting a contact from the phonebook; or
press it to receive an incoming call; or press it in standby state to show the latest call records.
End key
Press it to end a call being dialed or end an ongoing call; or press it to exit the menu and return to the
standby state.
Direction key
Press them to scroll the options when browsing a function list. In edit state, press direction keys to
navigate. In conversation status, you can press up or down direction key to tune volume.
OK key
Press it to confirm a selection.
Number keys, * key and # key
Press number keys 0 through 9 to input or edit state to input numbers and characters;
The # key and the * key represent different functions in different states or different function menus.
Hold the # key up to 2s in standby state to switch between meeting and normal mode.
Press the # key in edit state to switch between input methods.
Pressing the * key in edit status to select a symbol.
When the keypad is locked, you can press left soft key then * key to unlock it.
Press the * key twice can input "+" in standby interface. When the symbol "+" appears, press the * key
quickly to input "P" or "W". "P" and "W" are used for calling the extension; "+" are used for dialing an
international call.

-8-
3 Getting started
3.1 Installing the SIM Cards and the Battery
A SIM card carries useful information, including your mobile phone number, PIN (Personal Identification
Number), PIN2, PUK (PIN Unlocking Key), PUK2 (PIN2 Unlocking Key), IMSI (International Mobile
Subscriber Identity), network information, contacts data, and short messages data.
Note:
After powering off your mobile phone, wait for a few seconds before removing or inserting A SIM card.
Exercise caution when operating A SIM card, as friction or bending will damage the SIM card.
Properly keep the mobile phone and its fittings such as the SIM cards beyond children's reach.
Installation
Hold the End key for a while to power off the mobile phone
Push the back cover above the battery and remove it.
Pull the left battery buckle outward and then lift the battery away.
Insert the SIM card into the SIM card slot lightly with the corner cutting of the card aligning to the notch
of the slot and the gold plate of the card facing download, till the SIM card cannot be further pushed in.
With the metallic contacts of the battery facing the metallic contacts in the battery slot, press the
battery down until it locks into place.
Using code
The mobile phone and the SIM cards support sorts of passwords, in order to prevent the phone and the
SIM cards from being misused. When you are prompted to input any of the codes mentioned below, just
input the correct code and then press the OK key. If you input a wrong code, press the Right soft key to
clear it and then input the correct code.
Phone lock code
The phone lock code may be set to prevent your mobile phone from being misused. In general, this code

-9-
is provided along with the mobile phone by the manufacturer. The initial phone lock code is set to 0000 by
the manufacturer. If the phone lock code is set, you need to input the phone lock code when powering on
the mobile phone.
PIN
The PIN (Personal identification number, 4 to 8 digits) code prevents your SIM card from being used by
unauthorized people. In general, the PIN is supplied with SIM card by the network operator. If PIN check is
enabled, you need to input the PIN each time when you power on your mobile phone. The SIM card will
be locked if you input wrong PIN code for three times.
Unlocking methods as follows:
-Input the correct PUK according to the screen tips to unlock the SIM card.
-Then input the new PIN and press the OK key.
-Input the new PIN again and then press the OK key.
-If the input PUK is correct, the SIM card will be unlocked and the PIN will be reset.
Note: The SIM card will be locked if you input wrong PIN code for three times. To unlock the SIM card,
you need to input the PUK. In general, the PUK can be obtained from the network operator.
PUK
The PUK code (Personal Unlocking Key) is required to change a blocked PIN. It is supplied with SIM card.
If not, contact your network operator. If you input wrong PUK code for 10 times, SIM card will be invalid.
Please contact the network operator to replace the SIM card.
Barring code
A barring code is required for setting the call barring function. You can obtain this code from the network
operator to set the call barring function.
3.2 Installing T-Flash Card
The T-Flash card is a pluggable mobile storage card inside the mobile phone.
To install the T-Flash card, open its latch, place its indented side downward, insert the card into the card

-10-
slot, and then close the latch.
To remove the T-flash card, open its latch and slightly take the card out. And then close the latch.
Note:
1. The mobile phone cannot automatically identify the T-flash card being inserted when the mobile phone
is powered on. You must power off the mobile phone and then power it on, so that the phone can identify
the T-Flash card.
2. The T-Flash card is a miniature object. Keep it out of the reach of children for fear that children swallow
it!
3.3 Charging the Battery
The lithium battery delivered with the mobile phone can be put into use immediately after being unpacked.
Battery level indication:
Your mobile phone can monitor and display the battery state.
Normally the remaining energy of the battery is indicated by the battery level icon at the upper right
corner of the display screen.
When the battery energy is insufficient, the mobile phone prompts "Battery low". If you have set an
alert tone, an alert tone will be given off when the battery level is too low.
A charging animation appears when the battery is being charged. When the charging is complete, the
animation disappears.
Using a travel adapter:
Install the battery into the mobile phone before charging the battery.
Connect the adapter of the travel charger with the charging slot in the mobile phone. Ensure that the
adapter is fully inserted.
Insert the plug of the travel charger to an appropriate power outlet.
During the charging, the battery level grids in the battery icon keep flickering till the battery is fully
charged.

-11-
It is normal when the battery is become hot during the charging period.
The battery icon does no longer flicker when the charging process ends.
Note:
Ensure that the plug of the charger, the plug of the earphone, and the plug of the USB cable are inserted
in the right direction. Inserting them in a wrong direction may cause charging failure or other problems.
Before the charging, ensure that the standard voltage and frequency of the local mains supply match the
rated voltage and power of the travel charger.
Using the Battery
The performance of a battery is subject to multiple factors: radio network configuration, signal strength,
ambient temperature, chosen functions or settings, phone fittings, and the voice, data or other application
mode you choose to use.
To guarantee the optimal performance of your battery, please stick to the following rules:
Use only the battery provided by the vendor. Otherwise, damages or even injuries could be caused
during the charging.
Power off the mobile phone before removing the battery.
The charging process lasts a longer time for a new battery or a battery not in use for long. If the
battery voltage is too low to enable the mobile phone to be powered on, charge the battery for a longer
time. In this case, the battery icon does not flicker until a long time after the battery enters the charge
status.
During the charging, ensure the battery is placed in a room temperature environment or in an
environment close to room temperature.
Immediately stop using the battery if the battery produces odor, overheats, cracks, distorts or has
other damage, or if the electrolyte leaks.
The battery wears out with use. A longer charging time is required as the battery is put into use for a
long time. If the total conversation duration decreases but the charging time increases even though the

-12-
battery is properly charged, purchase a standard battery from the OEM or use a battery approved by our
company. Using any poor-quality fittings will cause harm to your mobile phone or even incur danger!
Note: To guarantee your personal safety and protect the environment, do not litter the battery! Return the
old battery to the mobile phone manufacturer or place it in specified battery reclamation areas. Do not
litter any battery with other rubbish.
Warning: Short-circuits of the battery may cause explosion, fire, personal injury or other severe
consequences!
3.4 Powering On/Off the Mobile Phone
Hold the End key for a while to power on the mobile phone. A power-on animation appears on the display
screen.
Input the phone lock code and press the OK key if the mobile phone prompts you to input the phone lock
code. The original code is 0000.
Input the PIN and press the OK key if the mobile phone prompts you to input the PIN. The PIN is provided
by the network operator for new opening SIM card.
Enter the standby interface. To power off the mobile phone, hold the End key for a while.
3.5 Linking to the Network
After the SIM card and the mobile phone are successfully unlocked, the mobile phone automatically
searches for an available network. After finding a network, the mobile phone enters the standby state.
When the mobile phone is registered in the network, the name of the network operator is displayed on the
screen. Then you can dial or receive a call.
3.6 Dialing Calls
In the standby interface, press number keys to input the area code and the telephone number, and then
press the Dial key to dial a call. To end the call, press the End key.
Dialing an international call

-13-
Press the * key twice can input "+". Then input the country code, the area code and the telephone number.
Finally, press the Dial key.
Dialing a call to a number in the phonebook
Enter the phonebook and use the up or down direction keys to find the telephone number you want to call.
Press the Dial key. The mobile phone automatically dials the chosen telephone number.
Redialing the last number
In the standby interface, press the dial key to show the dialed calls.
Press the up or down direction keys to select a number you want to dial and then press the Dial key.
Adapting volume
During a conversation, you can press the Up or Down direction keys to tune the sound volume.
Answering incoming calls
Press the Dial key or the Left soft key to answer an incoming call.
Press the End key to end the current conversation.
To reject an incoming call, press the End key or the Right soft key.
Note: If the caller can be identified, the mobile phone will present the calling number. If the calling number
exists in the phonebook, the mobile phone will present both the name and the phone number of the caller.
If the caller cannot be identified, the mobile phone will present the calling number only. You can answer an
incoming call when using a function list or browsing the phonebook.
Using options during a conversation
Select Options during a conversation to pause, end the ongoing call, originate a new call, browse the
phonebook, view information, set the mute, set the DTMF, or perform other operations. For details, refer to
the menu guide.
3.7 Using the Headset
It would enter headset mode automatically when you insert headset to the slot. Make sure of inserting it at
the bottom of the slot, or you can’t use it normally.

-14-
4 Input method
This mobile phone provides multiple input methods, including English input and numeric input. You can
use these input methods when editing the phonebook, short messages, files and greeting text.
4.1 Icons for Input Methods
After you enter an edit window such as a window for editing the phonebook, short messages or the
memorandum, an icon is displayed to indicate the current input method:
Numeric input:“123”
English input in upper case:“ABC”
English input in lower case:“abc”
4.2 To Shift Entry Methods
Press the #key to switch between input methods.
4.3 Numeric Input
You can input numbers with the numeric input method. Press a number key to input the corresponding
number.
4.4 English input and numeric input:
The keyboards for English input and numeric input are defined in the following table:
Key
Character or Function
Remarks
Number key 1
. , - ? ! ’@ : # $ /_ 1
Number key 2
ABCabc2
Number key 3
DEFdef3
Number key 4
GHIghi4
Number key 5
JKLjkl5

-15-
Number key 6
MNOmno6
Number key 7
PQRSpqrs7
Number key 8
TUVtuv8
Number key 9
WXYZwxyz9
Number key 0
0
# key
Press it to switch between input
methods
Left direction key
Press it to move to the left
Right direction key
Press it to move to the right
Left soft key
Equivalent to OK or Options
Right soft key
Equivalent to Back or Clear
End key
Press it to return to the standby
interface
English input:
Each key is used to represent multiple characters. Quickly and continuously press a key till the
character you want appears. Input the next character after the cursor moves.
Press the #key to switch between input methods
To input a blank, switch to the English input mode (in upper or lower case) and then press number key
0.
To clear wrong inputs, press the Right soft key.
4.5 Inserting a Symbol
Press * key to enter the Select symbol interface, use direction keys to select a symbol you want.

-16-
5 Using the Menus
5.1 Call logs
Missed calls
You can view a list of the latest missed calls.
Note: When the mobile phone indicates that some calls are missed, you can select Details to enter the
missed calls list. Navigate to a missed call and then press the Dial key to dial the number that originated
that call.
Dialed calls
You can view the latest dialed calls. Choose Dialed calls and then select a dialed call to call, delete or
delete all (or send SMS to it) etc.
Received calls
You can view the latest received calls. Choose Received calls and then select a received call to call,
delete or delete all (or send SMS to it) etc.
All calls
You can view the latest all calls. Choose all calls and then select a dialed call to call, delete or delete all
(or send SMS to it) etc.
5.2 Names
The mobile phone can store up to 300 telephone numbers. The telephone numbers that a SIM card can
store depends on the storage capacity of the SIM card. The telephone numbers stored in the mobile
phone and in the SIM cards form a phonebook.
The phonebook search function enables you to view contacts. You can search a contact as required from
the phonebook. Select this option, in the edit interface, input the name of the contact you want to search
or the first letter(s) of the name. All the contacts meeting the search condition are listed. Press the Up and
Down direction keys to browse the contacts and select contact. Press left or right direction key to view

-17-
other groups: family, friends, business, classmates and so on.
5.3 Fun and Games
FunBox:You can enter FunBox through this function.
Snake: A game name Snake was embedded in the phone, for more specification, please refers to
Help in the game.
5.4 Multimedia
Camera
The phone is provided with a camera, which supports the photographing functions. Roll the phone to align
the camera to the picture and then press OK key to capture photos. Pictures will be saved in the file
system of the memory card. You can change the image/camera settings, by accessing the options after
entering the camera mode.
Image
You can view the pictures or images through this function.
Video camera
This function enables you to record dynamic pictures. You can press OK key to capture video clips; left
soft key to access Options; right soft key to exit capture interface.
Video
This function enables you to play video files. By pressing the direction key can you control the playing
process of video player: play/pause(OK key), switch to last video/next video (press left or right direction
key), fast forward (press and hold right direction key) and rewind (press and hold left direction key). In
video player interface, you can press * and # key to tune volume.
Audio
You can use this function to play audio files. By pressing the direction key you can control the playing
process of audio player: play/pause(OK key), switch to last song/next song (press left or right direction

-18-
key), fast forward (press and hold right direction key) and rewind (press and hold left direction key). In
audio player interface, you can press * and # key to tune volume.
FM radio
You can use the application as a traditional FM radio with automatic tuning and saved channels.
Recorder
Use this function to record audio files. The phone support WAV and AMR. The recording file you stopped
would be stored in file list automatically.
5.5 Message
If the short message memory is full, a blinking message icon appears on the top of the screen. To
normally receive short messages, you need to delete some of the existing short messages.
Write message
Through this function, you can create a new text message. You can type a message, and you're also able
to insert a pre-defined message from “Templates”.
Inbox
Received messages are listed in this menu.
Outbox
Messages sent failed are stored in this item.
Drafts
Draft messages are listed in this item.
Sent box
The messages which are sent successfully are stored in this menu.
Templates
You can create pre-defined messages in this interface.
Broadcast message
You can view or set the broadcast messages in this interface.
Table of contents
Languages:
Other FLY Cell Phone manuals