manuals.online logo
Brands
  1. Home
  2. •
  3. Brands
  4. •
  5. FOR-A
  6. •
  7. Switch
  8. •
  9. FOR-A HVS-490 User manual

FOR-A HVS-490 User manual

HVS-490
HVS-491OU/492OU/492WOU/492ROU
1. 接続
(1) 映像 (SDI 信号) を入力します。
(2) 同期信号を入力します。
ループスルーしないときは、
他方の端子を 75Ωで終端します。
同期信号を入力しない場合は、
「2. セットアップ」を参照し、
フレームシンクロナイザ機能を ON に
設定してください。
(3) 合成出力 (SDI 信号) を後段の機器に
接続します。
(4) OU 付属のケーブルを使い
HVS-490 のLAN HVS (OU) と
コントロールパネルの HVS LAN を接続します。
(5) 付属の電源ケーブルを使い HVS-490 と
コントロールパネルに電源を供給します。
(6) コントロールパネルの背面にある
電源スイッチを ON にします。
(7) HVS-490 前面にある電源スイッチを
ON にします。
※HDMI 出力は、プレビュー、プログラム、
マルチビューなどの合成映像の他、
入力映像をそのまま出力することもできます。
※LAN の接続には、イーサネットハブを使用することもできます。
2. セットアップ
MU (HVS-490)の選択
(1) システムを起動すると、コントロールパネルにメニューが表示されます。
(2) メニュー画面の上部で PANEL タブをタップします。
(3) NETWORK ボタンを押し、[PANEL > NETWORK > NETWORK] メニューを開きます。
(4) ▼ボタンを押し、2ページに移動します。F1 を回し、HVS-490を選択し F1 を押します。YESをタップすると、コントロールパネルが再起動します。再起動
後、HVS-490 と接続するとコントロールパネルのボタンが点灯します。
もしコントロールパネルのボタンが点灯しないときは、HVS-490 のIP アドレス(LAN HVS(OU) ポート) を指定します。[PANEL > NETWORK >
NETWORK] メニュー PAGE 2 でF2 を押し、キーパッドでアドレスを入力後 Enter を押します。
システムモードの選択
(1) [SETUP > SYSTEM > FORMAT] メニューを開きます。
(2) F1 を回し、スイッチャで使用するビデオ信号のフォーマットを選択し F1 を押します。YES をタップすると、スイッチャが再起動します。再起動後スイッチャは
指定したフォーマットに切り替わります。
(3) アスペクト比は、[SETUP > SYSTEM > FORMAT] メニューで F2 を回して設定します。
日付、時刻の設定
[SETUP > SYSTEM > TIME] メニューを開き、日付を設定します。PAGE 2 で時刻を、PAGE 3 でタイムゾーンとサマータイムの ON/OFF を設定します。
フレームシンクロナイザ機能を ON にする
必要に応じてフレームシンクロナイザ機能を ON にしてください。
(1) [SETUP > INPUT > SIGNAL] メニューを表示します。
(2) F1 を回して IN01 を選びます。F4 を回して FS をON にします。
(3) F1 を回して IN02 を選びます。F4 を回して FS をON にします。その他の入力についても同様に FS をON にできます。
3. 出力映像を選ぶ
M/E1PGM の映像を選ぶ
M/E1PGM 列のボタンを押します。ボタンの
ソース映像が M/E1 出力に表示されます。
M/E2PGM の映像を選ぶ
M/E2PGM 列のボタンを押します。ボタンの
ソース映像が M/E2 出力に表示されます。
M/E2PGM の映像を切り替える
(1) M/E2 PST 列のボタンを押してネクスト映像を選んでください。
(2) フェーダを端から端まで動かします。M/E2 出力の映像が
選択したネクスト映像に切り替わります。これをバックグランドの
トランジションと呼びます。
(3) もう一度フェーダを端から端まで動かします。前の映像に戻ります。
※映像が切り替わった瞬間、PGM 列と PST 列の映像信号も切り替わり、
ネクスト映像は常に下の列で選択できるようになります。
M/E1 の操作も同様です。
AUX 出力の映像を選ぶ
(a) AUX1 から M/E1 のPREV 映像を出力してみましょう。
M/E1 バスの上に、バス選択ボタンとKEY/AUX バス*があります。
AUX1 ボタンを押し、次に M/E1 のOUT1 ボタンを押してください。
AUX1 出力に M/E1 のPREV 映像が出力されます。
(b) AUX2 に入力 1を出力するには AUX2 次に KEY/AUX バス*の1 を押します。
(c) AUX3 にマルチビューワ映像を出力するには AUX3、MV1 と押します。
* HVS-491OU はKEY/FLX/AUX バス
4. バックグランドのトランジションを実行する
PST 列のボタンを押し、ネクスト映像を選びます。
BKGD ボタンが点灯していることを確認してください。消灯しているときはボタンを押してください。
トランジション
・CUT ・MIX
CUT を押します。 MIX を押します。次に AUTO を押します。(またはフェーダを端から端へ動かします。)
映像が即座に切り替わります。
・パターン
(1) WIPE を押します。
(2) BKGD ボタンをすばやく 2度押し
[M/E FLEXaKEY > M/E2 > BKGD PGM >
TRANS > TRANS] メニューを表示します。
(3) F4 を回してパターンを選択します。
(4) AUTO を押します。(またはフェーダを端から端へ動かします。)
HVS-490 梱包品
HVS-490
電源コード
EIA ラック取付金具
CD-ROM (PDF 取扱説明書)
セットアップガイド (本書)
セットアップガイド
HVS-490用OU 梱包品
HVS-491OU/492OU/492WOU/
492ROU
LAN ケーブル
電源コード
M/E1PGM
M/E2PGM
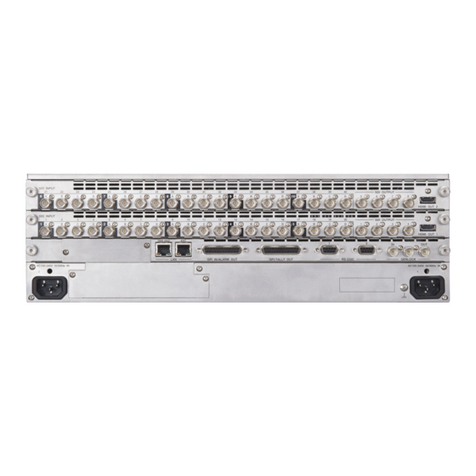
HVS-490 背面
HVS-492OU
1 2
M/E
1 2
M/E
BUS DISP SEL BUS
BUSFUNC
BUS REC ATTACH DETACH
MACRO
FLX1 FLX2 FLX3 FLX41 2
UTILITY
KEY1 KEY2 KEY3 KEY4
12345678910 11 12 13 15 16 17 1814
KEY/FLX
1 2 3 4 5 6 7 8 9 10 11 12 13 14 15 16 17 18 BUS FUNC
FADERLIMIT
DIRECTION
REV NOR/REV PATTERN TRANS
RATE
M/E2PGM
M/E2PST
1 2 3 4 5 6 7 8 9 10 11 12
KEY1 KE Y2 KE Y3 KEY4 1 2
AUX
UTI LITY
1 2 3 4 5 6 7 8 9 10 11 12 13 14 15 16 17 18
KEY /AUX
M/E1 M/E2
PGM OUT1 OUT2 OUT3 PGM OUT1 OUT2 OUT3 MV1 MV2 MV3 BUS DISP
CUT MIX WIPE
AUX TRANS ITION
1 2 3 4 5 6 7 8 9 10 11 12 13 14 15 16 17 18 BUS FUNC
FADER LIMI T
DIRECTION
REV NOR/REV PAT TERN TRANS
RATE
AUTO C UT
TRAN SITION TYPE
MIX W IPE EF F1 EF F2
NEXT TRANS ITION
BKGD
KEY1 KEY2 KE Y3 KE Y4
BUS DISP SEL BUS
BUS FUNC
B US REC A TT ACH DET ACH
MACRO
FLX1 FLX2 FLX3 FLX41 2
UTILIT Y
KEY1 KE Y2 KEY3 KEY4
1 2 3 4 5 6 7 8 9 10 11 12 13 15 16 17 1814
KEY /FLX
USE R BUT T ON
11 12 13 14 15
GPII/O HVS LAN
POWER1
AC100-240V50/60Hz IN POWE R
ON
OFF
POWER2
AC100-240V5 0/60HzIN P OWER
ON
OFF
SDI INPUT HDMI
65431 21615141312111098765431 2 21
M/E AUX
OPTION SLOT BOPTION SLOT A
AC100-240V 50/60Hz IN
2 1
AC100-240V 50/60Hz IN
REF IN REF OUT
GENLOCKGPI/TALLY OUTGPI IN/ALARMLAN
HVS(OU) EXT 1 2
RS-422
3G/HD-SDI (M/E2 PGM)
3G/HD-SDI (M/E1 PGM)
同期信号
AC 電源
プレビュー
映像
AC 電源
ビデオサーバ
VTR など
3G/HD-SDI
75Ω終端
(AUX1)
HVS-490
HVS-491OU/492OU/492WOU/492ROU
1. Connection
(1) Connect SDI video signal inputs.
(2) Input a reference signal. Terminate the
other connector with 75-ohm,
if it is not looped-through.
If no reference signal is input, refer to
Sec. 2 “Setup” to turn on frame synchronizers.
(3) Connect combined SDI video signal outputs.
(4) Use the supplied LAN cable to connect
HVS-490 LAN HVS (OU) to HVS LAN on the control panel.
(5) Supply power to HVS-490 and the control panel
respectively using the supplied AC cables.
(6) Turn on power switch(es) on the rear control panel.
(7) Turn on power switch(es) on the
HVS-490 front panel.
* HDMI outputs can display input sources,
as well as combined images such as
preview, program or multiview.
* An Ethernet hub can be used for LAN connections.
2. Setup
Select the HVS-490 for MU
(1) A menu is displayed on the control panel at power ON.
(2) Tap the PANEL tab on the touch panel menu screen.
(3) Tap NETWORK to display the [PANEL > NETWORK > NETWORK] menu.
(4) Press the down arrow (▼) button to go to PAGE 2. Turn F1 to select HVS-490 and press F1. Tap YES on the confirmation
dialog box to restart the control panel. After restart, control panel buttons will light up when the control panel is connected to HVS-490.
If the buttons stay unlit, set the MU (HVS-490) IP address (LAN HVS(OU) port). Press F2 on the [PANEL > NETWORK > NETWORK]
menu PAGE 2. Enter the address using the keypad and press Enter.
Select the System Signal Format
(1) Open the [SETUP > SYSTEM > FORMAT] menu.
(2) Turn F1 to select the signal format, then press F1. Tapping YES restarts the switcher. After a restart, the new format is applied.
(3) Open the [SETUP > SYSTEM > FORMAT] menu and turn F2 .to select an aspect ratio.
Set Date and Time
Open the [SETUP > SYSTEM > TIME] menu to set the date.
Go to PAGE 2 to set the time. Go to PAGE 3 to set the time zone and summertime on/off.
Turn Frame Synchronizer to ON
Turn on the frame synchronizer, if necessary.
(1) Open the [SETUP > INPUT > SIGNAL] menu.
(2) Turn F1 to select IN01. Turn F4 to set FS to ON.
(3) Turn F1 to select IN02. Turn F4 to set FS to ON. Set FS to ON for other inputs in the same manner.
3. Select Output Video
Select an M/E1PGM Video
Press a bus button on the M/E1PGM row.
The corresponding video will appear on M/E1 output.
Select an M/E2PGM Video
Press a bus button on the M/E2PGM row.
The corresponding video will appear on M/E2 output.
Change the M/E2PGM Video
(1) Press a button on the M/E2 PST row to select a next video.
(2) Move the fader from end to end.
The M/E2 output screen will change to the next video.
This is called a "background transition."
(3) Move the fader from end to end again. The M/E2 output
screen changes to the previous video.
* The PGM and PST signal selections switch as soon as the
PGM video changes, and the next video can always be selected
on the bottom (PST) row. The M/E1 bus operates in the same manner as the M/E2 bus.
Select AUX Output Video
(a) To display the M/E1 Preview video on the AUX1 screen, locate
the bus selection buttons and KEY/AUX bus* on the M/E1 bus
and press AUX1, then press M/E1 OUT1.
(b) To display the Input 1 video on the AUX2 screen,
press AUX2, then press 1 on the KEY/AUX bus*.
(c) To display a multiviewer video on the AUX3 screen,
press AUX3, then press MV1.
* KEY/FLX/AUX bus (HVS-491OU)
4. Perform Background Transitions
Select a next video on the PST bus.
Verify that BKGD is turned on. If not, press the button to turn on the button light.
Transitions
- CUT - MIX
Press CUT. The background image changes instantly. Press MIX. Then press AUTO. (Or move the fader from end to end.)
- Pattern
(1) Press WIPE.
(2) Press BKGD twice quickly to display the
[M/E FLEXaKEY > M/E2 > BKGD PGM > TRANS >
TRANS] menu.
(3) Turn F4 to select a pattern.
(4) Press AUTO. (Or move the fader from end to end.)

Quick Setup Guide
HVS-490 Packing List
HVS-490
AC cord
EIA Rack mount brackets
CD-ROM (PDF Operation Manual)
Quick Setup Guide (this guide)
Control Panel Packing List
HVS-491OU/492OU/492WOU/492ROU
LAN cable
AC cord
M/E1PGM
M/E2PGM
HVS-490 rear panel
HVS-492OU
1 2
M/E
1 2
M/E
1 2 3 4 5 6 7 8 9 10 11 12 13 14 15 16 17 18 BUS FUNC
FADER LIMI T
DIRECTION
REV NOR/REV PAT TERN TRANS
RATE
AUTO C UT
TRAN SITION TYPE
MIX W IPE EF F1 EF F2
NEXT TRANS ITION
BKGD
KEY1 KEY2 KE Y3 KE Y4
BUS DISP SEL BUS
BUS FUNC
B US REC A TT ACH DET ACH
MACRO
FLX1 FLX2 FLX3 FLX41 2
UTILIT Y
KEY1 KE Y2 KEY3 KEY4
1 2 3 4 5 6 7 8 9 10 11 12 13 15 16 17 1814
KEY /FLX
USE R BUT T ON
11 12 13 14 15
1 2 3 4 5 6 7 8 9 10 11 12
KEY1 KE Y2 KE Y3 KEY4 1 2
AUX
UTI LITY
1 2 3 4 5 6 7 8 9 10 11 12 13 14 15 16 17 18
KEY /AUX
M/E1 M/E2
PGM OUT1 OUT2 OUT3 PGM OUT1 OUT2 OUT3 MV1 MV2 MV3 BUS DISP
CUT MIX WIPE
AUX TRANS ITION
BUS DISP SEL BUS
BUSFUNC
BUS REC ATTACH DETACH
MACRO
FLX1 FLX2 FLX3 FLX41 2
UTILITY
KEY1 KEY2 KEY3 KEY4
12345678910 11 12 13 15 16 17 1814
KEY/FLX
1 2 3 4 5 6 7 8 9 10 11 12 13 14 15 16 17 18 BUS FUNC
FADERLIMIT
DIRECTION
REV NOR/REV PATTERN TRANS
RATE
M/E2PGM
M/E2PST
AC power source
GPII/O HVS LAN
POWER1
AC100-240V50/60Hz IN POWE R
ON
OFF
POWER2
AC100-240V5 0/60HzIN P OWER
ON
OFF
SDI INPUT HDMI
65431 21615141312111098765431 2 21
M/E AUX
OPTION SLOT BOPTION SLOT A
AC100-240V 50/60Hz IN
2 1
AC100-240V 50/60Hz IN
REF IN REF OUT
GENLOCKGPI/TALLY OUTGPI IN/ALARMLAN
HVS(OU) EXT 1 2
RS-422
3G/HD-SDI (M/E2 PGM)
3G/HD-SDI (M/E1 PGM)
Reference signal
Preview
AC power source
VTR
Video server
3G/HD-SDI
75-ohm termination
(AUX1)

Other manuals for HVS-490

4

This manual suits for next models

4

Other FOR-A Switch manuals

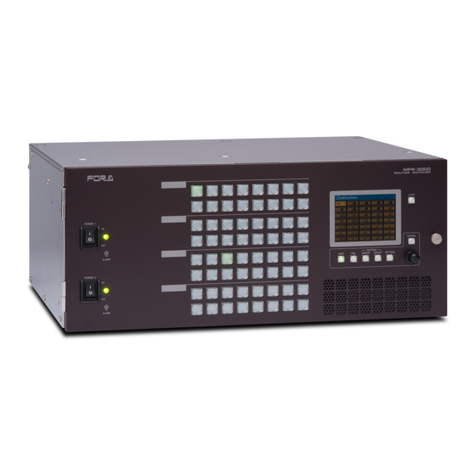
FOR-A MFR-6100 User manual

FOR-A

FOR-A MFR-6100 User manual

FOR-A MFR-4000R User manual

FOR-A

FOR-A MFR-4000R User manual

FOR-A MFR-3000 User manual

FOR-A

FOR-A MFR-3000 User manual

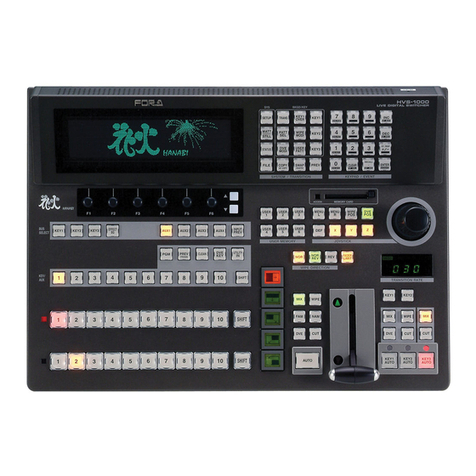
FOR-A HVS-492OU User manual

FOR-A

FOR-A HVS-492OU User manual

FOR-A MFR-6000R User manual

FOR-A

FOR-A MFR-6000R User manual

FOR-A MFR-3100EX User manual

FOR-A

FOR-A MFR-3100EX User manual

FOR-A MFR-1000 User manual

FOR-A

FOR-A MFR-1000 User manual

FOR-A MFR-5000 User manual

FOR-A

FOR-A MFR-5000 User manual

FOR-A VSF-6496 User manual

FOR-A

FOR-A VSF-6496 User manual

FOR-A HVS-350HS User manual

FOR-A

FOR-A HVS-350HS User manual

FOR-A HVS-6000 User manual

FOR-A

FOR-A HVS-6000 User manual

FOR-A MFR-3232 User manual

FOR-A

FOR-A MFR-3232 User manual

FOR-A MFR-4000 User manual

FOR-A

FOR-A MFR-4000 User manual

FOR-A VPS-700 MU User manual

FOR-A

FOR-A VPS-700 MU User manual

FOR-A HVS-1000HS User manual

FOR-A

FOR-A HVS-1000HS User manual

FOR-A HVS-3800HS Quick setup guide

FOR-A

FOR-A HVS-3800HS Quick setup guide

FOR-A HVS-3800HS User manual

FOR-A

FOR-A HVS-3800HS User manual

FOR-A HVS-390HS User manual

FOR-A

FOR-A HVS-390HS User manual

FOR-A RS-HD808 User manual

FOR-A

FOR-A RS-HD808 User manual

FOR-A MFR-3100EX User manual

FOR-A

FOR-A MFR-3100EX User manual

FOR-A HVS-AUX8 User manual

FOR-A

FOR-A HVS-AUX8 User manual

FOR-A MFR-1616 Installation manual

FOR-A

FOR-A MFR-1616 Installation manual

FOR-A Multi Viewer MV-40F(A) User manual

FOR-A

FOR-A Multi Viewer MV-40F(A) User manual

FOR-A MFR-6000 User manual

FOR-A

FOR-A MFR-6000 User manual

Popular Switch manuals by other brands

Force 10 C300 Installing and maintaining

Force 10

Force 10 C300 Installing and maintaining

3Com 4007 release note

3Com

3Com 4007 release note

Silicon Graphics VBOB owner's guide

Silicon Graphics

Silicon Graphics VBOB owner's guide

Moxa Technologies TN-4516A non-PoE series Quick installation guide

Moxa Technologies

Moxa Technologies TN-4516A non-PoE series Quick installation guide

Juniper QFX3600 quick start

Juniper

Juniper QFX3600 quick start

EVAPCO 017-00464P installation manual

EVAPCO

EVAPCO 017-00464P installation manual

Hirschmann MACH1000 Series user manual

Hirschmann

Hirschmann MACH1000 Series user manual

FS S5850-24S2C-DC quick start guide

FS

FS S5850-24S2C-DC quick start guide

MDT Technologies MDT Glass Push-button II Smart Technical manual

MDT Technologies

MDT Technologies MDT Glass Push-button II Smart Technical manual

Moxa Technologies NPort S8458 Series Quick installation guide

Moxa Technologies

Moxa Technologies NPort S8458 Series Quick installation guide

Asco 3ATS installation manual

Asco

Asco 3ATS installation manual

Sound Sculpture ABYSS owner's manual

Sound Sculpture

Sound Sculpture ABYSS owner's manual

CTC Union ITP-800-8PH24 Quick installation guide

CTC Union

CTC Union ITP-800-8PH24 Quick installation guide

Abseco AFi Series manual

Abseco

Abseco AFi Series manual

ATEN CS22U user guide

ATEN

ATEN CS22U user guide

ABB GAF460 Series operating instructions

ABB

ABB GAF460 Series operating instructions

Roger RWH-1 operating manual

Roger

Roger RWH-1 operating manual

NETGEAR XSM7224S - ProSafe 10 Gigabit Stackable installation guide

NETGEAR

NETGEAR XSM7224S - ProSafe 10 Gigabit Stackable installation guide

manuals.online logo
manuals.online logoBrands
  • About & Mission
  • Contact us
  • Privacy Policy
  • Terms and Conditions

Copyright 2025 Manuals.Online. All Rights Reserved.