FUHR 833 Manual

WWW.FUHR.PL
FUNKCJA ZAMYKANIA
Przy zamykaniu drzwi dwa rygle zapadkowe wysuwają
się automatycznie na 20 mm i są zabezpieczone przed
wciśnięciem do środka. Drzwi otwiera się po prostu
klamką od wewnątrz lub kluczem do wkładki profilowanej
od zewnątrz. Główny rygiel można otworzyć jednym
obróceniem klucza. Klamka blokuje wtedy drzwi dla kontroli
lub jako zabezpieczenie dla dzieci.
Funkcja ogranicznika 833
(opcjonalne doposażenie)
W środku: Funkcja ogranicznika jest aktywowana przez obrót
gałki o 90° bądź przez obrót klucza we wkładce. Funkcja
ogranicznika jest dezaktywowana przez obrót w przeciwnym
kierunku.
Na zewnątrz: Od strony zewnętrznej w wariancie z gałką
ogranicznik nie jest obsługiwany. W wariancie z wkładką
funkcję ogranicznika można obsługiwać również z zewnątrz.
Funkcja ogranicznika 833SP
W środku: Funkcja ogranicznika jest aktywowana przez
obrót gałki o 90°. Funkcja ogranicznika jest dezaktywowana
przez obrót w przeciwnym kierunku.
Na zewnątrz: Przy nieaktywnej funkcji ogranicznika można
otworzyć drzwi jak zwykle kluczem do wkładki profilowanej.
Przy aktywnej funkcji ogranicznika rygiel główny musi
być otwarty jeszcze raz kluczem do wkładki profilowanej.
Następnie można otworzyć drzwi jak zwykle kluczem do
wkładki profilowanej.
Funkcja dzienna zapadki (wersja opcjonalna)
Aktywacja zapadki dziennej: Nacisnąć do oporu
i przytrzymać klamkę. Przesunąć suwak dzienny do oporu.
Zwolnić klamkę. Zapadki ryglowe pozostają teraz wciągnięte,
zapadka główna nadal działa.
Dezaktywacja zapadki dziennej: Ustawić suwak dzienny
z powrotem w pozycji wyjściowej. Zapadki ryglowe teraz
ponownie działają.
www.fuhr.pl
Instrukcja montażu, obsługi i konserwacji
833/833SP
autosafe
MBW5/PL-EN/07.19-8
Certyfikowane przez SGK typy drzwi
aluminiowych i drewnianych
7V08 / DIN 18251-3, klasa / Class 3
LOCKING FUNCTION
By closing the door two latching deadbolts extend automati-
cally to 20 mm and remain blocked until operated.
The door is unlocked by means of the handle or via the pro-
file cylinder key from outside. The main bolt can be locked by
a simple turn of the key. The handle is blocked as a control or
as child lock.
Restrictor function 833
(retrofittable option)
Internal: A 90° turn of the knob respectively a turn of the
cylinder key enables the restrictor function. A turn in the
opposite direction disables the restrictor function.
External: The restrictor cannot be operated from the outside
with the knob version. With the cylinder version the restrictor
function can be operated form the outside as well.
Restrictor function 833SP
Internal: A 90° turn of the knob enables the restrictor func-
tion. A turn in the opposite direction disables the restrictor
function.
External: If the restrictor function is deactivated the door
may be opened by cylinder key as usual. If the restrictor func-
tion is activated the deadbolt has to be locked out once again
via the cylinder key. Afterwards the door can be opened via
the cylinder key as usual.
Day latch function (optional version)
Day latch activation: Press the lever handle to the limit stop
and hold on. Slide the day latch switch to the limit stop.
Release the lever handle. The latching deadbolts now stay
retracted; the main latch is still in function.
Day latch deactivation: Bring the day latch switch back into
the starting position. The latching deadbolts are now again
in function.
Installation, operation and maintenance instructions
SKG-certified types for timber and
aluminium doors

WWW.FUHR.PL
833/833SP
autosafe
Konserwacja
Zwracamy uwagę inwestorów i użytkowników na to, że
przynajmniej raz do roku należy przeprowadzić następujące
prace konserwacyjne:
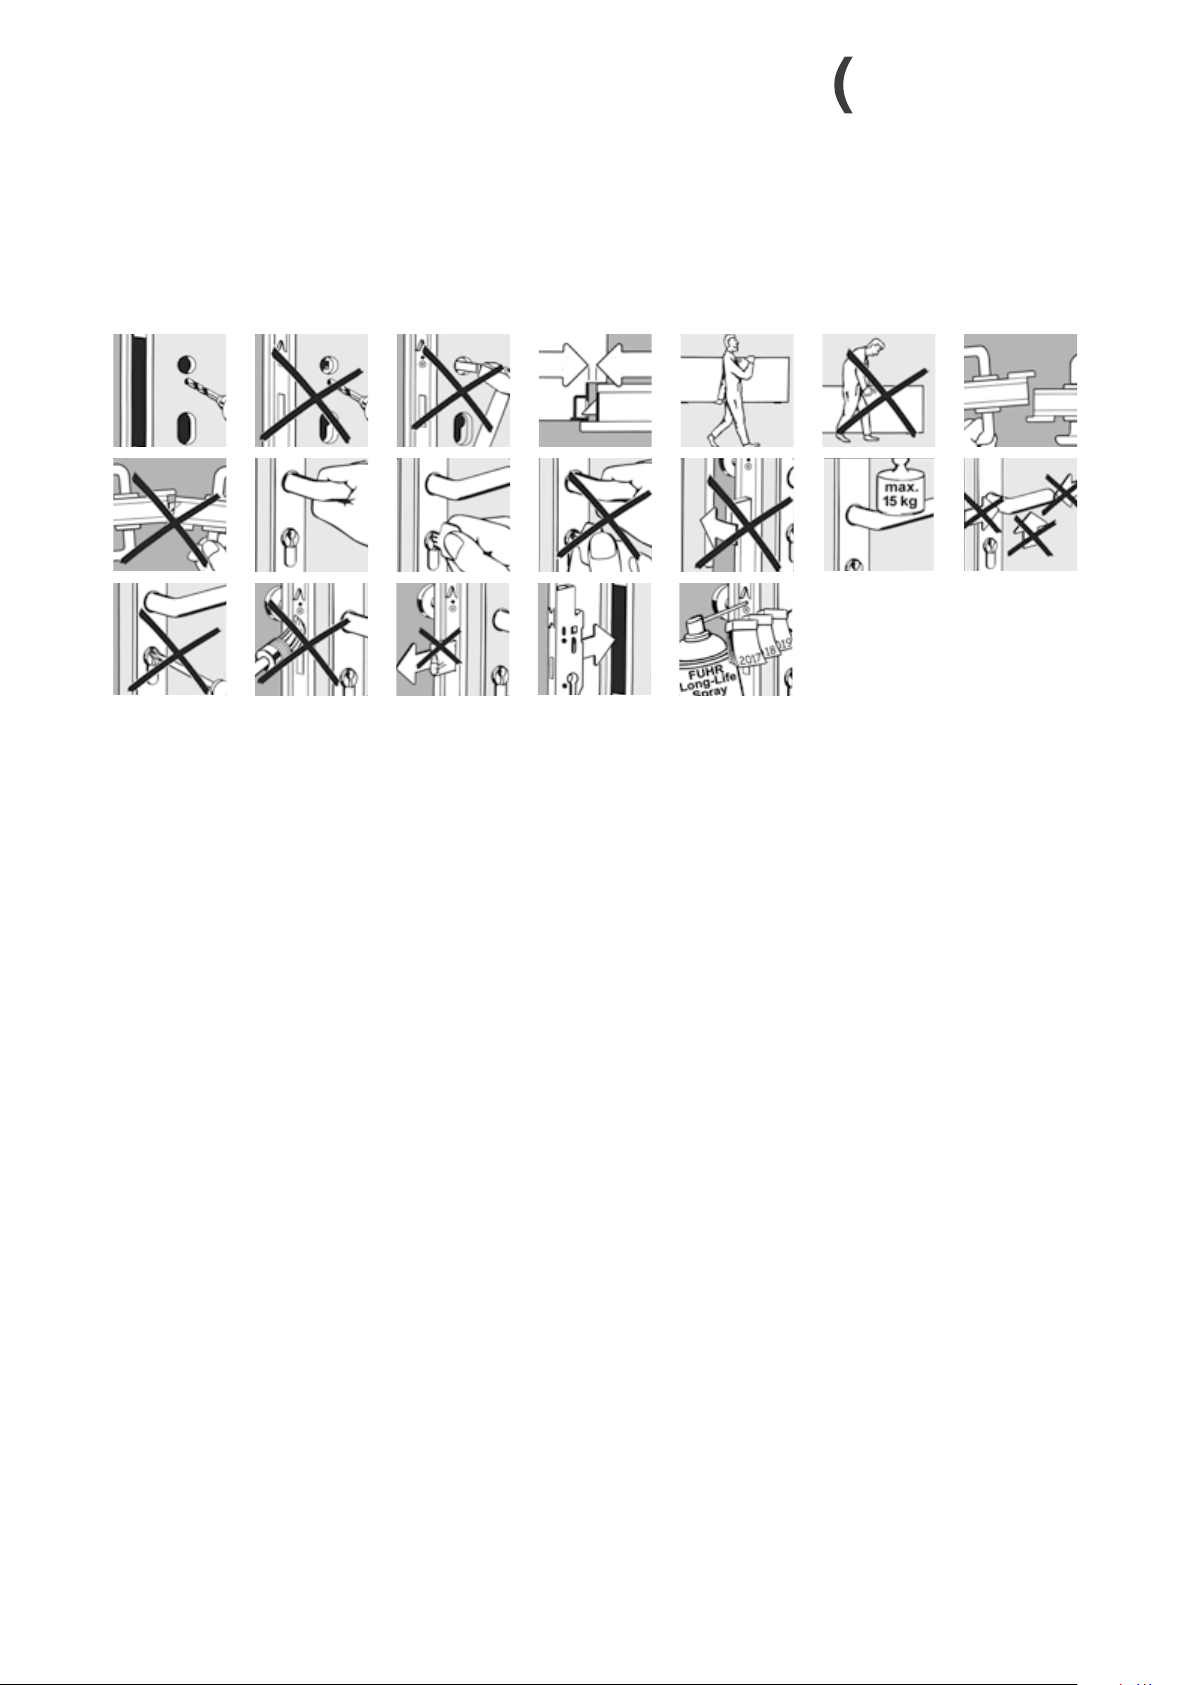
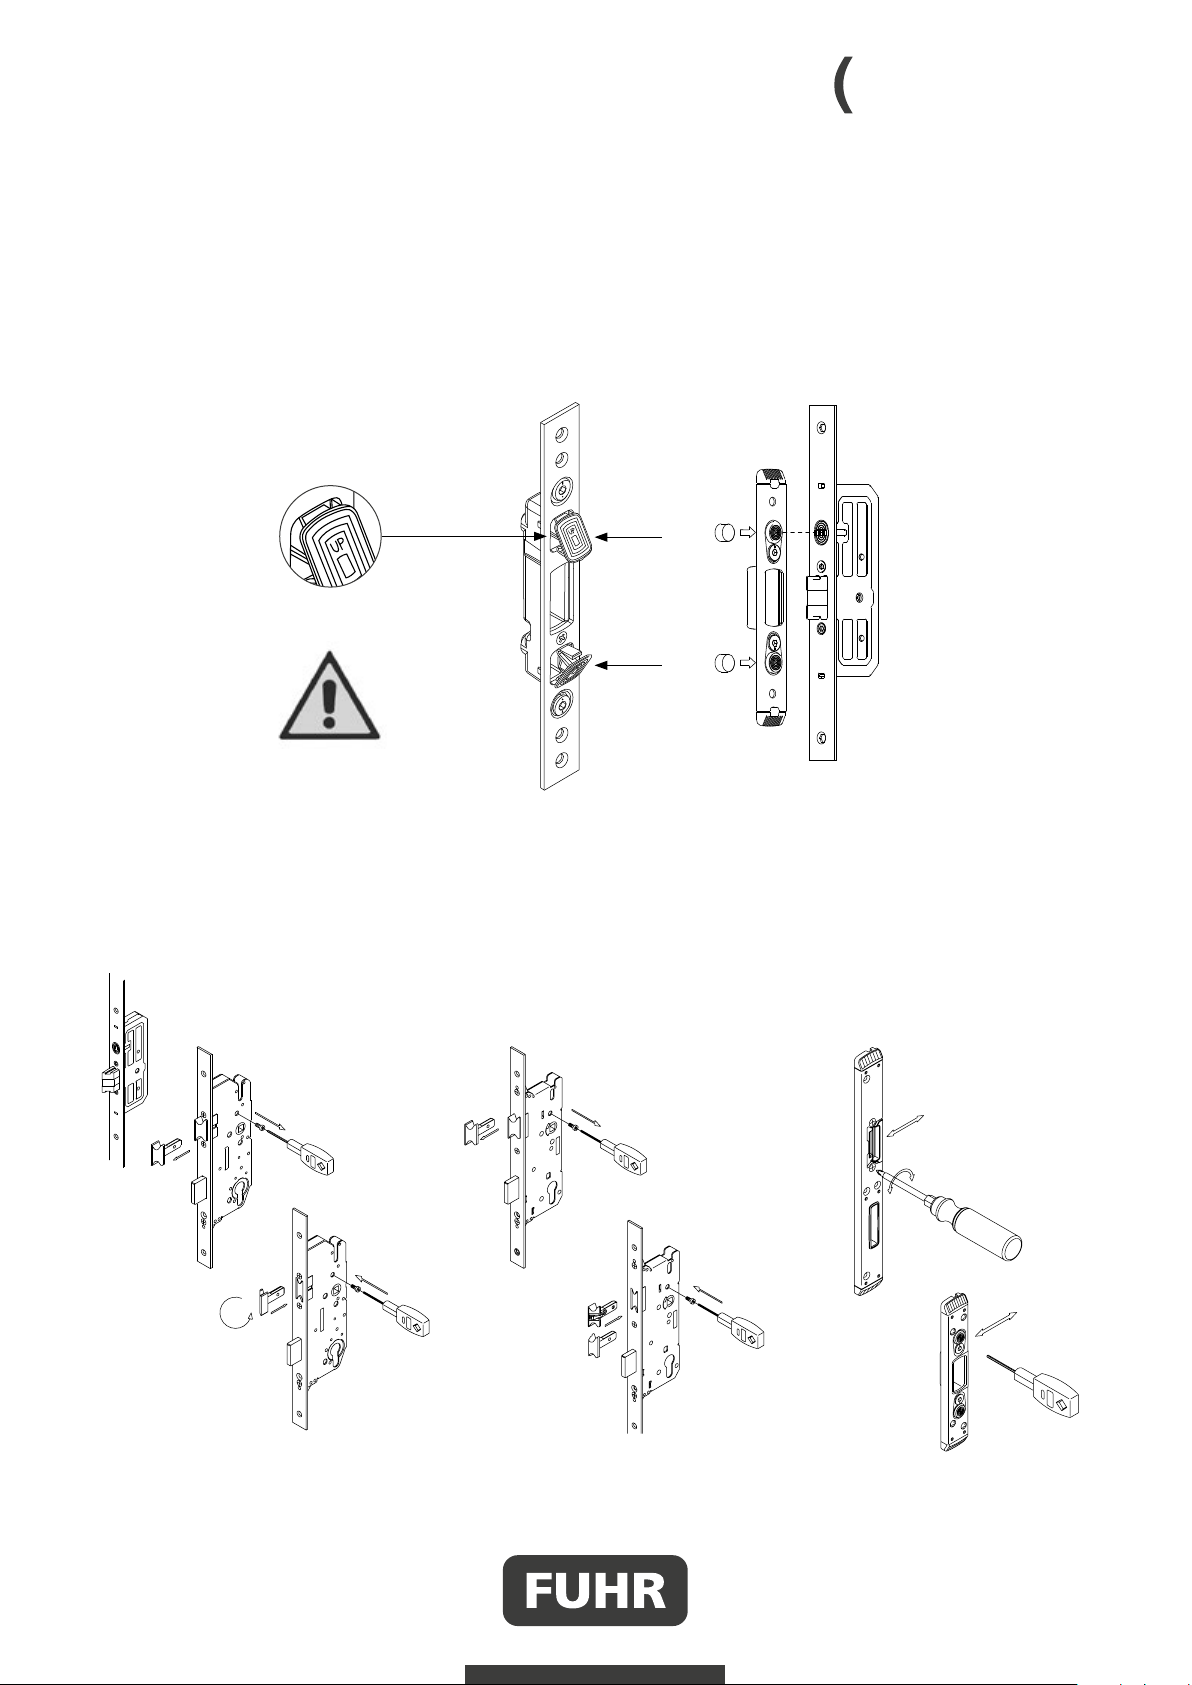
• Wszystkie części ruchome i miejsca zamykania należy
nasmarować i skontrolować ich działanie.
• Istotne dla bezpieczeństwa elementy okuć skontrolować
pod kątem pewnego zamocowania i zużycia.
• W zależności od potrzeb wkręty mocujące powinny
zostać dokręcone, a uszkodzone lub zużyte części okuć
wymienione na oryginalne przez specjalistów.
• Należy stosować tylko takie środki do czyszczenia
i pielęgnacji, które nie mają negatywnego wpływu na
zabezpieczenie antykorozyjne elementów okuć.
WAŻNE: Podane punkty służą jako uzupełnienie do
informacji firmy FUHR w sprawie odpowiedzialności
za produkt dla zamknięć drzwi, patrz www.fuhr.de.
Zwracamy uwagę inwestorów i użytkowników na
ich przestrzeganie. W razie nieprzestrzegania tych
niezbędnie koniecznych zaleceń nie ma gwarancji
niezawodnego działania produktu.
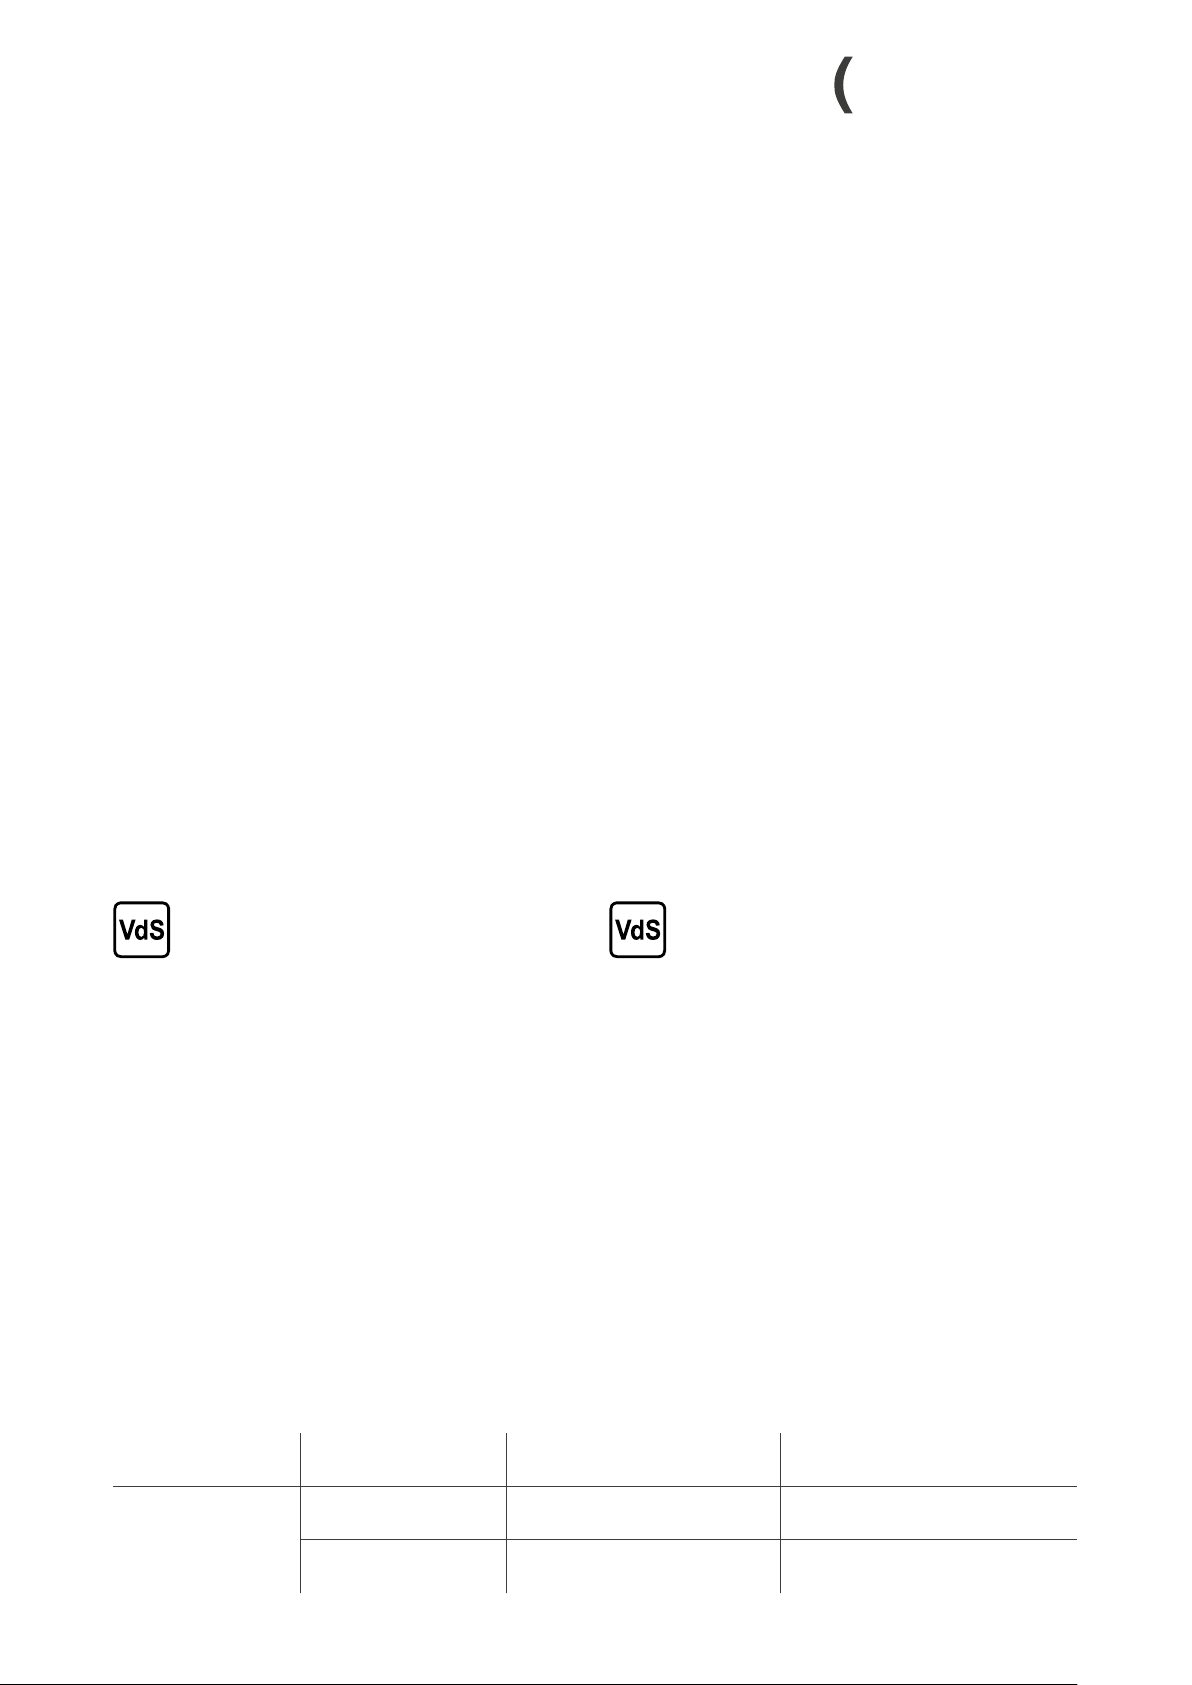
Dla systemów zaaprobowanych przez
VdS należy przestrzegać następujących
zaleceń:
Do zaaprobowanego przez VdS zamka wielopunktowego należy
zamontować zaaprobowaną przez VdS wkładkę profilowaną.
Wkładkę profilowaną należy chronić zaaprobowanym przez
VdS lub testowanym zgodnie z DIN szyldem antywłamaniowym.
Klucz należy zawsze przechowywać w bezpieczny sposób,
tak by był dostępny tylko dla uprawnionych.
W razie zgubienia klucza wkładkę należy niezwłocznie
wymienić lub przestawić na nowy sposób zamykania przez
zmianę kodowania bądź zablokować/skasować kodowanie
zgubionego klucza.
Wymagana klasa dla tych komponentów zależy od klasy
zamka i można się z nią zapoznać w poniższej tabeli:
autosafe 833/833SP – aprobata VdS klasa A
Zamek
Lock
Wkładka profilowana
Profile cylinder
Szyld zaaprobowany przez VdS
VdS-approved door plate
Testowany zgodnie z DIN 18 257
DIN tested to DIN 18 257
Klasa A
Class A
Klasa A
Class A
przynajmniej klasa AZ
at least class AZ
przynajmniej klasa ES 1-ZA
at least class ES 1-ZA
Klasa AZ
Class AZ
przynajmniej klasa A
at least class A
przynajmniej klasa ES 1
at least class ES 1
Maintenance
Owners and users of buildings are advised that the following
maintenance work has to be carried out at least once a year:
• All movable parts and locking parts have to be oiled and
their working order checked.
• Safety-relevant hardware should be checked for wear and
tear and a continuous firm fit.
• Depending on requirement fixing screws have to be tigh-
tened or the damaged or worn parts exchanged for original
parts by an authorized specialist.
• Only cleaning and care products that do not affect the
hardware’s anti-corrosion qualities must be used.
IMPORTANT: The points outlined above are intended as
an addition to the FUHR Product Liability Information for
door locks, see www.fuhr.de. Owners and maintenance
building managers are instructed to comply with. In
the event of non-compliance with these necessary
instructions faultless operation of the locks cannot be
guaranteed.
The following must be observed for VdS-
approved locking systems:
A VdS-approved profile cylinder is to be installed in the VdS-
approved multipoint locking system. The profile cylinder is
to be protected with a VdS-approved or DIN-tested burglar
resistant door plate.
The key must always be kept secure so that it is accessible
only to the authorized person.
In the case of key loss, the cylinder must be replaced
immediately or, by changing to a new coding, or the coding
of the lost key must be blocked/deleted.
The required class for these components depends on the
class of the lock as shown in the following table:
autosafe 833/833SP – VdS approval class A

WWW.FUHR.PL
833/833SP
autosafe
• Można stosować do elementów z tworzywa sztucznego,
drewna i aluminium.
• Skrzydło i rama muszą przebiegać na równolegle na tej
samej wysokości.
• Należy stosować wyłącznie wkładki profilowane zgodne
z DIN 18252.
• Wyfrezowanie na skrzynkę zamka zgodnie z rysunkiem.
• Wyfrezowanie na wkładkę profilowaną i klamkę muszą być
dopasowane.
• Nigdy nie wiercić otworów na okucia przy wmontowanym
zamku.
• Przed montowaniem zamka należy usunąć wszystkie
zanieczyszczenia np. wióry z obszaru frezowania.
• Listwę czołową i zaczepy zamocować wkrętami ø 4 mm
o długości dopasowanej do systemu profili.
• Wkręty montażowe należy wkręcić prostopadle do listwy
czołowej.
• Zwrócić uwagę na dokładne umiejscowienie zaczepów
zgodnie z rysunkiem.
• Przy dokręcaniu wkrętów listwy czołowej zwrócić uwagę
na to, żeby pręty zasuwane mogły się swobodnie poruszać.
• Dla elementów plastikowych certyfikowanych przez SKG:
Listwę czołową i zaczepy połączyć przynajmniej dwoma
wkrętami (ø 4 mm) z profilem wzmacniającym.
• Dla elementów aluminiowych certyfikowanych przez SKG:
Listwę czołową i zaczepy zamocować wkrętami ø 4 mm
o długości dopasowanej do systemu profili do profilu
aluminiowego.
• Dla elementów drewnianych certyfikowanych przez SKG:
Listwę czołową i zaczepy zamocować wkrętami ø 4 mm
o długości 40 mm.
• W razie ewentualnych oporów w działaniu zamka po
montażu nigdy nie używać siły! Zamiast tego należy znaleźć
i usunąć przyczynę.
• Przy transporcie drzwi – również przy zamkniętym zamku
– chronić skrzydło przed przesunięciem.
Instrukcje montażu i zamocowania
2 - 6 mm
Installation and fixing instructions
• Solely profile cylinders according to DIN 18252 have to be
installed.
• Applicable for elements made of PVC, timber or aluminium.
• Door leaves and frame must run in parallel throughout the
entire height.
• Mortise for the lock cases as per drawing.
• Mortise for the profile cylinder and lever must be in
alignment.
• Never drill the fitting when the lock has been installed.
• All contamination such as shavings as a result of drilling
must be removed prior to the installation of the lock.
• Attach faceplate and strike plates with screws of a 4 mm
diameter and a length matching the profile system.
• Fixing screws have to be positioned perpendicular to the
faceplate.
• Observe exact position of the strike plates as per drawing.
• Observe by fixing the faceplate screws that the rods must
have the room to move freely.
• For SKG-certified PVCu doors: Connect faceplate and
strike plates to the reinforcing profile with at least two
screws (ø 4 mm).
• For SKG-certified aluminium doors: Attach faceplate and
strike plates with the aluminium profile with screws of
a 4 mm diameter, length matching to the profile system.
• For SKG-certified timber doors: Attach faceplate and strike
plates with screws of a 4 mm diameter and 40 mm in
length.
• Do not use force in the event of tightness or sluggish
operation after the lock has been installed! The cause of the
problem should be ascertained and remedied instead.
• Suitable protection must be applied to the door leaves
during transportation even if the locks are bolted.

833/833SP
autosafe
klik
klik
SW 2
SW 2
SW 4
± 2 mm
± 2 mm
SW 2
SW 2
Przestawienie zapadki
latch changing
Typ 4 /11
type 4/11
Typ 4
type 4
Wymiana na zapadkę korbową/
zapadkę podciętą
change-over to soft latch/
reduced latch
Zaczepy / listwy zaczepowe z magnesem
strike plates/one-piece strike plates with magnet
Regulacja zaczepów /
listw zaczepowych
adjustment of strike plates/
one-piece strike plates
Wskazówki do montażu
CARL FUHR GmbH & Co. KG
Carl-Fuhr-Straße 12 D-42579 Heiligenhaus
Tel.: +49 2056 592-0 Faks: +49 2056 592-384
www.fuhr.de · info@fuhr.de
magnes
Installation notes
FUHR Polska Sp. z o.o.
ul. Beskidzka 11 32-590 Libiąż
Tel.: +48 32 624 21 40 Faks: +48 32 627 39 56
www.fuhr.pl · info@fuhr.pl
This manual suits for next models
1
Other FUHR Door Lock manuals
Popular Door Lock manuals by other brands

Assa Abloy
Assa Abloy SARGENT KP8977 Instructions for installation

ANXELL
ANXELL ML-605M-30 Installation instruction

Assa Abloy
Assa Abloy effef 118 Installations

Simons Voss
Simons Voss PegaSys Door Handle 4.1 Reader on both sides quick guide

Abus
Abus CFA3100 Fitting and operating instructions

Stuv
Stuv 3.31.270 Series Assembly instructions