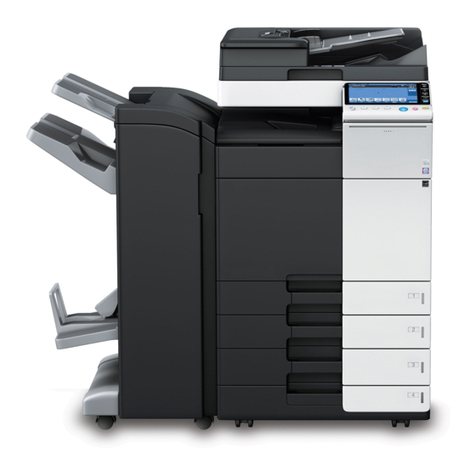
Fuji Xerox DocumentCentre C400 Series User manual

DocumentCentre C400/320/240 Series
User Guide (Copier)
This PDF file is best viewed using Acrobat®Reader 5

This equipment is certified by the Japan Electrical Safety & Environment Technology laboratories in compliance with
IEC60950 (AS/NZS 3260). The equipment is manufactured under the ISO 9002 Quality System certified by the British
Standards Institution. The equipment is also certified in compliance with applicable standards by various national bodies.
The equipment was tested and is certified by the New Zealand Ministry of Commerce and the Australian Com-
munications Authority in conformance with CISPR pub. 22 (1993) AS/NZS 3548 (1995), which relates to radio
frequency interference regulations.
Note:Machines intended for use in South Korea and Taiwan have been certified separately in compliance with
the requirements.
Any unauthorized alteration which includes the addition of new functions or the connection of external devices
may impact this certification.
Contact your local Fuji Xerox representative for a list of approved accessories.
Microsoft, MS-DOS, Windows, Windows NT, Microsoft Network are trademarks or registered trademarks of
Microsoft Corporation in the U.S. and other countries.
Novell, NetWare, IntranetWare, NDS are registered trademarks of Novell, Inc. in the United States. and other
countries.
Adobe, Acrobat, PostScript, Postscript 3, and the PostScript logo are trademarks of Adobe Systems Incorporated.
Apple, AppleTalk, EtherTalk, LocalTalk, Macintosh, Mac OS, TrueType are registered trademarks of Apple
Computer, Inc.
Intel and Pentium are trademarks or registered trademarks of Intel Corporation.
UNIX is a registered trademark in the United States and other countries, licensed exclusively through X/Open
Company Ltd.
Solaris, Sun OS, and NIS (Network Information Services) are trademarks or registered trademarks of Sun
Micosystems Inc. in the United States.
PCL, HPGL, HPGL/2 are registered trademarks of Hewlett-Packard Corporation.
All product/brand names are trademarks or registered trademarks of the respective holders.
Permission has been obtained from Microsoft Corporation for use of software screen shots.
Our printer software uses some of the codes created by the Independent JPEG Group.
Xerox, The Document Company and Ethernet are registered trademarks.
DocuWorks and CentreWare are trademarks.
Using the printer to print copies of bank notes or securities is illegal and punishable, regardless of whether they
are being used.
Saved data may be lost if hard disk of the machine breaks down due to external shocks or if the power is acci-
dentally cut off in a manner not following the methods listed in manuals or other documentations. Fuji Xerox is
not responsible for such data loss and any consequence caused by such data loss.
Fuji Xerox is not responsible for any breakdown of machines due to infection of computer virus.
Important
This guide is copyrighted with all rights reserved. Under the copyright laws, this guide may not be copied or
modified in whole or part, without the written consent of the publisher.
Parts of this guide are subject to change without prior notice.
We welcome any comments on ambiguities, errors, omissions, or missing pages.
Never attempt any procedure on the machine that is not specifically described in this guide. Unauthorized
operation can cause faults or accidents. Fuji Xerox is not liable for any problems resulting from unauthorized
operation of the equipment.
1
2
3
4

i
Thank you for purchasing the Fuji Xerox DocumentCentre C400/320/240 Series.
This User Guide provides all the necessary operating procedures, maintenance information
like how to clear paper jams, daily care, setting various items, and precautions.
Please read this guide thoroughly to obtain the best performance on your machine. After
reading this guide, be sure to keep it handy for quick reference. This guide will prove useful
if you are unsure of particular operations or you encounter difficulties with the machine dur-
ing use.
For details about printing and scanning features, and how to set a network environment,
refer to the User Guide (Printer/Scanner). For details about optional accessories in the
printer kit package, also refer to the guide provided with each optional accessory. Also, for
details on machines installed with the fax feature, refer to the User Guide (Facsimile).
In this guide, DocumentCentre C400, C320 and C240 may be referred to as the Document-
Centre C400/320/240 series.
In this guide, precautions are indicated with the symbol . Always read and follow these instructions
before carrying out the required procedure. Also, thoroughly read the Safety Notes provided in this
guide.
As a member of the International Star Program, Fuji Xerox certifies that this product satisfies
the Japanese requirements for International Star Program standards.
Fuji Xerox shares the global concern about environmental conservation and has integrated that con-
cern in its business activities from research and development to disposal. We have implemented a
number of programs to lessen the burden on the environment through totally eliminating ozone-deplet-
ing chlorofluorocarbons from our manufacturing facilities.
We are committed to leadership in the conservation of resources by reusing and recycling post-con-
sumer waste material such as paper, consumables such as cartridges and parts from copiers and print-
ers of our customers.
Along with our efforts to make environmental values a part of the Fuji Xerox culture, DocumentCentre
C400/320/240 adopts recycled components that satisfy our strict quality standards.
About reception interference
If you notice flickering or distorted images or noises on your audio-visual units, your machine may be
causing radio interference. Switch it off immediately. If this interference disappears, the machine is the
cause of the interference. Perform the following procedure until the interference is corrected.
●Reposition or re-orient the machine and the TV and/or radio.
●Move the machine and the TV and/or radio away from each other.
●Unplug the machine, TV and/or radio, and replug them into outlets that operate on different circuits.
●Reorient the TV and/or radio antennas and cables until the interference stops. (For an outdoor
antenna, ask your local electrician for support.)
●Use coaxial cable antennas.
This equipment is certified as a Class 1 laser product under IEC60825. This means that the machine
does not emit hazardous laser radiation. Since radiation emitted inside the machine is completely con-
fined within the protective housings and external covers, the laser beam cannot escape from the
machine during any phase of user operation.
This equipment complies with the guidelines set forth by the Japan Business Machine Makers
Association on the harmonic affects by copiers and other reproduction devices in accordance with
the guidelines on the harmonic suppressors of electronic appliances and general-purpose
machines.
Preface
ii
The following shows a list of samples made using the copy features of this machine. The
illustrations used in these samples have been modified slightly to simplify explanations for
these copy features.
Making one sided/two sided
copies
“3.3 Making One sided/Two sided Copies - 2 Sided”
(P. 299) in “Part 2 Copier”
Report
A
B
Report
Making enlarged/reduced copies
“3.4 Making Enlarged/Reduced Copies - Reduce
/
Enlarge” (P. 306) in “Part 2 Copier”
Inserting blank sheets be-
tween copied transparencies
“3.14 Inserting Blank Sheets Between Copied Transparencies
- Transparency Separators” (P. 357) in “Part 2 Copier”
3
A
B
2
Report
1
Sorting copies before output
“3.6 Sorting Copies Before Output - Output”
(P. 324) in “Part 2 Copier”
3
A
B
2
Report
1
3
A
B
2
Report
1
3
3
A
B
2
A
B
2
Report
1
Report
1
Making copies from a bound
document onto separate sheets
“3.12 Making Copies From a Bound Document Onto Separate
Sheets - Bound Originals” (P. 351) in “Part 2 Copier”
Making two sided copies from
a bound document
“3.25 Making Two sided Copies From a Bound Doc-
ument - Book Duplex” (P. 391) in “Part 2 Copier”
Report
A
B
C
D
No.1
No.1
A
B
Blank
sheet
Features in Brief

iii
S
tapling copies
“3.7 Outputting to the Finisher Tray - Output/Sta-
p
ling” (P. 327) in “Part 2 Copier”
A
B
Report
A
B
Report
S
canning different size docu-
ments
“3.11 Simultaneously Scanning Different Size Document
s
- Mixed Size Originals” (P. 346) in “Part 2 Copier”
3
A
B
2
Report
1
3
A
B
2
Report
1
Copying two or four docu-
ment onto one sheet
“3.13 Copying Multiple Documents Onto One Shee
t
- Multiple Up” (P. 354) in “Part 2 Copier”
4
3
2
121
43
21
2
1
Specifying the document
scanning size
“3.10 Specifying the Document Scanning Size Before
M
aking Copies - Original Size” (P. 343) in “Part 2
Copier”
Question
Question
Answer
X
Y
Moving the position of images
in the copy
“3.8 Moving the Position of Images in the Copy -
M
argin Shift” (P. 333) in “Part 2 Copier”
A
B
A
B
Erasing edges and shadows
in the document
“3.9 Erasing Edges and Margin Shadows in the Doc-
ument - Border Erase” (P. 340) in “Part 2 Copier”

iv
S
electing the original type
“3.16 Selecting the Original Type - Original Type”
(P. 365) in “Part 2 Copier”
Adjusting copy density and
contrast
“3.18 Adjusting Copy Density and Contrast - Lighter
/
Darker/Contrast” (P. 371) in “Part 2 Copier”
Making multiple copies on
one sheet
“3.26 Making Multiple Copies on One Sheet - Repea
t
Image” (P. 395) in “Part 2 Copier”
Making reversed copies of im-
ages
“3.28 Making Reversed Copies of Images - Mirror
I
mage/Negative Image” (P. 400) in “Part 2 Copier”
Adjusting the sharpness and
saturation of images
“3.19 Adjusting the Sharpness and Saturation of Images -
Sharpness/Color Saturation” (P. 373) in “Part 2 Copier”
Automatically adjusting im-
age quality
“3.22 Selecting Image Quality - Image Quality Pre-
sets” (P. 380) in “Part 2 Copier”

v
Adjusting tone
“3.20 Adjusting Tone - Color Shift” (P. 375) in
“Part 2 Copier”
Adjusting color balance
“3.21 Adjusting Color Balance - Color Balance”
(P. 378) in “Part 2 Copier”
Creating a booklet
“3.24 Creating a Booklet - Booklet Creation”
(P. 385) in “Part 2 Copier”
A
B
7
Report
1
3
A
B
3
A
B
7
Report
1
3
A
B
3
Outputting a cover for copies
“3.23 Outputting a Cover for Copies - Covers”
(P. 382) in “Part 2 Copier”
B
B
4
3
A
B
2
Report
1
B
B
4
3
A
B
2
Report
1
Making enlarged copies
spread over multiple sheets
“3.27 Making Enlarged Copies Spread Over Multi-
ple Sheets - Poster” (P. 398) in “Part 2 Copier”

vi
◆Preface ...................................................................................................................................i
◆Features in Brief ....................................................................................................................ii
◆Contents ............................................................................................................................... vi
◆Related Guides .................................................................................................................. xiii
◆Using This Guide ................................................................................................................ xiv
◆Safety Notes ...................................................................................................................... xvii
◆The Objective of the International Energy Star Program ................................................ xxvii
◆Illegal Copies ...................................................................................................................xxviii
Part 1 Hardware
Chapter 1 Getting to Know Your Copier
1.1 Main Components and Their Functions................................................................. 4
1.1.1 Main Body ............................................................................................... 4
1.1.2 Control Panel .......................................................................................... 8
1.1.3 How to Use the Touch Panel Display .................................................... 10
1.2 Switching on/off the Power .................................................................................. 16
1.2.1 Switching On the Power ........................................................................ 16
1.2.2 Switching Off the Power ........................................................................ 17
1.2.3 About the Breaker (Clear All) ................................................................ 18
1.3 Power Saver Mode............................................................................................... 19
1.3.1 Setting the Power Saver Feature .......................................................... 19
1.3.2 Exiting the Power Saver Mode .............................................................. 23
1.4 Possible Combinations of Features ..................................................................... 24
Chapter 2 Loading Paper
2.1 Loading Paper ..................................................................................................... 28
2.1.1 Loading Paper in Trays 1 to 4................................................................ 28
2.1.2 Loading Paper in Tray 5 (Bypass Tray).................................................. 30
2.2 Changing the Size of Paper in Trays.................................................................... 33
2.3 Changing Paper Settings..................................................................................... 35
2.4 Confirming Trays Set on the Machine.................................................................. 40
Contents

vii
Chapter 3 Daily Care
3.1 Confirming Machine Status.................................................................................. 42
3.2 Replacing Consumables...................................................................................... 45
3.2.1 About Consumables/Maintenance Parts ............................................... 45
3.2.2 Confirming the Status of Consumables................................................. 46
3.2.3 Replacing Toner Cartridges .................................................................. 48
3.2.4 Replacing the Toner Collection Bottle B ................................................ 51
3.2.5 Replacing Drum Cartridges A1, A2, A3, A4 .......................................... 55
3.2.6 Replacing the Staple Cartridge ............................................................. 58
3.3 Cleaning the Copier ............................................................................................. 62
3.3.1 Cleaning External Covers ..................................................................... 62
3.3.2 Cleaning Internal Components (Raster Output Scanners).................... 63
3.3.3 Cleaning the DADF and Document Glass............................................. 66
3.4 Executing Automatic Gradation Adjustment ........................................................ 67
Chapter 4 Troubleshooting
4.1 Troubleshooting.................................................................................................... 72
4.2 Initial Checks ....................................................................................................... 73
4.3 Poor Print Quality................................................................................................. 81
4.4 Confirming Error Information ............................................................................... 85
4.4.1 Printing Error History Reports ............................................................... 85
4.5 Paper Jams.......................................................................................................... 86
4.5.1 Paper Jams at the Top Left Cover ......................................................... 87
4.5.2 Paper Jams at the Left Center Cover .................................................... 89
4.5.3 Paper Jams at the Bottom Left Cover ................................................... 90
4.5.4 Paper Jams in Trays 1 to 4 .................................................................... 91
4.5.5 Paper Jams on the High Capacity Tray ................................................. 92
4.5.6 Paper Jams in Tray 5 (Bypass Tray) ...................................................... 94
4.5.7 Paper Jams on the Duplex Unit............................................................. 95
4.5.8 Paper Jams on the Light Finisher.......................................................... 96
4.6 Document Jams................................................................................................. 100
4.6.1 Document Jams in the Left Cover (Top).............................................. 100
4.6.2 Paper Jams on Document Tray and Document Glass Section............ 101
4.7 Stapler Faults..................................................................................................... 103

viii
Chapter 5 System Administration Mode Settings
5.1 Overview of System Administration Mode ......................................................... 108
5.2 Entering and Exiting the System Administration Mode...................................... 111
5.2.1 Entering the System Administration Mode .......................................... 111
5.2.2 Exiting the System Administration Mode............................................. 112
5.2.3 Setting System Settings in the System Administration Mode ............. 113
5.3 Setting and Changing System Administrator’s Passwords ................................ 117
5.3.1 Setting New Passwords ...................................................................... 117
5.3.2 Changing Passwords .......................................................................... 119
5.4 Setting the System Settings (Common Settings)............................................... 122
5.4.1 Machine Clock/Timers......................................................................... 123
5.4.2 Setting Audio Tones ............................................................................ 125
5.4.3 Setting Screen Defaults ...................................................................... 126
5.4.4 Setting Paper Tray Attributes............................................................... 127
5.4.5 Printing Priority.................................................................................... 132
5.4.6 Image Quality/Auto Gradation Adjustment.......................................... 133
5.4.7 Reports ............................................................................................... 137
5.4.8 Initializing the Hard Disk (Diagnostics)................................................ 138
5.4.9 Migration to Sleep Mode and Offset Settings (Others) ....................... 138
5.5 Copy Mode Settings .......................................................................................... 139
5.5.1 Basic Copying Presets ........................................................................ 139
5.5.2 Copy Defaults...................................................................................... 141
5.5.3 Copy Control ....................................................................................... 153
5.5.4 Original Size Defaults.......................................................................... 154
5.5.5 Reduce/Enlarge Presets ..................................................................... 155
5.5.6 Custom Colors .................................................................................... 156
5.6 Network Settings ............................................................................................... 157
5.6.1 Port Settings........................................................................................ 158
5.6.2 Protocol Settings ................................................................................. 164
5.7 Print Mode Settings ........................................................................................... 166
5.7.1 Allocate Memory ................................................................................. 167
5.7.2 Others (Print Mode Settings) .............................................................. 170
5.8 Scan Mode Settings .......................................................................................... 171
5.8.1 Basic Scanning Presets ...................................................................... 172
5.8.2 Scan Defaults...................................................................................... 173
5.8.3 Scan Size Default................................................................................ 178
5.8.4 Output Size Default ............................................................................. 179

ix
5.8.5 Reduce/Enlarge Presets ..................................................................... 180
5.8.6 Others (Scan Mode Settings).............................................................. 181
5.9 Registering/Changing Mailboxes ....................................................................... 184
Chapter 6 Managing Totals and Outputting Reports
6.1 Overview of the Totals Management Feature .................................................... 188
6.1.1 Authentication...................................................................................... 189
6.1.2 Overview of Auditron Administration ................................................... 190
6.1.3 Managed Functions and Features....................................................... 191
6.1.4 Starting Setting of Totals Management ............................................... 194
6.2 Confirming the Totals Management Feature...................................................... 196
6.3 Registering/Confirming Account Data ............................................................... 198
6.3.1 Setting the Password/Account Name .................................................. 198
6.3.2 Setting Color Mode/Maximum Number .............................................. 201
6.3.3 Confirming the Total Number for Each Account .................................. 203
6.4 Deleting/Resetting Total Data ............................................................................ 205
6.4.1 Deleting/Resetting Data by Account.................................................... 205
6.4.2 Deleting the Data of All Accounts........................................................ 207
6.4.3 System Administrator Confirmation of Total Number .......................... 208
6.5 Confirming the Total Number of Copied/Printed Pages ..................................... 210
6.5.1 Confirming the Number of Copied/Printed Pages by Meters .............. 210
6.5.2 Confirming the Number of Copied/Printed Pages by Meter Reports .. 213
6.6 Printing Reports/Lists ........................................................................................ 219
6.6.1 Types of Reports/Lists......................................................................... 219
6.6.2 Printing Reports/Lists.......................................................................... 241
Chapter 7 Confirming Jobs
7.1 Overview of Job Confirmation Feature .............................................................. 244
7.2 Confirming Jobs................................................................................................. 245
7.2.1 Confirming Currently Executing Jobs .................................................. 245
7.2.2 Changing the Print Priority .................................................................. 246
7.2.3 Confirming Completed Jobs................................................................ 247
7.2.4 Outputting/Deleting Secure Prints....................................................... 248
7.2.5 Outputting Sample Prints .................................................................... 252
7.2.6 Making Prints at a Specified Time....................................................... 256
7.2.7 Deleting Stored Documents ................................................................ 259
7.2.8 Forcibly Outputting Data Wait Documents .......................................... 262

x
Part 2 Copier
Chapter 1 Loading Documents
1.1 About Documents .............................................................................................. 266
1.1.1 Available Document Sizes................................................................... 266
1.1.2 Automatically Detectable Document Sizes.......................................... 267
1.1.3 Important Notes About Documents..................................................... 268
1.2 Loading Documents........................................................................................... 270
1.2.1 Placing Documents on the Document Glass....................................... 270
1.2.2 Loading Copies on the DADF ............................................................. 271
1.2.3 About Orientation When Loading Documents..................................... 273
Chapter 2 Making Copies
2.1 Overview of Basic Copy Features...................................................................... 276
2.2 Making Copies on Transparencies..................................................................... 282
2.3 Copying on Heavyweight Paper......................................................................... 285
2.4 Making Copies on Non-standard Size Paper..................................................... 288
2.5 Interrupting a Copy Job ..................................................................................... 290
Chapter 3 User Friendly Features
3.1 How to Switch the Screen Display..................................................................... 292
3.2 Selecting the Color to Copy - Output Color ....................................................... 295
3.3 Making One sided/Two sided Copies - 2 Sided ................................................. 299
3.3.1 Making One sided Copies ................................................................... 299
3.3.2 Copying on Two Sides......................................................................... 301
3.4 Making Enlarged/Reduced Copies - Reduce/Enlarge ....................................... 306
3.4.1 Making Copies at the Same Copy Ratio for the X and Y Directions ... 306
3.4.2 Making Copies at Independent Copy Ratios for
the X and Y Directions ........................................................................ 311
3.4.3 Making Copies at Specified Dimensions in the X and Y Directions .... 313
3.5 Selecting the Paper to Use for Copying - Paper Supply .................................... 317
3.5.1 Making Copies With the Paper Automatically Selected ...................... 317
3.5.2 Making Copies on a Selected Paper Size........................................... 319
3.6 Sorting Copies Before Output - Output............................................................. 324
3.7 Outputting to the Finisher Tray - Output/Stapling............................................... 327
3.7.1 Outputting to the Finisher Tray ............................................................ 328
3.7.2 Stapling Copies ................................................................................... 330

xi
3.8 Moving the Position of Images in the Copy - Margin Shift ................................. 333
3.9 Erasing Edges and Margin Shadows in the Document - Border Erase ............. 340
3.10 Specifying the Document Scanning Size Before Making Copies - Original Size343
3.11 Simultaneously Scanning Different Size Documents - Mixed Size Originals ..... 346
3.12 Making Copies From a Bound Document Onto Separate Sheets -
Bound Originals ................................................................................................. 351
3.13 Copying Multiple Documents Onto One Sheet - Multiple Up............................. 354
3.14 Inserting Blank Sheets Between Copied Transparencies -
Transparency Separators................................................................................... 357
3.15 Making Copies With the Image Rotated Vertically or Horizontally -
Image Rotation .................................................................................................. 362
3.16 Selecting the Original Type - Original Type........................................................ 365
3.17 Erasing the Background Color of Documents - Auto Exposure ......................... 369
3.18 Adjusting Copy Density and Contrast - Lighter/Darker/Contrast........................ 371
3.19 Adjusting the Sharpness and Saturation of Images -
Sharpness/Color Saturation............................................................................... 373
3.20 Adjusting Tone - Color Shift ............................................................................... 375
3.21 Adjusting Color Balance - Color Balance........................................................... 378
3.22 Selecting Image Quality - Image Quality Presets .............................................. 380
3.23 Outputting a Cover for Copies - Covers ............................................................. 382
3.24 Creating a Booklet - Booklet Creation ............................................................... 385
3.25 Making Two sided Copies From a Bound Document - Book Duplex.................. 391
3.26 Making Multiple Copies on One Sheet - Repeat Image..................................... 395
3.27 Making Enlarged Copies Spread Over Multiple Sheets - Poster ....................... 398
3.28 Making Reversed Copies of Images - Mirror Image/Negative Image ................ 400
3.29 Storing Frequently Used Setups - Stored Jobs.................................................. 403
3.29.1 Storing Copy Setups to Stored Jobs ................................................... 403
3.29.2 Deleting Stored Jobs........................................................................... 405
3.29.3 Copying With Stored Jobs................................................................... 407
3.30 Making Copies of Documents at Different Settings in a Single Operation -
Build Job ............................................................................................................ 408
3.31 Specifying the Document Orientation - Original Orientation.............................. 417
Part 3 Appendix
A Specifications..................................................................................................... 424
B Optional Accessories ......................................................................................... 432
C Cautions and Limitations ................................................................................... 433
D Possible Combinations of Features ................................................................... 434

xii
E Error Codes Displayed on the Display ............................................................... 443
E.1 Error Code Tables ............................................................................... 443
E.2 About Other Errors .............................................................................. 452
◆Index ................................................................................................................................. 453

xiii
This section describes the guides provided for this machine.
Guides Supplied
We provide the following guides for optimum usage of this machine.
■User Guide (Copier) (this guide)
This guide describes all the necessary steps for copying, clearing paper jams,
daily care, setting the various items and safety information.
■User Guide (Printer/Scanner)
This guide describes all the necessary steps for printing and scanning, setting
the network environment, setting the various items, and troubleshooting.
■User Guide (Facsimile)
This guide describes all the necessary steps for faxing and troubleshooting
when faxing. This guide is provided with the DocumentCentre C400/320/240
Series machine equipped with the fax function as well as with the Standard
G3 Fax Kit (option).
■User Guide (PostScript®Kit)
This guide describes how to install and use the software that is included in the
PostScript Driver Library. It is included with the PostScript kit.
Guides for Optional Accessories
Optional accessories are also available for this machine. User Guides are provided
with the optional accessories exclusively for the DocumentCentre C400/320/240
Series. These User Guides are referred to as “guides for optional accessories”. Guides
for optional accessories are provided in two forms, printed or as On-line Help.
Guides for optional accessories describe all the necessary steps for operating optional
accessories and installing software.
Related Guides

xiv
This section describes the organization of this guide.
This guide has been produced for people who operate the DocumentCentre C400/320/240
Series of copiers on a regular daily basis. When reading this guide, read the chapter that is
of particular relevance to the operation you are performing.
What You Need to Know
This guide assumes that the operator has a basic knowledge of the operating
environment of the personal computer in use, networking environments, and how
to operate a personal computer.
For details about the environment of the personal computer in use, basic knowl-
edge of networking environments, and how to operate a personal computer,
refer to the User Guides provided with the personal computer, operating system,
and network system.
Organization of This Guide
This guide consists of the following chapters.
Part 1 Hardware
Chapter 1 Getting to Know Your Copier
This chapter describes basic information such as identifying the major compo-
nents, how to switch the machine on and off, how to use the Touch Panel Dis-
play, and how to set the power saver feature.
Chapter 2 Loading Paper
This chapter describes the types of paper that can be used on this machine, pre-
cautions when handling paper, and how to load paper in trays
Chapter 3 Daily Care
This chapter describes how to check machine states, replace consumables,
clean the machine, and adjust gradation.
Chapter 4 Troubleshooting
This chapter describes what kind of actions should be taken to remedy poor print
quality, and paper, document or staple jams.
Using This Guide

xv
Chapter 5 System Administration Mode Settings
This chapter describes how to enter and exit the System Administration Mode,
how to set and change System Administrator’s passwords, operations in the
default screen, and default settings.
Chapter 6 Managing Totals and Outputting Reports
This chapter describes how to register and check account data, delete and reset
total data, manage and total the number of copies by account, and output reports
and lists.
Chapter 7 Confirming Jobs
This chapter describes how to check, output or delete currently executing,
queued or saved documents.
Part 2 Copier
Chapter 1 Loading Documents
This chapter describes the specifications of documents that can be used on this
machine, precautions when handling documents, and how to load documents.
Chapter 2 Making Copies
This chapter describes basic copying operations and other nice-to-know applica-
tions such as copying on transparencies, heavy-stock paper and other special
paper, and interrupt copy.
Chapter 3 User Friendly Features
This chapter describes operations in the Basic Copying, Advanced Features,
Image Quality, and Other screens. All almost regular copy operations are
described in this chapter.
Part 3 Appendix
Appendix
This appendix describes the specifications of this machine, optional accessories,
cautions and limitations, possible combinations of features, and error codes dis-
played on the display.

xvi
Conventions
In this guide, host device refers to a personal computer or workstation and “Doc-
umentCentre C400/320/240”refers to “Fuji Xerox DocumentCentre C400/320/
240”.
The following icons are used in this guide.
Indicates important information and must be read in detail.
Indicates supplementary information.
Indicates references used in this guide. Guide titles are noted without double
quotes while specific sections such as “1.9.2 Disabling the Power Save Mode”
are found within double quotes.
Special marks/characters used in this guide.
“”: Double quotes indicate the following:
●Messages that appear in the touch panel display and computer
screens.
●Characters to be entered.
●Feature names or buttons that are difficult to understand.
Bold face : Bold face characters refer to selections made like options on the
screen, hard or soft buttons, and keys from the keyboard.
For example: Press ESC.
When a checkbox is checked, it indicates ON, otherwise it indicates OFF.
The item with the radio button checked is the selected item.
1
2
3
4
5

xvii
Read this section carefully before using the DocumentCentre 400/320/240 Series to ensure
that you operate your machine safely.
Installation and Relocation Cautions
Do not place the machine near heaters or volatile, flammable, or combustible materials
such as curtains that may catch fire.
Do not place the machine in a hot, humid, dusty or poorly ventilated environment. Pro-
longed exposure to these adverse conditions can cause fire or electric shocks.
Place the machine on a level and sturdy surface that can withstand a weight of 215kg. If
tilted, the machine may fall over and cause injuries.
Instructions Unplug Ground/Earth
Heated surface Flammable Electric shock Pinched fingers
Prohibited No fire Do not
tear down
Do not
touch
This section explains the graphic symbols used in this guide.
is used to alert operators to an operating procedure, practice or condi-
tion that, if not strictly observed, may result in severe injury or loss of
life.
is used to alert operators to an operating procedure, practice or condi-
tion that, if not strictly observed, may result in safety hazards to per-
sonnel or damage to the equipment.
This symbol is used to alert operators to a
specific operating procedure that requires close
attention. Read and follow instructions carefully
to ensure the task is accomplished safely.
This symbol is used to alert operators to a
specific operating procedure that must not be
performed. Read instructions carefully and do
not perform any procedures that are prohibited.
This symbol is used to alert operators to a
specific operating procedure that must be
emphasized in order to operate the machine
safely. Read and follow instructions carefully.
Safety Notes

xviii
The machine has ventilation holes. Ensure that the machine is installed with a minimum
clearance of 100mm from the rear vent to the wall. A poorly ventilated machine can cause
excessive internal heat and fire. The accompanying diagrams show the minimum clear-
ances required for normal operation, consumables replacement and maintenance to ensure
your machine operates at peak performance. Your Xerox representative will provide neces-
sary support for the proper installation of the machine.
1067
400
425
780
100
1705
96750 50
Without DADF
(unit : mm) 1461
400
425
780
100
1705
136150 50
(unit : mm)
With DADF
2117
305
1705
50
400
425
780
100
50
2217
(unit : mm)
With staple finisher (option) and side tray (option)
Other manuals for DocumentCentre C400 Series
1
This manual suits for next models
2
Table of contents
Other Fuji Xerox Copier manuals

Fuji Xerox
Fuji Xerox DocuCentre-V C2265 User manual

Fuji Xerox
Fuji Xerox ApeosPort-IV C7780 User manual

Fuji Xerox
Fuji Xerox DocuPrint CM415 AP User manual

Fuji Xerox
Fuji Xerox DocuColor 5065II User manual

Fuji Xerox
Fuji Xerox DC1010S User manual

Fuji Xerox
Fuji Xerox DocuPrint 3105 User manual

Fuji Xerox
Fuji Xerox Document Centre 706 User manual

Fuji Xerox
Fuji Xerox DC 236 User manual

Fuji Xerox
Fuji Xerox ApeosPort-IV 5070 Use and care manual

Fuji Xerox
Fuji Xerox DocuCentre 9000 User manual