manuals.online logo
Brands
  1. Home
  2. •
  3. Brands
  4. •
  5. Furuno
  6. •
  7. Marine Equipment
  8. •
  9. Furuno FA-150 Manual

Furuno FA-150 Manual

FA-150 UAIS TRANSPONDER
Operator’s Guide
The purpose of this Operator's Guide is to provide basic operating procedures for this equipment. For more
detailed information see the Operator's Manual.
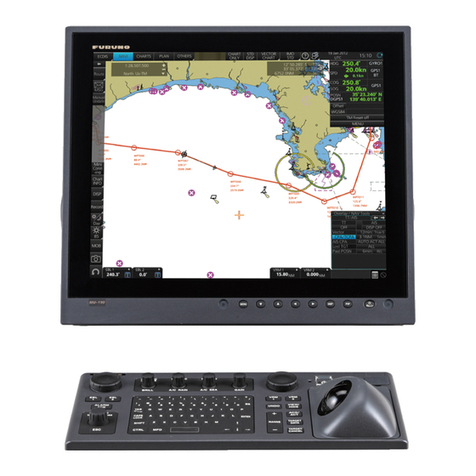
Plotter display
www.furuno.co.jp
All brand and product names are trademarks, registered trademarks or service marks of their respective holders.
2
SOLAS MODE OPERATIONS
How to set up for a voyage
1. Press the NAV STATUS key.
[NAV STATUS]

NAV STATUS: 0
***
STATUS DETAIL
***
UNDER WAY USING
ENGINE
2. If your navigation status is different
from that shown, do a) and b) below. If
it is the same as shown, go to step 3.
a) Press the ENT key.
b) Press ▲or ▼to choose
appropriate status and then
press the ENT key.
3. Press ►to show page 2 of the NAV
STATUS menu.
[DESTINATION]

*************
(0/0)
[NEW?]
4. NEW is selected; press the ENT key.
[DESTINATION]

ENTER A NEW
DESTINATION
QUIT:[NAV STATUS]
5. Press the ENT key. Use the
CursorPad to enter destination and
then press the ENT key.
6. Press ►to show page 3 of the NAV
STATUS menu.
[ARRIVAL TIME] 
DATE
[UTC]: - -/- - -
TIME[UTC]: - -*- -
7. DATE is selected; press the ENT key.
8. Use the CursorPad to enter the date
of arrival and then press the ENT key.
9. TIME is selected; press the ENT key.
10. Use the CursorPad to enter the
estimated time of arrival and then
press the ENT key. Use 24-hour
notation.
11. Press ►to show page 4 of the NAV
STATUS menu.
[CARGO TYPE & CREW]

CREW: 0
TYPE NO: 00
**** TYPE DETAIL****
NOT AVAILABLE
12. CREW is selected; press the ENT key.
13. Use the CursorPad to enter number of
crew and then press the ENT key.
14. TYPE NO. is selected; press the ENT
key.
15. Use the CursorPad to choose type of
vessel and then press the ENT key.
16. Press ►to show page 5 of the NAV
STATUS menu.
[DRAUGHT]

DRAUGHT: 0.0 m
17. Press the ENT key.
18. Use the CursorPad to enter ship’s
draught, and then press the ENT key.
19. Press the DISP key to close the menu.
How to send a message
1. Press the MENU key.
2. Use ▼or ▲to choose MSG and then
press the ENT key.
[MSG]
CREATE MSG
TX LOG
RX LOG
3. CREATE MSG is selected; press the
ENT key.
[CREATE MSG]
SET MSG TYPE
SET MSG
SEND MSG
4. SET MSG TYPE is selected; press the
ENT key.
[SET MSG TYPE]
ADRS TYPE: BROAD CAST
MMSI : - - - - - - - - -
MSG TYPE : NORMAL
CHANNEL: ALTERNATE
MMS
5. ADRS TYPE is selected; press the
ENT key.
BROAD CAST
ADRS CAST
6. Choose ADRS CAST or BROAD CAST
as appropriate. Press the ENT key.
7. For BROAD CAST, go to step 8. For
ADRS CAST, “MMSI” is selected; press
the ENT key, use the CursorPad to
enter MMSI number of receiving vessel
and then press the ENT key.
8. MSG TYPE is chosen; press the ENT
key.
SAFETY
NORMAL
9. Choose message type: NORMAL
(message other than safety) or
SAFETY (important navigational or
meteorological warning). Press the
ENT key.
10. CHANNEL is chosen; press the ENT
key.
ALTERNATE
BOTH A & B
A
B
11. Choose which channel to transmit your
message over.
12. Press the ENT key.
13. Press the MENU key to return to the
CREATE MSG sub-menu.
14. Choose SET MSG and press the ENT
key.
15. Use the CursorPad to enter your
message. Use ▼or ▲to choose
character; ◄or ►to shift the cursor.
16. Press the ENT key to return to the
CREATE MSG sub-menu.
17. Choose SEND MSG; press the ENT
key to send your message.
18. Press ◄to choose YES; press the
ENT key.
How to set CPA/TCPA
1. Press the MENU key.
2. Use ▲or ▼to choose USER
SETTINGS and then press the ENT
key.
3. Use ▲or ▼to choose CPA/TCPA
ALARM and then press the ENT key.
4. CPA is selected; press the ENT key.
5. Use the CursorPad to enter CPA and
then press the ENT key.
6. TCPA is selected; press the ENT key.
7. Use the CursorPad to enter TCPA and
then press the ENT key.
8. ALARM MODE is selected; press the
ENT key.
9. Choose ON to enable the CPA/TCPA
alarm feature; OFF to disable it. Press
the ENT key.
10. ALARM BUZZER is selected; press
the ENT key.
11. Choose ON to enable the CPA/TCPA
audio alarm, or OFF to disable it. Press
the ENT key.
12. Press the DISP key to close the menu
INLAND AIS OPERATIONS
How to select INLAND AIS mode
1. Press the NAV STATUS key.
[NAV STATUS]

NAV STATUS: 15
AIS MODE: SOLAS
***
STATUS DETAIL
***
NOT DEFINED
(DEFAULT)
3
2. Push ▼to select AIS MODE then
press the ENT key.
SOLASRX
INLAND
3. Select INLAND then press the ENT
key.
How to enter voyage-related data
1. Press the NAV STATUS key.
[NAV STATUS]

NAV STATUS: 0
AIS MODE: INLAND
***
STATUS DETAIL
***
UNDER WAY USING
ENGINE
2. Press ►to show the DESTINATION
sub-menu.
[DESTINATION]

*************
(0/0)
[NEW?]
3. NEW is selected; press the ENT key.
[DESTINATION]

ENTER A NEW
DESTINATION
QUIT:[NAV STATUS]
4. Press the ENT key. Enter destination
(20 characters max.) then press the
ENT key.
5. Press ►to show the ARRIVAL TIME
sub-menu.
[ARRIVAL TIME]

DATE
[UTC]: - -/- - -
TIME[UTC]: - -*- -
6. DATE[UTC] is selected; press the ENT
key.
7. Enter the date of arrival then press the
ENT key.
8. TIME[UTC] is selected; press the ENT
key.
9. Enter the estimated time of arrival then
press the ENT key. Use 24-hour
notation.
10. Press ►to show the DRAUGHT
sub-menu.
[DRAUGHT] 
SOLAS DRAUGHT: 0.0 m
INLAND DRAUGHT:
0.00m
11 SOLAS DRAUGHT is selected; press
the ENT key.
12. Enter SOLAS draught then press the
ENT key.
13. INLAND DRAUGHT is selected; press
the ENT key.
14. Enter inland draught then press the
ENT key.
15. Press ►to show the CARGO TYPE
sub-menu.
[CARGO TYPE]

TYPE NO.: 00
**** TYPE DETAIL****
NOT AVAILABLE
16. TYPE NO. is selected; press the ENT
key.
17. Select type of vessel/cargo then press
the ENT key.
18. Press ►to go to the ERI CODE
sub-menu.
[ERI CODE]

ERI CODE: 8000
****CODE DETAIL****
VESSEL,
TYPE UNKNOWN
19. ERI CODE is selected; press the ENT
key.
20. Enter four-digit ERI code then press
the ENT key.
21. Press ►to go to the NO. OF
PERSONS sub-menu.
[NO. OF PERSONS]

CREW: _ _ _
PASSENGER: _ _ _ _
SHIPBOARD PERSONNEL
_ _ _
NO. OF PERSONS: 0
22. CREW is selected; press the ENT key.
23. Enter number of crew then press the
ENT key.
24. PASSENGER is selected; press the
ENT key.
25. Enter number of passengers then
press the ENT key.
26. SHIPBOARD PERSONNEL is
selected; press the ENT key.
27. Enter number of shipboard personnel
then press the ENT key.
28. NO. OF PERSONS is selected; press
the ENT key.
29. Enter the total number of persons then
press the ENT key.
30. Press ►to go to the LENGTH&BEAM
sub-menu.
[LENGTH&BEAM]

LENGTH OF SHIP
0.0 m
BEAM OF SHIP: 0.0 m
31. Enter the length and beam of your ship,
pressing the ENT key after entering
each item.
32. Press ►to go to the OTHER
sub-menu.
[OTHER]

DYNAMIC INFORMATION
RATE: AUTO
HAZARDOUS CARGO:
UNKNOWN
UN/LOADED: UNKNOWN
33. DYNAMIC INFORMATION RATE is
selected; press the ENT key.
34. Select option then press the ENT key.
35. HAZARDOUS CARGO is selected;
press the ENT key.
NUMBER OF CONES 0
NUMBER OF CONES 1
NUMBER OF CONES 2
NUMBER OF CONES 3
B-FLAG
UNKNOWN
36. Select appropriate item then press the
ENT key.
37. UN/LOADED is selected; press the
ENT key.
UNKNOWN
LOADED
UNLOADED
38. Select appropriate item then press the
ENT key.
39. Press the DISP key to close the menu.
How to send an ETA message
1. Press the MENU key.
2. Select MSG then press the ENT key.
[MSG]
TEXT
ETA/RTA
NO. OF PERSONS
EMMA WARNING
WATER LEVEL
3. Select ETA/RTA then press the ENT
key.
[ETA/RTA]
CREATE MSG
ETA LOG
RTA LOG
4. CREATE MSG is selected; press the
ENT key.
[CREATE MSG]
SET MSG TYPEE
SET DESTINATION
SET ETA
SEND MSG
5. SET MSG TYPE is selected; press the
ENT key.
[SET MSG TYPE]
MMSI : 000000000
CHANNEL: ALTERNATE
RETRY TIMES: 3
MMS
6. MMSI is selected; press the ENT key.
4
7. Enter the MMSI of the
lock/bridge/terminal you want to pass
through then press the ENT key.
8. CHANNEL is selected; press the ENT
key.
ALTERNATE
BOTH A & B
A
B
9. Select the channel over which to send
the message then press the ENT key.
10. RETRY TIMES is selected; press the
ENT key.
11. Enter the number of times to re-send
the message (if the first transmission is
unsuccessful) then press the ENT key.
An ETA message can be resent a
maximum of three times.
12. Press the MENU key to return to the
CREATE MSG menu.
13. Select SET DESTINATION then press
the ENT key.
[SET DESTINATION]
* * * * * * * * * * * * * (0/0)
[NEW?]
(If you have entered some
destinations, they appear here.)
14. NEW is selected. If your destination is
shown on screen, select it, press the
ENT key then go to step 18. To enter a
new destination, go to step 15.
15. With NEW selected, press the ENT
key.
[SET DESTINATION]
ENTER A NEW DEST
COUNTRY CODE:
LOCATION CODE:
FAIRWAY NO. : 00000
TERMINAL CODE:
FAIRWAY HECT: 00000
QUIT: [MENU]
16. COUNTRY CODE is selected; press
the ENT key. Enter the UN country
code of your destination, referring to
ISO 3166, then press the ENT key.
17. Enter location code, fairway no.,
terminal code, and fairway hectometre.
18. Press the MENU key twice to return to
the CREATE MSG menu.
19. Select SET ETA then press the ENT
key.
[SET ETA]
ETA
DATE[UTC] - - / - - -
TIME[UTC] - - : - -
AIR DRAUGHT: 0.00 m
NO. OF TUGBOATS: -
20. DATE[UTC] is selected; press the ENT
key.
21. Enter the day (1-2 digits) and month
(three-character abbreviation) of ETA
then press the ENT key.
22. TIME[UTC] is selected; press the ENT
key.
23. Enter your ETA, in 24-hour notation,
then press the ENT key.
24. AIR DRAUGHT is selected; press the
ENT key.
25. Enter your ship's air draught then press
the ENT key.
26. NO. OF TUGBOATS is selected; press
the ENT key.
27. Enter the no. of assisting tugboats
(0-6) your ship requires then press the
ENT key. Enter "0" for none.
28. Press the MENU key to return to the
CREATE MSG menu.
29. Select SEND MSG then press the ENT
key. You are asked if you are sure to
send the message. Select YES then
press the ENT key to send the
message.
How to send a text message
1. Press the MENU key to open the
menu.
2. Select MSG then press the ENT key.
[MSG]
TEXT
ETA/RTA
NO. OF PERSONS
EMMA WARNING
WATER LEVEL
3. TEXT is selected; press the ENT key.
[TEXT]
CREATE MSG
TX LOG
RX LOG
4. CREATE MSG is selected; press the
ENT key.
[CREATE MSG]
SET MSG TYPEE
SET MSG
SEND MSG
5. SET MSG TYPE is selected; press the
ENT key.
[SET MSG TYPE]
ADRS TYPE: BROAD CAST
MMSI : - - - - - - - - -
MSG TYPE: SAFETY
CHANNEL: ALTERNATE
RETRY TIMES: -
MMS
6. ADRS TYPE line is selected; press the
ENT key.
BROAD CAST
ADRS CAST
7. Select ADRS CAST or BROAD CAST
as appropriate.
8. Press the ENT key. For ADRS CAST,
select MMSI then enter MMSI no.
9. Select MSG TYPE then press the ENT
key.
SAFETY
NORMAL
10. Select message type: NORMAL
(message other than safety) or
SAFETY (important navigational or
meteorological warning). Press the
ENT key.
11. CHANNEL is selected; press the ENT
key.
ALTERNATE
BOTH A & B
A
B
12. Select which channel to transmit your
message over then press the ENT key.
13. RETRY TIMES is selected; press the
ENT key. If the ADRS TYPE is BROAD
CAST go to step 14. For ADRS CAST,
enter the number of times to
re-transmit a message (0-3) then press
the ENT key.
14. Press the MENU key to return to the
CREATE MSG sub-menu.
15. Select SET MSG then press the ENT
key.
[SET MSG]
1( 90)* [DIM]HOLD:CLEAR
Number of characters used/available
16. Use the CursorPad to enter your
message.
17. Press the MENU key to return to the
CREATE MSG sub-menu.
18. Select SEND MSG then press the ENT
key. The prompt shown below appears.
SEND MESSAGE.
ARE YOU SURE?
YES NO
19. Press ◄to select YES then press the
ENT key to send your message.
How to display an RTA message
1. Press the MENU key to open the
menu.
2. Select MSG then press the ENT key.
3. Select ETA/RTA then press the ENT
key.
4. Select RTA LOG then press the ENT
key to show the RTA log.
5. Select message then press the ENT
key.
[RTA LOG] 1/2
STATUS
LIMITED OPERATION
RTA: 05/JUN 12:32 UTC
[RTA LOG] 2/2
COUNTRY CODE: DE
LOCATION CODE: TRI
FAIRWAY NO.: 01234
TERMINAL CODE: 11111
FAIRWAY HECTOMETRE
01000
Your RTA
Lock Status
Lock
particulars
PUB.NO.OSE-44310-C
(1002,DAMI) FA-150
Other manuals for FA-150

7

Other Furuno Marine Equipment manuals

Furuno LH-5000 User manual

Furuno

Furuno LH-5000 User manual

Furuno F-851SD User manual

Furuno

Furuno F-851SD User manual

Furuno NavNet TZtouch3 Series User manual

Furuno

Furuno NavNet TZtouch3 Series User manual

Furuno FCV-1200L User manual

Furuno

Furuno FCV-1200L User manual

Furuno FELCOM251 User manual

Furuno

Furuno FELCOM251 User manual

Furuno VR-5020 User manual

Furuno

Furuno VR-5020 User manual

Furuno GS-100 User manual

Furuno

Furuno GS-100 User manual

Furuno DS-50 User manual

Furuno

Furuno DS-50 User manual

Furuno FCV30BB User manual

Furuno

Furuno FCV30BB User manual

Furuno CN-24 User manual

Furuno

Furuno CN-24 User manual

Furuno DS-50 User manual

Furuno

Furuno DS-50 User manual

Furuno FI5002 Owner's manual

Furuno

Furuno FI5002 Owner's manual

Furuno FE-4300 User manual

Furuno

Furuno FE-4300 User manual

Furuno FE-800 User manual

Furuno

Furuno FE-800 User manual

Furuno FCV-292 User manual

Furuno

Furuno FCV-292 User manual

Furuno DSC-6A User manual

Furuno

Furuno DSC-6A User manual

Furuno DS-8500 User manual

Furuno

Furuno DS-8500 User manual

Furuno FE-700 Quick start guide

Furuno

Furuno FE-700 Quick start guide

Furuno Color LCD Sounder FCV-620/585 User manual

Furuno

Furuno Color LCD Sounder FCV-620/585 User manual

Furuno FG-11/200 MARK-3 User manual

Furuno

Furuno FG-11/200 MARK-3 User manual

Furuno FW-200 User manual

Furuno

Furuno FW-200 User manual

Furuno MU-270W User instructions

Furuno

Furuno MU-270W User instructions

Furuno FCV-600L User manual

Furuno

Furuno FCV-600L User manual

Furuno GP-39 User manual

Furuno

Furuno GP-39 User manual

Popular Marine Equipment manuals by other brands

Glendinning Cablemaster User's installation and operation manual

Glendinning

Glendinning Cablemaster User's installation and operation manual

Mercury VesselView 703 quick guide

Mercury

Mercury VesselView 703 quick guide

Raymarine ST60+ SPEED INSTRUMENT Owner's handbook

Raymarine

Raymarine ST60+ SPEED INSTRUMENT Owner's handbook

Harken Black Magic Series instruction sheet

Harken

Harken Black Magic Series instruction sheet

Scanstrut Scanpod Deck Pod installation instructions

Scanstrut

Scanstrut Scanpod Deck Pod installation instructions

PYI FENDERTEX FX-BST-800 Assembly instructions

PYI

PYI FENDERTEX FX-BST-800 Assembly instructions

E2S A100SONTEL Instructions/service manual

E2S

E2S A100SONTEL Instructions/service manual

Scanstrut SPR-1u-AM installation instructions

Scanstrut

Scanstrut SPR-1u-AM installation instructions

Actisense NDC-3 user manual

Actisense

Actisense NDC-3 user manual

Venitem GIUDECCA Technical manual

Venitem

Venitem GIUDECCA Technical manual

Kongsberg Simrad ES80 installation manual

Kongsberg

Kongsberg Simrad ES80 installation manual

JRC ALPHATRON Marine AlphaRiverTrackPilot user manual

JRC

JRC ALPHATRON Marine AlphaRiverTrackPilot user manual

MOFLASH SIGNALLING AE100M Series INSTALLATION & TECHNICAL INFORMATION

MOFLASH SIGNALLING

MOFLASH SIGNALLING AE100M Series INSTALLATION & TECHNICAL INFORMATION

Maxwell 2500 HWC manual

Maxwell

Maxwell 2500 HWC manual

Kongsberg cPAP MKII Quick reference guide

Kongsberg

Kongsberg cPAP MKII Quick reference guide

Marine PC MPC-ML2**R user manual

Marine PC

Marine PC MPC-ML2**R user manual

Kongsberg Simrad IS12 Service manual

Kongsberg

Kongsberg Simrad IS12 Service manual

iXBlue Octans quick start guide

iXBlue

iXBlue Octans quick start guide

manuals.online logo
manuals.online logoBrands
  • About & Mission
  • Contact us
  • Privacy Policy
  • Terms and Conditions

Copyright 2025 Manuals.Online. All Rights Reserved.