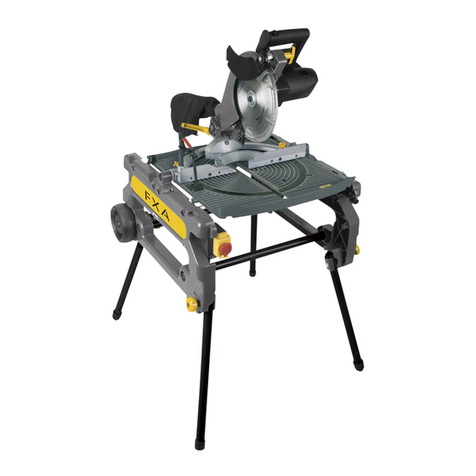
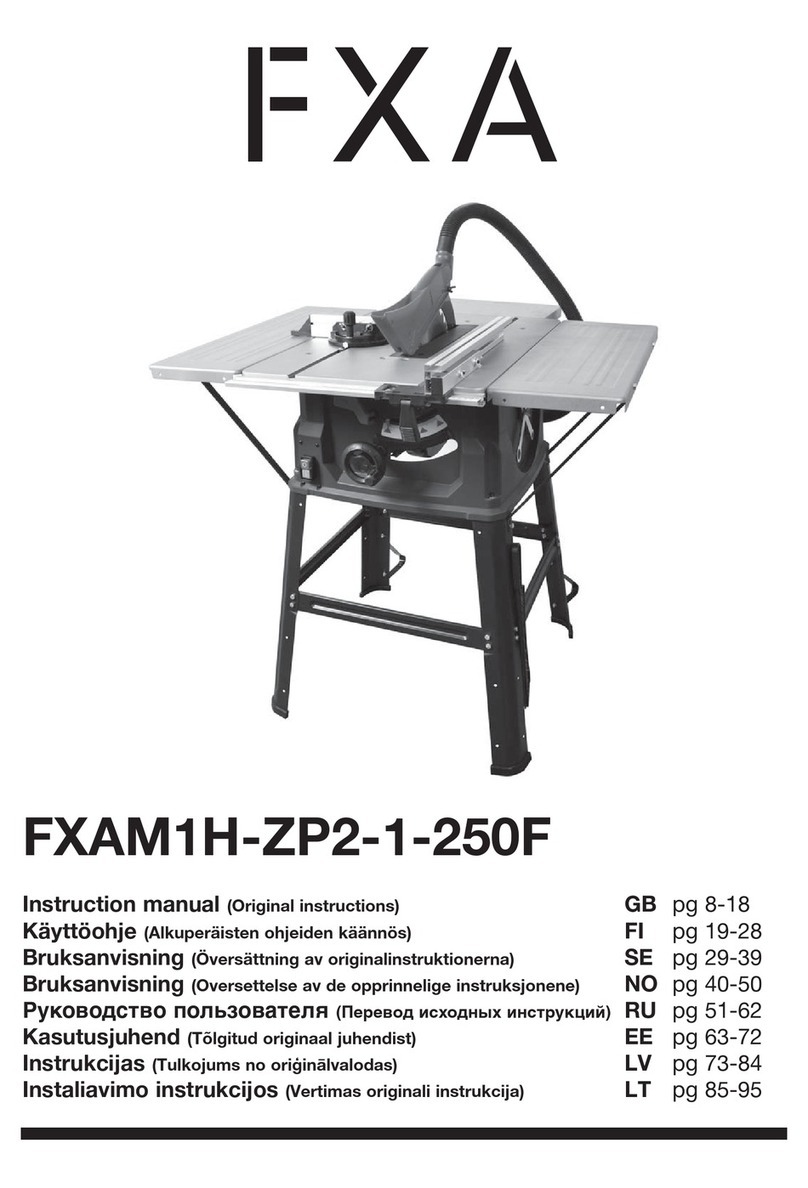
FXA FXA502024131 User manual

FXA502024131
Instruction manual (Original instructions) GB pg 7-16
Käyttöohje (Alkuperäisten ohjeiden käännös) FI pg 17-26
Bruksanvisning (Översättning av originalinstruktionerna) SE pg 27-36

5
1
9
11
10
14
2
13
2
(A) 12 6 8 4 3
7
9

3
(A1) 15
16
17
18 19

4
(1) (2)
(3) (4)
(5) (6)
(8)(7)
Spacer
M8x40
M8x80
M8
Bolts Nuts
Open
Wrench
Locking
Wrench
Lower Guard

5
(9) (10)
(11) (12)
(13)
Moving
Guard
40mm Bolts
40mm
Bolts
Cradle
Support
M6 Bolt
R-Clip
Log Cradle
Support
60mm Bolts
Chain
Locating
Bolt & Nut
Sliding
Guard Plate
Support Arm
Spring
Return
Spring
Mounting
Bracket
Handle Log Stop
Bar
Protective
Plate
(14)
(16)(15)
Log
Support
Yoke
Knob

6
(17) (18)
(19) (20)
(21) (22)
(23) (24)
Stop
Bar
Securing
Knob
Connecting
Bolt
Open
Wrench
Locking
Wrench

7
IPORTANT! Read all safety warnings, instructions, illustrations and specifications provided with this
power tool.
TÄRKEÄÄ! Lue tarkkaavaisesti kaikki tämän työkalun kanssa toimitetut varoitukset, ohjeet ja
spesifikaatiot, ja katso lisäksi kuvat.
VIKTIGT! Läs uppmärksamt alla varningar, instruktioner och specifikationer som bifogas med
detta verktyg och studera bilderna.
INTRODUCTION
Thankyou for purchasing this product which has
passed through our extensive quality assurance
process. Every care has been taken to ensure that it
reaches you in perfect condition.
SAFETY FIRST
Before attempting to operate this power tool the
following basic safety precautions should always be
taken to reduce the risk of fire, electric shock and
personal injury. It is important to read the instruction
manual to understand the application, limitations and
potential hazards associated with this tool.
CERTIFICATE OF GUARANTEE
This product is guaranteed for a period of 2 Years,
with effect from the date of purchase and applies only
to the original purchaser. This guarantee only applies
to defects arising from, defective materials and or
faulty workmanship that become evident during the
guarantee period only and does not include
consumable items. The manufacturer will repair or
replace the product at their discretion subject to the
following. That the product has been used in
accordance with the guide lines as detailed in the
product manual and that it has not been
subjected to misuse, abuse or used for a purpose for
which it was not intended. That it has not been taken
apart or tampered with in any way whatsoever or has
been serviced by unauthorised persons or has been
used for hire purposes. Transit damage is excluded
from this guarantee, for such damage the transport
company is responsible. Claims made under this
guarantee must be made in the first instance, directly
to the retailer within the guarantee period. Only under
exceptional circumstances should the product be
returned to the manufacturer. In these case it shall be
the consumer’s responsibility to return the product at
their cost ensuring that the product is adequately
packed to prevent transit damage and must be
accompanied with a brief description of the fault and
a copy of the receipt or other proof of purchase. The
manufacturer shall not be liable for any special,
exemplary, direct, indirect, incidental, or consequential
loss or damage under this guarantee. This guarantee
is in addition to and does not affect any rights, which
the consumer may have by virtue of the Sale of Goods
Act 1973 as amended 1975 and 1999.
STATUTORY RIGHTS
This guarantee is in addition to and in no way affects
your statutory rights.
PRODUCT DISPOSAL
When this product reaches the end of it’s life or is
disposed of for any other reason, it must not be
disposed of in household waste. In order to preserve
natural resources, and to minimise adverse
environmental impact, please recycle or dispose of
this product in an environmentally friendly way. It
should be taken to your local waste recycling centre
or other authorised collection and disposal facility.
If in doubt consult your local waste authority for
information regarding available recycling and / or
disposal options.
SPECIFIC SAFETY INSTRUCTIONS
Warning: When using electric tools it is imperative to
take the following basic safety precautions in order to
reduce the risk of electric shock, injury and fire.
Take due note of all this information before and while
working with the saw.
Do not lose these safety regulations.
Guard against electric shock
Avoid body contact with earthed parts.
When equipment is not being used it should be kept
in a dry, closed place out of children’s reach..
Keep mounted attachments sharp and clean to enable
you to work well and safely.
Check the power cable regularly and have it replaced
by an authorized specialist at the first sign of any
damage.
Check your extension cables regularly and replace
them if damaged.
When working outdoors, use only extension cables
that are approved for outdoor use and which are
marked accordingly.
Concentrate on what you are doing. Use common
sense when working. Do not operate the tool if your
mind is not on your work.
Never use an electric tool with a switch that cannot be
turned on and off.
Warning! The use of other tools and accessories may
put you at risk of injury.

8
Always pull the plug out of the power socket before
adjusting or servicing the machine.
Give these safety regulations to all persons who work
on the machine.
Caution! Hands and fingers may be injured on the
rotating saw blade.
The machine is equipped with a safety circuit-breaker
to prevent it starting up again after a voltage drop.
Before you use the machine for the first time, check
that the voltage marked on the rating plate is the
same as your mains voltage.
If you need to use extension cable, make sure its
conductor cross-section is big enough for the saw’s
power consumption. Minimum cross-section 1.5 mm²
or 2.5 mm² for cable lengths of 20m or more.
If you use a cable reel, the complete cable must be
pulled off the reel.
Check the power cable. Never use a faulty or
damaged power cable.
Do not use the cable to pull the plug out of the socket.
Protect the cable from heat, oil and sharp edges.
Do not leave the saw in the rain and never use it in
damp or wet conditions.
Provide good lighting.
Do not saw near flammable liquids or gases.
Wear suitable work clothes! Loose garments or
jewellery may become caught up in the rotating saw
blade.
Non-slip shoes are recommended when working
outdoors.
Wear a hair net if you have long hair.
Avoid abnormal working postures.
Operators must be at least 16 years of age.
Keep children away from the machine when it is
connected to the power supply.
Keep your workplace clean of wood scrap and any
unnecessary objects.
An untidy work area invites accidents.
Do not allow other persons, especially children, to
touch the tool or cable. Keep them out of your work
area.
Persons working on the machine should not be
distracted.
Note the direction of rotation of the motor and saw
blade. Use only blades whose permissible maximum
speed is not lower than the maximum spindle speed
of the circular saw and of the material to be cut.
After you have switched off the motor, never slow
down the saw blade by applying pressure to its side.
Only fit blades which are well sharpened and have no
cracks or deformations.
Do not use circular saw blades made of high-alloy
high-speed steel (HSS).
Do not use circular saw blades made of high-alloy
high-speed steel (HSS).
Only use saw blades that are recommended by the
manufacturer, comply with EN 847-1 and bear a
warning note. When replacing the saw blade ensure
that the cutting width is no smaller and the basic
blade thickness of the saw blade is no larger than the
thickness of the splitter.
aulty saw blades must be replaced immediately.
Never use saw blades which do not comply with the
data specified in this manual.
Never dismantle the machine’s safety devices or
render them inoperative.
If the table insert is worn, replace it.
Always stand to the side of the saw blade when
working with the saw.
Never load the machine so much that it cuts out.
Make sure that off-cuts do not catch on the saw blade
crown. Risk of catapulting!
Never remove loose splinters, chips or jammed pieces
of wood when the saw blade is running.
To rectify faults or remove jammed pieces of wood,
always switch off the machine first. Pull the power
plug!
If the sawing gap is worn, replace the table insert. Pull
the power plug!
Carry out retooling work, adjustments, measurements
and cleaning jobs only when the motor is switched off.
Pull the power plug!
Before switching on, make sure that all keys and
wrenches have been removed from the tool.
Switch off the motor and pull the power plug before
you leave the workplace.
Refit all guards and safety devices immediately after
you have completed any repairs or maintenance work.
Be sure to observe the safety information and
operating and maintenance instructions issued by the
manufacturer, as well as the dimensions listed in the
Technical Data.
It is imperative to observe the accident prevention
regulations in force in your area as well as all other
generally recognized rules of safety.

9
Note the information published by your professional
associations (VBG7j).
Do not use any low-powered machines for heavy duty
work.
Do not use the cable for purposes for which it is not
designed.
Make sure you stand squarely and keep your balance
at all times.
Check the tool for damage.
Each time before re-using the tool, carefully check
that the guards or any slightly damaged parts are
working as intended.
Check that the moving parts are in good working
order, that they do not jam, and that no parts are
damaged. Make sure that all parts are fitted correctly
and that all other operating conditions are properly
fulfilled.
Unless otherwise stated in the operating instructions,
damaged safety devices and parts must be repaired
or replaced by an authorized service center.
Have damaged switches replaced by a customer
service workshop.
This electric tool complies with the pertinent safety
regulations. Repairs are to be carried out only by a
qualified electrician using original replacement parts or
the user may suffer an accident.
If necessary, wear suitable personal protection
equipment. This could consist of:
Ear plugs to prevent the risk of damaging your
hearing;
A breathing mask to avid the risk of inhaling
hazardous dust.
Always wear gloves when handling saw blades and
rough materials. Whenever practicable, saw blades
must be carried in a container.
The operator must be informed about the conditions
that influence the generation of noise (for example
saw blades designed to reduce noise emissions,
caring for blades and the machine).
aults on the machine or its guards, safety devices
and blade must be reported to the person in charge
as soon as they are discovered.
Use only the transport devices to move the machine.
Never use the guards for handling and moving the
machine.
All operators must receive proper training in the use,
adjustment and operation of the machine.
Do not saw any materials that contain foreign bodies
such as wires, cables or ties.
Only use sharp saw blades.
Do not use the machine without the guards installed.
Doing so could result in serious injury to the user.
NOTE!
NEVER CUT CHUNK OF WOODS OF SIZES
EXCEEDING THE SAW AXI U POSSIBILITIES.
Vibrations produced during the saw operation can
loosen the clamping bolt causing damage or accident.
Check these bolts regularly for their loosening, both,
before and during the saw operation.
ADDITIONAL INFOR ATION
Due to the power consumed by the tool, during its
start-up voltage drops can occur influencing operation
of other devices (for example, lighting intensity can be
reduced for a short time).
We inform that in case the main impedance is lower
than 0,23087 Ω, such interference should not occur.
In case of problems, please contact with the electric
energy supplier.
GENERAL SAFETY RULES
WARNING! Read all instructions ailure to follow all
instructions listed below may result in electric shock,
fire and/or serious injury. The term "power tool" in all
of the warnings listed below refers to your mains
operated (corded) power tool or battery operated
(cordless) power tool.
SAVE THESE INSTRUCTIONS
1) WORK AREA
a) Keep work area clean and well lit. Cluttered and
dark areas invite accidents.
b) Do not operate power tools in explosive
atmospheres, such as in the presence of
flammable liquids, gases or dust. Power tools
create sparks which may ignite the dust or fumes.
c) Keep children and bystanders away while
operating a power tool. Distractions can cause you
to lose control.
2) ELECTRICAL SAFETY
a) Power tool plugs must match the outlet. Never
modify the plug in any way. Do not use any
adapter plugs with earthed (grounded) power
tools. Unmodified plugs and matching outlets will
reduce risk of electric shock.
b) Avoid body contact with earthed or grounded
surfaces such as pipes, radiators, ranges and
refrigerators. There is an increased risk of electric
shock if your body is earthed or grounded.
c) Do not expose power tools to rain or wet
conditions. Water entering a power tool will
increase the risk of electric shock.

10
d) Do not abuse the cord. Never use the cord for
carrying, pulling or unplugging the power tool.
Keep cord away from heat, oil, sharp edges or
moving parts. Damaged or entangled cords
increase the risk of electric shock.
e) When operating a power tool outdoors, use an
extension cord suitable for outdoor use. Use of a
cord suitable for outdoor use reduces the risk of
electric shock.
3) PERSONAL SAFETY
a) Stay alert, watch what you are doing and use
common sense when operating a power tool. Do
not use a power tool while you are tired or under
the influence of drugs, alcohol or medication.
A moment of inattention while operating power
tools may result in serious personal injury.
b) Use safety equipment. Always wear eye
protection. Safety equipment such as dust mask,
non-skid safety shoes, hard hat, or hearing
protection used for appropriate conditions will
reduce personal injuries.
c) Avoid accidental starting. Ensure the switch is in
the off position before plugging in. Carrying power
tools with your finger on the switch or plugging in
power tools that have the switch on invites
accidents.
d) Remove any adjusting key or wrench before
turning the power tool on.
A wrench or a key left attached to a rotating part
of the power tool may result in personal injury.
e) Do not overreach. Keep proper footing and
balance at all times. This enables better control of
the power tool in unexpected situations.
f) Dress properly. Do not wear loose clothing or
jewellery. Keep your hair, clothing and gloves
away from moving parts. Loose clothes, jewellery
or long hair can be caught in moving parts.
g) If devices are provided for the connection of dust
extraction and collection facilities, ensure these
are connected and properly used. Use of these
devices can reduce dust related hazards.
4) POWER TOOL USE AND CARE
a) Do not force the power tool. Use the correct
power tool for your application. The correct power
tool will do the job better and safer at the rate for
which it was designed.
b) Do not use the power tool if the switch does not
turn it on and off. Any power tool that cannot be
controlled with the switch is dangerous and must
be repaired.
c) Disconnect the plug from the power source before
making any adjustments, changing accessories, or
storing power tools. Such preventive safety
measures reduce the risk of starting the power
tool accidentally.
d) Store idle power tools out of the reach of children
and do not allow persons unfamiliar with the
power tool or these instructions to operate the
power tool. Power tools are dangerous in the
hands of untrained users.
e) Maintain power tools. Check for misalignment or
binding of moving parts, breakage of parts and
any other condition that may affect the power
tools operation. If damaged, have the power tool
repaired before use. Many accidents are caused
by poorly maintained power tools.
f) Keep cutting tools sharp and clean. Properly
maintained cutting tools with sharp cutting edges
are less likely to bind and are easier to control.
g) Use the power tool, accessories and tool bits etc.,
in accordance with these instructions and in the
manner intended for the particular type of power
tool, taking into account the working conditions
and the work to be performed. Use of the power
tool for operations different from intended could
result in a hazardous situation.
5) SERVICE
a) Have your power tool serviced by a qualified repair
person using only identical replacement parts. This
will ensure that the safety of the power tool is
maintained.
CO PONENTS & CONTROLS (FIG A/A1)
1 Log support yoke
2 Support stand
3 ixed guard
4 Moving guard
5 Log stop bar
6 Protective plate
7 Return spring assembly
8 Motor stand complete with motor
9 Handle x 2
10 Connecting plate
11 Cradle support arm
12 Log cradle
13 Connecting chain
14 Securing knob
15 Protection plate
16 Side plastic handle
17 Upper plastic handle
18 Lock nut (M6) x 4
19 Screw (M6x15) x 5

11
OTHER ITE S SUPPLIED LOOSE
Guard support bracket
Saw blade
Blade securing discs x 2
Open wrench
Blade locking wrench
On/Off switch complete with plug
UNPACKING
Note! The delivered packing contains cutting parts
inside. Pay special attention during the tool
unpacking.
The tool must be lifted and carried by two persons.
Take out the tool together with equipment from the
packing. Check all parts for good technical condition
and completeness.
During warranty period do not dispose the packing –
in case user wishes to dispose the packing after this
period, find out the ways the packing can be utilized.
In case no recommendations regarding the utilization
exist, dispose the packing in a possibly best way. Do
not allow children to play with the plastic bags – risk
of suffocation.
ASSE BLING THE SWITCH & STANDS
PARTS REQUIRED
ON/OFF Switch: 4 x 4 x 60 mm screws
otor Stand/Support Stand: 2 x Spacers, 4 x 6 x
40 bolts, nuts & washers, 2 x 8 x 80 bolts, nuts &
washers, 2 x 8 x 60 bolts, nuts & washers.
Connecting Plates: 2 x 8 x 40 bolts, locknuts and
washers.
Refer to the ‘Overview’ illustration and to igs 1 & 2.
it the ON/O switch to the Motor Stand using the
4 x M4 x 60 mm screws as shown in ig 1.
Join the Motor Stand and Support Stand together
using the M8 x 80 bolts as shown in ig 2, using the
spacers between the stand items.
it the Connecting Plates to the Motor Stand and
Support Stand, using the M8 x 40 bolts, flat washers
and M8 locknuts.
INSTALLING THE FIXED GUARD
PARTS REQUIRED
Guard Support Bracket: 2 x 8 x 15mm Bolts,
Washers & Locknuts
Fixed Guard: 4 x 8mm washers & locknuts
Attach the ixed Guard Support Bracket to the motor
mounting plate using 2 x M8 bolts, locknuts &
washers as shown in ig 3.
Secure the ixed Guard to the Motor Stand and fixed
Guard Support Bracket with the four flat washers and
locknuts as in ig 4.
Note: One fixing passes through the support stand.
INSTALLING THE SAW BLADE
PARTS REQUIRED
1x 20 Bolt
1 x 20 Flat Washer
1 x Saw Blade
Inner/Outer Retaining Discs
Lower Guard
2 x 6 machine screws/washers
Slide the Inner Retaining Disc onto the motor shaft,
followed by the Saw Blade and the Outer Retaining
Disc.
Install the blade in the orientation shown in fig 5,
noting the direction of the arrows on the blade and
ensuring the teeth point in the direction of rotation
shown.
Do not use a blade with no markings, but if they have
become worn away during previous use, inspect the
blade and note the direction of the teeth. Only use
XA supplied replacement blades.
Never use cracked, blunt or otherwise damaged
blades.
Ensure that the blade used is rated at least equal to
the speed/performance of the machine.
The blade is designed to sit on a machined shoulder
on the drive shaft and must be in this position before
the securing bolt is tightened.
The outer retaining disc has a flat on one side of the
central hole to align with a flat on the motor shaft.
Secure the discs and blade with the flat washer and
M20 bolt.
Use the Locking Wrench to stop the blade from
turning while tightening the nut with the Open Wrench
provided as shown in ig 6.
Attach the Lower Guard to the fixed guard using the
M6 machine screws and washers as shown in
igs 7 & 8.
ASSE BLING THE LOG CRADLE
PARTS REQUIRED
Return Spring ounting Bracket: 1 x 40mm bolt,
locknut, 2 x washers.
Return Spring Rod: 1 x 6 x 40 bolt, locknut,
2 x 6 mm washers, 1 x R-Clip & 1 x Spring.
Connecting Chain: 2 x 6 x 40mm bolts, 2 6 nuts
& 4 x washers
Cradle Support Arms: 2 x 8 x 60mm bolts, 2 x 8
locknuts & 2 x washers.
Sliding Guard Plate: 1 x locating bolt.
Bolt the Cradle Support Arms to the Support rame
using 60mm bolts, nuts & washers, ig.9.

12
Taking the weight of the cradle assembly, manouvre
the sliding guard plate to engage with the locating bolt
on the fixed guard.
The sliding guard plate will then support the weight of
the log cradle assembly, ig.10.
Secure the Connecting Chain between the cradle
support and support stand using the 40mm bolts,
washers & nuts, ig.11.
Bolt the return spring mounting bracket to the support
arm using the 40mm bolt.
it the Return Spring Assembly to the cradle support
arm using a the 40mm bolt, at the same time, feeding
the spring onto the rod before passing the rod
through the return spring mounting bracket. Secure
the spring assembly with the R-Clip, ig.12.
Lift the cradle and turn the blade gently by hand and
check it is passing cleanly through the gap in the
cradle without touching the sides.
INSTALLING THE HANDLES, PROTECTIVE PLATE
& LOG SUPPORT YOKE
PARTS REQUIRED
Handles:- 4 x 6 x10 hex headed screws.
Protective Plate:-2 x 6 x 6 machine screws
Log Support Yoke
Log Stop Bar
Secure both the handles to the log cradle with M6 x
10 hex headed screws.
Attach the Protective Plate using 2 x M6 machine
screws, ig.13.
Insert the Log Support Yoke into the cradle and lock
in position as required with the securing knob.
Slide in the Log Stop Bar into the other end of the
cradle and set it in position as required by screwing in
the securing knob, ig.14.
INSTALLING THE PROTECTIVE PLATE
Warning! Do not use the machine without the
protective plate installed. Doing so could result in
serious injury to the user.
1. Place the side plastic handle through the
protection plate and attach into place with 2 x
M6x15 screws and 2 x M6 lock nuts, ig.15.
2. ix the side panel of the protective plate to the
work table with 1 x M6x15 screw, ig.15
3. Place the upper plastic handle through the
protection plate and attach into place with 2 x
M6x15 screws and 2 x M6 lock nuts, ig.15.
LOCKING PLATE OPERATION
Open state: Move up the locking plate from the screw
to allow the work table to move forward, ig.16.
Locked state: Move down the locking plate to prevent
the work table from moving, ig.17.
Always ensure the locking plate is fixed in place and
the table does not move before commencing work.
OUNTING THE SAW TO THE FLOOR
The foot of each leg is provided with a bolt hole for
fixing the log saw to a suitably level floor or platform.
Choose a suitable position close to a convenient
power supply and bolt or screw the stand securely in
position. (fixings not supplied)
OPERATION
BEFORE STARTING WORK
WARNING: DO NOT PLUG IN TO THE AINS,
UNLESS YOU HAVE ENSURED THE SAW IS
SWITCHED OFF AND THE RE OVABLE BLADE
GUARD IS IN PLACE.
Check that all parts are secure. If the log saw is not
fixed to the floor, ensure that it is placed in a steady
position on firm ground.
Ensure the power cable is well away from the saw and
the workpiece before plugging into the mains supply.
Always check that the saw guard and cradle move
freely and spring back when released.
Make sure that any timber being sawn does not
contain any nails or other metal objects which would
damage the saw blade.
Note: The maximum log diameter that can be cut is
135mm.
USING THE SAW
Position the workpiece in the cradle so that it will not
move while cutting.
If the length of the log is greater than the length of the
cradle, extend the log support yoke and set it’s
position to suit with the securing knob, ig.18.
If logs of equal length are required, set the log stop
bar to the required distance and lock in position with
the securing knob, ig.19.
Lift the top cover of the On/Off switch in order to
press the green On button and switch the saw on,
ig.20.
The top cover should be opened by pushing the top
forward then lifting.
Close the top cover section as soon as the saw is
running but do not latch it shut. To stop the saw,
press or strike the red top cover section, ig.21.
The saw will stop and the brake will be applied to the
saw automatically.

13
Hold both handles at all times to push the workpiece
steadily against the saw blade. Wait for the motor to
reach full speed before cutting. Take care not to let
the log bounce against the saw blade. Always remove
the sawn wood before attempting to cut the next
piece.
Only one piece of wood should be placed on the log
cradle for cutting at any one time.
Always control the cradle keeping both hands on the
handles provided.
When pushing the wood into the saw, take care that
the motor speed does not drop.
To stop the saw press the O switch. Always switch
off before unplugging and never leave the saw running
unattended.
Avoid putting unnecessary pressure on the blade. Let
the blade work naturally.
Never try to re-start the saw if the blade becomes
jammed in the workpiece. Switch off and release the
jammed log first.
CHANGING THE SAW BLADE
CAUTION: ONLY USE SAW BLADES WITH THE
CORRECT FITTING AS SUPPLIED. ALWAYS
ENSURE THE SAW IS DISCONNECTED FRO THE
POWER SUPPLY BEFORE INSTALLING/RE OVING
THE BLADE.
Ensure the saw is disconnected from the power
supply. Take care that the saw blade has cooled
down before touching if it has just been in use.
Remove the R-Clip from the log carriage return spring
shown in ig 12 and remove the securing bolt from
the safety chain shown in ig 11.
Swing the log cradle away and down to the ground.
Detach the sliding guard plate from the connecting
bolt nearest the motor, ig.22.
To provide enough clearance for blade
removal/replacement, it is also necessary to remove
the lower guard cover by undoing the two retaining
screws, together with their locking and plain washers,
ig.23.
Use the blade locking wrench to prevent the blade
from turning and remove the blade retaining bolt using
the open wrench provided, ig.24.
Remove the outer retaining disc and lift away the
blade.
Brush away any dust or debris from the spindle before
fitting the new blade.
Replace in reverse order, ensuring the blade is fitted
the right way round (check the markings and direction
of teeth), and that the retaining bolt is secure. Use the
blade locking wrench to stop the blade from turning
while tightening the bolt with the open wrench.
CAUTION: INSTALLING THE BLADE THE WRONG
WAY ROUND WILL RESULT IN DA AGE TO THE
BLADE.
AINTENANCE
Always inspect the saw before use and ensure it is in
top condition.
Ensure that the guard can spring freely back to its
closed position and clean out any debris lodged
behind it.
Check the power cable to ensure it is sound and free
from cracks, bare wires etc.
After use, clean all dust and wood chippings from the
saw and its hinged parts and guards.
Ensure motor air vents are clear of debris, (use
compressed air to clean the machine if possible).
STORAGE
Store in a clean, dry environment protected from the
weather and away from children and untrained users.
TECHNICAL SPECIFICATION
Voltage 230V~50Hz
Rated Power 2000W S6 (40%)
No load speed 2800min-1
Blade Dimensions Ø405 x Ø30 x 3.2mm
Number of teeth 32
Cutting diameter Ø135mm max.
Ø30mm min.
Max. material length 3000mm
Insulation class I
Protection class IP54
Weight 37kg
Sound Pressure Level LpA 98 dB(A)
K=4dB(A)
Sound Power Level LWA 108 dB(A)
K=4dB(A)

14

15
LIST OF PARTS
1 On/Off Switch
2 Screw M4 x 60mm
3ixed Guard Support Bracket
4ixed Blade Guard Strips
5 Inner Retaining Disc
6Saw Blade
7Outer Retaining Disc
8lat Washer
9 Blade Retaining Bolt
10 Lower Guard
11 Sliding Guide Plate
12 M8 Locknut
13 Washer
14 Screw
15 Log Cradle
16 Moving Guard
17 Spacer Nut
18 55mm Bolt
19 Washer
20 Nut
21 R-Clip
22 Return Spring Bracket
23 Spring
24 Return Spring Rod
25 Log Stop Bar
26 Bolt 55mm
27 Connecting Plate
28 40mm bolt
29 Nut
30 Washer
31 Plastic Guard Wear Strips
32 Protective Plate
33 Screw Locking Knob
34 X-head m/c screw
35 Support Stand
36 Handle
37 Machine Screw
38 Cradle Support Arm
39 Log Support Yoke
40 Connecting Chain
41 Spacer
42 Motor Stand Assembly
43 End Cap 20mm
44 End Cap 25mm
45 Motor
46 M8 Bolt
47 M8 Washer
48 X-head screw
49 ibre Pad
50 Power Cable
51 Motor Cable
52 Bolt/Locknut (sliding guideplate)
53 Open Wrench
54 Blade Locking Wrench
ENVIRON ENTAL PROTECTION
Information for (private householders) for the environmentally responsible disposal of Waste Electrical and
Electronic Equipment (WEEE)
This symbol on products and or accompanying documents indicates that used and end of life
electrical and electronic equipment should not be disposed of in household waste. or the
proper disposal, treatment, recovery and recycling, please take these products to designated
collection points, where they will be accepted on a free of charge basis. Alternatively, in some
countries you may be able to return your products to your retailer upon the purchase of an
equivalent new product. Disposing of this product correctly will help to save valuable resources
and prevent any potential adverse effects on human health and the environment which could
otherwise arise from inappropriate waste disposal and handling. Please contact your local
authority for further details of your nearest designated collection point. Penalties may be applicable for incorrect
disposal of this waste in accordance with national legislation.
FOR BUSINESS USERS IN THE EUROPEAN UNION.
If you wish to discard electrical and electronic equipment, please contact your dealer or supplier for further
information.
Information on Disposal in other Countries outside the European Union.
This Symbol is only valid in the European Union.
If you wish to dispose of this product, please contact your local authorities or dealer and ask for the correct
method of disposal.

16
SY BOLS
The rating plate on your tool may show symbols. These represent important information about the product or
instructions on its use.
Conforms to relevant safety
standards.
Read and understand the owners
manual and labels affixed to the
machine. Learn its application
and limitations as well as the
specific potential hazards peculiar
to it.
Danger! Be aware at all time and
keep clear of moving parts.
Always pay full attention to the
movement of the log saw. Do not
attempt to load the log on until
the log saw has stopped.
Keep hands out of the way of all
moving parts.
Protect your hands by keeping
them away from splits and cracks
which open in the log. They may
close suddenly and crush or
amputate your hands. Do not
remove jammed logs with your
hands.
Keep visitors and children away.
The log saw must be always
operated by one person only.
Other people should keep a safe
distance from the work area,
especially when the log saw is
under operation. Never use other
people to help you with freeing
jammed log.
This machine contains dangerous
voltages and should not be
disassembled.
Disconnect power. Unplug when
not in use, before making
adjustments, changing parts,
cleaning, or working on the log
splitter. Consult technical manual
before servicing.
Any machine of this type may
throw foreign objects into the
eyes. This can cause permanent
eye damage. Always wear safety
goggles. Everyday eyeglasses
have only impact resistant lenses.
They are not safety glasses.
Do not wear loose clothing,
neckties or jewellery (rings, wrist
watches). They can be caught in
moving parts. Protective
electronically non conductive
gloves and non-skid footwear are
recommended when working.
Wear protective hair covering
when working. Wear protective
hair covering to contain long hair,
preventing it from getting it
caught in machinery.
Inspect the machine before
turning on. Keep guards in place
and in working order. orm a
habit of checking to see that
tools are removed from area
before turning on. Replace
damaged, missing or failed parts.
Waste electrical products should
not be disposed of with
household waste. Please recycle
where facilities exist. Check with
your Local Authority or retailer for
recycling advice.

17
ESITTELY
Kiitos, että ostit tämän tuotteen, joka on läpäissyt
kattavan laatutarkastusprosessimme. Kaikki on tehty
sen varmistamiseksi, että saat sen täydellisessä
toimintakunnossa.
TURVALLISUUS ENSIN
Seuraavat perusvarotoimet on tehtävä ennen
sähkötyökalun käyttämistä tulipalojen, sähköiskujen ja
henkilövahinkojen estämiseksi. On tärkeää lukea nämä
käyttöohjeet, jotta ymmärrät tämän työkalun käytön,
siihen liittyvät rajoitukset ja potentiaaliset vaarat.
TAKUUTODISTUS
Tällä tuotteella on kuluttajakäytössä 2 vuoden takuu,
joka alkaa ostopäivästä ja koskee vain ensimmäistä
ostajaa. Ammattikäytössä takuuta ei ole (laite ei ole
suunniteltu ammattikäyttöön). Tämä takuu kattaa vain
virheet, jotka aiheutuvat raaka-aine- ja
valmistusvioista, ja jotka tulevat esille takuuaikana.
Takuu ei korvaa kuluvia osia. Valmistaja korjaa tai
vaihtaa tuotteen harkintansa mukaan edellyttäen
seuraavassa mainittuja asioita. Tuotetta on käytetty
käsikirjan ohjeiden mukaisesti, ja sitä ei ole käytetty
väärin tai huolimattomasti tai tarkoitukseen, johon sitä
ei ole tarkoitettu käytettäväksi. Laitetta ei ole purettu
osiin tai peukaloitu millään tavalla, sitä ei ole
huollatettu valtuuttamattomilla henkilöillä tai käytetty
vuokrauksen kohteena. Kuljetusvauriot eivät kuulu
tämän takuun piiriin. Niistä on vastuussa kuljetusliike.
Takuuvaateet on esitettävä ensisijaisesti suoraan
jälleenmyyjälle takuukauden aikana. Tuote tulee
palauttaa valmistajalle vain poikkeuksellisissa
tapauksissa. Näissä tapauksissa ostajan vastuulla on
tuotteen palauttaminen omalla kustannuksellaan ja
varmistaen, että se on asianmukaisesti pakattu
kuljetusvaurioiden estämiseksi. Mukaan tulee liittää
lyhyt kuvaus viasta ja kopio kuitista tai muusta
ostotodistuksesta. Valmistaja ei ole vastuussa mistään
erityisistä, esimerkillisistä, suorista, välillisistä,
satunnaisista tai epäsuorista menetyksistä tai
vahingoista takuun aikana. Tämä takuu tulee lisänä,
eikä vaikuta oikeuksiin, joita kuluttajalla saattaa olla
vuoden 1973 Tavaranmyyntilain ja siihen vuonna 1975
ja 1999 tehtyjen muutosten mukaisesti.
LAKISÄÄTEISET OIKEUDET
Tämä takuu on lisänä, eikä vaikuta lakisääteisiin
oikeuksiisi.
TUOTTEEN HÄVITTÄ INEN
Kun tuotteen käyttöikä loppuu tai se hävitetään
jostakin muusta syystä, sitä ei saa hävittää
kotitalousjätteen mukana. Luonnonvarojen
säilyttämiseksi ja haitallisten ympäristövaikutusten
minimoimiseksi, kierrätä tuote tai hävitä muulla
ympäristöystävällisellä tavalla. Tuote tulee viedä
paikalliseen kierrätyskeskukseen tai muuhun
viralliseen keräily- ja hävityspisteeseen.
Jos olet epävarma, kysy kierrätys- ja/tai
hävittämisvaihtoehdoista paikalliselta jäteliikkeeltä.
ERITYISET TURVAOHJEET
Varoitus: Sähkötyökaluja käytettäessä on
noudatettava seuraavia perusturvaohjeita sähköiskun,
loukkaantumisten ja tulipalojen välttämiseksi.
Ota nämä tiedot asianmukaisesti huomioon ennen
sahan käyttöä ja kun työskentelet sahalla.
Älä hukkaa näitä turvamääräyksiä.
Suojaudu sähköiskujen varalta
Vältä koskemasta vartalollasi maadoitettuihin osiin.
Laite on säilytettävä kuivassa, suljetussa paikassa ja
poissa lasten ulottuvilta silloin, kun sitä ei käytetä.
Pidä asennetut lisävarusteet terävinä ja puhtaina, jotta
voit työskennellä hyvin ja turvallisesti.
Tarkista virtajohto säännöllisesti ja anna valtuutetun
asentajan vaihtaa se heti, kun siinä näkyy merkkejä
vaurioista.
Tarkista jatkojohdot säännöllisesti ja vaihda, jos ne
ovat vaurioituneet.
Ulkotyössä saa käyttää vain jatkojohtoja, jotka on
hyväksytty ulkokäyttöön, ja jotka on merkitty sen
mukaisesti.
Keskity siihen, mitä teet. Käytä työskennellessä
tervettä järkeä. Älä työskentele työkalulla, jos
ajatuksesi eivät pysy työssä.
Älä koskaan käytä sähkötyökalua, jos sitä ei voi kytkeä
päälle tai pois päältä virtakytkimestä.
Varoitus! Muiden työkalujen ja varusteiden
käyttäminen saattaa aiheuttaa loukkaantumisriskin
sinulle.
Irrota aina pistoke pistorasiasta ennen koneen
säätämistä tai huoltamista.
Anna nämä turvasäännöt kaikille henkilöille, jotka
käyttävät konetta.
Huomio! Kädet ja sormet voivat loukkaantua pyörivään
sahanterään.
Kone on varustettu vikavirtasuojakytkimellä, joka estää
uudelleen käynnistymisen jännitteen putoamisen
jälkeen.
SÄHKÖISET TIEDOT
TÄRKEÄÄ
Tämä tuote on varustettu sinetöidyllä sähköpistokkeella, joka sopii työkalulle ja käyttömaassa käytetylle virralle ja
vastaa kansainvälisiä standardeja.
Laite tulee kytkeä arvokilvessä ilmoitettua jännitteeseen. jos pistoke tai sähköjohto on vaurioitunut, ne tulee
vaihtaa täysin samanlaiseen sarjaan.
Noudata aina käyttömaassa voimassa olevia sähköverkkoon kytkemistä koskevia lakeja.
Ota tarvittaessa aina yhteys ammattitaitoiseen sähköasentajaan.

18
Tarkista ennen koneen ensimmäistä käyttökertaa, että
arvokilpeen merkitty jännite vastaa omaa
verkkojännitettäsi.
Jos jatkojohdon käyttäminen on välttämätöntä,
varmista, että johdon poikittaispinta on riittävä sahan
virrankulutukselle. Minimi poikittaispinta 1,5 mm² tai
2,5 mm² yli 20 metrin pituisille kaapeleille.
Jos käytät kaapelikelaa, kelaa kaapeli kokonaan auki
kelasta.
Tarkasta virtajohto. Älä koskaan käytä viallista tai
vaurioitunutta virtajohtoa.
Älä irrota pistoketta virtajohdosta vetämällä. Suojaa
johto lämmöltä, öljyltä ja teräviltä reunoilta.
Älä jätä sahaa sateeseen, äläkä käytä sitä märissä tai
kosteissa olosuhteissa.
Huolehdi hyvästä valaistuksesta.
Älä sahaa lähellä syttyviä nesteitä tai kaasuja.
Käytä asianmukaista työvaatetusta! Löysät asusteet
tai korut voivat tarttua pyörivään sahanterään.
Ulkona työskennellessä suositellaan luistamattomia
jalkineita.
Suojaa pitkät hiukset hiusverkolla.
Vältä epänormaaleja työasentoja.
Käyttäjien on oltava vähintään 16-vuotiaita.
Pidä lapset poissa koneen luota, kun se on liitettynä
verkkovirtaan.
Pidä työalue puhtaana puulastuista ja kaikista
tarpeettomista esineistä.
Epäjärjestys työskentelyalueella lisää
onnettomuusvaaraa.
Älä anna muiden henkilöiden, etenkään lasten, koskea
työkaluun tai virtajohtoon. Pidä heidät poissa
työskentelyalueelta.
Koneella työskenteleviä henkilöitä ei saa häiritä.
Huomioi moottorin ja sahanterän pyörimissuunta.
Käytä ainoastaan sahanteriä, joiden sallittu
maksiminopeus on sama tai suurempi kuin
työstettävän materiaalin ja laitteen maksimi
karanopeus.
Sammutettuasi moottorin, älä koskaan yritä hidastaa
sahanterää kohdistamalla siihen sivuttaista painetta.
Kiinnitä vain teriä, jotka on hyvin teroitettu, ja joissa ei
ole murtumia tai vääntymiä.
Älä käytä pikateräksestä (HSS) valmistettuja
pyöröteriä.
Käytä vain valmistajan suosittelemia sahanteriä, jotka
vastaavat EN 847-1 -standardia, ja joissa on
varoitusmerkintä. Varmista terää vaihtaessasi, ettei
sahausleveys ole kapeampi ja sahanterälevy ei ole
suurempi kuin halkaisuveitsen paksuus.
Vialliset sahanterät tulee vaihtaa välittömästi.
Älä koskaan käytä sahanteriä, jotka eivät täytä tämän
käyttöoppaan vaatimuksia.
Älä koskaan irrota koneen turvalaitteita tai tee niitä
toimintakyvyttömiksi.
Mikäli pöydän irtopala on kulunut, vaihda se uuteen.
Seiso aina sahanterän sivulla sahalla
työskennellessäsi.
Älä kuormita konetta niin, että se leikkaa kiinni.
Varmista, etteivät irtisahatut jätepalat tartu kiinni
sahanterään. Sinkoutumisen vaara!
Älä koskaan poista irtolastuja, sahanpurua tai
juuttuneita puunpaloja, kun sahanterä pyörii.
Kytke kone aina ensin pois päältä ennen kuin korjaat
vikoja tai poistat juuttuneita puunpaloja. Irrota pistoke
pistorasiasta!
Mikäli sahausrako on kulunut, vaihda pöydän irto-osa.
Irrota pistoke pistorasiasta!
Suorita varusteiden muutokset, säädöt, mittaukset ja
puhdistustoimenpiteet vain silloin, kun moottori on
sammutettuna. Irrota pistoke pistorasiasta!
Tarkista ennen käynnistystä, että jako- ja
säätöavaimet on poistettu työkalusta.
Sammuta moottori ja irrota pistoke verkkovirrasta
ennen kuin poistut työpaikalta.
Kaikki suojukset ja turvalaitteet on asennettava
takaisin paikoilleen välittömästi niiden korjaus- tai
huoltotöiden jälkeen.
Varmista, että noudatat kaikkia valmistajan antamia
turva-, käyttö- ja huolto-ohjeita sekä teknisissä
tiedoissa ilmoitettuja mittoja.
Paikallisten voimassaolevien sääntöjen noudattaminen
onnettomuuksien ehkäisystä on äärimmäisen tärkeää,
kuten myös muiden yleisten turvaohjeiden
noudattaminen.
Huomioi ammattiyhdistyksesi julkaisut ja ohjekirjat.
Älä koskaan käytä kevyeen työstöön suunniteltua
laitetta raskaisiin töihin.
Älä käytä sähköjohtoa muuhun kuin siihen, mihin se
on suunniteltu.
Varmista siitä, että seisot tukevasti ja säilytät
tasapainon kaiken aikaa.
Tarkista työkalu vaurioiden varalta.
Ennen kuin käytät laitetta, tarkista että turvalaitteet ja
hieman vaurioituneet osat toimivat moitteettomasti ja
asianmukaisella tavalla.

19
Tarkista, että liikkuvat osat toimivat moitteettomasti
eivätkä juutu kiinni, sekä ettei mitkään näistä osista
ole vaurioituneet. Varmista, että kaikki osat on oikein
asennettuja ja niille asetettujen käyttövaatimusten
mukaisia.
Vaurioituneet turvalaitteet ja muut osat on
korjautettava tai vaihdatettava asianmukaisesti
valtuutetussa huoltoliikkeessä, ellei tässä ohjekirjassa
ole neuvottu toisin.
Vialliset kytkimet tulee vaihdattaa valtuutetussa
huoltoliikkeessä.
Tämä sähkötyökalu vastaa oleellisia turvasäädöksiä.
Korjauksia saa suorittaa ainoastaan ammattimainen
sähköasentaja alkuperäisvaraosia käyttäen, muuten
käyttäjä saattaa loukkaantua.
Käytä tarvittaessa henkilökohtaisia suojavarusteita.
Niitä voivat olla:
Kuulosuojaimet kuulovaurioiden estämiseksi;
Hengityssuojain estämään vaarallisen pölyn
hengittämisen.
Käytä suojakäsineitä aina sahanteriä ja karkeita
materiaaleja käsitellessäsi. Sahanteriä on kuljetettava
pakkauksessa aina kun se on mahdollista.
Käyttäjää on tiedotettava olosuhteista, jotka
vaikuttavat melun syntyyn (esim. terät, jotka on
suunniteltu alentamaan melupäästöä, terien ja
laitteiden huolto).
Vioista koneessa, sen suojuksissa, turvalaitteissa tai
terässä on ilmoitettava välittömästi havaitsemisen
jälkeen vastuussa olevalle henkilölle.
Siirrä laitetta ainoastaan kuljetuslaitteiden avulla. Älä
koskaan käsittele tai siirrä konetta sen suojuksista.
Kaikkien käyttäjien tulee saada kunnon koulutus
käyttöön, säätöihin ja koneen toimintaan.
Älä sahaa materiaaleja, joissa on vieraita esineitä
kuten rautalankaa, kaapeleita tai kiinnittimiä.
Käytä vain teräviä sahanteriä.
Älä käytä konetta ilman paikoilleen asennettuja
suojuksia. Se voi aiheuttaa vakavan henkilövahingon
käyttäjälle.
HUO IO!
ÄLÄ KOSKAAN SAHAA KLAPISIRKKELIN
SUURINTA SAHAUSKAPASITEETTIA YLITTÄVIÄ
TYÖKAPPALEITA.
Sahattaessa syntyy tärinää, joka saattaa johtaa
ruuviliitosten löystymiseen.
Tapaturmariskin tai loukkaantumisvaaran välttämiseksi
tarkista säännöllisesti kaikkien ruuviliitosten tiukkuus
ennen työn aloittamista ja työn aikanakin.
LISÄTIETOA
Tämän tehokkaan laitteen käynnistäessä saattaa
esiintyä sähköjännitteen laskua, joka vaikuttaa muiden
laitteiden toimintaan (esim. valaistusteho heikkenee
hetkeksi).
Kannattaa huomioida, että häiriöitä ei esiinny mikäli
impendassi on matalampi kuin 0,23087 Ohm,.
Ongelmien ilmetessä ota yhteyttä sähköenergian
toimittajaan.
YLEISET TURVALLISUUSSÄÄNNÖT
VAROITUS! Lue kaikki ohjeet
Alla olevien ohjeiden noudattamatta jättäminen voi
aiheuttaa sähköiskun, tulipalon ja/tai vakavan
vamman. Käsite ”sähkötyökalu” kaikissa alla
luetelluissa varoituksissa viittaa sähkövirtakäyttöiseen
(johdotettuun) sähkötyökaluun tai akkukäyttöiseen
(johdotoomaan) sähkötyökaluun.
PIDÄ NÄ Ä OHJEET TALLELLA
1) TYÖALUE
a) Pidä työalue puhtaana ja hyvin valaistuna.
Roskaiset tai pimeät alueet lisäävät
onnettomuusriskiä.
b) Älä käytä sähkötyökaluja ympäristöissä, joissa on
räjähdysvaara, kuten helposti syttyvien nesteiden,
kaasujen tai pölyn läsnä ollessa. Sähkötyökalut
synnyttävät kipinöitä, jotka voivat sytyttää pölyn tai
höyryt tuleen.
c) Pidä lapset ja sivulliset poissa sähkötyökalua
käytettäessä. Häiriötekijät voivat haitata
keskittymistä.
2) SÄHKÖTURVALLISUUS
a) Sähkötyökalun pistokkeiden tulee vastata
pistorasiaa. Älä koskaan muuta pistoketta millään
tavalla. Älä käytä sovitinpistokkeita maadoitettujen
sähkötyökalujen kanssa. Muuttamattomat
pistokkeet ja yhteensopivat pistorasiat vähentävät
sähköiskun vaaraa.
b) Vältä vartalokosketusta maadoitettuihin pintoihin
kuten putkiin, lämmittimiin, liesiin tai jääkaappeihin.
Sähköiskun vaara kasvaa, jos vartalosi on
maadoitettu.
c) Suojaa sähkötyökalut sateelta ja kosteudelta.
Sähkötyökalun sisään päässyt vesi lisää
sähköiskun vaaraa.
d) Älä käytä johtoa väärin. Älä koskaan käytä johtoa
sähkötyökalun kantamiseen, vetämiseen tai
irrottamiseen pistorasiasta.
Pidä johto kaukana lämmöstä, öljystä, terävistä
reunoista ja liikkuvista osista. Vaurioituneet tai
sotkeutuneet johdot lisäävät sähköiskun vaaraa.
e) Kun sähkötyökalua käytetään ulkotiloissa, käytä
jatkojohtoa, joka soveltuu ulkokäyttöön.
Ulkokäyttöön sopivan johdon käyttö vähentää
sähköiskun vaaraa.

20
3) HENKILÖTURVALLISUUS
a) Pysy valppaana, katso mitä teet ja käytä tervettä
järkeä käyttäessäsi sähkötyökalua. Älä käytä
sähkötyökalua ollessasi väsynyt tai huumeiden,
alkoholin tai lääkkeiden vaikutuksen alaisena.
Hetkellinen epähuomio sähkötyökalua käytettäessä
voi johtaa vakaviin henkilövammoihin.
b) Käytä suojavarustusta. Käytä aina suojalaseja.
Turvavarustus kuten hengityssuojain,
liukumattomat turvajalkineet, suojakypärä tai
kuulosuojain käytettynä asianmukaisissa
olosuhteissa vähentää henkilövammoja.
c) Vältä vahinkokäynnistyksiä. Varmista, että kytkin
on off-asennossa (sammutettuna) ennen virran
kytkemistä. Sähkötyökalun kantaminen sormi
kytkimellä tai virran kytkeminen päälle
sähkötyökaluihin, joiden kytkin on päällä, voi
aiheuttaa onnettomuuksia.
d) Poista säätöavaimet tai jakoavaimet ennen
sähkötyökalun käynnistämistä. Jako- tai muu
avain, joka on jätetty kiinni sähkötyökalun
pyörivään osaan voi aiheuttaa henkilövamman.
e) Älä kurkottele. Pidä asianmukainen jalansija ja
tasapaino kaiken aikaa. Tämä mahdollistaa
sähkötyökalun paremman
hallinnanodottamattomissa tilanteissa.
f) Pukeudu asianmukaisesti. Älä pidä löysiä vaatteita
tai koruja. Pidä hiuksesi, vaatteesi ja käsineesi
poissa liikkuvista osista. Löysät vaatteet, korut tai
pitkä tukka voivat jäädä kiinni liikkuviin osiin.
g) Jos pölynpoistoon tai keräyslaitteisiin kytkettäviä
laitteita on toimitettu, varmista, että ne on kytketty
ja niitä käytetään asianmukaisesti. Näiden
laitteiden käyttö voi vähentää pölyyn liittyviä
vaaroja.
4) SÄHKÖTYÖKALUN KÄYTTÖ JA HUOLTO
a) Älä käytä voimaa sähkötyökaluun. Käytä
käyttötarkoitukseesi soveltuvaa sähkötyökalua.
Asianmukainen sähkötyökalu toimii paremmin ja
turvallisemmin teholla, jolla se on suunniteltu.
b) Älä käytä sähkötyökalua, jos kytkin ei käännä sitä
päälle ja pois päältä. Sähkötyökalu, jota ei voida
kontrolloida kytkimestä on vaarallinen, ja se tulee
korjata.
c) Irrota pistoke virtalähteestä ennen kuin muutat
säätöjä, vaihdat lisävarusteita tai varastoit
sähkötyökalun. Tällaiset ehkäisevät turvatoimet
vähentävät sähkötyökalun vahinkokäynnistyksen
vaaraa.
d) Säilytä seisovat sähkötyökalut poissa lasten
ulottuvilta, äläkä anna henkilöiden, jotka eivät
tunne sähkötyökalua tai näitä ohjeita, käyttää
sähkötyökalua. Sähkötyökalut ovat vaarallisia
kouluttamattomien käyttäjien käsissä.
e) Pidä sähkötyökalut kunnossa. Tarkasta liikkuvien
osien kohdistusvirheet tai kiinnitykset, osien
murtumat ja muut seikat, jotka voivat vaikuttaa
sähkötyökalujen käyttöön. Jos sähkötyökalu on
vaurioitunut, korjauta se ennen käyttöä. Monet
onnettomuudet aiheutuvat huonosti
kunnossapidetyistä sähkötyökaluista.
f) Pidä leikkaustyökalut terävinä ja puhtaina.
Asianmukaisesti kunnossapidetyt leikkaustyökalut,
joissa on terävät leikkausreunat, eivät juutu
helposti ja niiden käsittely on helpompaa.
g) Käytä sähkötyökalua, lisävarusteita ja
työkalupaloja tms. näiden ohjeiden mukaisesti ja
tavalla, johon kyseessä oleva sähkötyökalu on
tarkoitettu, ottaen huomioon työolosuhteet ja
suoritettava työ. Sähkötyökalun käyttö
toimintoihin, joihin sitä ei ole tarkoitettu, voi johtaa
vaaralliseen tilanteeseen.
5) HUOLTO
a) Jätä sähkötyökalun huolto pätevälle korjaajalle,
joka käyttää ainoastaan täsmälleen samanlaisia
varaosia. Näin varmistetaan, että sähkötyökalun
turvallisuus säilyy.
OSAT JA SÄÄTI ET (KUVA A/A1)
1 Puukappaleen tukipidike
2 Tukiteline
3 Kiinteä suojus
4 Liikkuva suojus
5 Puun rajoitinpalkki
6 Suojalevy
7 Palautusjousikokoonpano
8 Moottoriteline ja moottori
9 Kahva x 2
10 Liitoslevy
11 Syöttökourun tukivarsi
12 Syöttökouru
13 Kytkentäketju
14 Kiinnitysnuppi
15 Suojalevy
16 Muovinen sivukahva
17 Muovinen yläkahva
18 Lukkomutteri (M6) x 4
19 Ruuvi (M6x15) x 5
Table of contents
Languages:
Other FXA Saw manuals
FXA
FXA 501739306 User manual

FXA
FXA FXADWCS1809 User manual

FXA
FXA FXAJD5385 User manual

FXA
FXA FXAM1H-ZP3-210 User manual

FXA
FXA FXAJ1G-ZP8-210C User manual

FXA
FXA FXAJF92109P User manual

FXA
FXA FXAJD3507 User manual

FXA
FXA FXAJD5385 User manual

FXA
FXA FXAM1H-ZP5-250-1 User manual
FXA
FXA FXAJ1XL-DU11-210 User manual