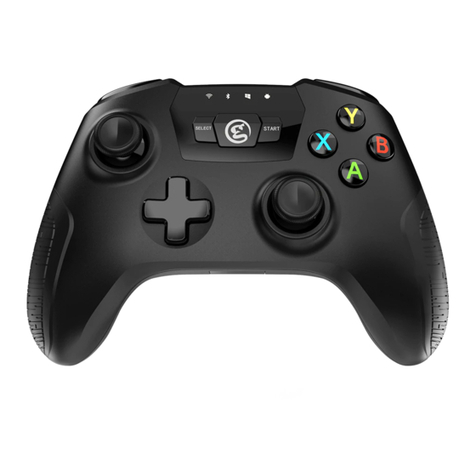
GameSir T4 User manual

GameSir • Gaming is Winning.™
© 2019 GameSir Inc. All rights reserved.
Product may vary slightly from those pictures. User Manual
GameSir T4
Wireless Controller

PACKAGE CONTENTS
SYSTEM REQUIREMENTS
REGISTRATION
Register your GameSir ID online at https://gamesir.hk/ to get real-time information on your
product's
warranty status and a series of exclusive benefits from GameSir.
YOUR BENEFITS
* 12-month replacement of the same model from the date you received it.
* Free online technical support at https://gamesir.hk/
GameSir T4 Wireless Controller
2.4 GHz Wireless Receiver
Type-C charging cable
Instruction Manual
Windows7/8/10

DEVICE LAYOUT
BACK Button
START Button
TURBO Button
A/B/X/Y Buttons
HOME Button
Backlight Loop
LED Light Indicators
D-Pad
Configurable Buttons(M1/M2/M3/M4)
Reset
LT Button
LB Button
Charging Light Indicator
Type-C Connector
RT Button
PB Button
2.4Ghz Dongle
USB Cable

CONNECTION
a. Turn on Switch and select the following option:
"System Settings" - "Controllers and Sensors" - "Pro Controller wired Communication" ,
and turn it on.
b. Plug USB cable into the USB 2.0 port of Switch dock.
c. When the LED is always on, the connection is successful.
d. Connect Switch Lite to a Type-CtoUSBadapter that supports Switch system. ( Type-C
toUSBadapter needs to be purchased by yourself)
e. Plug the dongle into the USB port of the Type-CtoUSBadapter, and the dongle indicator
light flashes green and they are pairing. When the connection indicator light and the
dongle indicator light stay on in green, the connection is successful. When the connection
indicator light turns red and is on, the identification is successful.
Connect Switch Lite to a Type-C to USB adapter that supports Switch system. ( Type-C to
USB adapter needs to be purchased by yourself)
Connect Switch to T4 controller (wireless connection)
a. Turn on Switch and select the following option:
"System Settings" - "Controllers and Sensors" - "Pro Controller wired Communication" , and
turn it on.
b. Plug the dongle into the USB port of Switch dock.
c. Press HOME button to power on, and lights run through LED1, LED2, LED3, and LED4 to
begin the pairing.
d. When any LED is always on, the connection is successful.
Note: The Switch’s USB 2.0 port just supports the wired controllers, and the USB 3.0 port
does not support the wired controllers. Only two wired controllers can be used at the
same time via Switch.
Connect Switch to T4 controller ( wired connection) a. Connect GameSir T4 Wireless Controller to PC's USB port via Type-C charging cable.
b. When LED1+LED4 of GameSir T4 Wireless Controller stay on, Xinput Mode is connected
successfully.
c. The corresponding driver will be automatically installed on PC. GameSir T4 Wireless
Controller can be used normally.
* Hold Home button for 5 seconds, GameSir T4 Wireless Controller can switch between
Xinput Mode and Dinput Mode.
Xinput Mode: LED1+LED4 indicators stay on
Dinput Mode: LED1+LED3 indicators stay on.
Connect to PC via 2.4 GHz receiver (Xinput Mode)
a. Click Home button to turn on GameSir T4 Wireless Controller, LED indicator lights scroll
up and down, the controller can be connected.
b. Plug 2.4 GHz receiver into PC's USB port.
c. When 2.4 GHz receiver indicator lights up and LED1+LED4 of GameSir T4 Wireless
Controller stay on, Xinput Mode is connected successfully.GameSir T4 Wireless Controller
can be used normally.
* Hold Home button for 5 seconds, GameSir T4 Wireless Controller can switch between
Xinput Mode and Dinput Mode.
Xinput Mode: LED1+LED4 indicators stay on
Dinput Mode: LED1+LED3 indicators stay on
Connect to PC via Type-C charging cable (Xinput Mode)
(Dinput Mode) (Xinput Mode)
CONFIGURABLE M BUTTONS
B button
M1
A button
M2
X button
M4
Y button
M3
Default Key layout
TURBO FUNCTION
AUTOMATIC POWER OFF
a. Press the key where you want to set turbo function, press TURBO key simultaneously,
then back light turns into red and Turbo function is successfully set.
b. Press the key that is successfully set for Turbo function, press TURBO key simultaneously,
then back light turns into red and Turbo function is successfully canceled.
* The following buttons can be used to set for Turbo function: A, B, X, Y, LB, RB, LT, RT.
a. Hold M1 then START or BACK, the backlight loop turns red and blue simultaneously to
be set up.
b. Hold the keys you want to combine.
c. Press M1 again, the red backlight loop turns off. Combination is successfully set.
d. These keys can be set up as combination buttons: A, B, X, Y, L1, L2, L3, R1, R2, R3. They
can be freely combined, either combination keys or single button.
e. M2, M3, M4 have the same settings as M1. This function can be set up only when the
controller is successfully connected.
When GameSir T4 Wireless Controller is connected, it will automatically
power off within 180 seconds under no operation.
When GameSir T4 Wireless Controller is disconnected, it will automatically
power off within 30 seconds under no operation.
CHARGING
Hold Turbo then press up or down of D-pad to adjust vibration. The lowest level is vibration
off among 5 levels of vibration.
It takes 1.5 to 2 hours to full charge GameSir T4 Wireless Controller.
The charging indicator light keeps steady red during charging.
When fully charged, the charging indicator light goes off. Please unplug the Type-C charging
cable.
LIGHTING ADJUSTMENT AND MOTOR VIBRATION INTENSITY
ADJUSTMENT
Lighting adjustment:
Hold LT, RT, R3 simultaneously then press up or down of D-pad to adjust lighting. The lowest
level is light off among 5 levels of lighting.
ABXY backlight adjustment:
Hold LB+RB for 5 seconds to switch backlight on/off.
Motor vibration intensity adjustment:

LOW BATTERY ALERT
RESET
GameSir T4 Wireless Controller shows low power condition (less than 10%)
when:
1. Battery voltage is less than 3.5V;
2. LED indicator light flashes;
3. Vibration is off.
Stick a slender pin into the Reset button on the back of GameSir T4 Wireless Controller to
reset. The controller will turn off and reboot. PC Windows 7(以降)
日本語
パッケージ内 容
システム要 件
ユーザー登録
https://gamesir.hk/にてGameSirIDを作成して、ご購入の製品を登録すると、当製品の品質保証
の状態に関するリアルタイム情報と、GameSir会員専用のメリットを得ることができます。
登録による特典
12ヵ月のメーカー限定保証
https://gamesir.hk/でのマニュアルの閲覧と無料オンラインテクニカルサポート(英語/日本語
対応)
GameSirT4コントローラー
Type-C充電ケーブル
2.4GHzドングル
GameSirT4コントローラー取扱説明書

各部の名称

a.2.4GHzドングルをPCのUSBポートに差し込んでください。2.4GHzドングルのライトは点滅し
ます。
b.GameSirT4コントローラーのHomeボタンを押してゲームパッドを起動してください。LED
インジケータライトが交互に点滅します。
c.2.4GHzドングルのライトとGameSirT4コントローラーのLEDインジケータライト(LED1+LED4)
が点灯になりますと、接続成功です。
d.PCは自動的に対応するドライバをダウンロードしてインストールします。
e.ゲームを楽しみましょう。
*HOMEボタンを5秒押すと、GameSirT4コントローラーはXinputモードとDinputモードを切り
替えることができます。LED1+LED4インジケータライトが点灯する場合はXinputモードになり、
LED1+LED3インジケータライトが点灯する場合はDinputモードになります。
a.Type-CケーブルをPCのUSBポートとGameSirT4コントローラーのUSB端子に差し込んでくだ
さい。
b.GameSirT4コントローラーのHomeボタンを押してゲームパッドを起動してください。
c.GameSirT4コントローラーのLEDインジケータライト(LED1+LED4)を点灯になりますと、接続
成功です。
d.PCは自動的に対応するドライバをダウンロードしてインストールします。
e.ゲームを楽しみましょう。
機能説明
2.4GHzドングルでPCへの接続ステップ(Xinpuモード)
Type-CケーブルでPCへの接続ステップ(Xinpuモード)
a.2.4GHzドングルをPCのUSBポートに差し込んでください。2.4GHzドングルのライトは点滅し
ます。
b.GameSirT4コントローラーのHomeボタンを押してゲームパッドを起動してください。LED
インジケータライトが交互に点滅します。
c.2.4GHzドングルのライトとGameSirT4コントローラーのLEDインジケータライト(LED1+LED4)
が点灯になりますと、接続成功です。
d.PCは自動的に対応するドライバをダウンロードしてインストールします。
e.ゲームを楽しみましょう。
*HOMEボタンを5秒押すと、GameSirT4コントローラーはXinputモードとDinputモードを切り
替えることができます。LED1+LED4インジケータライトが点灯する場合はXinputモードになり、
LED1+LED3インジケータライトが点灯する場合はDinputモードになります。
a.Type-CケーブルをPCのUSBポートとGameSirT4コントローラーのUSB端子に差し込んでくだ
さい。
b.GameSirT4コントローラーのHomeボタンを押してゲームパッドを起動してください。
c.GameSirT4コントローラーのLEDインジケータライト(LED1+LED4)を点灯になりますと、接続
成功です。
d.PCは自動的に対応するドライバをダウンロードしてインストールします。
e.ゲームを楽しみましょう。
2.4GHzドングルでPCへの接続ステップ(Xinpuモード)
Type-CケーブルでPCへの接続ステップ(Xinpuモード)

*HOMEボタンを5秒押すと、GameSirT4コントローラーはXinputモードとDinputモードを切
り替えることができます。LED1+LED4インジケータライトが点灯する場合はXinputモードに
なり、LED1+LED3インジケータライトが点灯する場合はDinputモードになります。
(Dinpuモード) (Xinpuモード)
TURBOボタンを押しながら連射させたいボタンを押すと連射になります。(バックライトループは
レッドになります。)
連射させたボタンを押しながらTURBOボタンを押すと、連射機能を解除します。(バックライトル
ープはブルーになります。)
カスタマイズMボタンの設置/変更
連射機能
ホームボタンを2秒長押しするとコントローラーがオフになり、すべてのライトが消灯します。
シャットダ ウン
a.GameSirT4コントローラーが接続状態で、いずれかのMボタンを押してから「STARTボタン/
BACKボタン」を押すと、バックライトループが同時にレッドとブルーで点灯になります。マクロ
設定モードに入ります。
b.カスタマイズさせたいボタンを押します。(例えば、LBボタンを押してからR3ボタンを押す)
c.もう一度Mボタンを押すと、レッドのバックライトループがオフになり、Mボタンのカスタマイズ
設定に成功しました。
*(Mボタン+BACKボタンを押すと、カスタム設定に入り、LBボタンとR3ボタンの機能が同時に
有効になる。Mボタン+STARTボタンを押すと、カスタム設定に入り、押す順に従って、LBボタン
とR3ボタンが先後に有効になる。)
d.下記のボタンはマクロボタンとして設定できます。A,B,X,Y,L1,L2,L3,R1,R2,R3,方向キー
デフォルトボタンレイアウト
M1 M2
M4
M3
Bボタン Aボタン
Xボタン
Yボタン
GameSirT4コントローラーが接続済みの状態で180秒以上操作されない場合は、自動的にシ
ャットダウンします。
GameSirT4コントローラーが接続なしの状態(接続待ち)で30秒以上接続されない場合は、自動
的にシャットダウンします。
充電時間は1.5〜2時間です、充電中に充電インジケータライトはレッドで点灯します。
充電完了(100%充電済み)に充電インジケータライトは消滅します。
充電完了後、充電線ケーブルを抜いてください。
自 動 シャットダ ウン
充電

GameSirT4コントローラーは接続状態で、バッテリー残量が10%に下回る場合、LEDインジケー
タライトが点滅し、モーター振動機能が自動的にオフになります。
バッテリー残量が5%に下回る場合は、過電圧保護モードに入り、コントローラーが自動的にシャ
ットダウンします。
LT+RT+R3を同時に押しながら、方向キーのUp/Downボタンを押すとボタンライトの明るさを
調節できます。
LB+RBボタンを5秒押すと、ボタンライトをオン/オフに切り替えます。
バッテリー残量確認/バッテリー残量不足警告
調節/ボタンの消灯
Turboボタンを5秒押しながら、方向キーのUp/Downボタンを押すとモーター振動の強さを調節
できます。
モーター振動の強さの調節
GameSirT4コントローラーの裏面の穴に針を差し込んで押すと、コントローラーがオフになり、
その後再起動します。
リセット(Reset)
简体中文
包装内容
系统要求
GameSir T4 游戏手柄
Micro-USB 充电数据线
说明书
合格证
Window 7以上

BACK 按键
START 按键
TURBO 按键
A/B/X/Y 按键
HOME 按键
摇杆
LED 指示灯
十字键
可配置按键(M1/M2/M3/M4)
重启按钮
LT 按键
LB 按键
充电指示灯
Type-C 充电口
RT 按键
PB 按键
2.4Ghz 接收器
USB 数据线
系统要求

连接方法
PC Xinput Dinput无线模式连接
a. 按HOME键开机,通道LED1、LED2、LED3,LED4跑动进入配对。
b. 把接收器插入电脑USB,手柄与接收器开始配对。LED1+ LED4常亮则Xinput模式连接成功。
LED1+ LED3常亮,则Dinput模式连接成功。可长按Home键5秒切换相应模式。
PC Xinput Dinput有线模式连接
a. 直接把USB线插入电脑USB口。
b. LEDI+ LED4常亮则Xinput模式连接成功。LED1+ LED3常亮,则Dinput模式连接成功。
可长按Home键5秒切换模式。
a. 打开Switch主机,选择菜单‘’System Settings‘’-‘’Controllers and Sensors‘’-‘’Pro Controller
wired Communication‘’打开。
b. 接收器直接插到任天堂主机充电座的USB 2. 0口。
c. 按HOME键开机,通道LED1,LED2,LED3,LED4跑动,进入配对。
d. 当通道LED常亮,则连接成功。
注意:Switch主机USB 2.0口支持有线手柄,USB 3.0口不支持有线手柄。且只能同时使用2
个有线手柄。
任天堂Switch无线连接
a. 打开Switch主机,选择菜单‘’System Settings‘’-‘’Controllers and Sensors‘’-‘’Pro Controller
wired Communication‘’打开。
b. USB线直接插到任天堂主机充电座的USB 2. 0口。
c. 当通道LED常亮,则连接成功。
任天堂Switch有线连接
可编程M键
Turbo连击键
游戏中按住设定好的TUBRO键不放,可实现快速连击功能、
a. 按住想设定为TURBO功能的按键不放,再按TURBO键。光环红色闪烁,则设定成功。按
住设定成TUBRO功能按键不放,再按一次TUBRO键,则可以取消TUBRO功能,且背光环
变成蓝色。
b. 仅switch模式下的TURBO键,需先按住R3+TURBO键切换,再按住想设定为TURBO功能
的按键不放,再按TURBO键。再按一次TUBRO键,则可以取消TUBRO功能。
c. 可以设定成TURBO按键有:A,B,X,Y,LB,RB,LT,RT。
a. 与设备连接成功后,先按住M1再按住BACK或START键,这时右摇杆背光圈红、蓝灯同时
常亮,进入编程设置状态。
b. 按住你想编程的按键。(如:先按LB键再按R3键)。
c. 再次按M1确认组合键设置成功,右摇杆背光圈蓝灯常亮,这时编程键设置成功。(若是按
M1+BACK进入编程键设置:LB和R3同时触发功能) , 若是按M1+START进 入编程键设置:
LB和R3按照按压先后顺序触发功能,同一触发支持16次组合响应。
d. 可设置组合键有:(A,B,X,Y,LB,LT,L3,RB,RT,R3方向键中任意组合,可以
多个组合键也可以只设置为一键)。
e. M2,M3,M4与M1设定方法一样。
f. (Switch不支持编程功能)在Switch模式 下:M1默认为Switch手柄B键,M2默认为Switch
手柄A键,M3默认为Switch手柄Y键,M4默认为Switch手柄X键。

灯光亮度调节与马达震动强度调节
同时长按LT,RT,R3再通过按压方向键上下来调节灯光,共有5档灯光亮度,最低档为关闭。
灯光亮度调节
ABXY背光调节
LB+RB键长按5秒切换背光开启或者关闭。
马达震动强度调节
长按Turbo键,再通过按压方向键上下来调节马达震动强度,共有5档马达震动强度,最低档
为关闭。
注:本产品没有电子关机键,30秒无连接状态自动休眠,连接状态下无任何操作600秒自动
休眠。
NOTICE:Please read this Precautions carefully.
CONTAINS SMALL PARTS. Keep out of reach of children under the age of 3. Seek immediate medical attention if
swallowed or inhaled.
DO NOT use the product near fire.
DO NOT expose to direct sunlight or high temperatures.
DO NOT leave the product in a humid or dusty environment.
DO NOT impact the product or cause it to fall due to strong impact.
DO NOT touch USB port directly or it might cause malfunctions.
DO NOT strongly bend or pull cable parts.
Use a soft, dry cloth while cleaning.
DO NOT use chemicals such as gasoline or thinner.
DO NOT disassemble, repair or modify.
DO NOT use for purposes other than its original purpose. We are NOT responsible for accidents or damage when used
for non-original purposes.
DO NOT look directly at the optical light. It might damage your eyes.
If you have any quality concerns or suggestions, please contact GameSir or your local distributor.
ご注意:保護者の方へ必ずお読みください。
*品質上の問題または提案がある場合に販売元またはアフターサービス担当者に連絡してください。
小さいな部品がありますので3歳未満のお子様には絶対に与えないでください。
乳幼児の手の届くところに置かないでください。万一飲み込んだ場合は、すぐに医師に相談してください。
火気のある場所では絶対に使用しないでください。
長時間直射日光当てたり、高温となる場所に置かないでください。
本品を湿気やホコリの多いところに置かないでください。
本品に物を当てたり、落下させるような強い衝撃を与えないでください。
故障の原因になりますので、USB端子を直接手で触ないでください。
ケーブル部を強く曲げたり引っ張ったりしないでください。
お手入れの際には、乾いた柔らかい布を使用してください。
ベンジン、シンナーなどの薬品は使用しないでください。
分解や修理、改造は絶対にしないでください。
本来の目的以外には使用しないでください。本来の目的以外に使用した場合の事故や損害に対し、弊社は一切その責任を負
いません。
光学式ライトの光を直接見ないでください。強い光より、目を痛める可能性があります。

1. 若商品有质量问题,请首先联系我们的客服进行登记。
联系方式:
QQ:800082537
电话:400-8828035(时间:9:00-18:00)
官网:www.xiaoji.com
出品:广州小鸡快跑网络科技有限公司
地址:广州市天河区建业路华翠街68号301A-1
2. 如需退、换商品,请确保商品完好无损(包括商品外包装、附赠品、说明书、售后卡、标签等),不影响二次销售。
3. 如要保修商品,请务必完整填写用户姓名、联系电话、联系地址,正确填选售后要求与详细说明售后原因,将售后卡随货
寄回(如不完整填写保修卡信息,恕无法提供任何的售后服务。)
注意事项
保修卡
(售后政策:非人为损坏,3个月包换、1年保修)
用户姓名
联系电话
联系地址
售后要求
售后原因
订单编号
(注:非小鸡官网途径购买的产品,售后问题请直接与购买商家联系)
退 换 保修
Other manuals for T4
4
Table of contents
Other GameSir Controllers manuals

GameSir
GameSir X2 User manual

GameSir
GameSir T2a User manual

GameSir
GameSir T3 User manual

GameSir
GameSir X2 User manual

GameSir
GameSir T4k User manual

GameSir
GameSir T3S User manual

GameSir
GameSir GameSir T6 User manual

GameSir
GameSir G4 pro User manual

GameSir
GameSir G7 SE User manual

GameSir
GameSir G3w User manual