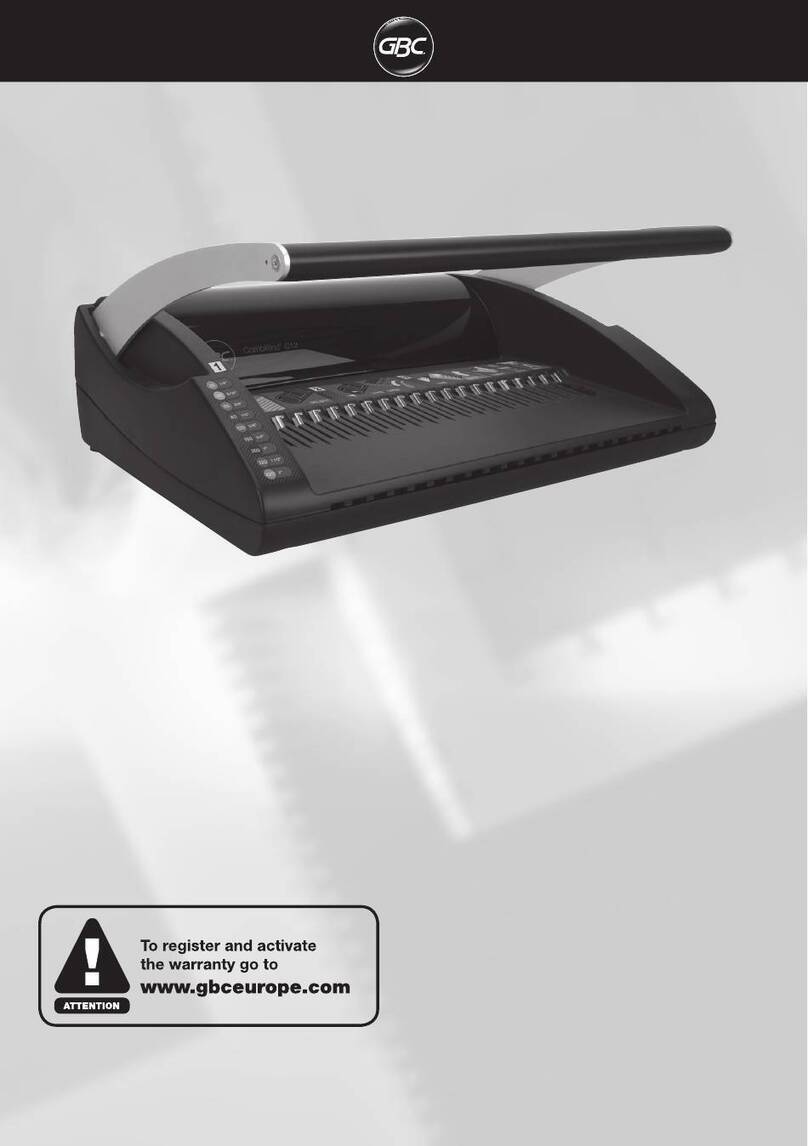
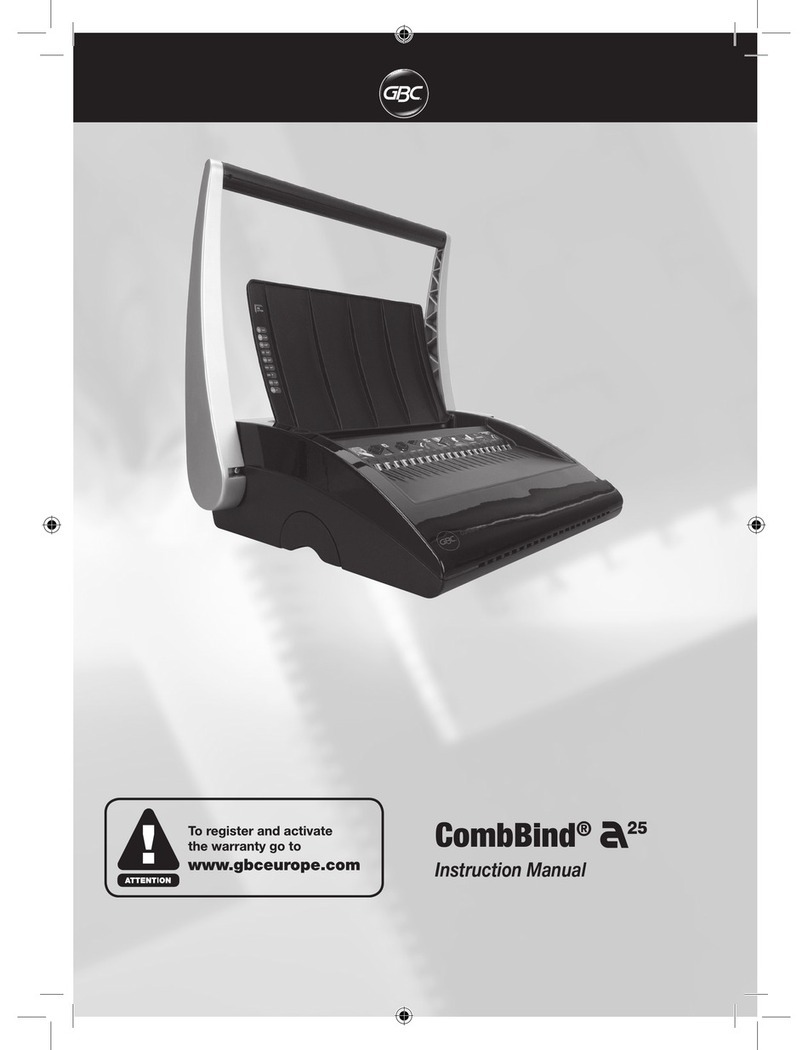
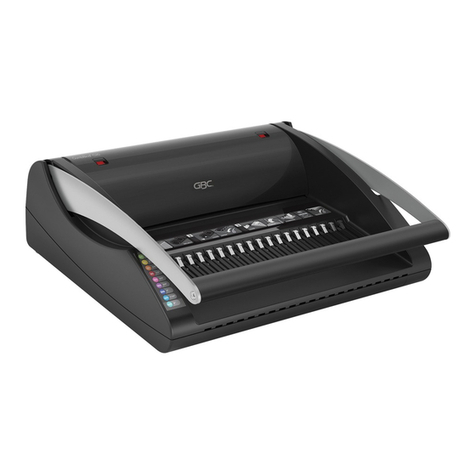
GBC CombBind C110E User manual

G
Instruction Manual
F
Manuel d’utilisation
D
Bedienungsanleitung
I
Manuale d’istruzioni
O
Gebruiksaanwijzing
E
Manual de instrucciones
P
Manual de Instruções
T
Kullanım Kılavuzu
K
Οδηγίες
c
Brugsvejledning
o
Käyttöopas
o
Bruksanvisning
S
Bruksanvisning
Q
Instrukcja obsługi
o
Návod k obsluze
H
Használati útmutató
o
Руководствo по
зкcплyатации
NO
FI
CZ
RUS
CombBind
C110 E

English 4
Français 8
Deutsch 12
Italiano 16
Nederlands 20
Español 24
Português 28
Türkçe 32
Ελληνικά 36
Dansk 40
Suomi 44
Norsk 48
Svenska 52
Polski 56
Česky 60
Magyar 64
Pyccкий 68

3
COMB SIZE
1/4” 6mm
5/16” 8mm
3/8” 10mm
1/2” 12mm
5/8” 16mm
3/4” 20mm
1” 25mm
1-1/4” 32mm
1-1/2” 38mm
1
COMB SIZE
1/4” 6mm
5/16” 8mm
3/8” 10mm
1/2” 12mm
5/8” 16mm
3/4” 20mm
1” 25mm
1-1/4” 32mm
1-1/2” 38mm
64
COMB SIZE
1/4” 6mm
5/16” 8mm
3/8” 10mm
1/2” 12mm
5/8” 16mm
3/4” 20mm
1” 25mm
1-1/4” 32mm
1-1/2” 38mm
5
2
COMB SIZE
1/4” 6mm
5/16” 8mm
3/8” 10mm
1/2” 12mm
5/8” 16mm
3/4” 20mm
1” 25mm
1-1/4” 32mm
1-1/2” 38mm
8
COMB SIZE
1/4” 6mm
5/16” 8mm
3/8” 10mm
1/2” 12mm
5/8” 16mm
3/4” 20mm
1” 25mm
1-1/4” 32mm
1-1/2” 38mm
7 9
10 Quickstart Guide 1-2-3

4
Technical specifications
Dimensions (HxWxD)
Weight
Punch Capacity, Paper
Punch Capacity, PVC covers
Punch Capacity, PP covers
Bind Capacity
Maximum Sheet Width
Electrical
GBC CombBind C110 E
411 x 355 x 225 mm
9.1 kg
Max. 15 sheets (80 gsm)
Max. 1 sheet, 0.2 mm
Max. 1 sheet, 450 micron
330 sheets (38 mm)
297mm A4
230V / 50Hz / 1 Amp / 150W
WARNING: FOR YOUR PROTECTION DO NOT CONNECT THE COMB BINDER TO ELECTRICAL POWER UNTIL YOU
READ THESE INSTRUCTIONS COMPLETELY. KEEP THESE INSTRUCTIONS IN A CONVENIENT LOCATION FOR
FUTURE REFERENCE. TO GUARD AGAINST INJURY, THE FOLLOWING BASIC SAFETY PRECAUTIONS MUST BE
OBSERVED IN THE SET-UP AND USE OF THIS PRODUCT.
m
Important safeguards m
THIS WARNING IS FOUND ON THE PRODUCT.
Electrical shock hazard.
Do not open. No user
servicable parts inside.
Refer servicing to qualified
service personnel.
WARNING
m
c
This safety message means that you could be seriously hurt or
killed if you open the product and expose yourself to hazardous
voltage.
THE SAFETY ALERT SYMBOL PRECEDES EACH SAFETY MESSAGE IN THIS INSTRUCTION MANUAL.
THIS SYMBOL INDICATES A POTENTIAL PERSONAL SAFETY HAZARD THAT COULD HURT YOU OR OTHERS, AS
WELL AS CAUSE PRODUCT DAMAGE OR PROPERTY DAMAGE.
m
The following ISO and IEC symbols appear on this product, and
their meaning is as follows:
On Punch
Off Jam
Chip Tray FullStandby
Safety instructions
YOUR SAFETY AS WELL AS THE SAFETY OF OTHERS IS IMPORTANT TO ACCO® BRANDS. IN THIS INSTRUCTION MANUAL AND ON THE
PRODUCT ARE IMPORTANT SAFETY MESSAGES. READ THESE MESSAGES CAREFULLY.
m

5
G
General safeguards
• Use the CombBind C110 E only for its intended purpose of
punching and binding paper and covers according to the
indicated specifications.
• Do not place anything in the punch opening of the machine
other than paper and cover stock.
• Place unit on a secure, stable work area to prevent the unit
from falling and possibly causing personal injury and damage
to the unit.
• Follow all warnings and instructions marked on the unit.
• Lift the machine from the bottom, not the cover.
• Do not lift the machine by the cover or paper holder wire.
Guarantee
Operation of this machine is guaranteed for two years from
date of purchase, subject to normal use. Within the guarantee
period, ACCO Brands Europe will at its own discretion either
repair or replace the defective machine free of charge. Defects
due to misuse or use for inappropriate purposes are not
covered under the guarantee. Proof of date of purchase will be
required. Repairs or alterations made by persons not authorised
by ACCO Brands Europe will invalidate the guarantee. It is our
aim to ensure that our products perform to the specifications
stated. This guarantee does not affect the legal rights which
consumers have under applicable national legislation governing
the sale of goods.
Register this product online at www.accoeurope.com
Caution: Unplug this product before cleaning.
• Wipe exterior only with a damp cloth. Do not use detergents
or solvents.
m
Cleaning Service
• Do not attempt to service or repair the CombBind C110 E
yourself.
• Unplug the comb binder and contact an authorised GBC
service representative for any required repairs.
Electrical safeguards
• The CombBind C110 E must be connected to a supply
voltage corresponding to the electrical rating of the machine
as indicated on the serial/rating plate or in this manual.
CAUTION: THE POWER RECEPTACLE MUST BE
LOCATED NEAR THE EQUIPMENT AND BE
EASILY ACCESSIBLE.
• Unplug the CombBind C110 E before moving it, or when it is
not in use for an extended period of time.
• Do not operate with a damaged supply cord or plug, after it
malfunctions, or after it has been damaged in any manner.
• Do not alter attachment plug. Plug is configured for the
appropriate electrical supply.
• Do not overload electrical outlets beyond their capacity as
this can result in fire or electrical shock.
• The unit is intended for indoor use only.
• Never push objects into this product through cabinet slots.
Do not spill liquid of any kind on this product.
• Do not operate if the product has been exposed to rain or
water.
m

Please read these instructions carefully and keep them in a safe place for later reference.
Instructions for use
Binding
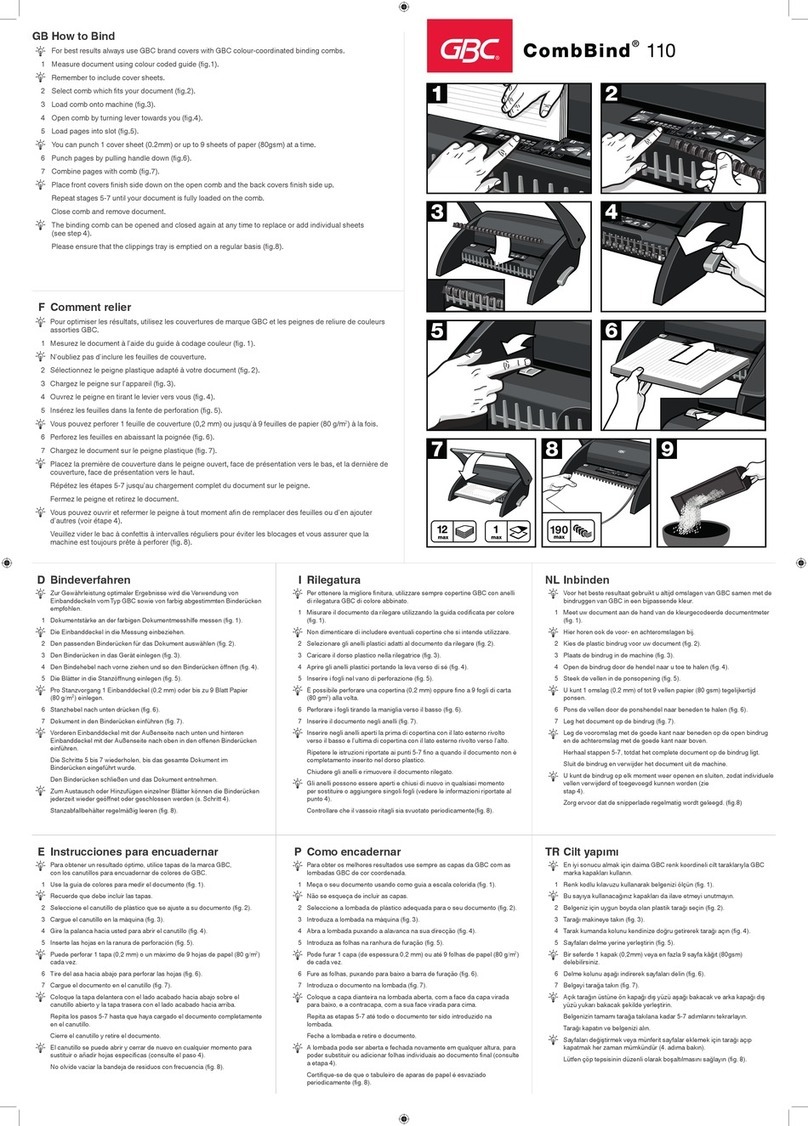
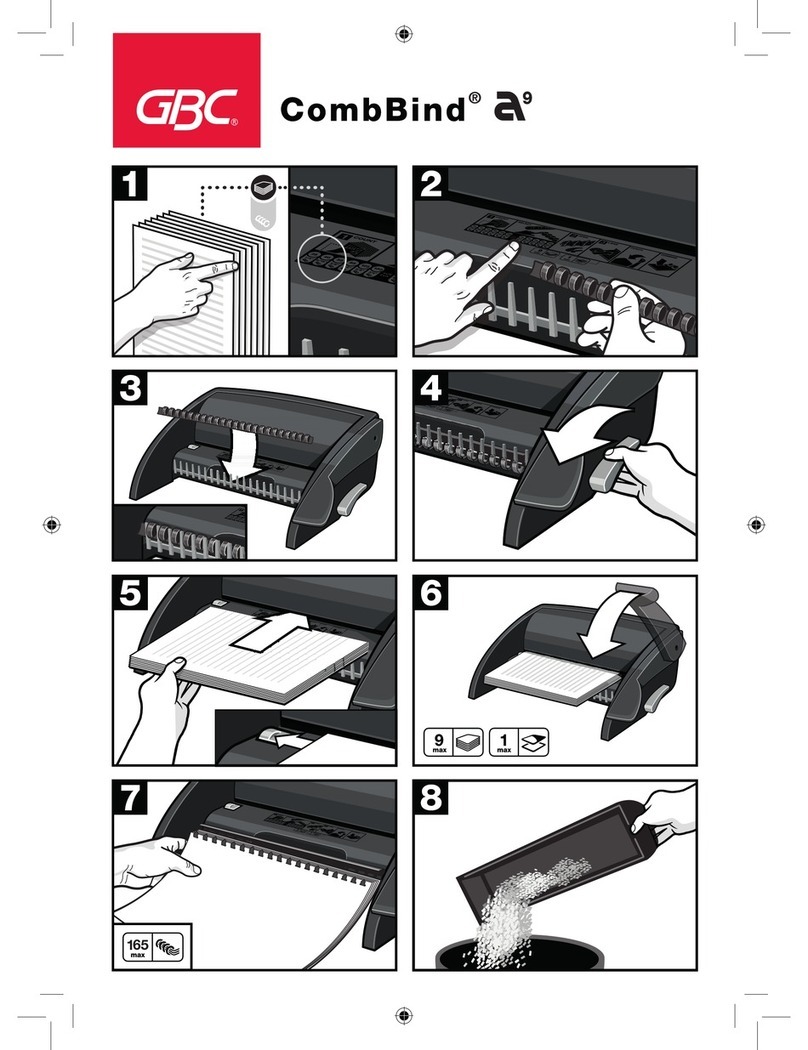
1 To turn the machine “ON” press the ON / OFF (I/O) switch
located in the rear of the machine. A green light will
illuminate to indicate that the power is on.
2 Place the document including the covers straight up against
the comb support to the right side aligning with the binding
size scale. Rotate the binding lever away from you to close
the hooks until they make contact with the document.
3 Select comb which fits your document (fig.3)
Use the comb size guide to select the size of comb that fits
your document i.e. 25 sheet document = 6mm comb.
4 Load comb onto machine (fig.4)
Insert the binding comb next to the white positional arrow
on the machine, behind the metal comb support fingers,
with the open side of the comb pointing upwards.
Note: If using GBC ProCombs™ the coloured line on your
comb should align to the coloured arrows on the machine
for faster binding.
5 Open comb by turning lever towards you
The coloured arrows adjacent to the opening comb act as
a guide as to how far to open in order to allow punched
sheets to be easily inserted.
Rotate the binding handle towards you to open the hooks
away from the comb support (fig.6)
6 Jog or align the sheets or covers and insert the edge to be
punched into the punch throat opening.
7 Fully insert the sheets into the throat opening and against
the edge guide (fig.5).
8 To punch, press the punch button (fig.5). The
CombBind C110 E will punch up to 15 sheets of 80 gsm
paper. Do not punch more than 1 clear cover at a time to
prevent jams.
9 If the punch jams the red jam light will illuminate to
indicate that the machine has jammed. The machine will
automatically reverse the punches to clear the jam and the
red jam light will remain illuminated. Remove the paper
and push the punch button to re-set the machine. The red
jam light will turn off indicating that the machine is ready to
punch. Reduce some of the sheets and repeat steps 2 to 4
to avoid jams on additional lifts.
J Place the front cover (finished side down) onto the opened
binding element fingers. Place the document pages (face
down) onto the element. Repeat for larger documents as
required. Place the back cover (finished side up) on the
open binding element fingers last.
K Rotate the binding lever away from you, back to its original
position to close the binding element.
L Remove the book by lifting upward. Your document is now
complete.
M Once you become familiar with your CombBind C110 E you
will find that you can bind as you punch, increasing your
productivity.
N When finished punching turn the machine OFF by pressing
the ON / OFF (I/O) switch located at the rear of the machine.
Determine sheet width
• Rotate the edge guide to the paper / cover size you wish to
bind (fig.1):
- Letter (8-1/2" x 11")
- A4 (297mm x 210mm)
- Oversized (222mm x 286mm)
• When using oversized covers, rotate the edge guide to the
oversize position, punch all of the covers for your documents
and set aside.
• Rotate the edge guide to either Letter or A4 position and
punch the paper for your document.
Getting started
Plug the power cord into an appropriate power receptacle.
6

Quickstep Guide 1-2-3 (fig.10)
The QuickStep Guide label on the machine is a quick reference
guide to how to bind in three quick and simple steps.
1 Understand the comb size required by measuring on the
document size area 1, select the appropriate ProComb.
2 Load the ProComb with the dot to the left and open until
you see the coloured arrow.
3 Punch and load your document on to the spine until your
document is complete. Close the spine.
ZipComb spine (fig.9)
The ZipComb spine allows you to create an easily editable
document with comb punch orientation.
1 Place the adaptor on to the metal teeth.
2 Place the spine into the zip holder as shown in fig.4.
3 Load and punch paper as per 'Binding' section 6-8.
4 Load punched paper on to spine.
5 Remove document and spine, close the ZipComb using the
zipper included in the ZipComb boxes.
6 Complete by flipping the back cover around the spine, for a
professional finish where the spine is hidden.
7
G
Empty chip drawer (fig.8)
• Your CombBind C110 E has a chip drawer located on the
right side of the machine.
• When it is full of punched paper chips, a red light (fig.5)
will illuminate.
• Gently pull the drawer to open it and remove from machine,
empty and re-insert the drawer back in machine until it
snaps in place.

8
L’AVERTISSEMENT SUIVANT SE TROUVE SUR LE
PRODUIT.
Risque de choc électrique. Ne
pas ouvrir. Aucune des pièces se
trouvant à l’intérieur ne peut être
réparée par l’utilisateur. En cas de
panne, s’adresser à du personnel
de dépannage qualifié.
AVERTISSEMENT
m
c
Ce message d’avertissement signifie que vous risquez de vous
blesser sérieusement ou de vous tuer si vous ouvrez le produit
et vous exposez à une tension dangereuse.
CE SYMBOLE D’AVERTISSEMENT PRÉCÈDE CHAQUE MESSAGE DE SÉCURITÉ DONNÉ DANS CE MANUEL.
IL INDIQUE UN DANGER POTENTIEL SUSCEPTIBLE DE PROVOQUER DES BLESSURES PERSONNELLES AINSI QUE
DES DOMMAGES AU PRODUIT OU À D’AUTRES BIENS MATÉRIELS.
m
Les symboles ISO et IEC suivants apparaissent sur l’appareil et
leur signification est la suivante:
Marche Poinçonner
Arrêt Bourrage
Tiroir à
Confettis Plein
En Attente
Consignes de sécurité
ACCO® BRANDS SE SOUCIE DE VOTRE SÉCURITÉ AINSI QUE DE CELLE DES AUTRES. DES MESSAGES DE SÉCURITÉ IMPORTANTS
SONT DONNÉS DANS CE MANUEL D’INSTRUCTION ET SUR LE PRODUIT. VEUILLEZ LES LIRE ATTENTIVEMENT.
m
Caractéristiques techniques
Dimensions (HxLxP)
Poids
Capacité de perforation - Papier
Capacité de perforation - couvertures PVC
Capacité de perforation - couvertures PP
Capacité de reliure
Largeur de travail maxi
Alimentation électrique
GBC CombBind C110 E
411 x 355 x 225 mm
9,1 kg
Maxi 15 feuilles (80g/m2)
Maxi 1 feuille, 0,2mm
Maxi 1 feuille, 450 microns
330 feuilles (38 mm)
297mm A4
230V / 50Hz / 1Amps / 150W
AVERTISSEMENT : POUR VOTRE PROTECTION, NE BRANCHEZ PAS LA PERFORELIEUSE C110 E À UNE PRISE
ÉLECTRIQUE AVANT D’AVOIR LU L’INTÉGRALITÉ DE CES INSTRUCTIONS. CONSERVEZ CES INSTRUCTIONS DANS
UN ENDROIT FACILE D’ACCÈS POUR TOUTE RÉFÉRENCE ULTÉRIEURE. POUR ÉVITER TOUT ACCIDENT, IL EST
INDISPENSABLE DE RESPECTER RIGOUREUSEMENT LES CONSIGNES DE SÉCURITÉ DE BASE CI-DESSOUS LORS
DE L’INSTALLATION ET DE L’UTILISATION DE CE PRODUIT.
m
Consignes de sécurité importantes m

9
F
Garantie
Le fonctionnement de cet appareil est garanti pendant deux
ans à partir de la date d’achat, sous réserve d’un usage
normal. Pendant la période de garantie, ACCO Brands Europe
décidera, à son gré, de réparer ou de remplacer gratuitement
l’appareil défectueux. Les défauts dus à un usage abusif ou
un usage à des fins non appropriées ne sont pas couverts par
cette garantie. Une preuve de la date d’achat sera exigée.
Les réparations ou modifications effectuées par des personnes
non autorisées par ACCO Brands Europe annuleront la
garantie. Notre objectif est d’assurer le bon fonctionnement
de nos produits conformément aux spécifications précisées.
Cette garantie ne compromet pas les droits légaux des
consommateurs au titre de la législation nationale en vigueur
régissant la vente des biens de consommation.
Enregistrez ce produit en ligne à www.accoeurope.com
Précaution: Débranchez ce produit avant le nettoyage.
• Essuyez l’extérieur uniquement avec un chiffon humide.
N’utilisez pas de détergents ou de dissolvants.
m
Nettoyage Service
• N'essayez pas de faire l'entretien ou de réparer le CombBind
C110 E vous-même.
• Pour toute réparation, débranchez l'appareil et contactez un
représentant de service autorisé par GBC.
Mesures De Protection Générales
• Utilisez le CombBind C110 E seulement aux usages prévus
soit pour perforer et relier le papier et les couvertures
conformément aux spécifications indiquées.
• Ne placez rien d’autre dans la fente de perforation de la
machine que du papier et des couvertures cartonnées.
• Placez l'unité sur une surface stable, fixe pour éviter que
l'appareil ne tombe provoquant ainsi des blessures ou des
dommages à l'appareil.
• Suivez tous les avertissements et les instructions indiqués
sur le produit.
• Soulevez la machine par le bas, et non par le capot.
• Ne soulevez pas la machine par le capot ou par le support
papier en métal.
Conseils de sécurité électrique
• Le CombBind C110 E doit être branché à une source de
tension correspondant à la capacité nominale électrique de la
machine indiquée sur la plaque de numéro de série/capacité
nominale ou dans ce manuel.
MISE EN GARDE : LA PRISE DOIT ÊTRE INSTALLÉE
PRÈS DE L'ÉQUIPEMENT ET
FACILE D'ACCÈS.
• Débranchez le CombBind C110 E avant de le déplacer ou
lorsqu'il ne sera pas utilisé pendant une longue période.
• N’utilisez pas l’appareil avec un cordon d’alimentation ou
une fiche endommagés, après toute défaillance ou après que
l’appareil ait été endommagé de quelque façon que ce soit.
• Ne modifiez pas la fiche de branchement. La fiche est
configurée pour l’alimentation électrique appropriée.
• Ne surchargez pas les prises de courant au-delà de leur
capacité car cela pourrait provoquer un incendie ou un choc
électrique.
• Cet appareil est conçu seulement pour être utilisé à
l'intérieur.
• N’introduisez jamais d'objets par les fentes de la carrosserie.
Ne déversez pas de liquide quelconque sur ce produit.
• Ne faites pas fonctionner le produit s'il a été exposé à la pluie
ou à l'eau.
m

10
Veuillez lire ces instructions attentivement et les conserver en lieu sûr pour référence ultérieure.
Mode d’emploi
Reliure
1 Pour mettre la machine en marche, appuyez sur
l'interrupteur MARCHE / ARRÊT (I/O) à l'arrière de la
machine. Un voyant vert s'allume pour indiquer que la
machine est sous tension.
2 Placez le document (y compris les couvertures) droit contre
le support de reliure du côté droit en vous alignant sur
l’indicateur de diamètre de reliure. Tournez la poignée de
reliure loin de vous pour refermer les crochets jusqu'à ce
qu'ils entrent en contact avec le document.
3 Sélectionnez le peigne plastique adapté à votre
document (fig.3)
Utilisez l’indicateur de diamètre de peigne pour sélectionner
le peigne de la taille adaptée au document, c.-à-d.
document de 25 feuilles = peigne de 6 mm.
4 Chargez le peigne sur la machine (fig.4)
Placez le peigne près de la flèche blanche de l’appareil,
derrière les doigts métalliques, en faisant en sorte que les
boucles du peigne s’ouvrent vers le haut.
Remarque : Si vous utilisez les peignes GBC ProCombs™,
la flèche blanche du peigne doit s’aligner avec la flèche
blanche de l’appareil.
5 Ouvrez le peigne en tirant le levier vers vous
Les flèches de couleur situées près du peigne ouvert
servent de guides pour savoir jusqu’où ouvrir le peigne afin
de faciliter l’insertion des feuilles perforées.
Tournez le levier de reliure vers vous jusqu'à ce que la
reliure s'ouvre suffisamment pour insérer votre document
(fig.6).
6 Taquez ou alignez les feuilles ou couvertures et insérez le
côté à perforer dans la fente de perforation.
7 Insérez entièrement les feuilles dans la fente de perforation
et contre la butée papier (fig. 5).
8 Pour perforer, appuyez sur le bouton de perforation
(fig. 5). Le CombBind C110 E perfore jusqu'à 15 feuilles de
80 g/m2 de papier. Ne perforez pas plus de 1 couverture
transparente à la fois pour éviter les bourrages.
9 Si le perforateur se bloque, le voyant rouge s'allume
pour indiquer que la machine est bloquée. La machine
inverse automatiquement les poinçons pour débloquer
l'appareil et le voyant rouge restera allumé. Retirez le papier
et poussez le bouton de perforation pour réinitialiser la
machine. Le voyant rouge s'éteint indiquant que la machine
est prête à perforer. Réduisez le nombre de feuilles et
répétez les étapes 2 à 4 pour éviter les bourrages pour les
passages suivants.
J Insérez la couverture avant (côté fini vers le bas) dans
les doigts ouverts de la reliure. Insérez les pages du
document (face vers le bas) sur l'élément. Répétez pour
les documents plus épais autant de fois que nécessaire.
Insérez la couverture arrière (côté fini vers le haut) dans les
doigts ouverts de la reliure, en dernier.
K Tournez le levier de reliure en l'éloignant de vous pour le
remettre en position initiale afin de fermer la reliure.
L Retirez le livre en le soulevant vers le haut. Votre document
est maintenant terminé.
M Lorsque vous vous serez familiarisé avec votre CombBind
C110 E, vous verrez que vous pouvez relier tout en en
perforant, ce qui augmentera votre productivité.
N À la fin de la perforation, éteignez la machine en appuyant
sur l'interrupteur MARCHE / ARRÊT (I/0) à l'arrière de la
machine.
Déterminez la largeur de la feuille
• Tournez la butée papier suivant la taille du papier / couverture
que vous désirez relier.
- Lettre (8-1/2" x 11")
- A4 (297mm x 210mm)
- Surdimensionné (222mm x 286mm)
• Lorsque que vous utilisez des couvertures surdimensionnées,
tournez la butée papier en position ‘surdimension’, perforez
toutes les couvertures de vos documents et mettez-les de
côté.
• Tournez la butée papier en position lettre ou A4 et perforez le
papier de votre document.
Installation
Branchez le cordon d'alimentation dans la prise de courant appropriée.

11
F
Instructions rapides
QuickStep 1-2-3 (fig.10)
L’étiquette d’instructions QuickStep apposée sur l'appareil est
un guide de référence rapide vous indiquant comment relier un
document en trois étapes simples et rapides.
1 Déterminez la taille du peigne requise en mesurant votre
document sur l’aire de calibrage du document « 1 ».
Sélectionnez le peigne ProComb approprié.
2 Placez le peigne ProComb sur l’appareil en mettant le point
numéroté sur la gauche et continuez à ouvrir le peigne
jusqu’à ce que la flèche de couleur soit visible.
3 Perforez et chargez toutes les feuilles de votre document
sur le peigne. Fermez le peigne.
Peigne ZipComb (fig.9)
Le peigne ZipComb vous permet de créer un document
facilement modifiable en utilisant le même mode de perforation
qu’un peigne ordinaire.
1 Placez l’adaptateur sur les doigts métalliques.
2 Placez le peigne sur l’adaptateur de peigne ZipComb
comme le montre l’illustration fig.4.
3 Insérez les feuilles dans la fente de perforation et perforez-
les en suivant les instructions de perforation 6-8 dans la
section ‘Reliure’.
4 Placez les feuilles perforées sur le peigne.
5 Retirez votre document doté du peigne et fermez le peigne
ZipComb à l’aide de l’outil zippeur inclus dans les boîtes de
peignes ZipComb.
6 Terminez l’opération en retournant la dernière de couverture
sur le peigne ZipComb pour dissimuler le dos du peigne et
donner un aspect professionnel à votre document.
Videz le tiroir à confettis (fig.8)
• Votre CombBind C110 E a un tiroir à confettis situé à droite
de l'appareil.
• Lorsqu'il est plein de confettis de papier perforé, un voyant
rouge s'allume (fig.5).
• Tirez-le délicatement pour l'ouvrir et retirez-le de la machine,
videz-le et remettez-le en place jusqu'à ce ce qu'il soit bien
refermé.

12
ACHTUNG: DAS GERÄT COMBBIND C110 E ERST NACH VOLLSTÄNDIGEM DURCHLESEN DIESER
ANWEISUNGEN AN EINE STROMQUELLE ANSCHLIESSEN. DIESE ANLEITUNG SICHER AUFBEWAHREN. ALS
VORSICHTSMASSNAHME SIND DIE FOLGENDEN GRUNDLEGENDEN SICHERHEITSVORKEHRUNGEN BEI DER
AUFSTELLUNG UND VERWENDUNG DES PRODUKTS STETS EINZUHALTEN.
m
Wichtige Sicherheitsvorkehrungen m
IN DIESER ANLEITUNG STEHT DAS SICHERHEITS-WARNSYMBOL VOR JEDEM SICHERHEITSHINWEIS.
DIESES SYMBOL KENNZEICHNET SOWOHL HINWEISE, BEI DEREN NICHTBEACHTUNG VERLETZUNGSGEFAHR
BESTEHT, ALS AUCH SOLCHE, DIE AUF POTENZIELLE PRODUKT- UND SACHBESCHÄDIGUNG AUFMERKSAM
MACHEN.
m
Sicherheitsanweisungen
IHRE SICHERHEIT SOWIE DIE SICHERHEIT ANDERER IST ACCO® BRANDS EIN WICHTIGES ANLIEGEN. IN DIESER ANLEITUNG UND AUF
DEM PRODUKT FINDEN SIE WICHTIGE SICHERHEITSHINWEISE. LESEN SIE DIESE HINWEISE SORGFÄLTIG.
m
Die folgenden ISO- und IEC-Symbole sind auf diesem Gerät
angebracht. Sie bedeuten Folgendes:
An Locher
Aus Papierstau
Abfallschublade vollStandby
Nicht öffnen - Stromschlaggefahr!
Es befinden sich keine Teile im
Geräteinnern, die vom Benutzer
gewartet werden können. Lassen
Sie das Gerät nur von qualifiziertem
Wartungspersonal warten.
ACHTUNG
m
c
Dieser Hinweis bedeutet, dass bei Öffnen des Geräts
Stromschlag- und damit die Gefahr schwerer Verletzungen
oder sogar Todesgefahr besteht.
DIE FOLGENDE WARNUNG BEFINDET SICH AUF DEM
PRODUKT:
Technische Daten
Abmessungen (BxHxT)
Gewicht
Stanzleistung, Papier
Stanzleistung, PVC Folien
Stanzleistung, PP Folien
Bindekapazität
Max. Bindegutbreite
Elektrisch
GBC CombBind C110 E
411 x 355 x 225 mm
9,1 kg
Max. 15 blatt (80 g/m2)
Max. 1 blatt, 0,2mm
Max. 1 sheet, 450 mic.
330 blatt (38 mm)
297mm A4
230V / 50Hz / 1 Amps / 150W

13
D
Gewährleistung
Der Betrieb des Geräts ist bei normaler Verwendung
für 2 Jahre ab Kaufdatum gewährleistet. Innerhalb des
Gewährleistungszeitraums wird ACCO Brands Europe nach
eigenem Ermessen das defekte Gerät entweder kostenlos
instandsetzen oder ersetzen. Die Gewährleistung deckt keine
Mängel ab, die aufgrund missbräuchlicher Verwendung
oder Verwendung für unangemessene Zwecke entstanden
sind. Ein Nachweis des Kaufdatums muss vorgelegt werden.
Instandsetzungen oder Änderungen, die durch nicht von
ACCO Brands Europe autorisierten Personen vorgenommen
werden, setzen die Gewährleistung außer Kraft. Es ist unser
Ziel, sicherzustellen, dass die Leistung unserer Produkte
den angegebenen technischen Daten entspricht. Diese
Gewährleistung stellt keine Einschränkung der nach dem
geltenden Kaufvertragsrecht gültigen Rechte des Verbrauchers
dar.
Registrieren Sie dieses Produkt online bei www.accoeurope.com
Wartung
• Sie dürfen diesen CombBind C110 E nicht selbst warten oder
reparieren.
• Stecken Sie das Gerät aus und setzen Sie sich mit einem
zugelassenen Servicevertreter von GBC in Verbindung, wenn
Ihr Gerät repariert werden muss.
Achtung: Stecken Sie dieses Produkt vor dem
Reinigen aus.
• Wischen Sie es nur mit einem feuchten Tuch ab. Es dürfen
keine Reinigungs- oder Lösungsmittel verwendet werden.
m
Reinigung
Allgemeine Sicherheitshinweise
• Benutzen Sie die Bindesysteme CombBind C110 E nur zum
Stanzen und Binden von Papier und Umschlagmaterialien
ensprechend der angegebenen Spezifikationen.
• In die Locheröffnung der Maschine dürfen nur Papierblätter
oder Einbanddeckel gesteckt werden.
• Das Gerät auf eine sichere und stabile Arbeitsoberfläche
stellen, damit das nicht herunterfallen kann, was zu Schäden
an Personen und Gerät führen könnte.
• Alle auf dem Produkt angegeben Warnungen und
Anweisungen sind zu befolgen.
• Die Maschine nur an der Unterseite und nicht an der
Abdeckung anheben.
• Die Maschine nicht an der Abdeckung oder am
Papierhalterdraht anheben.
Sicherheitshinweise für
elektrische Geräte
• Die CombBind C110 E muß an eine Netzspannung
angeschlossen werden, die den elektrischen Nennwerten
der Maschine entsprechen und die auf dem Serien- bzw.
Leistungsschild oder in diesem Handbuch angegeben sind.
VORSICHT: DIE STECKDOSE MUSS SICH IN DER
NÄHE DES GERÄTS BEFINDEN UND
LEICHT ZUGÄNGLICH SEIN.
• Stecken Sie das Gerät aus, bevor Sie es transportieren oder
wenn es über einen längeren Zeitraum hinweg nicht benutzt
wird.
• Benutzen Sie das Gerät nicht mit einem defekten Elektrokabel
oder Stecker, nach einer Fehlfunktion oder nachdem es in
irgendeiner anderen Form defekt war.
• Bauen Sie den Anschlussstecker nicht um. Der Stecker ist für
die korrekte elektrische Versorgung konstruiert.
• Überladen Sie die elektrischen Steckdosen nicht über ihre
Kapazität, denn dies kann zu einem Feuer oder einem
Elektroschock führen.
• Das Gerät ist nur für den Gebrauch in Innenräumen gedacht.
• Niemals Gegenstände durch die Gehäuseschlitze in diesem
Produkt schieben. Keine Flüssigkeiten gleich weicher Art über
das Gerät gießen.
• Das Produkt nicht betreiben, wenn es Regen oder Wasser
ausgesetzt wurde.
m

14
Bitte lesen Sie die Bedienungsanleitung vor Gebrauch sorgfältig durch und bewahren Sie diese gut auf, falls Sie
künftig nochmals etwas nachlesen wollen.
Bedienungsanleitung
Binden
1
Schalten Sie die Maschine ein, indem Sie den Anschalter
“ON” (I) auf der Rückseite des Geräts betätigen. Ein grünes
Lämpchen leuchtet auf und zeigt die Betriebsbereitschaft an.
2 Stellen Sie das komplette Dokument senkrecht an der
Bindekammhalterung ausgerichtet auf. Bewegen Sie
dann den Hebel wieder von sich weg, so dass sich
die Öffnungshaken wieder schließen. Das Dokument
ist nun senkrecht zwischen Bindekammhalterung und
Öffnungshaken eingeklemmt. Lesen Sie den notwendigen
Binderückendurchmesser an der aufgedruckten Skala ab.
3 Den passenden Binderücken für das Dokument
auswählen (Abb. 3)
Die für die Dokumentstärke geeignete Binderückengröße
anhand der Auswahlhilfe bestimmen (z. B. bei einer
Dokumentstärke von 25 Blatt die Binderückengröße 6 mm
wählen).
4 Den Binderücken in das Gerät einlegen (Abb. 4)
Den Binderücken an dem weißen Pfeil am Gerät ausrichten
und hinter die Metallfinger einsetzen. Dabei muss die offene
Seite des Binderückens nach oben weisen.
Hinweis: Bei Verwendung von Binderücken vom Typ
GBC ProCombs™ muss der weiße Pfeil des Binderückens
mit dem weißen Pfeil am Gerät ausgerichtet sein.
5 Den Bindehebel nach vorne ziehen und so den
Binderücken öffnen
Anhand der seitlichen Farbmarkierungen lässt sich
die für die jeweilige Anzahl Stanzdokumente nötige
Binderückenöffnungsweite ermitteln.
Bewegen Sie den Bindehebel auf sich zu bis der
Binderücken von den Öffnungshaken so weit geöffnet wird,
dass Sie das gestanzte Dokument einlegen können (fig.6).
6 Ordnen Sie das Papier oder Umschlagmaterial gleichmäßig
und legen Sie den geordneten Stapel in den Stanzschacht.
7 Legen Sie das Papier in den Stanzschacht komplett ein und
richten Sie es am Anschlag aus (Abb. 5).
8 Zum Auslösen des Stanzvorgangs drücken Sie die
Stanztaste (Abb. 5). Das Bindesystem CombBind
C110 E stanzt bis zu 15 Blatt (80g Standard Büropapier).
ACHTUNG: Stanzen Sie nicht mehr als 1 Folie auf einmal,
um Papierstaus zu vermeiden.
9 Wenn ein Papierstau auftritt leuchtet die rote
Papierstauleuchte auf. Die Maschine wird automatisch
die Stanzblöcke zurückfahren um den Papierstau
aufzulösen. Das rote Lämpchen leuchtet weiter. Entnehmen
Sie das gestaute Papier, um die Maschine wieder
funktionsfähig zu machen. Das rote Papierstaulämpchen
erlischt und Sie können den Stanzvorgang wie in den
Schritten 2 bis 4 fortsetzen (ggf. mit weniger Papier, um
einen weiteren Papierstau zu vermeiden).
J Legen Sie die Frontseite kopfüber in den geöffneten
Binderücken ein. Legen Sie alle weiteren Papiere ebenfalls
kopfüber ein. Zuletzt legen Sie die Rückseite mit der
Dokumentenaußenseite nach oben ein.
K Bewegen Sie den Bindehebel wieder nach hinten zurück
in seine Ausgangsposition und schließen Sie so den
Plastikbinderücken.
L Entnehmen Sie das gebundene Dokument nach oben – es
ist nun fertig gestellt.
M Wenn Ihnen der Bindevorgang mit dem CombBind C110 E
vertraut geworden ist, werden Sie feststellen, dass Sie auch
Zug-um-Zug stanzen und binden können für eine noch
höhere Produktivität.
N Wenn Sie Ihr Dokument/Ihre Dokument vollständig gestanzt
haben, schalten Sie die Maschine am Ausschalter “OFF” (O)
wieder aus.
Einstellung des Papierformats
• Drehen Sie den Papierseitenanschlag auf das Papierformat,
das gestanzt und gebunden werden soll:
- Letter (8-1/2" x 11")
- A4 (297mm x 210mm)
- Übergröße (222mm x 286mm)
• Wenn Sie Umschlagmaterial in Übergröße verarbeiten,
drehen Sie den Papierseitenanschlag auf die Einstellung
Übergröße („oversize“) und stanzen Sie in dieser Einstellung
alle Bindekartons und Folien, die Sie als Umschlagmaterial
verwenden wollen.
• Drehen Sie anschließend den Papierseitenanschlag auf
dieLetter oder A-4 Position und stanzen Sie anschließend das
Papier die in das Dokument gebunden werden sollen.
Bevor Sie starten
Stecken Sie den Stecker in eine geeignete Steckdose.

15
D
QuickStep-Anleitung 1-2-3
(Abb. 10)
Der Aufkleber mit der QuickStep-Anleitung auf dem Gerät
illustriert den Bindeprozess in drei einfachen Schritten.
1 Ermitteln Sie die erforderliche Binderückengröße, indem Sie
das Dokument im Messbereich 1 messen. Wählen Sie den
geeigneten ProComb-Binderücken aus.
2 Legen Sie den ProComb-Binderücken so ein, dass der
Punkt links liegt, und öffnen Sie den Binderücken bis der
farbige Pfeil zu sehen ist.
3 Stanzen Sie alle Dokumentteile, und legen Sie das gesamte
Dokument in den Binderücken ein. Schließen Sie den
Binderücken.
ZipComb-Binderücken (Abb. 9)
Mit ZipComb-Binderücken können Sie einfach modifizierbare
Dokumente mit einer Standardlochung erstellen.
1 Setzen Sie den ZipComb-Adapter auf die Metallfinger.
2 Legen Sie den Binderücken auf den ZipComb-Adapter auf
(Abb. 4).
3 Führen Sie das Dokument in die Stanzöffnung ein, und
stanzen Sie es (s. Schritte 6-8 unter „Binden“).
4 Legen Sie das gestanzte Dokument in den Binderücken ein.
5 Entnehmen Sie Dokument und Binderücken, und schließen
Sie dann den Binderücken mithilfe des den Bindrücken
beiliegenden ZipComb-Werkzeugs.
6 Schlagen Sie den hinteren Einbanddeckel um, sodass der
Bindrücken verborgen wird.
Leeren der Abfallschublade
(Abb. 8)
• Ihr CombBind C110 E hat eine Abfallschublade für die
Stanzschnipsel auf der rechten Seite der Maschine
• Ein rotes Lämpchen (Abb. 5) leuchtet auf, wenn die
Abfallschublade voll ist.
• Öffnen Sie vorsichtig diese Schublade und entnehmen Sie
diese. Leeren Sie sie und stecken Sie sie wieder in die
Maschine zurück bis sie vollständig einrastet.

16
ATTENZIONE – PER MOTIVI DI SICUREZZA, NON COLLEGARE LA RILEGATRICE COMBBIND C110 E
ALL’ALIMENTAZIONE ELETTRICA PRIMA DI AVER LETTO COMPLETAMENTE LE ISTRUZIONI. CONSERVARE
QUESTE ISTRUZIONI IN UN LUOGO ACCESSIBILE PER OGNI RIFERIMENTO FUTURO. PER PREVENIRE IL PERICOLO
DI INCIDENTI, È NECESSARIO OSSERVARE LE PRECAUZIONI RIPORTATE NEI SEGUENTI PARAGRAFI RELATIVI
ALL’INSTALLAZIONE ED USO DEL PRODOTTO.
m
Precauzioni importanti m
IL SEGUENTE MESSAGGIO SI TROVA SULLA MACCHINA.
Pericolo di scarica elettrica. Non aprire.
Non vi è alcun componente riparabile
da parte dell’utente all’interno
della macchina. Per operazioni di
manutenzione o riparazione rivolgersi
a personale qualificato.
ATTENZIONE
m
c
Questo messaggio di sicurezza significa che potreste
rimanere feriti gravemente o uccisi se aprite la macchina con
conseguente esposizione accidentale ad alto voltaggio.
QUESTO SIMBOLO PRECEDE OGNI MESSAGGIO RELATIVO ALLA SALVAGURDIA DELLA VOSTRA INCOLUMITÀ.
ESSO INDICA UN RISCHIO POTENZIALE PER L’OPERATORE O PER TERZI, O UN DANNO POTENZIALE ALLA
MACCHINA O AD ALTRI OGGETTI.
m
Istruzioni per la sicurezza
PER ACCO® BRANDS LA VOSTRA SICUREZZA E QUELLA DEGLI ALTRI È IMPORTANTE. ALCUNI IMPORTANTI MESSAGGI RELATIVI ALLA
SICUREZZA SONO RIPORTATI IN QUESTO MANUALE DI ISTRUZIONI E SULLA MACCHINA. LEGGETELI CON ATTENZIONE.
m
Sul prodotto compaiono i seguenti simboli ISO e IEC che
significano:
Acceso Punzonatura
Spento Inceppamento
Vassoio Per Gli
Scarti Pieno
Standby
Caratteristiche tecniche
Dimensioni (h x l x p)
Peso
Capacità foratura carta
Capacità foratura PVC copertine
Capacità foratura PP copertine
Capacità rilegatura
Larghezza massima foglio
Voltaggio
GBC CombBind C110 E
411 x 355 x 225 mm
9,1 Kg.
Max 15 fogli (80gr)
Max 1 foglio, 0,2mm
Max 1 foglio, 450 mic.
330 fogli (38 mm)
297mm A4
230V / 50Hz / 1 Amps / 150W

17
I
Garanzia
Il funzionamento di questa macchina è garantito per due
anni dalla data di acquisto, subordinatamente ad uso
normale. Durante il periodo di garanzia, ACCO Brands Europe
provvederà, a propria discrezione, a riparare o sostituire
gratuitamente la macchina difettosa. Difetti provocati da un uso
errato o un uso improprio non sono coperti dalla garanzia. Sarà
richiesta la prova della data di acquisto. Riparazioni o modifiche
effettuate da persone non autorizzate da ACCO Brands Europe
rendono nulla la garanzia. È nostro obiettivo assicurare il
funzionamento dei prodotti secondo le specifiche dichiarate.
La presente garanzia non pregiudica alcun diritto riconosciuto
ai consumatori dalle leggi nazionali applicabili che regolano la
vendita di beni.
Registrare il prodotto online su www.accoeurope.com
Assistenza
• Si prega di non tentare di effettuare interventi di
manutenzione o riparazione da soli.
• Staccare la macchina dalla presa elettrica e rivolgersi per le
riparazioni ad un rivenditore o distributore GBC.
Pericolo: Staccare sempre la presa della corrente
prima di procedere con la pulizia.
• Pulire la superficie esterna solo con un panno umido. Non
utilizzare detergenti o solventi.
m
Pulizia
Precauzioni generali
• Usa la CombBind C110 E solo per la sua funzione di
perforazione e rilegatura di fogli e copertine secondo le
specifiche indicate.
• Inserire nell'apertura di punzonatura della macchina
solamente fogli di carta e cartoncino per copertine.
• Collocare l’unità su una superficie di lavoro stabile e
sicura, in modo da evitare la caduta della macchina, il suo
danneggiamento ed eventuali lesioni personali.
• Attenersi a tutte le avvertenze ed instruzioni riportate sul
prodotto.
• Sollevare la macchina afferrandone il fondo e non il
coperchio.
• Non sollevare la macchina afferrandola per il coperchio né
per il filo portacarta.
Precauzioni elettriche
• La CombBind C110 E deve essere collagata ad una fonte
elettrica avente una tensione corrispondente a quella
nominale della macchina, indicata sulla targhetta del numero
di serie/specifiche o in questo manuale.
ATTENZIONE! LA PRESA DI CORRENTE DEVE
ESSERE SITUATA IN PROSSIMITA'
DELL'ATTREZZATURA ED ESSERE
FACILMENTE ACCESSIBILE.
• Estrarre la spina del cavo di alimentazione della CombBind
C110 E dalla presa a muro prima di spostarla o quando non
si usa la macchina per periodi prolungati.
• Non usare la macchina con il filo elettrico o la spina
danneggiati o dopo che la stessa abbia subito danni di
qualsiasi natura
• Non modificare la spina. La spina è configurata per
un’alimentazione corretta.
• Non sovraccaricare le prese elettriche: potrebbero verificarsi
un corto circuito o un incendio.
• L’unità è destinata ad essere usata solamente al coperto.
• Non inserire mai alcun oggetto attraverso le sfinestrature
della cassa. Non versare mai liquidi di alcun tipo su questo
prodotto.
• Non mettere in funzione la macchina se è stata esposta alla
pioggia o all'acqua.
m

18
Si prega di leggere attentamente queste istruzioni e di conservarle in un posto sicuro per un utilizzo futuro.
Istruzioni d’uso
Rilegatura
1 Per accendere la macchina premere il ‘tasto ON / OFF (I/O)
situato nella parte posteriore. Una luce verde s’illuminerà
per indicare che è accesa.
2 Posizionare il documento incluse le copertine appiattite
contro il supporto tendi-anelli allineandolo dal lato corretto
in base alla guida di rilegatura. Ruotare la barra di rilegatura
per chiudere i ganci fino a quando combaciano con il
documento.
3 Selezionare gli anelli plastici adatti al documento da
rilegare (fig. 3)
Utilizzare la guida del diametro degli anelli per selezionare il
diametro del dorso plastico adatto al documento da rilegare,
cioè documento da 25 fogli = dorso plastico da 6 mm.
4 Caricare il dorso plastico nella rilegatrice (fig. 4)
Inserire gli anelli plastici accanto alla freccia bianca situata
sulla macchina, dietro il meccanismo in metallo con il lato
aperto rivolto verso l’alto.
Nota - Se si usano gli anelli plastici GBC ProCombs™, la
freccia bianca sugli anelli deve essere allineata alla freccia
bianca riportata sulla macchina.
5 Aprire gli anelli plastici portando la leva verso di sé
Le frecce colorate adiacenti agli anelli che si aprono
fungono da guida per indicare la distanza di apertura degli
anelli necessaria a consentire un agevole inserimento dei
fogli perforati.
Ruotare la leva di rilegatura fino a che i dorsi plastici
si aprano in modo sufficiente da poter inserire il tuo
documento (fig. 6).
6 Spingere o allineare i fogli ed inserisci fino in fondo. Per
essere forati dentro la fessura aperta.
7 Inserire completamente i fogli dentro la fessura aperta e
contro la linea guida (fig.5).
8 Per perforare, spingere il pulsante (fig.5) La CombBind
C110 E perfora fino a 15 fogli di carta da 80 gr/m2. Non
forare più di una copertina trasparente per volta per
prevenire l’inceppamento.
9 In caso d’inceppamento, la luce rossa si accende
per indicare che la macchina si è inceppata. La
macchina automaticamente rimuoverà i dorsi per risolvere
l’inceppamento e la luce rossa rimarrà accesa. Rimuovere
la carta e premere il pulsante di perforazione per resettare
la macchina. La luce rossa si spegnerà indicando che la
macchina è pronta per perforare. Ridurre il numero di fogli e
ripetere dal passo 2 al 4 per evitare l’inceppamento durante
i passaggi successivi.
J Riporre la copertina frontale (la parte esterna in giù)
inserendo gli elementi del dorso plastico nei fori relativi.
Riporre le pagine del documento (faccia in giù) man mano.
Ripetere i passaggi più volte in base alla grandezza del
documento rilegato. Riporre la copertina posteriore (con la
parte rifinita in su) sul dorso plastico.
K Ruotare la barra di rilegatura (lontano dal corpo) verso la
sua posizione originale per chiudere il dorso plastico.
L Rimuovere il documento rilegato, sollevandolo.
M Nel momento in cui la tua CombBind C110 E ti diventerà
familiare riuscirai a rilegare durante la perforazione,
incrementando la tua produttività.
N Quando avete finito di perforare spegnere la macchina
spingendo il tasto ON/OFF (I/O) situato sul retro della
macchina.
Determinare la larghezza dei fogli
• Posizionare la guida in base all’ampiezza del foglio/copertina
che si desidera rilegare:
- Lettera (8-1/2" x 11")
- A4 (297mm x 210mm)
- Formato plus (222mm x 286mm)
• Quando si usano copertine di misura plus, posizionare
la guida sul formato plus, forare tutte le copertine del
documento e metterle da parte.
• Posizionare la guida sugli altri formati Lettera o A4 e
perforare i fogli del documento.
Per iniziare
Infilare il cavo di corrente in una presa adeguata.

19
I
Guida rapida QuickStep 1-2-3
(fig. 10)
L’etichetta Guida rapida QuickStep riportata sulla rilegatrice
è una guida di riferimento rapido che illustra l’operazione di
rilegatura in tre semplici e veloci passaggi.
1 Determinare il diametro degli anelli richiesto misurando lo
spessore del documento nell’apposita area “1”. Selezionare
gli anelli ProComb appropriati.
2 Mettere gli anelli ProComb nella rilegatrice facendo
attenzione che il puntino sia sulla sinistra. Continuare ad
aprire gli anelli fino a quando non sia visibile la freccia
colorata.
3 Perforare il documento e inserirne tutti i fogli nel dorso.
Chiudere il dorso.
Dorso ZipComb (fig. 9)
Il dorso ZipComb consente di creare documenti facilmente
modificabili e con la stessa disposizione dei fori utilizzata per gli
anelli standard.
1 Posizionare l’adattatore sul meccanismo in metallo.
2 Mettere il dorso nell’adattatore ZipComb come illustrato alla
fig. 4.
3 Inserire i fogli nel vano di perforazione e perforarli seguendo
le istruzioni riportate alla sezione 'Rilegatura' ai punti 6-8.
4 Inserire i fogli perforati nel dorso.
5 Rimuovere il documento con il dorso, chiudere gli anelli
ZipComb utilizzando l’apposito accessorio in dotazione
(zipper) nella confezione dei dorsi ZipComb.
6 Completare l’operazione di rilegatura girando l’ultima
di copertina intorno al dorso ZipComb per ottenere un
documento dal look professionale in cui il dorso rimane
nascosto.
Svuotare il vassoio per gli
scarti (fig. 8)
• La tua CombBind C110 E è dotata di un vassoietto di scarto,
localizzato sul lato destro della macchina.
• Quando è pieno di scarti, s’illumina una luce rossa
(fig. 5).
• Aprire con cautela il vassoietto, rimuoverlo completamente
dalla macchina per svuotarlo e successivamente, re-inserirlo
nella posizione corretta.

20
WAARSCHUWING: LEES VOOR UW EIGEN BESCHERMING DEZE INSTRUCTIES EERST GOED DOOR, VOORDAT U DE
COMBBIND C110 E OP DE NETSPANNING AANSLUIT. BEWAAR DEZE GEBRUIKSAANWIJZING OP EEN HANDIGE
PLAATS, ZODAT U HEM LATER SNEL KUNT RAADPLEGEN. OM UW VEILIGHEID TE GARANDEREN, DIENT U DE
VOLGENDE VOORZORGSMAATREGELEN IN ACHT TE NEMEN BIJ HET INSTELLEN EN GEBRUIK VAN HET PRODUCT.
m
Belangrijke voorzorgsmaatregelen m
DE VOLGENDE WAARSCHUWING IS TE VINDEN OP
HET PRODUCT.
Kans op elektrische schok.
Niet openen. Geen onderhoud
door gebruiker vereist. Laat het
onderhoud over aan bevoegd
onderhoudspersoneel.
WAARSCHUWING
m
c
Dit veiligheidsbericht houdt in dat u ernstig of fataal gewond
kunt raken als u het product opent, omdat u zich blootstelt aan
gevaarlijke elektrische spanning.
HET WAARSCHUWINGSSYSMBOOL STAAT VÓÓR IEDER VEILIGHEIDSBERICHT IN DEZE GEBRUIKSAANWIJZING.
DIT SYMBOOL DUIDT OP EEN POTENTIEEL VEILIGHEIDSRISICO WAARBIJ U OF ANDEREN LETSEL KUNNEN
OPLOPEN EN ER SCHADE AAN HET PRODUCT OF AAN EIGENDOMMEN KAN ONTSTAAN.
m
De volgende ISO en IEC symbolen komen voor op dit product,
en hun betekenis is als volgt:
Aan Ponsen
Uit Blokkering
Snipperbak VolStandby
Veiligheidsinstructies
UW VEILIGHEID EN DIE VAN ANDEREN VINDT ACCO® BRANDS ERG BELANGRIJK. IN DEZE GEBRUIKSAANWIJZING EN OP HET
PRODUCT VINDT U BELANGRIJKE VEILIGHEIDSAANWIJZINGEN. LEES DEZE GOED DOOR.
m
Specificaties
Afmetingen (h x b x d)
Gewicht
Ponscapaciteit, Papier
Ponscapaciteit, PVC covers
Ponscapaciteit, PP covers
Bindcapaciteit
Max. velbreedte
Elektrisch
GBC CombBind C110 E
411 x 355 x 225 mm
9,1 kg
Max. 15 vellen (80gr)
Max. 1 vel, 0,2mm
Max. 1 vel, 450 mic.
330 vellen (38 mm)
297mm A4
230V / 50Hz / 1 Amps / 150W
This manual suits for next models
1
Table of contents
Languages:
Other GBC Binding Machine manuals

GBC
GBC Velobind System One User manual

GBC
GBC WireBind W22 User manual

GBC
GBC CC2700 User manual

GBC
GBC CombPunch EP28Pro User manual

GBC
GBC KM1000PB User manual

GBC
GBC GBC WireBind W18 User manual

GBC
GBC SureBind 500 User manual

GBC
GBC GBC Proclick Pronto Operating manual

GBC
GBC B1 User manual

GBC
GBC SureBind System One User manual

GBC
GBC CombBind C110 User manual

GBC
GBC C200 User manual

GBC
GBC CombBind C800pro User manual

GBC
GBC 250T Therm-A-Bind User manual

GBC
GBC CoilBind MC10 User manual

GBC
GBC CombBind C20 User manual

GBC
GBC Modular TL2900 User manual

GBC
GBC AP-2 User manual

GBC
GBC GBC WireBind W15 User manual

GBC
GBC ThermaBind T400 User manual