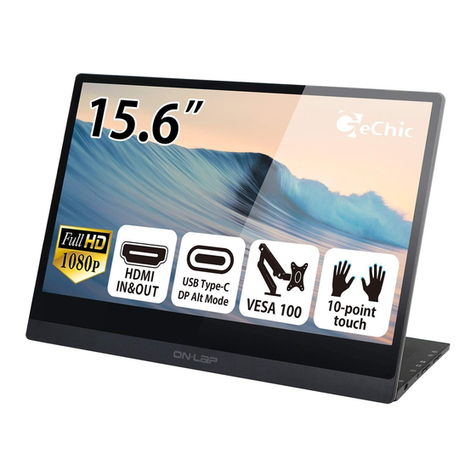
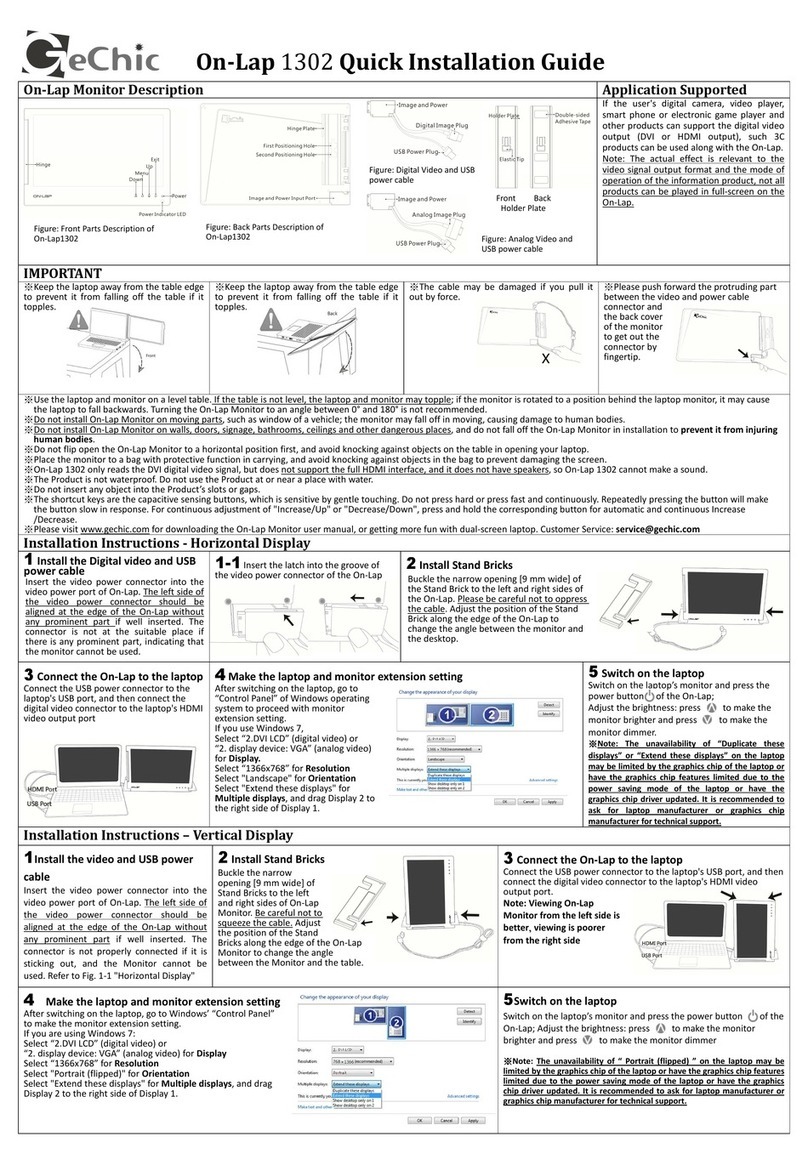
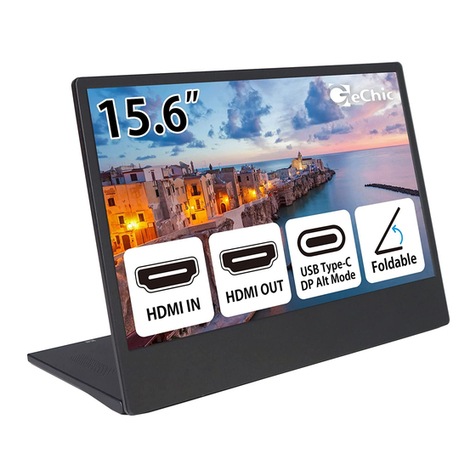
GeChic On-Lap 2501 Series User manual

Manual of 2501 Series
2501 シリーズ ユーザーガイド
Read Me Before First Usage
ご使用前にお読みください
2501

Table of Contents
English
Chapter 1 Content Description —1
Section 1 On-Lap Monitor and Accessories —1
Section 2 Notices of On-Lap Monitor —2
Section 3 Safety Precautions —3
Section 4 Safety Instructions —3
Section 5 Product Maintenance —3
Section 6 LCD Pixel Statement —3
Section 7 Disposal of Electronic Equipment and Batteries —3
Chapter 2 Installation Instructions —4
Section 1 Install the Protection Cover —4
Section 2 Install the Stand 4 —4
Section 3 Connect Micro USB Power Cable —5
Section 4 Connect the Video Cables —5
Chapter 3 Power On and Off the On-Lap Monitor —6
Section 1 Power On and Off —6
Section 2 Monitor Display Setting —6
Chapter 4 Hot Keys, LED lights and OSD Instructions —8
Section 1 Hot Keys & LED lights Description —8
Section 2 OSD Description —9
Section 3 Low Power Protection Warning —10
Chapter 5 Specification —11
Section 1 Plug and Play —11
Section 2 Pin Assignment —11
Section 3 Specification —12
Section 4 Troubleshooting —12

日本語
第1章On-Lapノート型モニターの説明 —15
その1On-Lapノート型モニター本体と付属品の説明 —15
その2On-Lapノート型モニターの注意事項 —16
その3 安全に関する警告 —17
その4 安全にご使用いただくために —17
その5 製品の修理 —17
その6 液晶ディスプレイの画素について —17
その7 電気・電子廃棄物とバッテリーの処理 —17
第2章 装着方法に関する説明 —17
その1 カバーの装着と使用 —17
その2 スタンド4の使用 —18
その3 Micro USB電源ケーブルの接続 —18
その4 ケーブルの接続 —19
第3章 On-Lapの起動 —19
その1 On-Lapの起動と電源のOn/Off —19
その2 拡張モニター表示方法の設定 —20
第4章 ホットキー、LEDランプとOSDの使用方法 —22
その1 ホットキーとLEDランプの説明 —22
その2 OSDの説明 —23
その3 低電圧保護の警告 —25
第5章 仕様説明 —25
その1 プラグアンドプレイ —25
その2 コネクタのピン配列説明と標準設定モード —25
その3 仕様 —26
その4 トラブルシューティング —27
目 次

1
Chapter 1 Content Description
Section 1 On-Lap Monitor and Accessories
1. Parts Description
Fig.: On-Lap 2501 Series input/output ports
Fig.: Front side & Button Description

2
Section 2 Notice of On-Lap Monitor
1. Do not put any heavy load on On-Lap Monitor. Avoid any hit or squeeze
even when the On-Lap Monitor is packed in a bag.
1) Hit or squeeze may cause the LCD panel to be broken.
2) Before you put the On-Lap Monitor into a bag, please install the cover.
Meanwhile, not to place the laptop or any other heavy objects together
with On-Lap Monitor.
3) Avoid any hit or
squeeze on the bag,
due to the On -Lap
2. Package & Accessories
Fig.: Do not put heavy objects on
On-Lap Fig.: Avoid any hit or squeeze
on the bag
2. While inputting images to On-Lap 2501 by smartphones, the image qual-
ity may be blurred due the low-resolution images are expanded to the
bigger screen. This can be improved by downloading the high-resolution
images. Videos displayed on On-Lap 2501 not at full-screen mode may
be caused by the format of videos or the settings of smartphones or
cameras. Please consult the manufacturers of your smartphones or cam-
eras.
Accessories 2501C2501H
Cover Stand * 1 set YesYes
Micro HDMI Video Cable*1 YesYes
USB to Micro USB Power Cable*1 YesYes
Charger(5V,2A)*1 OptionalYes
VGA Video Cable(1.2m) OptionalOptional
Mini-HDMI to Micro-HDMI Video Cable (2.1m) OptionalOptional
Micro HDMI Video Cable (2.1m) OptionalOptional
Micro USB to USB Touch & Power Cable(2.1m) OptionalOptional
Stand 4 OptionalOptional
Cable Clip*1 YesYes
User Manual*1 YesYes

3
Section 3 Safety Precautions
1. The Product may be severely damaged from overturning or falling. Please
do not place on a shaky or unstable table, cupboard or trolley. Do not use
the On-Lap Monitor on a moving vehicle.
2. Do not place the items on a vibrating surface, vibration may cause damage
to the internal components.
3. The product is not waterproof. Do not use the Product at or near a place
with water.
4. Do not insert any object into the Product’s slots or gaps.
5. Loudness warning! Avoid volume levels that may be harmful to your hear-
ing. Please check the volume setting before you use the Audio Jack.
6. Please notice the plug is applicable to its AC adapter only.
Section 4 Safety Instructions
Please read this Manual carefully and observe the operation instructions and
precautionary notes. Do retain this document for future reference.
Section 5 Product Maintenance
Do not attempt to repair the Product yourself.
Please send it to our professional maintenance personnel for service.
Should any of the following conditions occur, please contact our maintenance
personnel for service:
1) Unable to operate the Product after following the instructions in the
Manual.
2) The Product falls and the outer casing is damaged.
3) Power cable or video cables is damaged.
4) Liquid infiltrated into the Product.
Section 6 LCD Pixel Statement
The On-Lap Monitor uses a high quality LCD panel. Nevertheless, there might
be instances where defective pixels may occur; however, this will not affect
the normal functioning of the Product.
Section 7 Disposal of Electronic Equipment and Batteries
The electronic equipment and batteries should not be disposed of
with household waste but should be left at an appropriate collec-
tion point for recycling. Some products are battery built-in. Do not
attempt to remove internal batteries. The products should be han-
dled by a recycling center.
4
Chapter 2 Installation Instructions
Section 1 Install the Protection Cover
1. Use the Cover as the stand
Open the Cover. Turn the Cover backward
of the On-Lap Monitor and put the Prod-
uct on the table
Fig.: Turn the Cover backward of the Prod-
uct and put it on the table.
2. Remove and Install the Cover
Open the Cover and put the Cover with
the monitor flatly on the table. Fix the
monitor by one hand and use another
hand to push the Cover latch 5mm aside.
Then remove the cover in the direction
of arrow.
When install the Cover, insert the left
latch of the Cover to the enclosure hole
of On-Lap Monitor first. Then push the
right latch of the Cover 5mm aside and
insert the latch to the right enclosure
hole of the monitor.
Section 2 Install the Stand 4
(Optional)
Step1. Remove the Cover
Step2. Assemble Stand 4
Select the desired angle placement to assemble
Stand 4. Before assembly, check if X plate is
properly inserted onto slot.
Step3. Place On-Lap 2501 Series onto Stand 4
Place On-Lap 2501 Series onto Stand 4. Stand 4 is
positioned at the bottom center of monitor.
Fig.: Fix the monitor by one hand and
use another hand to push the Cover
latch aside. Then remove the cover.
Fig.: Place On Lap 2501 Series onto Stand 4

5
Section 4 Connect the Video Cables
On-Lap 2501 supports HDMI input, VGA input.
1. Use Micro HDMI port to input
Insert the Micro HDMI (HDMI-D) plug of Micro
HDMI Video Cable to the Micro HDMI port of On
-Lap. Insert the HDMI-A plug of Micro HDMI
Video Cable to the HDMI port of laptop, Tablet
PC, game consoles or DVD players.
Notice: To connect some smartphones, a HDMI-A
to HDMI-D adapter is required and shall be pur-
chased in additionally. Or you may need to
purchase the converting cable or adapter from
your smartphone manufacturers. To connect
the digital cameras, you may need to purchase
an additional HDMI-A (female) adapter to mini
HDMI (male).
2. Use VGA port to input
The VGA Video Cable of On-Lap 2501(optional
accessory) is required in this case. Insert the small
plug of VGA Video Cable to the VGA port of On-
Lap Monitor and insert the D-Sub plug of the
cable to the D-Sub/VGA output port of
laptops.
Section 3 Connect Micro USB Power Cable
Step1. Connect Micro USB Power Cable
Insert the DCIN plug of Micro USB Power cable to the port of
On-Lap 2501 . And insert the USB plug of the Micro USB Power cable to the
USB port of a laptop or the 5V 2A charger.
Fig.: Connect VGA Video Cable
Fig.: Connect Micro USB Power Cable to a laptop or charger
Caution: Plugging HDMI Video Cable first instead of Micro USB
Power Cable may cause the OSD unbooted or unresponsive.
Fig.: Connect HDMI Video
Cable

6
Chapter 3 Power On and Off the On-Lap Monitor
Section 1 Power On and Off
1. First Usage: After inserting the Micro USB Power to On-Lap Monitor and
5V DC power, the On-Lap Monitor will be on automatically. On-Lap Moni-
tor will scan the video input and display the video if any.
2. Power On: Touch “ “button to power on the On-Lap Monitor.
3. Power Off: Touch“ “button to power off the On-Lap Monitor.
4. Follow the following steps for monitor settings.
Section 2 Monitor Display Setting
1. Resolution setting –Windows 7/ Windows 8.1/ Windows 10 system
●Click on icon
●Click on Control Panel >Appearance and Personalization
●Click on Display > Connect to an external display.
Normally Display ①is the laptop’s monitor, Display ② is the external
monitor. Click on Detect if you are unsure.
●At Display, select “2.HDMI” (digital video) or “2. display device:
VGA” (analog video) for Display
●Select "1366x768"(2501C) or "1920x1080"(2501H) for Resolution
●Select "Landscape" or "Portrait" for Orientation.
●Select "Extend these displays" for Multiple display, and drag Display 2
to the right side of Display 1. For Duplicated mode, select "Duplicate
these displays".
●Select OK and exit after saving the settings.
【Please log on GeChic’s official website for more Windows 10/ 8.1 sys-
tem set up information.】

7
2. Resolution setting-Windows XP system
●Click on
●Click on Setting > Control Panel > Appearance and Theme
●Click on Adjust screen resolution
●Click on Setting, select Monitor at Display, and set the Screen Reso-
lution as 1366x768(2501C) or 1920x1080(2501H); Select "Extend my
Windows desktop to this monitor" and then select ”OK” and exit.
[Note: "Vertical mode" cannot be directly
chosen on Windows XP system; the ad-
justment needs to be made via the video
card. Please refer to the user manual of
your video card.]
3. Resolution setting- MAC system
【Note:This setting requires Mini
DisplayPort to HDMI adapter】
●Click on System Preferences >
Displays
●The above window appears on the
On-Lap Monitor. Please adjust the
resolution as 1366x768(2501C) or
1920x1080(2501H).

8
●Select the arrangement mode to
adjust the display position of the
monitors; this is the dual monitor
display mode (laptop’s moni-
tor)
Chapter 4 Hot Keys and OSD Instructions
Section 1 Hot Keys and LED Light Description
Caution: The buttons are capacitive touch module. Please touch the buttons
by the fingertip gently. Do not press the buttons with presure or continuously,
which may cause them fail to response. “Increase/up” or “Decrease/down”
continuously shall be done by touching the button and holding. Do not touch
1. LED Lights Description :
The LED indicator light shows green light when turn on On-Lap Monitor and
shows red light when stand by.
Hot Keys Lock Light: After press the Lock Button, all the buttons are
locked and the orange LED light is on.
Power Light: When the On-Lap Monitor is turned on, the green LED light
is on. When the Monitor is suspended, the Light turns red. When the
Monitor is turned off, the LED light is off.
2. Hot Keys Description
Hot Keys Lock Button: Touch the Lock Button constantly for 3 seconds,
and all the buttons are locked. Touch the Lock button again, and all the
buttons are unlocked. While the On-Lap Monitor is held in the hands, the
buttons can be locked and avoid to be touched by accident.
Power: Touch the Power Button can power on/off the Monitor.
Exit/Auto Adjustment: In the OSD panel, touch the Exit Button to exit
and back to the previous page. When there is no OSD menu, touch this
Button will activate automatic adjustment function (only pertains to
analog VGA signal)
Increase Volume/UP: Touch this Button to increase the volume of
speakers. If the OSD menu is launched, touch this button will move up
the list. Touch and hold for automatic continuous increase.
Menu/Select: Touch the Menu Button to launch OSD panel.
Decrease Volume/Down: Touch this Button to decrease the volume of
speakers. If the OSD menu is launched, touch this button will move down
the list. Touch and hold for automatic continuous decrease.
Mute: Touch the Mute Button to shut down the speakers. Touch the
Mute Button again can release the speakers’ output.

9
Fig.: On-Lap 2501 Series input/output ports
Section 2 OSD Description
1. Basic Button Operation
Press button to launch the OSD panel. Press or to view the
functions. To adjust a certain function, press to launch it. If the selected
function consists of sub-menu, press or again to view the sub-menu.
When the desired function is highlighted, press to launch it. Press
or to change the setting. To exit, press to exit. Repeat the preceding
steps to adjust other setting.
2. Display Settings
As shown in Fig., after Display Settings is
launched, can adjust Contrast, Brightness, and
Sharpness.
3. Color Setting
As shown in Fig., after Color Settings is
launched, can adjust Color Temp and Color
Effect to adjust screen color setting.
Hue setting can make the image color lean
toward green or purple/.
Saturation setting can make saturation more
vivid or more black and white.
At Color Temperature, select “User”, can adjust
RGB color setting, please refer to Fig. Select “Cool”
can increase the blue saturation of the image. Select
“Warm”can increase the red saturation of the im-
age. At Color Effect, select “Standard”, “Game”,
“Movie”, “Photo” and “Vivid”.
Select “User” can adjust the Hue and Saturation of
Red/Blue/Green/Cyan/Yellow/Magenta.

10
5. Manual Image Adjust
Auto Adjust: Only when input VGA signal can
use such function. Will automatically adjust VGA
setting
H.Position: Moves the display area left and
right .
V.Position: Moves the display area up and down
Clock: Adjust the pixel clock for user's prefer-
ence
Phase: Adjust the pixel phase for user's prefer-
ence
6. Audio: Adjust volume or select mute
7. OSD Menu
OSD Timer: Adjust OSD Time
OSD H. POS: Moves OSD left and right
OSD V. POS: Moves OSD up and down
OSD Transparency: Makes OSD transparent
Language: Select OSD language
Reset: Restore to factory setting
8. Input Source: Select VGA signal source, HDMI signal or Auto Detect
9. Information: Display factory version
Section 3 Low Power Protection Warning
The maximum power consumption of the On-Lap 2501 Series is 2.0 A. If the
volume setting is too high, the power requirement may be higher than 2.0 A.
At the meantime, the Low Power Protection Warning will appear. Do reduce
the volume immediately. If the volume is not
reduced in time, the Monitor will decrease the
volume and brightness automatically.
Fig.: Low voltage warning shown at
upper right corner on screen.
4. Aspect Ratio
Please refer to Fig. Suggested setting is 16:9.
When HDMI image is 4:3 format, can select 4:3,
make image not enlarge to 16:9 and change
shape. Using VGA image input won’t have this
function
Overscan: Only when input HDMI Video signal
(ex. 1080P/720P/576P/480P) , can use such
function. Use this function can adjust the image scan area.

11
Chapter 5 Specification
Section 1 Plug and Play
The On-Lap Monitor conforms to VESA DDC standard and supports VESA
DDC2. DDC2B is a bi-directional data channel based on I2C protocol. The host
can request EDID information over the DDC2B channel. The On-Lap Monitor is
able to inform the host system of its identity, and depending on the level of
DDC used, communicate additional information about its display capabilities.
Section 2 Pin Assignment
1. HDMI Connector Pinout
Pin Name Pin Name
1TMDS Data2+ 11 TMDS Clock Shield
2TMDS Data2 Shield 12
TMDS Clock –
3TMDS Data2 –13
CEC
4TMDS Data1+ 14
Reserved
5TMDS Data1 Shield 15 SCL (I²C Serial Clock for DDC)
6TMDS Data1 –16 SDA (I²C Serial Data Line for DDC)
7TMDS Data0+ 17 DDC/CEC Ground
8TMDS Data0 Shield 18 +5 V Power
9TMDS Data0 –19 Hot Plug Detect
10 TMDS Clock+
Fig.: HDMI-A connector
Pin No. Name Pin No. Name Pin No. Name
1RED 6RGND 11 NC
2GREEN 7GGND 12 SDA
3BLUE 8BGND 13 HSYNC
4NC 9+5V 14 VSYNC
5GND 10 SGND 15 SCL
Fig.: VGA connector
(connect to PC’s VGA port)
2. VGA Connector Pinout

12
Pin No. Name
1Vcc(+5V)
2NC
3NC
4Ground Fig .: Micro USB power cable
(connect to 5V DC power)
3. USB Power Cable
Section 3 Specification
Model On-Lap2501H On-Lap2501C
Panel 15.6" IPS FHD (16:9 Wide)
LED Backlight
15.6" HD (16:9 Wide)
LED Backlight
Resolution 1920x1080 1366x768
Viewing Angle (Typical) (U/D/R/L)80∘/80∘/80∘/80∘(U/D/R/L)20∘/45∘/45∘/45∘
Contrast Ratio (Typical) 400:1 400:1
Response Time
(Typical) 17.5(ms) 8(ms)
HDMI Video
Display Capabilities
1080P(60Hz/50Hz);
1080i(30Hz/25Hz);
720P(60Hz/50Hz)
1080P(60Hz/50Hz);
1080i(30Hz/25Hz);
720P(60Hz/50Hz);
576P(50Hz);
576i(25Hz);480P(60Hz);
480i(30Hz)
Speakers 1.0W (Max.) x 2 1.0W (Max.) x 2
Rating Voltage/Current 5V 2A(Max.) 5V 2A(Max.)
Dimension (Typical) 387x 260 x 12.8mm
(Without Cover)
387x 260 x 12.8mm
(Without Cover)
Weight (Typical) 780g (Monitor)
1035g( With Cover)
860g (Monitor)
1115g( With Cover)
Section 4 Trouble Shooting
1. Image or Audio output troubles
Problem Solution
No image
1. Examine the connection of the Micro USB Power Ca-
ble ( one plug to port, the other to the USB port
of the Adapter). If the connection is correct, the green
LED light shall be on.

13
Problem Solution
No image
2. Check the connection of the Video Cables ( HDMI or
VGA). One plug shall be inserted to the Video Input
port of On-Lap Monitor; the other shall be inserted
to the Video Output port of laptops, smartphones.
3. Do not insert the VGA Video Cable to the Micro
HDMI Input Port, or vice versa the Micro HDMI Cable
to the VGA Input port. The wrong connection caused
no image displayed.
No image Please adjust brightness and contrast settings, or reset
them to factory default via OSD.
OSD displays “ No
Signal” warning
Please check if the Video Cable is correctly connected
to On-Lap Monitor’s video input port and laptops’
video output port.
Image disappears,
or image size is too
big, too small, or
image is not
centered.
The trouble may be caused by VGA video input. Please
adjust resolution, clock, horizontal position and vertical
position via OSD.
No audio output Please check if the Mute Button was touched.
Touch the hot key “ “ up to increase the volume
Hot Keys no
response
Please check if the Power LED-green light is on.
Please check if the Hot Key Lock Button was touched.
Make sure you use the finger tip to touch the center of
the buttons.
OSD no response
Please make sure
1. Plug the USB Power Cable first
2. Then plug the HDMI Video Cable
3. Use the finger tip to touch the center of OSD
button
Caution: Plugging HDMI Video Cable first instead of
Micro USB Power Cable may cause the OSD unbooted
or unresponsive.
2. The unavailability of “ Duplicate these displays” or “ Extend these dis-
plays” in Display setting may be limited by the graphics chip of the laptop
or have the graphic chip features limited due to the power saving mode of
the laptop or have the graphic chip driver updated. Please consult your
laptop manufacturer or graphic chip manufacturer.

14
GeChic Corporation
5F-3, No. 138, Zhongming S. Rd.,
West Dist., Taichung, Taiwan (R.O.C.)
Rev.2017/1/16
w w w . g e c h i c . c o m

第1章 On-Lap ノート型モニターの説明
その1 On-Lap ノート型モニター本体と付属品の説明
1. 各部位の説明
図: On-Lap 2501Series 入出力ポートの説明
15
図: On-Lap 正面ボタンと LED ランプの説明

2. 同梱内容と付属品の説明
付属品 2501A SE2501H
カバー *1 ○
○
Micro HDMI ケーブル *1 ○
○
Micro USB-USB ケーブル *1 ○○
AC アダプター(5V/最大 2A)*1 ○
○
VGA ビデオケーブル ○
別売
Mini HDMI-Micro HDMI ビデオケーブル (2.1m) 別売 別売
Micro HDMI ビデオケーブル (2.1m)別売 別売
Micro USB –USB タッチ出力/電源ケーブル(2.1m) 別売別売
スタンド4 *1 set 別売別売
マジックベルト *1 ○
○
ユーザーガイド *1 ○
○
その2 On-Lap ノート型モニターの注意事項
1. On-Lap の上に重い物を置かないで下さい。On-Lap を携帯バッグに入れる
際、On-Lap を押し込んだり、重圧をかけないで下さい。
1)On-Lap が圧迫されたり押し込まれると、液晶パネルが破裂する場合が
あります。
2)On-Lap を携帯バッグに入れる前に、まずカバーを装着して下さい。ま
た、ノート PC やその他の重い物を On-Lap の上に入れないで下さい。
3)携帯バッグが衝撃を受けたり圧迫されて中の On-Lap が損傷しないよう
にして下さい。
図:衝撃による On-Lap の損傷を避
ける。
図:ノート PC 等の重い物を On-Lap の
上に載せない。
2. スマートフォンを使用して On-Lap2501 Series に映像を出力する場合、動
画または画像の解像度が低いと、On-Lap2501Series で映像を大きくした
際、不鮮明になります。高解像度のファイルを再ダウンロードすると改善さ
れます。動画が On-Lap2501 Series モニターの一部のみに出力され、フル
スクリーンにできない場合は、携帯電話/カメラの映像信号の出力フォー
マット、または動画のファイル形式が制限されている場合がありますので、
携帯電話の映像出力機能の説明を確認して下さい。
16

その3 安全に関する警告
1. 製品を転倒、落下させてしまうと故障の恐れがあります。不安定な場所や凹
凸のある場所に設置することは避けてください。また、乗り物での移動中に
本製品を利用することは避けてください。
2. 振動のある場所に製品を設置しないでください。内部の部品の損傷を招く恐
れがあります。
3. 耐水性ではありません。水に近い場所で使用しないようにしてください。
4. 製品表面の隙間やみぞに異物を入れないようにしてください。
5. スピーカの音量を上げ過ぎると、健康を損なう恐れがあります。オーディオ
ジャックを使用するまえにボリューム設定が適切か確認してください。
6. AC アダプタの電源プラグ部分は本製品付属の AC アダプタ専用です。
その4 安全にご使用いただくために
ユーザーガイドを詳細にお読み下さい。ユーザーガイド内の操作や注意事項を遵
守し、本ガイドを保存して下さい。
その5 製品の修理
本製品が故障した場合、お客様ご自身で修理せず、専門の修理スタッフに依頼し
てください。経年使用による消耗・摩擦や誤使用による破損・故障は保証の対象
となりません。不慮の事故、お客様ご自身によるソフト・ハードの変更や調整、
天災を含む不可抗力、液体接触による破損などが製品にもたらす故障も保証の対
象となりません。
次の状況に該当する場合は、修理スタッフに相談して下さい。
1) ユーザーガイドの操作方法に従っても、正常に使用できないとき。
2) 製品が落下し、筐体が破損したとき。
3) 電源ケーブルやビデオケーブルが破損、摩損、断裂したとき。
4) 液体が製品内部に入ったとき。
その6 液晶ディスプレイの画素について
本製品に使用されている液晶パネルは高精度な技術で製造されていますが、画面
の一部に点灯しない画素、黒点や赤点がある場合があります。また見る角度によ
り色むらや明るさのむらがある場合があります。これは液晶ディ
スプレイの構造によるものであり、故障ではありません。交換・
返品はお受けいたしかねますので、予めご了承ください。
その7 電気・電子廃棄物とバッテリーの処理
本製品は適切にリサイクルし、家庭ごみの中に混ぜないで下さ
い。一部機種に内蔵のバッテリーの処理は、指定のバッテリーリ
サイクル先、または専門のリサイクルサービス機関へ依頼して下
さい。
第2章装着方法に関する説明
その1 カバーの装着と使用
1. カバーはフレーム立てとして使用します。
図のように、カバーを開き、カバーをモニ
ター背面に裏返して、机上に置きます。
図:カバーをモニター背面に裏返し、机上に置く
17
This manual suits for next models
2
Table of contents
Other GeChic Monitor manuals

GeChic
GeChic On-Lap M505T/I User manual

GeChic
GeChic M161H-R1 User manual

GeChic
GeChic On-Lap 1002 User manual

GeChic
GeChic 1102 User manual

GeChic
GeChic OnLap 1302 User manual

GeChic
GeChic On-Lap 1305H-B User manual

GeChic
GeChic On-Lap M505E User manual

GeChic
GeChic 1305 Instruction sheet

GeChic
GeChic On-Lap 1305H User manual

GeChic
GeChic 1102 User manual