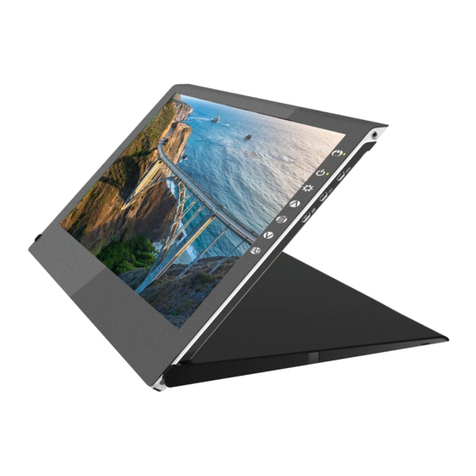
GeChic 1102 User manual

Manual of 1102
1102 ユーザーガイド
Read Me Before Usage!
ご使用前にお読みください。

Noces, Cauons & Warranty Exclusions
Lithium Polymer Baery Safety Cauon
LCD Pixel Statement
FCC & CE Statement
WEEE Symbol Informaon
I
II
II
III
III
Chapter 1 Parts of On Lap Monitor & Accessories 1
Secon 1 Parts Descripon 1
Secon 2 Accessories Descripon 2
Chapter 2 Installaon Instrucons 3
Secon 1 Installaon of Horizontal Display 3
Secon 2 Installaon of Vercal Display 4
Secon 3 Store the Monitor in the Protecve Cover 6
Secon 4 Connect to Headphone or Speaker 6
Secon 5 Connect to Camera or Mount on Tripod (Only for
1102H) 7
Secon 6 Lay Touch Monitor Flat with 1102 Mul Mount Kit 7
Secon 7 Connect to Headphone or Speaker 8
Secon 8 Installaon of Rear Dock 8
Secon 9 Plug Proprietary HDMI-A & USB-A to Dock Port Cable 9
Chapter 3 Hot Keys, LED and OSD Instrucons 9
Secon 1 Hot Keys & LED Indicaons 9
Secon 2 OSD Descripon 10
Secon 3 Baery Use & Charge Guideline (Only for 1102H) 12
Chapter 4 Sengs of Extended Display 13
Secon 1 Sengs of Extended Display on Windows 10 13
Secon 2 Sengs of Extended Display on Mac (OS X) 13
Chapter 5 Using of Touch Monitor (Only for 1102I) 14
Secon 1 Noces 14
Secon 2 Windows 10/7 Touchscreen Sengs 14
Chapter 6 Product Specicaon 15
Secon 1 General Specicaon 15
Secon 2 Supported Operang Modes 16
Secon 3 Supported Video Modes 16
Chapter 7 Troubleshoong 17
Table of Contents
English

ご使用上の注意事項と警告および製品保証について IV
リチウムポリマーバッテリ(Li Polymer)の注意事項 V
液晶ディスプレイの使用と画素について IV
WEEE マークについて IV
第一章 内容物の解説 19
その 1. モニタ本体の解説 19
その 2. 付属品の解説 20
第二章 インストールガイド 21
その 1. 横表示の使用 21
その 2. 縦表示の使用 22
その 3. モニタを保護カバーに収納する 24
その 4. イヤホンやスピーカーと接続する 25
その 5. カメラと組み合わせて使用する/三脚に取り付ける(On Lap
1102H のみ) 25
その 6. 1102 マルチマウントキット(別売)を使用してモニタを横向き
に設置する 26
その 7. 1102 マルチマウントキットを使用して On-Lap 1102 を
VESA75 モニターアーム/壁掛けマウンタに取り付ける 26
その 8. 背面拡張ドックの取り付け 27
その 9.「HDMI-A + USB-A to Rear Dock 専用ケーブル」の取り付け 27
第三章 ホットキー、LED、OSD 表示について 28
その 1. ホットキー、LED、OSD 表示について 28
その 2. OSD メニューについて 28
その 3. バッテリーの使用と充電について(On-Lap 1102H のみ) 30
第四章 モニタ拡張モードの設定 31
その 1. 拡張モード設定- Windows 10 31
その 2. 拡張モード設定- Mac (OS X) 31
第五章 タッチモニタの使用(On-Lap1102I のみ) 32
その 1. 注意事項 32
その 2. Windows 10/7 タッチモニタの設定 32
第六章 製品仕様 33
その 1. 一般仕様 33
その 2. 対応表示モード 34
その 3. 対応映像モード 34
第七章 トラブルシューティング 34
目次
日
本
語

Noces, Cauons & Warranty Exclusions
Warning: The sign alerts you to potenal hazards that can hurt
you or damage the product.
1. When carrying On-Lap Monitor, please put it into the protecve cover with
glass side inward and avoid pressing the monitor violently and rubbing the
glass surface by any sharp objects.
2. When plugging in/out the cables, do make sure the force exerts in horizon-
tal direcon - do not shake the port or plug it in vercal direcon. Any
damage caused by wrong plug urging is not included in the warranty cover-
age.
3. The power input specicaon for On-Lap monitor is 5V 2A DC current.
Inpung On-Lap Monitor more than 5V can cause shortages, and this will
void the GeChic Manufacture's Warranty. We suggest you to connect both
connectors of the USB power cable to your desktop΄s USB ports or use
GeChic 5V-2A charger.
4. Part of On-Lap Monitor or its protecve Cover contains magnets, please
put On-Lap Monitor away from hard drive or any device that may be
eected or damaged by magnets. Please put the magnec buckle of pro-
tecve cover away from your desktop when the PC is in sleep mode or
boosng.
5. Cleaning On-Lap Monitor : Unplug the power input before cleaning. Please
use so cloth to clean touch screen. For stubborn stains, please use lightly-
dampened cloth to wipe again. Do not use benzene, alcohol, thinner, am-
monia, abrasive cleaners, compressed air or other corrosive solvents.
These solvents may cause permanent damage on the screen or leave unre-
movable stain.
6. Please do not place the monitor on a shaky or unstable table, cupboard or
trolley and do not use the On-Lap Monitor on a moving vehicle. The Prod-
uct may be severely damaged from overturning or falling.
7. The product is not waterproof. Do not use this product in or near water.
8. Do not insert any object into the Product΄s slots or gaps. Do not disassem-
ble the monitor in any way.
9. High Volume Warning: High volume can lead to lasng damage to your
hearing. Please check the volume sengs before reproducing any sound.
10.Overuse of the monitor may result in vision damage. For every 30 minutes
with the monitor, give your eyes 10 minutes break. Avoid children under
age 2 to watch with the monitor; prevent children over age 2 from watch-
ing with the monitor over 1 hour per day.
11.Exclusions from Warranty Service
Please read the warranty terms below carefully, and follow the usage guide
and precauonary notes. Please keep this manual for future reference.
GeChic does not warrant uninterrupted or error-free operaon of this Prod-
uct. The warranty only covers failure /malfuncon under normal use condi-
ons during warranty period. The warranty does not apply to the following
condions:
(1)The bar code has been removed or worn down, and cannot be idened.
(2)This product has been modied, disassembled, or reed.
I

(3)Display and touch funcon working normally; only variaon in
appearance (i.e., ageing, arion, scratch, color changing and etc.).
(4)Any breakdown caused by power supply. (i.e., inpung power over 5V
or unsteady current)
(5)Any damage caused by disoperaon or failure to follow this manual.
(i.e., Plug or unplug the cable in wrong direcon and causing damage on
cable or monitor.)
(6)Any damage caused by hing or cracking monitor accidentally or
purposely, or collapsing or overturning monitor.
● Built-in Baery Exclusions from Warranty (Only for 1102H)
The warranty doesn't apply to the following situaons;
1) The baery capacity loss caused by aging.
2) The Baery inside or connecter is oxidized or rusted caused by seeped
liquid.
3) Any abnormal use by man made.
Lithium Polymer Baery Safety Cauons
1. On-Lap 1102H equips a built-in Li-polymer baery. Please keep away from
any ame. Do NOT use the monitor near heang sources over 60℃(140°F),
such as stove, microwave, steam cooker or any heang devices, otherwise it
may lead to baery leakage or explosion. Please do NOT store the product
in a car under sun heat or any environment above 60℃(140°F).
2. Avoid storing the monitor in a humid environment, or it may cause the eect
of high self-discharge. Low temperature could damage chemical materials
inside the baery; high temperature may cause explosion.
3. When the monitor is turned o, the lithium polymer baery could be self-
discharge, and the power will be slowly consumed. It is recommended to
charge the lithium baery to three bars before storage. If stored for a long
period, the baery may over-discharge, and lead to charging failure. Do
charge the baery full before its storage. The baery discharges its power
slowly even not in use. Please check the power regularly and charge it in
me.
4. According to ICAO regulaons, you need to transport all electric devices with
built-in baery in the luggage. Do pack the monitor in a box or with cushion
materials to avoid accidentally turning on the monitor. (Please check the
details of baery transportaon regulaon to your airline company)
5. Do NOT pierce the baery with sharp objects.
6. Do NOT disassemble the monitor, replace or disassemble the baery.
7. Do NOT dispose of this product with your other household waste.
LCD Pixel Statement
There is slightly uneven brightness on the screen when displaying dierent
screen paern. The LCD screen has 99.99% or more eecve pixels. 0.01% of
pixels or less may not light or may light incorrectly.The On-Lap monitor uses a
high quality LCD panel. Nevertheless, pixels on the LCD screen may not light or
appear as red or black dots. All the above are normal with the LCD monitor and
will not aect the normal usage of the product.
Avoid placing the monitor against sun-light, or it may damage the monitor.
An aerimage of the previous screen may remain, when the same image is
displayed for hours. In this case, the screen is recovered slowly by turning o
the power for a few hours.
II
Federal Communicaons Commission (FCC) Class B Statement
Noce: This equipment has been tested and found to comply with the limits
for a class B digital device, pursuant to part 15B of the FCC Rules. These limits
are designed to provide reasonable protecon against harmful interference in
a residenal installaon.
If this equipment does cause harmful interference to radio or television recep-
on, which can be determined by turning the equipment o and on, the user is
encouraged to try to correct the interference by one or more of the following
measures:
●Reorient or relocate the receiving antenna.
●Increase the separaon between the equipment and receiver.
●Connect the equipment into an outlet on a circuit dierent from that to
which the receiver is connected.
●Consult the dealer or an experienced radio/TV technician for help.
Cauon:
1.Changes or modicaons not expressly approved by GeChic Corp. could void
the user's authority to operate the equipment.
2.Shielded interface cables and AC power cord, if any, must be used in order to
comply with the emission limits.
3.The manufacturer is not responsible for any radio or TV interference caused
by unauthorized modicaon to this equipment. It is the responsibilies of
the user to correct such interference.
4.
CE Declaraon of Conformity
This product complies with the following standards:
●EN60950-1:2006 and A11+A1 (Safety requirement of Informaon Technol-
ogy Equipment).
●EN 55032:2006+A1: 2007 (Radio Disturbance requirement of Informaon
Technology Equipment).
●EN55024:1998+A1:2001+A2:2003 (Immunity requirement of Informaon
Technology Equipment).
●N 61000-3-2:2006+A1: 2009+A2: 2009 (Harmonic current emissions).
●EN 61000-3-3:2008 (Voltage uctuaons & icker) following provisions of
direcves applicable.
●2006/95/EC (Low Voltage Direcve).
●2004/108/EC (EMC Direcve).
●2005/32/EC (EuP Direcve, EC No. 1275/2008 implemenng Direcve for
Standby and O mode power consumpon) and is produced by a manufac-
turing organizaon on ISO9000 level.
WEEE Symbol Informaon
This symbol on the product, accessories or literature indicates that this product
and its electronic accessories (e.g., adapter, cables, and Rear Dock) must not be
disposed of with your other household waste. Instead, it is your responsibility
to dispose of these items by handing it over to a designated collecon point for
the recycling of waste electrical and electronic equipment.
III

For more informaon about where you can drop o your
waste equipment for recycling, please contact your local
city oce, your household waste disposal service or the
shop where you purchased the product.
For Disposal in Countries Outside of the
European Union
If you wish to discard this product and its accessories in
other area and countries, please contact your local government for applica-
ble laws and regulaons governing the disposal of this product.
Chapter 1 Parts of On Lap Product & Accessories
Secon 1 Parts Descripon
1
Fig: 1102 Monitor & Connecon Ports
Fig.: Part descripon of 1102 Cover Stand

Fig.: 1102 Buons, LED Lights & Kensington Slot Descripon
2
Secon 2 Accessories Descripon
1. Accessories in Package
Standard Accessory On-Lap 1102H On-Lap 1102I
USB-A to micro USB power & touch cable(1.2m) 1 pcs Yes Yes
HDMI-A to micro-HDMI video cable(1.2m) 1 pcs Yes Yes
5V,Max.2A Adapter 1 pcs Yes Yes
Protecve Cover Stand 1 pcs Yes Yes
1102 Tripod Mount Kit (1/4”screw hole) Yes No
Screw (M2 x5mm) 4 pcs Yes No
Manual 1 pcs Yes Yes
2. Oponal Accessories
Product Name Descripon
USB-A to micro USB power &
touch cable(2.1m) 1 pcs
One plug is USB-A (male) for adapter/computer USB
port ; the other is Micro-USB (male) for On-Lap moni-
tor.
On-Lap Proprietary VGA video
cable (1.2m/2.1m)
Proprietary cable for On-Lap products.
One plug is D-sub (male) for computer΄s VGA port ; the
other plug is micro-HDMI (male) for On-Lap monitor.
HDMI-A to Micro-HDMI Video
Cable (2.1m)
One plug is HDMI-A (male) for connecng to comput-
er΄s HDMI-A port ; the other plug is micro-HDMI (male)
for connecng to On-Lap monitor.
Mini-HDMI to Micro-HDMI
Video Cable (2.1m)
One plug is mini-HDMI (male) for camera΄s mini-HDMI
port ; the other plug is micro-HDM (male) connecng
to On-Lap monitor.
Micro-HDMI to Micro-HDMI
Video Cable (1.2m)
One plug is micro HDMI (male) for camera’s or laptop’s
micro HDMI port ; the other plug is micro-HDMI (male)
for connecng to On-Lap monitor.
On-Lap proprietary HDMI-
A&USB-A to dock port cable
(1.2m)
Proprietary cable for On Lap1503/1102. One plug is
Gechic proprietary connector for plugging into Rear
Dock΄s port ; the other two plugs are HDMI-A (male)
and USB-A (male). Please refer to Chapter 2>Secon 9.

Chapter 2 Installaon Instrucons
Secon 1 Installaon of Horizontal Display
Refer to the Fig., ① take the magnec buckle o rstly, ②fold and aach
the rubber side of the magnec buckle on the mental plate. Adjust the
posion of the magnet buckle to change the viewing angles.
The min. viewing angle of horizontal
display is 40 degrees.
Do not aach the magnec buckle higher
than the blue line, otherwise it may
cause the monitor overturning.
3
Rear Dock
The Rear Dock shall be installed on the backside connector of
1102/1503. It equips with HDMI-A input and USB-A input for
installing Computer Sck or HDMI wireless display. For aach-
ing a power bank on the Rear Dock, refer to Chapter 2.
1102 Mul
Mount Kit
Proprietary for On-Lap1102 . Can be used as a stand of touch
monitor for varies viewing angles; can be installed on wall
mount or arm of VESA 75. Please refer to Chapter 2.
1102 Tripod
Mount Kit
(1/4”screw hole)
Proprietary for On-Lap1102. A 1/4” screw hole allows you to
install On-Lap1102 on a camera tripod. Please refer to Chapter
2.
Stand 4 An oponal stand for On Lap 1102. It supports horizontal
display and 4 adjustable viewing angles.

As the g. below, rotate aside the Cover Locks rstly, and take the monitor
out. Then turn the monitor's backside to the Protecve Cover:○
1Put the
boom half of the monitor into the Protecve Cover, and○
2Put the top half
of the monitor into the Protecve Cover. Rotate down the Cover Locks to
prevent the monitor from sliding out.
P.S. If the monitor does not get enough power from a single USB port, it
may cause splash screen or display interrupon. Please connect to the 5V-
2A adapter.
4
Secon 2 Installaon of Vercal Display (Only for On-Lap 1102H)
As the g. below, rotate aside the Cover Lock rstly, and take out the moni-
tor, then turn the monitor's back side to the Protecve Cover . Do keep the
connecon ports on the topside. ○
1Put the boom half of the monitor into
the Protecve Cover, ○
2Put the top half of the monitor into the Indentaon
of the Protecve Cover. Rotate down the Clover Lock.
As the g. , connect On-Lap 1102 to a laptop. On-Lap 1102 can be powered
on through two USB ports or a 5V-2A adapter. The video input source is
"HDMI1".

The min. viewing angle of vercal display
is 60 degrees.
Do not aach the magnec buckle higher
than the orange line, or it may cause
the monitor overturning.
As the g. below, connect On-Lap 1102 to a laptop. On-Lap 1102 can be
powered on through two USB ports or a 5V2A adapter.
5
It is recommended to install 1102I touch monitor on VESA75 arm or wall
mount for its Vercal Display. If you put 1102I in Cover Stand vercally , it
may lt down.

Secon 3 Store the Monitor in the Protecve Cover
Warning: When not in use, please put the monitor back in the Protec-
ve Cover with its backside outward. Please also rotate down the Cover
Lock to prevent the monitor from sliding out.
Warning: Please keep the " Rear Dock Port" downward in the Protecve
Cover. If the monitor is put upside down in the Protecve Cover, it may
cause the scratches and the Cover Locks cannot be locked on.
Secon 4 Connect to Headphone or Speaker
On-Lap 1102's audio jack supports both analog audio and digital audio
(opcal) outputs. When your desktop, video game console or DVD player
inputs 5.1 surround-sound digital audio to On-Lap 1102, the Monitor is able
to output opcal digital audio to any digital sound systems. Please refer to
the g.
6
Fig.: Analog audio output

7
Fig.: Opcal audio output
Secon 5 Connect to Camera / Mount on Tripod (Only for On-Lap 1102H)
As the g., rstly use three M2x5mm screws to x the monitor to 1102 Tri-
pod Mount Kit (1/4" screw hole). Then, fasten the 1/4" screw on the camera
tripod to the 1/4" screw hole at the buon of the Tripod Mount Kit.
Secon 6 Lay Touch Monitor Flat with 1102 Mul Mount Kit
As the g., rstly use three M2x5mm
screws to x the monitor to the Monitor
Bracket. Aer selecng the viewing angle
of 75°,62°,42° or 25°, use two M4x5mm
screws to x Bracing Plate to the Monitor
Bracket.

Secon 7 Install 1102 to VESA 75 monitor Arm or Wall Mount
(With 1102 Mul Mount Kit)
As the g., rstly use three M2x5mm screws to x the monitor to the Moni-
tor Bracket.Then use four M4x5mm screws to x the Monitor Bracket to the
arm.
Secon 8 Install Rear Dock
As the g., remove the rubber bung at the rear of the monitor.
Insert "Rear Dock" to the rear port on the 1102 and screws it up. Users can
plug in computer sck ( such as Intel® Compute Sck) or HDMI wireless
display adapter (such as Microso® Wireless Display Adapter) to the HDMI-
A port of Rear Dock. Please press the menu buon on the monitor to enter
OSD menu and choose "HDMI 2" as "Input Source."
Fig.: Install Rear Dock
8
Warning: The 1102H built-in baery only powers 1102 monitor. The
baery can't power Rear Dock or the devices installed on it, such as Wire-
less Display Adapter.

Fig.: Install Compute Sck Fig.: Install Wireless Adapter
Secon 9 Install On-Lap Proprietary HDMI-A & USB-A to Dock Port
Cable
As the g., remove the rubber bung
at the rear of the monitor rstly.
Insert "On-Lap Proprietary HDMI-A
& USB-A to Dock Port Cable" to the
rear port of 1102, and then screw it
up. Plug in USB-A connector to
computer's USB port; HDMI-A con-
nector to computer's HDMI port.
Please press the menu buon of
the monitor to enter OSD menu
and choose "HDMI 2" as "Input
Source."
Fig.: Install On-Lap Proprietary HDMI-A & USB-A to Dock Port Cable
Chapter 3 Hot Keys, LED and OSD Instrucons
Secon 1 Hot Keys & LED Indicaons
Noce: If need to adjust “Increase/up ” or “Decrease/down ”
connuously , press the buon and don't release. Do not press two
buons at the same me, or it may cause no response or fault response.
LED Light Descripon :
LED Light: It shows green light when turning on On-Lap Monitor and shows
orange light when stand by. There is no light when the monitor is o. When
charging to 1102H's baery, it shows blue light.
9

Hot Keys Descripon :
Increase Volume/UP: Press this Button to show "Volume bar." In the OSD menu, press this
button to move up or to the left. Press and hold this button to increase the volume continu-
ously.
Decrease Volume/Down: Press this Button to show "Input Source." In the OSD menu, press
this button to move down or to the right. Press and hold this button to decrease the volume
continuously.
Menu/Select: Press the Menu Buon to launch OSD panel. In OSD panel, press
this buon to select and enter the next page.
Exit: In the OSD panel, press the Exit Buon to exit and back to the previous
page.
Power: Press the Power Buon to power on/o the Monitor.
If press both "Increase Volume/Down " and "Exit " at the same time, OSD will be reset
as the factory settings.
If press both " Increase Volume/Up " and "Decrease Volume/Down " at the same time,
you can enable "Mute" mode. Press these two buttons again to release mute mode.
Secon 2 OSD Descripon
When turning on On-Lap monitor at the rst me, the "Language Select"
menu appears on the le top. Please press " Menu/Select" buon to
choose the language you like, then the "Language Select" menu won't appear
next me. If press "Exit" buon to disable the "Language Select" menu, it
will appear again when powering on the monitor next me.
1. Basic Buon Operaon
Press buon to launch the OSD panel. Press or to view the items.
Press to launch the selected item. If the selected item has sub-items, press
again to launch the sub-items, and press or to select the sengs of
sub-items. To exit, press . Repeat the steps above to adjust the other
sengs.
2. Display Sengs
As the g. shown, enter "Display Sengs" to
adjust "Brightness", "Contrast", "Sharpness",
and the other funcons.
1) ECO Mode: The maximum brightness is at
50 in Eco Mode.
2) Auto Adjust: Launch "Auto Contrast Adjust"
and "Auto Brightness Adjust" to adjust
brightness and contrast automacally to
ensure the highest quality when displaying
moving images.
3. Color Sengs
1) Color Eect: In Color Eect, there are 4
modes: "Standard", "Photo", "Game", and
"Movie" oered to be selected.
2) Blue Light Reducon: Select "On" to reduc-
es the screen's blue light automacally.
3) Color Temperature: Select "Cool" to in-
crease the blue color of the image; Select
"Warm" to increase the red color of the
image. Select "User" to adjust the RGB color
sengs manually.
10

4. Aspect Rao
1) Aspect rao: When select "16:9 Full
Screen", the monitor displays a 16:9
image in full screen. When select 4:3, the
monitor displays a 4:3 image with le-
right side black borders to ll the 16:9
screen. When select "Original", the moni-
tor displays the image in its original size.
2) Overscan: only available when inpung
HDMI video signal (ex:1080P/720P).
Enabling this funcon allows you to cali-
brate the display area.
5. Manual Image Adjust
1) Auto Adjust: Adjust image settings automatical-
ly. Only available when inputting VGA video
signal.
2) H. Position: Move screen image to left/right.
3) V. Position: Move up/down screen image.
4) Clock: Adjust the pixel clock for horizontal
sweep. If the frequency is not correct, the screen
shows vertical stripes and the image is not pro-
portional.
5) Phase: Adjust the phase of the pixel clock signal.
With a wrong phase
adjustment, the screen shows horizontal disturb-
ances..
6. OSD menu:
1) Language Select: Change to the other language.
2) H. Position: Move the OSD menu to left/right.
3) V. Position: Move up/down the OSD menu.
4) OSD Timer(sec.): Adjust idle time before OSD
menu disappears.
5) OSD Transparency: Make the OSD menu trans-
parent to show the background.
6) Auto Power Off: Select "On" to launch this
function, when no image displayed on the
screen, the monitor will enter Stand-by mode,
and power off itself after 15 minutes.
Select "Off" to disable this function. The monitor will stay in Stand-by mode and will not
power off.
7) Power On/Off Indicator: Select "Off" to turn off the Power On/Off Indicator.
8) Power Button Lock: Select "On" to lock the Power Button.
7. Audio Settings: Adjust audio volume or select silent mode.
8. Input Source: Select Analog VGA source, HDMI1 digital video signal (from the left HDMI
port) or HDMI 2 digital video signal (from the HDMI port on Rear Dock). When no video
signal inputting to the selected input source, the monitor will detect other video signal
automatically.
9. Information: Show the frequency of the input image, On-Lap model, firmware ver-
sion ...etc.
1) Reset: Select "Yes" to reset to defaults.
11

Section 3 Battery Usage & Charging Guide (Only for On-Lap 1102H)
1. Before the first use of On-Lap1102H, please charge it for 3.5 hours.
2. Battery Charging: When On-Lap1102H displays image, the battery can't be charged.
Please press the Power button to shut-down the monitor or enter stand-by mode, and
then plug 5V 2A charger to begin charging. When the blue light is on, the charging begins.
3. After charging 3.5 hours, the light goes off to indicate that the battery has been fully
charged. Then please remove 5V2A charger.
4. Battery Use: When the USB power cable is not connected, press power button to turn on
1102H and adopt the battery power. At this time, the indicator light is green.
5. Charging Bar: When the monitor is on (green light), enter OSD menu, the power bar will
be shown on the upper right corner. When there is only one bar or zero left, which means
power low, please turn off 1102H and charging right away.
PS. When the monitor is off, lithium battery will self-discharge power gradually. It is sug-
gested to store 1102H with battery capacity more than 3 bars.
6. Battery Charging Bar Description
Fig.: Charging Bar Icon at the upper right corner of OSD menu
Power Bar Icon Power Status Remaining Time
About 100% About 4.5 hrs.
About 75% About 3.3 hrs.
About 50% About 2.5 hrs.
About 25% About 0.8 hrs.
The remaining me is esmated based on brightness 70 and Volume 50.
The power consumes quicker if the brightness and volume is set higher.
When there is only one bar le , the
power voltage drops quickly and the moni-
tor will appear "Insucient Power" cau-
on on the screen. Then the monitor en-
ters ECO Mode or cannot work normally.
please shut down the monitor right away.
Fig.: Insucient Power cauon
12

Chapter 4 Sengs of Extended Display
Secon 1 Sengs of Extended Display on Windows 10
Click , then select 【Settings】→ select【System】→ Select 【Display】 →
Choose "Extend these displays" at Multiple displays.
Select "1920x1080" at Resolution; Select "Landscape" at Orientation for horizontal dis-
play, select "Portrait" for vertical display. Click Apply and exit.
Secon 2 Sengs of Extended Display on Mac (OS X)
Click , then select 【System Preference】→ choose 【Arrangement】
tab, and uncheck "Mirror Displays". Select one of the blue rectangles, and
drag to the desired posion.
Click【Display】tab, select resolu-
on of the laptop rstly, then click
"Gather Windows", and select reso-
luon to "1080p" for On-Lap 1102.
For vercal display, select 90゚at
"Rotaon"
13

14
Chapter 5 Using Touch Monitor (Only for 1102I)
Secon 1 Noces
1. Computer with operang system of Windows
10/7 supports On-Lap 1102I's touch funcon.
If computer does not be equipped with Win-
dows 10/7, it may not be able to use On-Lap
1102I's touch funcon. Please be noced
whether the computer's operang system
supports an external touch monitor.
2. As the g., USB power & touch cable ① can
transmit both power and touch signal at the same me; ② only can trans-
mit power. If ① connector does not connect to computer's USB port , then
touch funcon will be no longer available.
Secon 2 Windows 10/7 Touchscreen Sengs
If your computer does not enable touch screen funcon automacally or rec-
ognize mul-screen, then touch screen will not sense touch posion accurate-
ly. Please use Windows 10/7 "Tablet PC Sengs" of Control Panel to start
touch screen sengs.
In Windows 10, search "Calibraon" at 'Sengs', then select "Calibrate the
screen for pen or touch input." In Windows 7, select "Tablet PC Sengs" at
Control Panel to start touch sengs.
As the g. below, please select "Sengs (S)", and follow Windows on-screen
instrucons to calibrate the touch points on On-Lap 1102 to complete touch
sengs.
Other manuals for 1102
1
Table of contents
Other GeChic Monitor manuals

GeChic
GeChic On-Lap 1002 User manual

GeChic
GeChic On-Lap 1306H-R User manual

GeChic
GeChic 1102 User manual

GeChic
GeChic On-Lap 1305H User manual

GeChic
GeChic T1 Series User manual

GeChic
GeChic On-Lap 1502 User manual

GeChic
GeChic On-Lap M505E User manual

GeChic
GeChic On-Lap M505T/I User manual

GeChic
GeChic On-Lap 2101H User manual

GeChic
GeChic M161H-R1 User manual