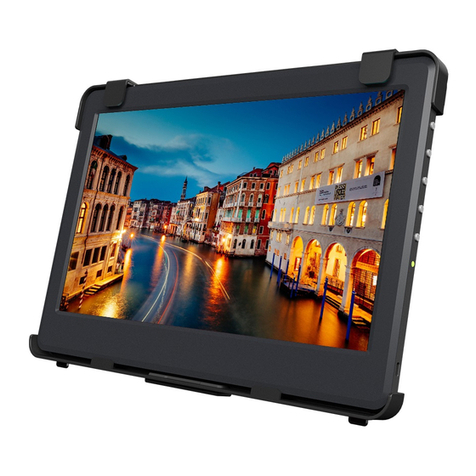
GeChic M161H-R1 User manual

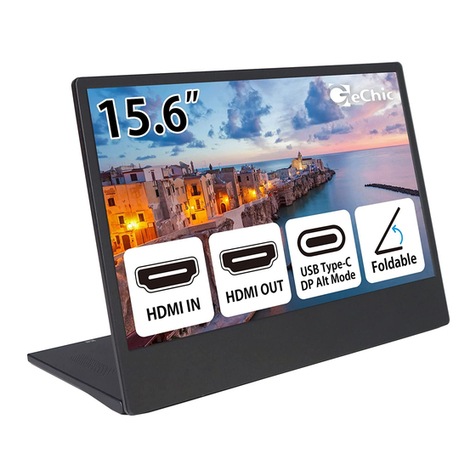
M161H-R1 Monitor
User Manual
How-to’s
23.03.15

The sign alerts you to potential hazards that can hurt you or damage the product.
1. Use only the power supply and power cord that comes with this monitor. Using
other power adapter may cause malfunction or danger.
2. It is recommended to use the monitor in a well-ventilated environment at room
temperature around 0 to 40 and humidity around 45 to 85 . The monitor
should display continuously changing images rather than displaying the same and a
still image for a long time. If you need to use this monitor in an abnormal environ-
ment such as high temperature, high humidity, conned space, low atmospheric
pressure, etc., please contact Gechic customer service center for further advice on
usage environment.
3. When plugging in/out the cables, do make sure the force exerts in horizontal direc-
tion and do not shake the plug in vertical direction. Any damage caused by wrong
plug urging is not included in the warranty coverage.
4. Cleaning On-Lap Monitor: Unplug the power input before cleaning. Please use soft
cloth to clean touch screen. For stubborn stains, please use lightly-dampened cloth to
wipe again. Do not use benzene, alcohol, thinner, ammonia, abrasive cleaners, com-
pressed air or other corrosive solvents. These solvents may cause permanent dam-
age on the screen or leave unremovable stain.
5. Do not expose the LCD panel to sunlight.
6. The product is not waterproof. Do not use this product in or near water.
7. Do not use the volume that may cause damage to hearing; when connecting head-
phones to use, please lower the volume setting rst. Slowly adjust to the appropriate
volume, do not wear headphones for long, continuous, high volume to avoid hearing
damage.
8. Overuse of the monitor may result in vision damage. For every 30 minutes with the
monitor, give your eyes 10 minutes break. Avoid children under aged 2 watching the
monitor; prevent children over aged 2 from watching with the monitor over 1 hour per
day.
9.Exclusions from Warranty Service
Please read the warranty terms below carefully, and follow the usage guide and
precautionary notes. Please keep this manual for future reference. GeChic does not
warrant uninterrupted or error-free operation of this Product. The warranty only
covers failure /malfunction under normal use conditions during warranty period. The
warranty does not apply to the following conditions:
(1)The bar code has been removed or worn down, and cannot be identied.
(2)This product has been modied, disassembled, or retted.
(3)Display and touch function working normally; only variation in appearance (e.g., age-
ing, attrition, scratch, color changing and etc.).
(4)Any breakdown caused by power supply. (e.g., inputting power over rating voltage or
unsteady current)
(5)Any damage caused by disoperation or failure to follow this manual. (e.g., Plug or
unplug cables in wrong direction and causing damage on cables or the monitor.)
(6)Any damage caused by hitting or cracking monitor accidentally or purposely, or col-
lapsing or overturning monitor.
°C°C%%
◆
◆
Under the Partition
HDMI-A Video Cable
USB-A to USB-C Power Cable
5V 2A Adapter
Sleeve(16A4)
USB Type-C Video Cable

◆
Optional Accessory Description
M1S4 Stand Insert the quick-release port of M16 monitor into M1S4
stand and you can use the monitor above the laptop.
M16 VESA 75 Aluminum
Alloy Bracket
With 4 VESA 75 screw holes and a 1/4” screw hole for
screwing M16 monitor on a VESA arm, mounting on the
wall or installing on the camera cradle head of tripod.
USB Type-C Video
Cable (2M)
Connect one end to computer's USB-C (DP Alt) port,
and the other end to M16's USB-C port to transmit
audio, video signals and power at the same time.
HDMI-A to mini-HDMI
Video Cable (2.1 M)
Connect mini-HDMI plug to camera and connect HDMI-
A plug to M16 monitor.
LED Power Indicator
It shows green light when the monitor is "On" and shows red
light when the monitor is stands by. There is no light when
the monitor is "O".
Power
Press once to turn on the monitor and press again to turn
o the monitor.
Reset: Press and hold for 5 seconds to reset the OSD set-
tings to default.
Exit/ Input Source
Press this button to show "Input Source" and then press
to switch the input sources. When using the OSD menu,
press this button to return to previous page.
Menu/ Select
Press this button to launch OSD panel. When using OSD
menu, press this button to select and enter the next page.
Increase Volume/ Up or Left
Press this button to show ”Volume bar”. Press and hold this
button to increase the Volume continuously. In the OSD
menu, press this button to move up or the left.
Decrease Volume/ Down or Right
Press this button to show ”Volume bar”. Press and hold this
button to decrease the Volume continuously. In the OSD
menu, press this button to move down or the right.
+ OSD Menu Unlock
Press these two buttons at the same time to release ”OSD
Menu Lock” and enable the functions of OSD buttons.


As shown in the g., use GeChic USB Type-C video cable (optional) to con-
nect the monitor's USB-C port to the computer's USB Type-C(DP Alt) port.
The computer outputs power and video signals through its USB Type-C
port, so there is no need to connect the power adapter and HDMI cable. To
output audio, please connect headphones or speakers to the headphone
out jack of the monitor.
Notice! The USB Type-C ports on the computer or phone must:
1. support DisplayPort Alternate Mode (USB Type-C(DP Alt Mode)).
2. be able to stably output 5V 2.0A current to the monitor (if the phone cannot
supply sucient current, please connect the adapter to DC IN port of the
monitor.)

The Gechic label is on the FRONT of the sleeve, which is the thick side to
protect the screen panel. Please put the thick side of the sleeve up, put the
monitor into the sleeve with the panel upward, and then stick the hook and
loop tape.
Caution! DO NOT put the monitor into the sleeve with its panel side toward
the back of sleeve. The panel side must face the thick side of the sleeve to
protect the panel from being broken.
Caution! Do not put items on the sleeve or hit the sleeve vigorously, other-
wise the screen panel will be broken.
Thick Side
Slim Side
Panel Side
As shown in the g., use USB-A to USB-C power cable to connect the moni-
tor's DC IN port to 5V 2A adapter (or two USB-A ports of the computer) and
connect monitor's HDMI input port to the computer by HDMI-A video cable,
game console or other devices. When you need to output audio, please con-
nect headphones or speakers to the headphone out jack of the monitor.
To 5V 2A Power
WARNING ! Please use the HDMI-A cable
included in this product in priority.
The top side of the HDMI-A plug shell must be
less than 3mm thick, otherwise it will put pres-
sure and cause malfunction on the monitor.

Use the M16 VESA 75 Aluminum Alloy Bracket (optional) to secure M161H
monitor to a monitor arm, wall mount or T1S2 Stand (optional). As shown in
the g., please follow below assembly steps :
○
1Use two M4 screws to screw the M16 VESA 75 Aluminum Alloy Bracket to
the screw holes on the back of the monitor.
○
2Use four M4 screws to screw M16 monitor to the monitor arm, wall mount
or T1S2 stand.
Monitor Arm
T1S2 Stand
1/4” Screw Hole

◆
As shown in the Fig., enter "Display Settings"
to adjust "Brightness", "Contrast",
"Sharpness", etc.
1. ECO Mode: The maximum brightness is at
50 in ECO Mode.
2. Auto Adjust: Launch "Auto Contrast Adjust"
and "Auto Brightness Adjust" to adjust
brightness and contrast automatically to
ensure the highest quality when displaying moving images.
3. Aspect Ratio: When "Full Screen(16:9)" is selected, the monitor displays a
16:9 image in full screen. When "4:3" is selected, the monitor displays a 4:3
image with left-right side black borders to ll the 16:9 screen. When
"Original" is selected, the monitor displays
the image in its original size.
◆
1. Color Eect: If the output format of com-
puter image is RGB Limited, it is recom-
mended to select "Standard1"; if it is RGB
Full format, it is recommended to select
"Standard2". Select "Dark Highlight" mode
to brighten up dark areas; select "Text"
mode to make HTML text clearer.
2. Blue Light Reduction: Select "On" to reduce
the screen's blue light automatically.
3. Color Temperature: Select "Cool" to in-
crease the blue color of the image; Select
"Warm" to increase the red color of the
image. Select "User" to adjust the RGB
color settings manually.
◆
1. Auto Power O: Select "Yes" to activate
this function. When there is no image input,
the monitor will enter Standby mode, and
power o itself after 270 seconds. The
power button shall be pressed to turn on
the monitor again. Select "No" to disable
this function. The monitor will remain in
standby mode and will not switch o the
power.

2. Power On/O Indicator : Select “No” to turn o the power on/o indica-
tor.
3. OSD Button Lock : If "On" is selected, the four OSD buttons are disabled.
Press and hold the power button for 5 seconds, the monitor will restore
factory settings and enable the four OSD buttons again. (Hot-Key: Press-
ing two buttons at the same time will release OSD Button Lock and
enable the OSD buttons)
4. CEC Mode: When "On" is selected and connect to a computer with HDMI
CEC function, user may switch the monitor and computer synchronously.
When switching the computer o, the monitor will be turned o at the
same time. However, when switching the computer on , the monitor can't
be turned on automatically. Please turn on the monitor by pressing power
button.
5. Overscan: Only applicable to HDMI video signal input (such as
1080P/720P, etc.). Enabling this function will calibrate the display range
automatically.
◆
1. Language Select: Change to the other
language.
2. H. Position: Move the OSD menu left/right.
3. V. Position: Move the OSD menu up/down
4. Timer (sec): Adjust the idle time before
OSD menu disappears.
5. Transparency: Make the OSD menu trans-
parent to show the background.
◆
Adjust the audio volume or activate the mute mode. When “On” is selected
for “Mute”, the monitor stops playing audio and the sound can only be
played again after “ Mute” mode is turned o.
◆
1. Input Source: Select HDMI (video input via
HDMI-A port) or USB Type-C (video input
via USB Type-C port).
2. Auto Search: When "On" is selected, the
monitor will detect two video input
sources in sequence, and the monitor will
show the rst video input read. When "O"
is selected, only the video source selected
in Input Source will be displayed. If there is
no such selected video input, the monitor
will show "No signal" warning message,
and won’t detect other video sources.
◆
Show frequency of the input image, model name, rmware version, etc.

Panel Wide Screen 16.1 inch(16:9)
Resolution 1920x1080
Color Depth 16.7M Colors
Brightness 270 (cd/m²) (Typ.)
Contrast 1000:1 (Typ.)
Viewing Angle 170°(H)/170°(V)(CR>10)
Response Time 15ms (Typ.)
Video Input HDMI-A*1、USB Type-C (DP 1.2)*1
Audio Output Earphone Jack(3.5mm mini jack)
(Support Analog 3.5mm AUX)
Support HDCP、HDMI CEC
VESA Mount VESA 75(75mm×75mm) & 1/4” screw hole × 1
Power Spec.
Rating Power: 5V 2.0A(Typ.)
Power Consumption-On: ≦10W
Power Consumption-Standby: ≦0.3W
Power Consumption-O: ≦0.1W
Environment
Conditions
Operational: 0~50℃
Storage -20~60℃
Dimension
(W×H×D)
W×H: 369mm × 232mm
D: 7mm~ 19mm
Weight (Typ.)784g
Certication
R53848
RoHS
1920x1080P(50Hz/59.94Hz/60Hz) 1280x720P(50Hz/59.94Hz/60Hz)
720x480P(59.94Hz/60Hz) 640x480P(59.94Hz/60Hz)

Resolution Refresh Rate Horizontal Frequency
(kHz)
Vertical Frequency
(kHz)
640x480 60Hz 31.469 59.940
720x480 60Hz 29.855 59.710
800x600 60Hz 37.879 60.317
848x480 60Hz 31.02 60.000
960x600 60Hz 37.212 59.635
1024x768 60Hz 48.363 60.004
1152x864 60Hz 53.783 59.959
1280x600 60Hz 37.377 59.900
1280x720 50Hz 37.500 50.000
1280x720 60Hz 45.000 60.000
60Hz 44.772 59.855
1280x768 60Hz 47.776 59.870
1280x800 60Hz 49.702 59.810
1280x960 60Hz 60.000 60.000
1280x1024 60Hz 63.981 60.020
1360x768 60Hz 47.712 60.015
1366x768 60Hz 47.712 59.790
1360x1024 60Hz 63.606 59.836
1400x1050 60Hz 65.317 59.978
1440x900 60Hz 55.935 59.887
1600x900 60Hz 55.990 59.946
1600x1024 60Hz 63.675 59.901
1680x1050 60Hz 65.290 59.954
1920x1080 50Hz 56.250 50.000
1920x1080 60Hz 67.500 60.000
60Hz 66.587 59.934

Scan the QR Code to Find FAQs and Solutions.
Problem Solution
1. How to set M16 screen and
laptop as extended dis-
play?
On Windows 11/10, please go to Settings →
System →Displays, under Multiple Displays,
select "Extend these Displays".
On Mac OS X, please go to System Prefer-
ences →System →Displays, click
"Arrangement". Uncheck "Mirror Displays",
then you can use the extended mode.
2. There is no image while
connecting PC or
smartphone by USB-C port
Your PC or smartphone must support USB
Type-C display port Alternate Mode (USB-
C DP alt mode). Please contact the manu-
facturer of your PC/smartphone to conrm
whether USB-C DP alt mode is supported.
3. The monitor connected to
my smartphone via its USB
Type-C port ickers or
restarts sometimes.
Smartphone may not be able to output
stable 5V 2A current to the monitor. Please
connect the 5V power adapter to the DC IN
port on the monitor.

This product needs to be recycled at an appropriate recycling point. Do not
mix it with household waste.
This symbol on the product, accessories or literature indicates
that this product and its electronic accessories (e.g., adapter,
cables) must not be disposed of with your other household
waste. Instead, it is your responsibility to dispose of these
items by handing it over to a designated collection point for
the recycling of waste electrical and electronic equipment. For
more information about where you can drop o your waste
equipment for recycling, please contact your local city oce, your house-
hold waste disposal service or the shop where you purchased the product.
For Disposal in Countries Outside of the European Union
If you wish to discard this product and its accessories in other area and
countries, please contact your local government for applicable laws and
regulations governing the disposal of this product.
There is slightly uneven brightness on the screen when displaying dierent
screen pattern. The LCD screen has 99.99% or more eective pixels. 0.01% of
pixels or less may not light or may light incorrectly. The On-Lap monitor
uses a high quality LCD panel. Nevertheless, pixels on the LCD screen may
not light or appear as red or black dots. All the above are normal with the
LCD monitor and will not aect the normal usage of the product. Avoid
placing the monitor against sun-light, or it may damage the monitor.

Notice: This equipment has been tested and found to comply with the
limits for a class B digital device, pursuant to part 15B of the FCC
Rules. These limits are designed to provide reasonable protection
against harmful interference in a residential installation.
If this equipment does cause harmful interference to radio or television
reception, which can be determined by turning the equipment o and on,
the user is encouraged to try to correct the interference by one or more of
the following measures:
˙Reorient or relocate the receiving antenna.
˙Increase the separation between the equipment and receiver.
˙Connect the equipment into an outlet on a circuit dierent from that to
which the receiver is connected.
˙Consult the dealer or an experienced radio/TV technician for help.
Caution:
1. Changes or modications not expressly approved by GeChic Corp. could
void the user's authority to operate the equipment.
2. Shielded interface cables and AC power cord, if any, must be used in
order to comply with the emission limits.
3. The manufacturer is not responsible for any radio or TV interference
caused by unauthorized modication to this equipment. It is the respon-
sibilities of the user to correct such interference.
11F-3, No. 138, Zhongming S. Rd.,
West Dist., Taichung, Taiwan
Customer Service: service@gechic.com
Table of contents
Other GeChic Monitor manuals

GeChic
GeChic On-Lap M505E User manual

GeChic
GeChic On-Lap 2101H User manual

GeChic
GeChic On-Lap 1502 User manual

GeChic
GeChic On-Lap M505T/I User manual

GeChic
GeChic OnLap 1302 User manual

GeChic
GeChic On-Lap M505E User manual

GeChic
GeChic 1305 Instruction sheet

GeChic
GeChic On-Lap 1302 User manual

GeChic
GeChic T1 Series User manual

GeChic
GeChic On-Lap 2501 Series User manual
Popular Monitor manuals by other brands

Ikan
Ikan Atlas AX20-FK-V2 quick start guide

Ikegami
Ikegami MLM-1582C instruction manual

Panasonic
Panasonic TH-50PB2W operating instructions

LG
LG UltraGear 38GL950G owner's manual

PureAire Monitoring Systems
PureAire Monitoring Systems Air Check Advantage Ex instruction manual

Sony
Sony FD Trinitron CPD-G500 Service manual