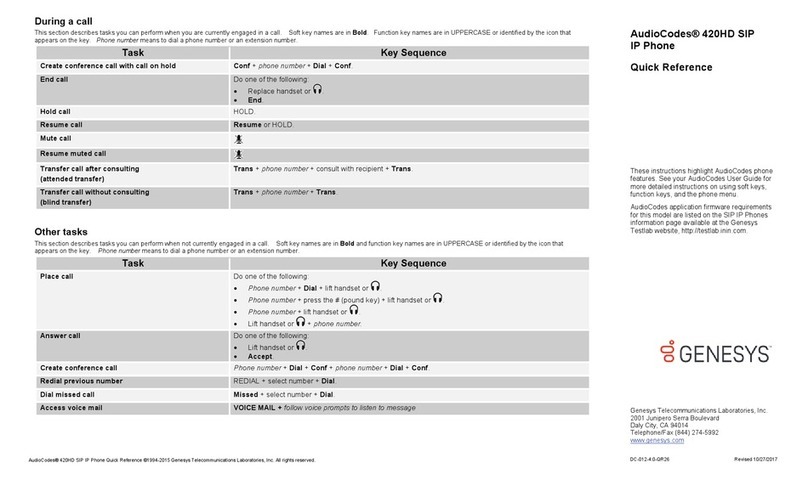
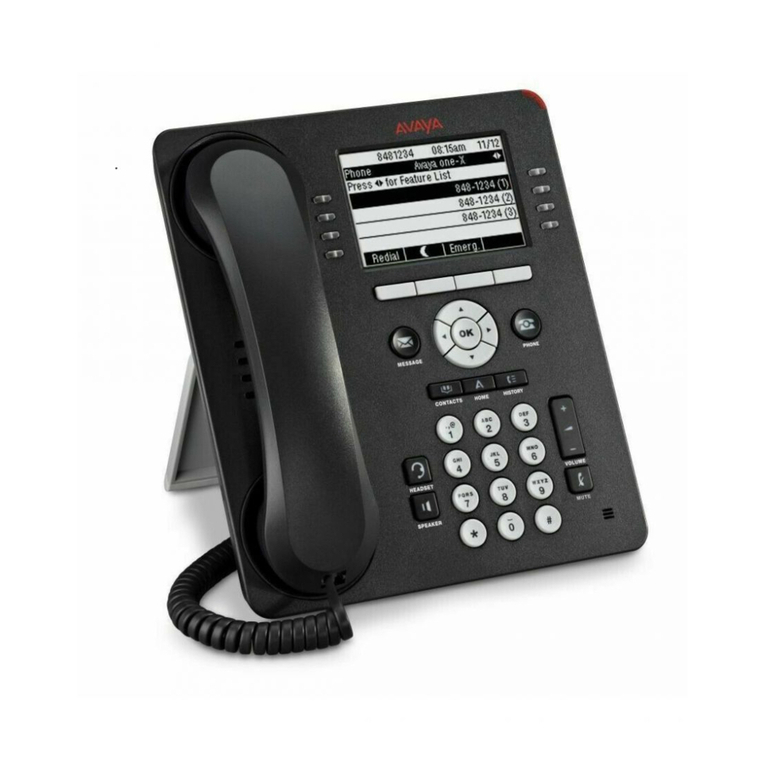
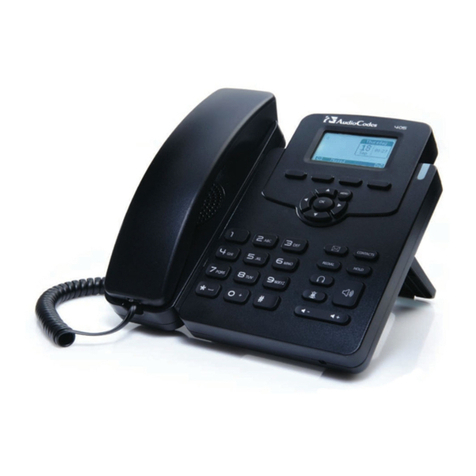
Genesys AudioCodes 420HD User manual

420HD IP Phone
User’s Guide

The information contained herein is proprietary and confidential and cannot be disclosed
or duplicated without the prior written consent of Genesys Telecommunications
Laboratories, Inc.
Copyright © 2016 Genesys Telecommunications Laboratories, Inc. All rights reserved.
About Genesys
Genesys is the world's leading provider of customer service and contact software -
with more than 4,000 customers in 80 countries. Drawing on its more than 20 years of
customer service innovation and experience, Genesys is uniquely positioned to help
companies bring their people, insights and customer channels together to effectively
drive today's customer conversation. Genesys software directs more than 100 million
interactions every day, maximizing the value of customer engagement and
differentiating the experience by driving personalization and multi-channel customer
service - and extending customer service across the enterprise to optimize processes
and the performance of customer-facing employees. Go to www.genesys.com for
more information.
Each product has its own documentation for online viewing at the Genesys
Documentation website.
Notice
Although reasonable effort is made to ensure that the information in this document is
complete and accurate at the time of release, Genesys Telecommunications
Laboratories, Inc. cannot assume responsibility for any existing errors. Changes
and/or corrections to the information contained in this document may be incorporated
in future versions.
Your Responsibility for Your System’s Security
You are responsible for the security of your system. Product administration to prevent
unauthorized use is your responsibility. Your system administrator should read all
documents provided with this product to fully understand the features available that
reduce your risk of incurring charges for unlicensed use of Genesys products.
Trademarks
Genesys and the Genesys logo are registered trademarks of Genesys
Telecommunications Laboratories, Inc. All other company names and logos may be
trademarks or registered trademarks of their respective holders. © 2016 Genesys
Telecommunications Laboratories, Inc. All rights reserved.
Technical Support from VARs
If you have purchased support from a value-added reseller (VAR), please contact the
VAR for technical support.
Ordering and Licensing Information
Complete information on ordering and licensing Genesys products can be found in the
Genesys Licensing Guide.
Released by: Genesys Telecommunications Laboratories, Inc.
http://www.genesys.com/
Document Version: 420HD_IP_Phone_User_Guide_05-2016v8.5.001.00

Genesys 420HD IP Phone User's Manual Contents
Genesys 420HD IP Phone User's ManualVersion 2.2.8 3
Table of Contents
1Introducing the 420HD IP Phone................................................................................9
1.1 About Genesys' Series of High Definition IP Phones.......................................................9
1.2 Complete Range of Phones............................................................................................9
1.3 Cutting Edge Voice Quality & HD VoIP ...........................................................................9
2Setting up the Phone.................................................................................................11
2.1 Unpacking.....................................................................................................................11
2.2 Device Description........................................................................................................11
2.2.1 Front View..........................................................................................................................11
2.2.2 Rear View ..........................................................................................................................13
2.3 Cabling..........................................................................................................................14
2.4 Mounting the Phone...................................................................................................... 15
2.4.1 Mounting the Phone on a Desk .........................................................................................15
2.4.1.1 Routing the Handset Cable ................................................................................15
2.4.2 Mounting the Phone on a Wall...........................................................................................16
3Getting Started...........................................................................................................17
3.1 LCD in Idle State...........................................................................................................17
3.1 LCD in Ongoing Call State............................................................................................17
3.2 Default Softkeys............................................................................................................18
3.3 Accessing Menus..........................................................................................................19
3.4 Entering Numbers, Alphabetical Letters and Symbols...................................................20
3.5 Displayed Messages.....................................................................................................22
4Customizing Your Phone..........................................................................................23
4.1 Selecting Language ......................................................................................................23
4.2 Selecting Ring Tone......................................................................................................23
4.3 Enabling Call Waiting....................................................................................................24
4.4 Setting Date and Time .................................................................................................. 24
4.5 Changing LCD Contrast Level....................................................................................... 25
4.6 Setting the LCD Backlight Timeout................................................................................25
4.7 Changing the Default Answer Device............................................................................ 25
4.8 Restarting the Phone ....................................................................................................26
4.9 Adjusting Volume..........................................................................................................26
4.9.1 Adjusting Ring Volume.......................................................................................................26
4.9.2 Adjusting Tones Volume....................................................................................................26
4.9.3 Adjusting Handset Volume ................................................................................................27
4.9.4 Adjusting Speaker Volume ................................................................................................27
4.9.5 Adjusting Headset Volume ................................................................................................27
4.10 Defining Call Forwarding...............................................................................................28
4.11 Managing Your Personal Directory................................................................................29
4.11.1 Accessing the Directory.....................................................................................................29
4.11.2 Adding Contacts to the Personal Directory........................................................................29
4.11.3 Editing a Contact................................................................................................................30
4.11.4 Deleting a Contact .............................................................................................................31
4.11.5 Searching for a Contact.....................................................................................................31
4.12 Configuring Keys...........................................................................................................32
4.12.1 Configuring Function Keys [as Speed Dials] .....................................................................32
4.12.1.1 Editing a Function Key Configured as a Speed Dial ..........................................33
4.12.1.2 Deleting a Function Key Configured as a Speed Dial........................................33

4 Version 2.2.8
4.12.2 Softkeys .............................................................................................................................33
4.12.2.1 Programmable SoftKeys (PSKs)........................................................................34
4.12.2.2 Configuring Softkeys ..........................................................................................35
4.12.3 Deleting a Configured Softkey...........................................................................................36
4.12.3.1 Configuring a Softkey as a Speed Dial...............................................................36
4.12.3.2 Configuring a Softkey as a Speed Dial + BLF....................................................37
4.12.4 Configuring a Navigation Key Position Function ...............................................................37
4.12.4.1 Removing a Configured Function.......................................................................38
5Performing Basic Operations...................................................................................39
5.1 Using Audio Devices.....................................................................................................39
5.2 Making Calls .................................................................................................................39
5.2.1 Dialing................................................................................................................................40
5.2.2 Redialing............................................................................................................................40
5.2.3 Dialing a Missed Call .........................................................................................................41
5.3 Answering Calls............................................................................................................41
5.4 Rejecting Incoming Calls...............................................................................................42
5.5 Silencing Incoming Calls............................................................................................... 42
5.6 Ending an Established Call ...........................................................................................42
5.7 Viewing Missed, Received and Dialed Calls..................................................................42
6Performing Advanced Operations ...........................................................................45
6.1 Answering Waiting Calls ...............................................................................................45
6.2 Placing Calls On Hold...................................................................................................45
6.3 Calling a Contact Listed in the Directory........................................................................45
6.4 Enabling Auto Redial.....................................................................................................46
6.5 Pressing a Speed Dial Key to Make a Call....................................................................47
6.6 Transferring Calls..........................................................................................................47
6.6.1 Performing an Attended Transfer ......................................................................................47
6.6.2 Performing a Semi-Attended Transfer...............................................................................49
6.6.3 Performing a Blind Transfer...............................................................................................50
6.7 Hosting 3‐Way Conference Calls ..................................................................................51
6.7.1 Leaving a 3-Way Conference You Set up without Disconnecting the Others ...................51
6.8 Muting Calls..................................................................................................................51
6.9 Activating Do Not Disturb..............................................................................................52
6.10 Retrieving Voice Mail Messages ...................................................................................52
6.11 Using Two Lines ...........................................................................................................53
6.11.1 Choosing an Extension Line..............................................................................................53
6.11.2 Making a Call on an Extension Line ..................................................................................53
6.11.3 Making Two Calls on a Line...............................................................................................54
6.11.4 Making Multiple Line Calls.................................................................................................54
6.11.5 Toggling Between Multiple-Line Calls................................................................................54
6.11.6 Toggling Between Calls on the Same Line........................................................................55
6.11.7 Answering Calls.................................................................................................................55
6.11.8 Ending Calls.......................................................................................................................55
6.12 Logging into a Remote HTTP/S Server.........................................................................56
7Troubleshooting........................................................................................................57
ASpecific Third-Party Features...................................................................................59
A.1 BroadSoft......................................................................................................................59
A.1.1 Monitored Lines Based on BroadSoft's BroadWorks BLF Service....................................59
A.1.2 Softkey Display and Command Menu Options..................................................................60
A.1.2.1 Presence Management ......................................................................................60
Genesys 420HD IP Phone User's Manual Contents
Genesys 420HD IP Phone User's ManualVersion 2.2.8 5
A.1.2.2 Setting Unavailability Status...............................................................................61
A.1.2.3 Setting Availability Status...................................................................................62
A.1.2.4 Logging Out........................................................................................................62
A.1.3 Viewing Missed Calls.........................................................................................................62
A.1.4 Configuring Do Not Disturb (DnD) .....................................................................................63
A.1.5 Configuring Automatic Forwarding ....................................................................................63
A.1.6 Configuring the 'Forward No Reply' Timeout as Number of Rings....................................63
A.1.7 Automatically Receiving an External Line .........................................................................64
A.1.8 Viewing VOICEMAIL Indications Per Line.........................................................................64
A.1.9 Listening in Capability for Call Center Supervisors ...........................................................64
A.1.10 Recording an Agent's Welcome Greeting..........................................................................65
A.2 Genesys' Contact Centers ............................................................................................66
A.2.1 Softkey Display and Command Menu Options..................................................................66
A.2.1.1 Using the Newer BroadSoft-Style ACD..............................................................67
A.2.2 Presence Management......................................................................................................68
A.2.3 Logging In ..........................................................................................................................68
A.2.4 Setting Unavailability Status ..............................................................................................69
A.2.5 Settings Availability Status.................................................................................................69
A.2.6 Logging Out .......................................................................................................................69
A.2.7 Configuring Do Not Disturb (DnD).....................................................................................70
A.2.8 Configuring Automatic Forwarding ....................................................................................70
A.2.9 Listening in Capability for Call Center Supervisors ...........................................................70
A.2.10 Recording an Agent's Welcome Greeting..........................................................................71

6 Version 2.2.8
List of Figures
Figure 2-1: Front View......................................................................................................................................12
Figure 2-2: Rear View.......................................................................................................................................13
Figure 2-3: Cabling...........................................................................................................................................14
Figure 3-1: LCD in Idle State............................................................................................................................17
Figure 3-2: LCD in Ongoing Call State.............................................................................................................17
Figure 3-3: Menus.............................................................................................................................................19
Figure 3-4: Alphanumerical Selection...............................................................................................................20
Figure 3-5: Selected Alphanumerical Mode (Abc)............................................................................................20
Figure 3-6: Entering a Symbol such as a Full Stop..........................................................................................21

Genesys 420HD IP Phone User's Manual Contents
Genesys 420HD IP Phone User's ManualVersion 2.2.8 7
List of Tables
Table 2-1: Font View Description .....................................................................................................................12
Table 2-2: Rear View Description.....................................................................................................................13
Table 3-1: LCD in Idle State .............................................................................................................................17
Table 3-2: LCD in Ongoing Call State..............................................................................................................17
Table 3-3: Default Softkeys for all Menus.........................................................................................................18
Table 3-4: Messages Displayed on LCD Indicating Processes In Progress....................................................22
Table 4-1: Configurable Softkeys .....................................................................................................................34
Table 7-1: Troubleshooting...............................................................................................................................57
Table A-1: Broadsoft-Softkey Display States and Command Menu Options...................................................60
Table A-2: Genesys-Softkey Display States and Command Menu Options....................................................66
Table A-3: Genesys Contact Center Phones' Newer BroadSoft-Style ACD....................................................67

8 Version 2.2.8
Notice
This document shows how to use the Genesys 420HD IP Phone.
Information contained in this document is believed to be accurate and reliable at the time of printing.
However, due to ongoing product improvements, Genesys cannot guarantee accuracy of printed
material after the Date Published nor can it accept responsibility for errors or omissions. Updates to
this document and other documents as well as software updates can be viewed on the Genesys
documentation site at docs.genesys.com.
© Copyright 2016 Genesys Telecommunication Laboratories. All rights reserved.
This document is subject to change without notice.
Date Published: 30 April 2016
.
WEEE EU Directive
Pursuant to the WEEE EU Directive, electronic and electrical waste must not be disposed of with
unsorted waste. Please contact your local recycling authority for disposal of this product.
Customer Support
If you have purchased support directly from Genesys, please read the Genesys Care Support
Guide for On-Premises for complete information on how and when to contact Customer Care.
Abbreviations and Terminology
Each abbreviation, unless widely used, is spelled out in full when first used.
Documentation Feedback
If you especially like or dislike anything about this document, feel free to e-mail your comments to
Techpubs.webadmin@genesys.com.
When you send us comments, you grant Genesys a nonexclusive right to use or distribute your
comments in any way it believes appropriate, without incurring any obligation to you.
Related Documentation
Document Name
400HD Series IP Phone Release Notes
400HD Series IP Phone Administrator's Manual
420HD IP Phone Quick Guide

Genesys 420HD IP Phone User's Manual 1. Introducing the 420HD IP Phone
Genesys 420HD IP Phone User's ManualVersion 2.2.8 9
1 Introducing the 420HD IP Phone
Genesys’420HD IP Phone is based on Genesys’High Definition voice technology, providing
clarity and a rich audio experience in Voice-over-IP (VoIP) calls. The 420HD is a
two-line, two concurrent calls per line premium model which includes a large monochrome multi-
language graphic LCD display.
The 420HD IP Phone is a fully-featured telephone that provides voice communication over an IP
network, allowing you to place and receive phone calls, put calls on hold, transfer calls, make
conference calls, etc.
Read this User’s Manual to learn how to operate this product and take advantage of its multiple
features.
1.1 About Genesys' Series of High Definition IP Phones
Genesys Series of High Definition IP Phones offers a new dimension of voice call quality and
clarity for the IP Telephony market. This new series of IP Phones further expands Genesys’ VoIP
product offering for the service providers’ hosted services, Enterprise IP telephony and Enterprise
contact centers markets. As a natural addition to the Genesys Mobile Clients, Media Gateway,
Media Server & Multi-Service Business Gateway products, the Genesys Series of High Definition
IP Phones enable Systems Integrators and end-customers to build end-to-end solutions that rely
on Genesys’ technological advantage and proven track record in providing state-of-the-art
products. The Genesys Series of High Definition IP Phones meet a growing demand for High
Definition VoIP solutions in end-user phones and terminals, improving the productivity and
efficiency of business communications with new quality standards set by the High Definition voice
technology.
1.2 Complete Range of Phones
Genesys’ 400HD Series of High Definition IP Phones are well suited to the requirements of
different types of business users.
The series currently includes the following:
The 420HD phone with two lines (two concurrent calls per line) and a multi-lingual graphic
LCD display (128 X 48).
The 430HD phone with six lines (two concurrent calls per line), a graphic multi-lingual LCD
display (132 X 64), six multi-function keys, 12 programmable speed dial keys, and optional
GbE support.
The 440HD phone includes: six lines (two concurrent calls per line); a graphic multi-lingual
LCD display (132 X 64); six multi-function keys; 12 programmable function keys (for
assigning Speed Dials, Speed Dials + BLF and Multicast paging) with capability to scroll to
additional pages to configure additional keys (displayed in a dedicated integrated Side-Car
Contacts LCD screen-376 X 60) and GbE support.
All phone’s support four softkeys with the capability to scroll to additional pages to configure
additional keys. All phones support HDVoIP and are available with Power over Ethernet and/or
external power supply.
1.3 Cutting Edge Voice Quality & HD VoIP
Based on Genesys’ advanced, robust and field-proven VoIPerfectHD™ software, Genesys’ IP
Phones are designed to utilize the most popular wideband coders. Each of these phones features
enhanced proprietary capabilities, such as packet loss concealment, high quality wideband
acoustic echo canceler, and low-delay adaptive jitter buffers to enrich the HDVoIP experience.

10 Version 2.2.8
This page is intentionally left blank.

Genesys 420HD IP Phone User's Manual 2. Setting up the Phone
Genesys 420HD IP Phone User's ManualVersion 2.2.8 11
2 Setting up the Phone
2.1 Unpacking
When unpacking, ensure that the following items are present and undamaged:
420HD IP Phone / Stand
Handset / Cord
Cat 5e Ethernet Cable
AC Power Adapter (Optional)
If anything appears to be missing or broken, contact the distributor from whom you purchased the
phone for assistance.
2.2 Device Description
Use the graphics below to identify and familiarize yourself with the device's hardware functions.
2.2.1 Front View
The front view of the phone is shown in Figure 2-1 and described in Table 2-1.

12 Version 2.2.8
Figure 2-1: Front View
Table 2-1: Font View Description
Item #
Label/Name
Description
1
Ring LED
Flashing blue light visually indicates an incoming call.
2
LCD
Liquid Crystal Display - interactive screen displaying calling information,
enabling you to set up phone features.
3
Softkeys
See Section 3.2.
4
Navigation
Control /OK
Press the upper rim to scroll up menus/items in the LCD display screen.
Press its lower rim to scroll down. Press its left or right rim to move the
cursor left or right (when editing a contact number for example). Press the
OK button to select a menu/item/option.
5
VOICE MAIL
Retrieves voice mail messages.
6
CONTACTS
Press to directly access the Personal directory.
7
MENU
Accesses menus (1) Call Log (2) Directory (3) Speed Dial (4) Settings (5)
Status (6) Administration.
1
2
3
4
5
6
7
8
9
12
13
14
15
11
10
16

Genesys 420HD IP Phone User's Manual 2. Setting up the Phone
Genesys 420HD IP Phone User's ManualVersion 2.2.8 13
Item #
Label/Name
Description
8
REDIAL
Accesses recently dialed numbers; one can be selected to redial.
9
TRANSFER
Transfers a call.
10
HOLD
Places an active call on hold.
11
Alphanumerical
Keypad
Keys for entering numbers, letters and symbols (e.g., colons).
12
SPEAKER
Activates the speaker, allowing a hands-free conversation.
13
HEADSET
Activates a call using an external headset.
14
MUTE
Mutes a call.
15
▲
VOL
Increases or decreases the volume of the handset, headset, speaker, ring
tone and call progress tones.
VOL
▼
16
x
Cancel an action, such as dialing a number, after beginning it.
2.2.2 Rear View
The rear view of the phone is shown in the figure below and described in the table below.
Figure 2-2: Rear View
Table 2-2: Rear View Description
#
Label
Description
Handset jack, i.e., RJ-9 port, to connect the handset.
RJ-45 port to connect to the Ethernet LAN cable for the LAN connection
(uplink - 10/100 Mbps). If you're using Power over Ethernet (PoE), power
to the phone is supplied from the Ethernet cable (draws power from either
a spare line or signal line).
RJ-45 port for connecting the phone to a PC (10/100 Mbps downlink).
12V DC power jack that connects to the AC power adapter.
Headset jack, i.e., RJ-9 port that connects to an external headset.
2
4
3
1
1
2
3
4
5
5

14 Version 2.2.8
2.3 Cabling
This section shows how to cable your phone.
Figure 2-3: Cabling
Action
Description
Connect the short, straight end of the cord to the handset.
Connect the longer, straight end to the jack (RJ-9 port, for the handset) on the phone.
Connect the RJ-45 LAN port to your LAN network (LAN port or LAN switch/router), using a
CAT 5 / 5e Ethernet cable
Connect the RJ-45 PC port to a computer, using a CAT 5 / 5e straight-through Ethernet cable
Connect the connector tip of the AC power adapter to the phone’s power socket (labelled DC
12V). Connect the two-prong AC adapter directly to the electrical wall outlet. When the phone
powers up, all the LEDs momentarily light up
Connect the RJ-9 headset jack to a headset (optional)
Note: If the LAN to which the phone is connected supports Power over Ethernet (PoE), no AC
adapter is required; the phone receives power from the Ethernet network.
1
2
3
4
5
1
2
3
4
5

Genesys 420HD IP Phone User's Manual 2. Setting up the Phone
Genesys 420HD IP Phone User's ManualVersion 2.2.8 15
2.4 Mounting the Phone
The phone can be mounted on a:
Desk (see Section 2.4.1 below)
Wall (see Section 2.4.2 on page 16)
2.4.1 Mounting the Phone on a Desk
You can mount the phone on a desk or flat surface.
To mount the phone on a desk or flat surface:
1. Off-hook the handset (if on-hook) and place the phone upside down, i.e., base-up, on your
desktop.
2. On the phone's base, identify outer rails.
3. On the phone's stand, identify outer notches.
4. Invert the stand and align its outer notches with the base's outer rails.
5. Insert the stand's outer notches into the base's outer rails and slide the notches along the
rails until the stand click-locks into the base.
6. Revert the phone and stand it on the desktop.
2.4.1.1 Routing the Handset Cable
The phone features a groove for routing the handset cable.

16 Version 2.2.8
2.4.2 Mounting the Phone on a Wall
This section shows you how to mount the phone on a wall or wall plate.
To mount the phone on a wall:
1. Attach the stand of the phone for the purpose of a wall mounting:
a. Detach the base.
To detach the phone's stand, push this button
b. Attach it again as you did for a desktop mounting (see Section 2.4.1 on page 15) only
now make sure that it's flatly aligned to lie flush against the wall, i.e., slide the middle
rails of the phone stand onto the phone base's inner notches.
2. Connect the AC power adapter, LAN and PC cords.
3. In the wall, drill two horizontal holes at a distance of 3 15/16 inches (100 mm) from one
another, in line with the template.
4. Insert two masonry anchors into the holes if necessary.
5. Thread two screws (not supplied) into the two masonary anchors; ensure that the heads
extend sufficiently (about 3/16 inch or 5 mm from the wall) for the phone stand's keyhole
slots to hang on.
6. Hang the phone stand's keyhole slots on these screws.

Genesys 420HD IP Phone User's Manual 3. Getting Started
Genesys 420HD IP Phone User's ManualVersion 2.2.8 17
3 Getting Started
The phone features an LCD, providing an intuitive, menu-driven user interface for configuring the
phone and viewing call information.
This section shows how to use the phone’s LCD.
3.1 LCD in Idle State
The figure below shows the phone’s LCD in idle state. See the table below for reference.
Figure 3-1: LCD in Idle State
Table 3-1: LCD in Idle State
Reference
Description
1
Extension lines. An extension line will only be displayed after your system administrator
configures it using the Web interface. See the Administrator's Manual for details on how to
configure a line.
2
Softkeys (Directory, Missed, Forward and DnD1).
To activate a softkey, press the key below it on the device.
3
Day, Date and Time.
3.1 LCD in Ongoing Call State
Figure 3-2: LCD in Ongoing Call State
Table 3-2: LCD in Ongoing Call State
Reference
Description
1
Extension lines. An extension line will only be displayed after your system administrator
configures it using the Web interface. See the Administrator's Manual for details on how to
configure a line.
2
Softkeys (Hold, Conf, New Call and End2)).
To activate a softkey, press the key below it on the device.
3
Day, Date and Tim
1
The default softkeys in the idle screen (for more information, see Section 3.23.2).
2
The default softkeys in the ongoing call state screen (for more information, see Section 3.23.2).
1
2
3
3
1
2

18 Version 2.2.8
3.2 Default Softkeys
The table below describes softkeys displayed in the LCD according to menu level currently
accessed. To activate a softkey, press the key on the phone keypad, located below the screen,
corresponding to the softkey.
Note: Softkeys can also be customized. For more information, see Section 4.12.2.
Table 3-3: Default Softkeys for all Menus
Softkey
Description
Opens the phone's directory. Lets you select a contact in the Personal directory
or Corporate directory. Displayed in idle state as well as (for example) after lifting
the handset.
Missed
Displays missed calls.
Forward
Defines and activates call forwarding.
DnD
Displayed in idle state. Activates the Do not Disturb feature.
Select
Selects a menu or menu option. Identical to the OK key. Either can be used.
Back
Displayed for example after pressing the MENU key as well as after selecting any
of the submenu's under it. Returns you to the previous screen state or menu level.
Dial
Displayed after a number is keyed, a directory contact is selected, or a logged call
is selected. Dials the phone number / directory contact / logged call.
Save
Saves settings.
Detail
Displayed after a number is keyed, a directory contact is selected, or a logged call
is selected. Dials the phone number / directory contact / logged call.
Clear
Displayed for example after pressing the first digit key of a phone number. Deletes
from right to left each time the digit or character is pressed. To delete all
digits/characters, keep pressed until all are deleted.
New Call
Displayed after you dial a number and the call is answered. Also shown after you
answer a call. Opens the NEW CALL screen in which you can key a number or
URL to include in the current call.
Conf
Displayed after you dial a number and the call is answered. Also shown after you
answer a call. Opens the CONFERENCE WITH screen in which you can key a
number or URL to include in the current call.
Hold
Lets you place the call on hold. Displayed when you are in an active call.
URL
Displayed after lifting the handset, after selecting New Call, Conf or Trans, and
after keying the key. Lets you call a URL.
Opens the Call Log submenus. Lets you select All Calls, Missed Calls, Received
Calls or Dialed Calls. Displayed after lifting the handset. Also displayed after New
Call or Conf is selected.
A/a/l
Enables choosing letters or digits (123). The letters option can be all caps (ABC),
all small letters (abc) or first letter capitalized (Abc).
Start
Displayed after pressing Forward > selecting an extension line > selecting when to
forward. Activates call forwarding.
Cancel
Cancels the currently initiated call or configuration.

Genesys 420HD IP Phone User's Manual 3. Getting Started
Genesys 420HD IP Phone User's ManualVersion 2.2.8 19
Softkey
Description
End
Displayed for example after pressing the Dial softkey and when the called party lifts
the handset/accepts the call. Also displayed after accepting an incoming call or
lifting the handset to answer. Ends the call.
Edit
Displayed after a menu/submenu item to be edited is selected. Enables editing the
selected item.
Delete
Displayed you select the Detail softkey after selecting a call under a Call Log
submenu (e.g., under Missed Calls). Before deleting the call, a warning prompt is
displayed.
3.3 Accessing Menus
Menus are used to access information and to configure the phone. Example: Use Personal
directory under Directory to add contacts; use Missed Calls under Call Log to view missed
calls and reply to them; use Network Status under Status to view the phone's dynamic IP
address.
The figure below shows the phone's menus and submenus.
Figure 3-3: Menus

20 Version 2.2.8
Note:
The Administration menu is intended for system administrators only. It is password
protected. See the Administrator’s Manual for details.
If you define a second extension line, the Call Log menu displays menu items per
extension.
The Soft Keys item under the Keys Configuration menu is not displayed on IP phones in a
Genesys or Broadsoft environment when the Automatic Call Distribution (ACD) feature is
enabled .
To access the menus:
Press the MENU key located on the device.
To navigate to menus and items:
Press the navigating control's upper and lower rim -OR- press the listed item's number on
the keypad, e.g., press 3to navigate to Speed Dial.
To select a menu or menu item:
Press the Select softkey or press the navigation control's OK button.
To cancel and move to a previous menu level:
Press the Back softkey.
3.4 Entering Numbers, Alphabetical Letters and Symbols
The phone’s alphanumerical keypad lets you to enter alphabetical letters, numbers and symbols.
To select either alphabet mode, number mode or symbol mode, press the A/a/1 softkey
successively or press the #pound key successively.
To define a contact name, you need alphabet mode. To define an IP address, you need to revert
from number mode to symbol mode: and back to number, etc. To dial a number to make a new
call, press its key on the keypad when the LCD is in idle state.
To select a mode:
1. Successively press the A/a/1 softkey or # key to select the mode required:
Figure 3-4: Alphanumerical Selection
2. Choose either:
abc =lower case letters
ABC = upper-case letters
Abc = first-letter upper case, the rest lower case
123 =numerical mode (i.e., numbers)
After selecting, the LCD displays your selection.
Figure 3-5: Selected Alphanumerical Mode (Abc)
Other manuals for AudioCodes 420HD
2
Table of contents
Other Genesys IP Phone manuals

Genesys
Genesys AudioCodes 420HD User manual

Genesys
Genesys AudioCodes 420HD User manual

Genesys
Genesys 400 Series Service manual

Genesys
Genesys 405HD User manual

Genesys
Genesys Polycom IP 330 User manual

Genesys
Genesys Polycom SoundPoint IP 450 SIP User manual

Genesys
Genesys 405 User manual

Genesys
Genesys Interaction SIP Station II User manual