Quick Start Guide 8MP H.265 IP IR Vandal Dome with 3.3-12mm Auto Focus Lens and Facial Recognition
5
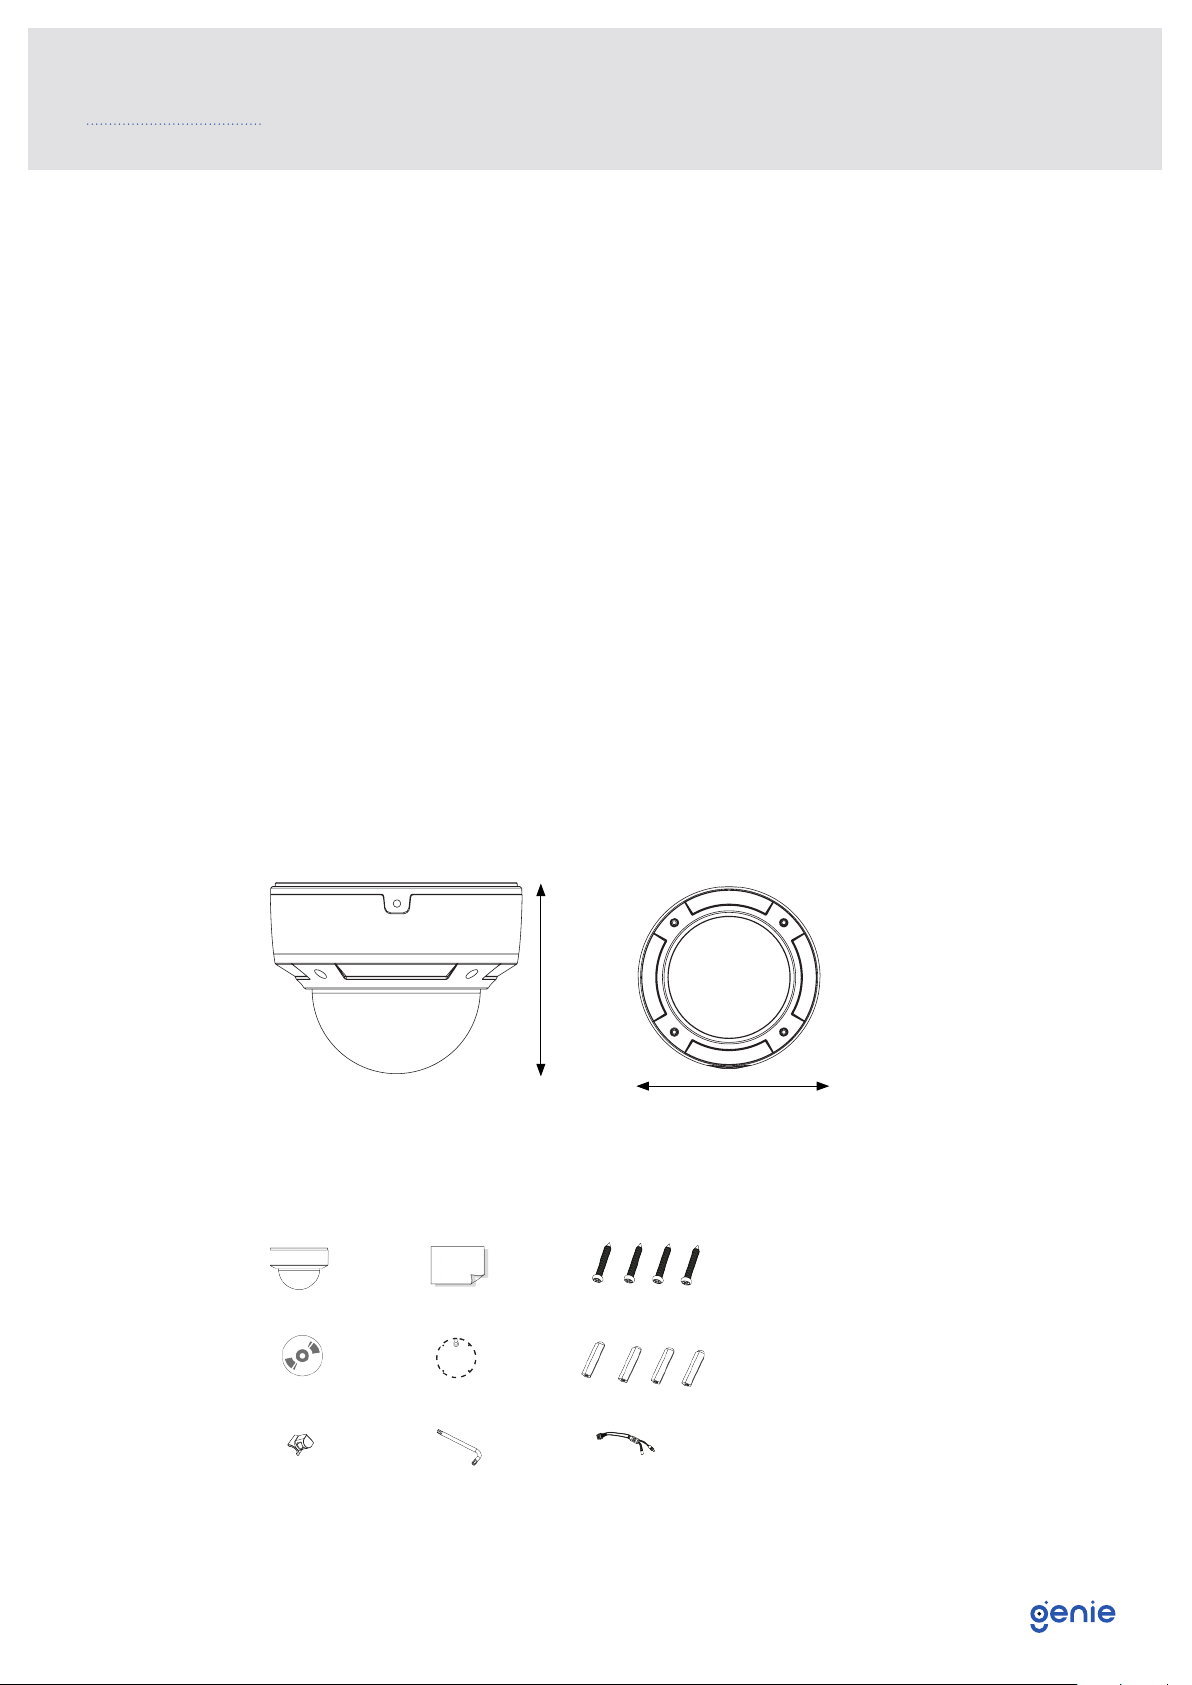
1.4 Specification
Camera
Image Sensor 1 / 2.5” CMOS
Image Size 3840 × 2160
Electronic Shutter 1 / 25 s ~ 1 / 100000 s
Iris Type Fixed Iris
Minimum Illumination 0.024 Lux @ F1.2, AGC ON, 0 Lux with IR
0.068 Lux @ F2.0, AGC ON, 0 Lux with IR
Lens 3.3~12mm @ F1.4
Lens Mount Φ14
Field of View Horizontal field of view : 97.5° ~ 38.5°
Day & Night ICR
Wide Dynamic Range 120dB
BLC Yes
HLC Yes
Defog Yes
Digital NR 3D DNR
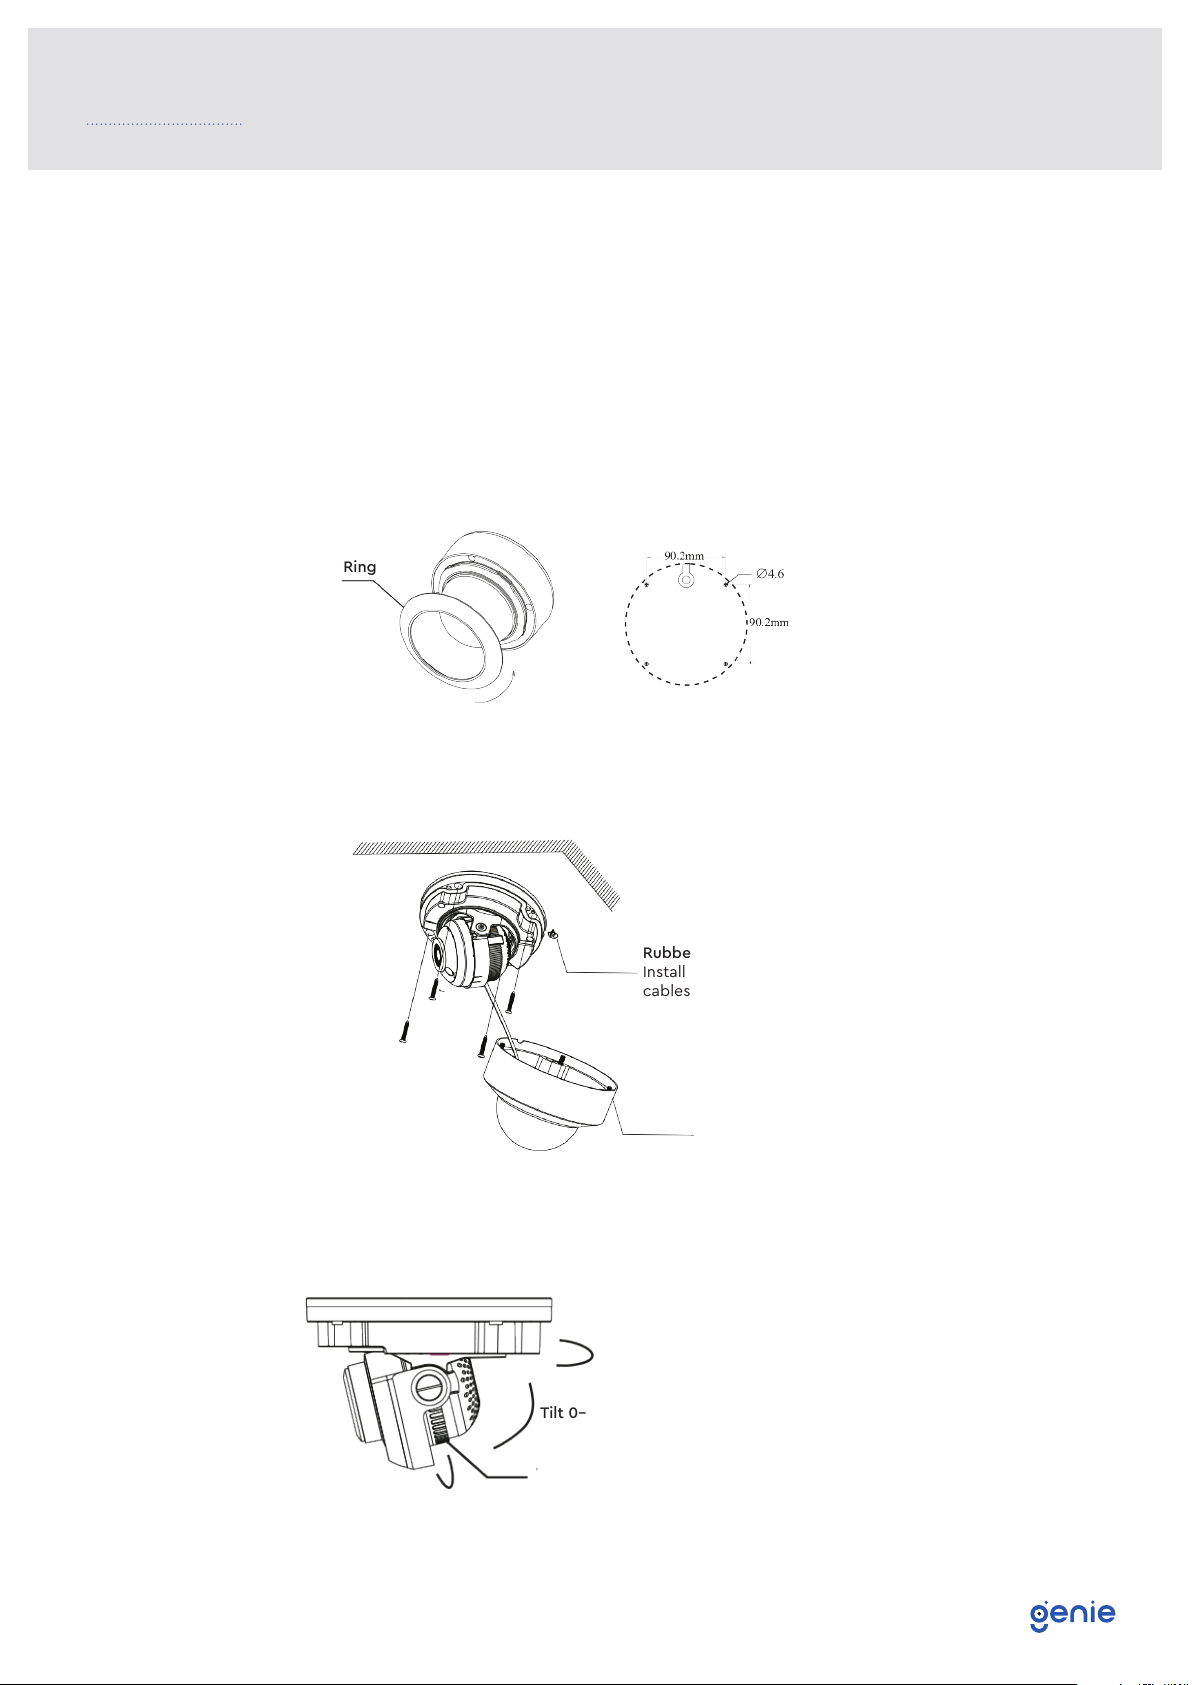
Angle Adjustment Pan: 0°~360°, Tilt: 0°~77°, Rotation: 0°~360°
Image
Video Compression H.265+ / H.265 / H.264+ / H.264 / MJPEG
H.264 Compression
Standard Baseline Profile / Main Profile / High Profile
Resolution 8MP (3840 × 2160), 2K (2560 × 1440), 3MP (2304 × 1296),
1080p (1920 × 1080), 720p (1280 × 720), D1, CIF, 480 × 240
Main Stream 60Hz : 8MP 2K/3MP/ 1080p / 720p (1~30fps)
50Hz : 8MP/ 2K/3MP/ 1080p/ 720p (1~25fps)
Sub Stream 60Hz : 1080p (1~5fps) / 720P (1~10fps) / D1 (1~30fps)
50Hz: 1080p (1~25fps) / 720P (1~25fps) /D1 (1~25fps)
Third Stream 60Hz : 720p / D1/ CIF / 480 × 240 (1~30fps)
50Hz: 720p / D1 / CIF / 480 × 240 (1~25fps)
Bit Rate 128 Kbps ~ 12 Mbps
Bit Rate Type VBR / CBR
Audio Compression G711A / U
Image Settings
ROI, Saturation, Brightness, Chroma, Contrast, Wide Dynamic,
Sharpen, NR,etc. Adjustable through client software or web
browser
ROI Each ROI to be configured separately
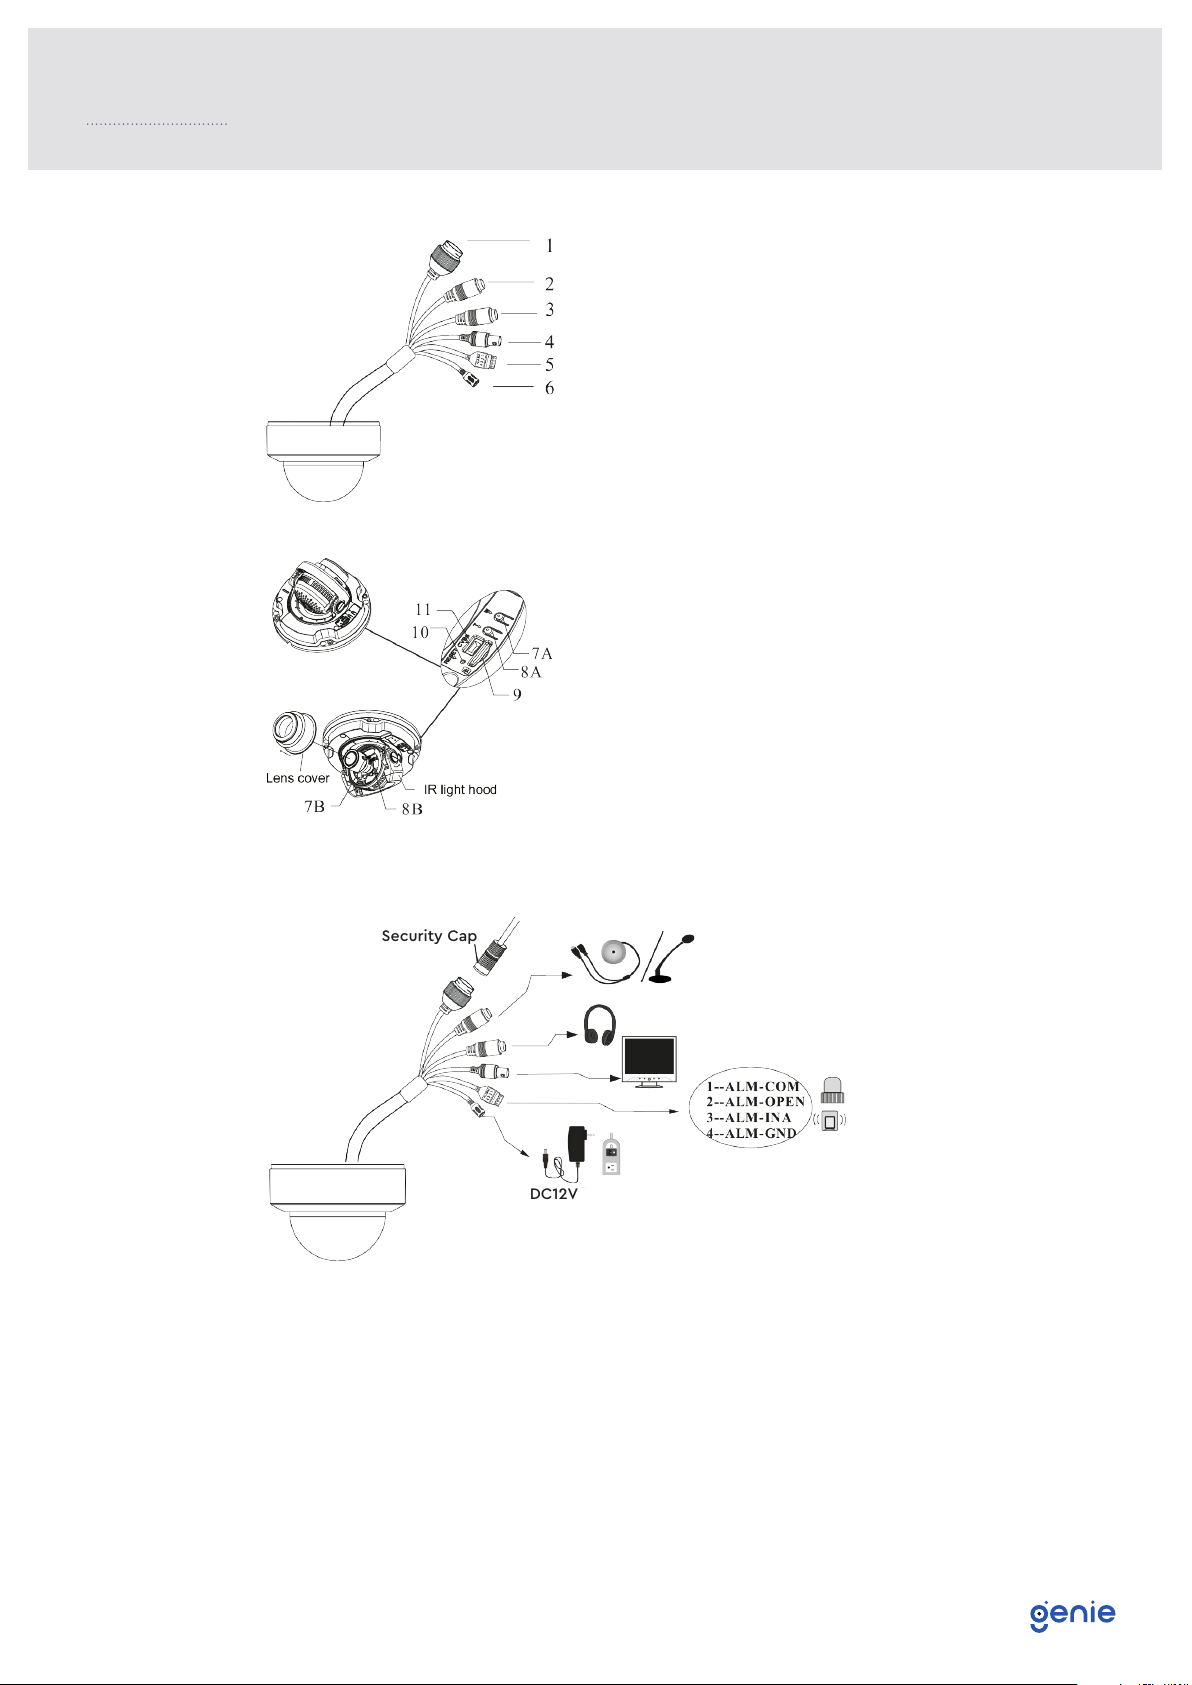
Interface
Network RJ45
Video Output CVBS Output (BNC x 1), Built-in CVBS output x 1
Audio Audio input x 1, audio output x 1
Alarm Alarm input x 1, alarm output x 1
Storage Built-in micro SD card slot, up to 128GB
Hardware Reset Yes