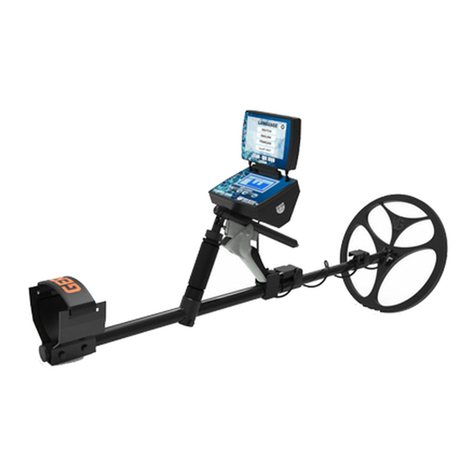
Ger Detect EASY WAY SMART User manual


INDEX
Section 1
Critical Warning
Section 2
Overview
Section 3
Definition of the main unit buttons
Section 4
The long-range system
Section 5
Long-range system parts connection
Section 6
Long -range system operation steps
Section 7
The 3D imaging system
Section 8
3D imaging system communication steps
Section 9
GER 3D VIEWER operation steps
Section 10
3D imaging system operation steps
Section 11
The device parts and accessories

- Please be sure that all precautions are taken against risks.
- Do not use your device while it is raining or on extremely wet floor.
- Turn on the device after you make sure that all parts are in place and connected.
- Make sure that the device battery is fully charged before you start the search.
- If the device starts to give a beep sound, close the device and recharge the battery.
- when the battery will almost die the device will close automatically.
- It is recommended to read the user manual before starting on the device to understand
everything and to avoid the mistakes through the search.
- After the device starts to make sound and turn off automatically, put the battery on
charge and do not try to switch on the device without charging the battery.
- If the green light and the red light on the charger are on, it means the battery is full, and
if the battery is empty, the red light will be on.
- Be aware of high voltage resources, and do not use any charger other than the original
charger that comes with the device.
- Main unit of the device is under warranty against all electronic breakdowns for two (2)
years, any damages caused by user errors (laying open the main unit, hits, harms etc.) are
not within this warranty.
- Battery, antennas and tablet are also not under the warranty.
- You should follow the instructions in this user manual strictly to minimize the faults and
to use your device correctly.
We wish you all the best of luck in your search……
Section 1 (Critical warning)

Dear customer,
“Thank you for choosing EASY WAY SMART”
✓The world's unique and only technology that combines two systems within one
device.
✓Specialized in prospecting and searching for gold, precious metals, burials,
caves and voids inside the ground, with confidentiality and ease.
✓EASY WAY SMART is designed to operate in all kinds of terrain and in the
most difficult climatic conditions.
✓The smallest device with a radar sensing system and a 3D imaging system,
completely concealable.
✓The device depth is up to 18 meters underground.
✓The device works in 8 different languages.
✓Two search systems in 1 device.
Section 2 (Overview)

Description
Power Indicator: which lights up when the device is turned on after long
pressing the power button.
Power button: turn on the device by pressing the power button for two
seconds.
Long-range System Indicator: which lights up when activating the long-
range radar system.
Long-range system button: the system starts on after pressing this button.
Up-button: to select the target type by going up.
The target type indicators: (it turns ON when you select the traget type).
Down-button: to select the target type by going down.
The 3D imaging system button: it runs the 3D imaging system after you
press it.
Bluetooth Indicator: which lights up when connected to the tablet.
3D System Indicator: which lights up when activating the 3D imaging
system.
Section 3 (Definition of the main unit buttons)
1
8
9
10
7
6
5
4
3
2

Section 4 (The long-range system)
Transmitter and receiver antenna
Part 1
Radar system grip
Transmitter and receiver antenna
Part 2
The main unit
Signal transmission cable

Section 5 (Long-range system parts connection)
Step (1)
Step (3)
Step (2)
Step (4)

(1) Connect the two parts of the antenna together.
(2) Install the sensor handle to the antenna.
(3) Connect the signal transmission cable between the sensor system handle on the one side
and (4) the main unit on the other side.
As a user, you should remove all holdings that may affect the functionality of the device such
as a wrist watch, mobile phone, wallet, ring, and belt. Make sure that your shoes do not
contain any metallic items on them).
Turn on the device by pressing the power button for two seconds.
Section 6 (Long -range system operation steps)

The long-range system will operate automatically with its light indicator on.
You can choose the target type by pressing the Up and Down buttons.
After selecting the target to be searched for, securely
place the main unit to your waist and then hold the
sensor grip at a 90-degree angle in order for the
antenna to function properly.
It is essential to make sure that you are standing North to South.
The reason for that is that the ionic fields are radiations emanating
from gold and buried treasures that have been remaining under
the ground for a long time and have immersed and interacted
within the soil taking into account the nature of the Earth's
formation, and its alignment with magnetic lines north and south.

If no signal is obtained, change your direction from east to west,
from west to east, and from south to north.
When a signal is sensed, the antenna will turn towards the target
directly.
Follow the signal until the antenna turns back, this means that you
have walked past the target.
When this happens, confirm the location of the target from the four
directions (from south to north, from north to south, from west to
east, and from east to west).
Identify the search location by marking it as the focus of target
confirmation process.
NORTH TO SOUTH
SOUTH TO NORTH
EAST TO WEST
WEST TO EAST

(1) Unplug the signal cable from the main unit
(2) Select the 3D imaging system by pressing the
3D button with the imaging system and
Bluetooth lights on.
Section 7 (The 3D imaging system)

Section 8 (3D imaging system communication steps)
connect the main unit to the tablet device via
Bluetooth, by pressing and holding on the Bluetooth
icon
GER3D

Bluetooth will search for devices near your tablet.
Then the Bluetooth will appear like
GER3D
Click on the device name, a window will appear to enter the
password which is: 1000
GER3D
GER3D
GER3D?

Press OK to complete the pairing operation between the tablet
and the main unit.
Close the window and run GER 3D Viewer program

A list of several languages will appear:
(German, English, French, Italian, Spanish, Arabic, Portuguese, and Russian).
Select the device you want to work on “Easy way”
Section 9 (GER 3D VIEWER operation steps)

The program will connect to the device
a CONNECTED sign will then appear Then

Press the Next button to go to Scan settings menu, which consists of:
Scanning Direction - Number of lines - Number of Steps

Scanning Direction: is to select the scanning method during imaging
And there are two methods for scanning
Either scan in one direction
Or two-way scanning, back and forth.
Number of lines: to determine the number of lines within to search.
Number of Steps: for each line to determine the images within one line.

Then press Next to open the software interface
Walk in consecutive steps at a distance of 30 cm between every two steps
taking into account keeping a 30-cm distance from the first line while
scanning backwards. Alongside pressing the “imaging” button for each step
Number of Steps: for each line to determine the images within one line.
1
2
Section 10 (3D imaging system operation steps)

During the scanning process, a 3D image of the target being imaged will
appear on the tablet screen.
This image consists of a grid of squares indicating the number of steps and
lines that have been scanned .
Example: We have a grid of lines consisting of three columns and ten steps
per column, which means three lines of scan, and each line consists of ten
images captured.
The following parameters will appear on the image:
The depth of the target in the ground –The Value.
Table of contents
Other Ger Detect Metal Detector manuals
Ger Detect
Ger Detect Titan Ger 1000 User manual

Ger Detect
Ger Detect TITAN GER-400 User manual

Ger Detect
Ger Detect Titan 400 Smart User manual

Ger Detect
Ger Detect Gold Hunter User manual
Ger Detect
Ger Detect Gold Hunter User manual

Ger Detect
Ger Detect TITAN GER-400 User manual
Ger Detect
Ger Detect Gold Hunter User manual

Ger Detect
Ger Detect Titan Ger 1000 User manual

Ger Detect
Ger Detect GOLDEN WAY User manual