Getinge 86 SERIES User manual

GETINGE 86-SERIES
USER MANUAL
502607400
SEV0725001-

<Doc_USR><Doc_502607400><Rel_A><Lang_GB>
Page 2 of 28
Contents
FOREWORD ____________________________________________3
SAFETY REGULATIONS _________________________________4
Important _________________________________________________ 4
Product liability ____________________________________________ 4
In an emergency ___________________________________________ 4
INTRODUCTION ________________________________________5
Intended field of application _________________________________ 5
Symbols on the machine ____________________________________ 5
Attention symbols __________________________________________ 5
General ___________________________________________________ 5
Control panel ______________________________________________ 6
Control system_____________________________________________ 7
Door function ______________________________________________ 7
Dosing system _____________________________________________ 9
OPERATING INSTRUCTIONS_____________________________10
Machine without barcode scanner____________________________ 10
Machine with barcode scanner_______________________________ 11
Positioning the goods_______________________________________ 13
Working with detergents etc _________________________________ 13
Daily inspection ____________________________________________ 14
If necessary _______________________________________________ 15
Printer (optional) ___________________________________________ 16
PROCESS ______________________________________________18
Changing parameters _______________________________________ 18
Printing out a program for a machine with printer (option) _______ 18
FAULT INDICATIONS ____________________________________19
Handling alarms____________________________________________ 19
Alarms ____________________________________________________ 20
Fault codes in the machine __________________________________ 20
Fault codes in the master supervisory system (option) __________ 22
Detergents etc__________________________________________23
Water quality - washer disinfectors_______________________24

Page 3 of 28
<Doc_USR><Doc_502607400><Rel_A><Lang_GB>
FOREWORD
This user manual is intended for users of Getinge 86-series washer disinfectors.
The instruction manual describes the design and operation of the machine and the main-
tenance for which the user is responsible. The purpose of the information in the manual
is to ensure safe operation and optimum efciency.
Before using the machine for the rst time, users must have read this instruction manual
and familiarized themselves with the operation of the machine and its safety instructions.
Read the user manual before using the machine.
The information in this manual describes the machine as dispatched from Getinge. There
may be differences due to customization.
The machine is accompanied by the following documentation:
• User manual (this book)
• Installation manual
• Technical manual
• Spare parts list
Getinge reserves the right to change the specication and design without prior notice.
The information in this manual was up to date on the date of issue of the manual.
© Copyright
The content of this manual must not be copied, in
whole or in part, without the written consent of Getinge.

<Doc_USR><Doc_502607400><Rel_A><Lang_GB>
Page 4 of 28
SAFETY REGULATIONS
This machine has been designed with a number of built-in safety devices. To avoid
injury, it is highly important not to bypass or disable these safety devices.
The equipment must be used in accordance with the safety instructions
below. If in doubt, contact a representative of the reseller without delay.
Important
Read the instruction manual thoroughly before using the machine.
The equipment must only be used by personnel who know about it and are trained
to use it. Personnel must also receive regular training on this equipment.
Take care when handling the chemical agent used in the machine. Read the details
on the container or contact the manufacturer:
- if the agent comes into contact with the operator’s eyes or skin or if the vapors are
breathed in, etc.
- about storing the agent and disposing of empty containers.
Take care, because the machine uses hot water and possibly steam.
Installation and service work must be done by personnel trained in the use of
this machine.
Never bypass the door switch of the machine.
Leakage in the system, due to a worn door seal for example, must be dealt
with immediately.
The electric power must be switched off before the machine cabinet is opened.
(The machine cabinet contains electrical components).
Make sure that there is always detergent in the bottles. This is important both for the
operation of the machine and for keeping the washing chamber free from staining.
The machine will only work properly if it is kept clean.
Do not wash down or hose down the machine with water.
Spare parts must be obtained only via Getinge EDC.
Product liability
Any modication or incorrect use of the equipment without the approval of Getinge
Disinfection AB invalidates Getinge Disinfection AB´s product liability.
This product was manufactured by:
GETINGE DISINFECTION AB
Ljungadalsgatan 11, Box 1505
351 15 Växjö, Sweden
In an emergency
Switch off the main switch
Close stopcocks in the water and (where present) steam supply lines.
•
•
•
•
•
•
•
•
•
•
•
•
•
•

Page 5 of 28
<Doc_USR><Doc_502607400><Rel_A><Lang_GB>
INTRODUCTION
Intended field of application
Getinge 86-series washer disinfectors are intended for cleaning, disinfecting and drying
surgical instruments (solid and tubular), dishes, hand bowls and baby feeding bottles,
containers, anesthesia equipment (critical objects such as surgical instrument and anes-
thesia equipment must also be sterilized before use), laboratory glass and OP shoes.
The items must be placed in the proper accessories, recommended by Getinge Disinfection AB.
The customer is responsible for ensuring that an Installation Qualication and a Performance
Qualication according to ISO 15883 are carried out before the product goes into service.
Incorrect use may result in damage and injury.
Symbols on the machine
Warning, see instruction manual.
Warning, hot surface.
Warning: electrically live parts.
Attention symbols
Some of the warnings, instructions and advice in this manual are so important that we use the
following special symbols to draw attention to them. The symbols and designs used are:
This symbol indicates a warning in the text of the manual. It warns of a hazard
that may lead to more or less severe injury and in certain cases mortal danger.
It also highlights warnings to avoid damage to equipment.
General
The machine is a fully-automatic washer disinfector for cleaning and disinfecting goods
in hospitals, laboratories and the pharmaceutical industry.
The machine has two spray arms and two dockings and can be equipped with several
different accessories for different cleaning requirements. These accessories are presented
in a special accessories catalogue.
There are several possible ways of installing and equipping the machine depending on
its eld of application:
Heating by electricity or steam.
Connection of distilled or de-ionised water.
Electrically-heated booster tank for the water for the nal rinse.
Single or double door.
Extra dosing pumps which allow chemical disinfection of heat-sensitive goods,
for instance.
Infeeder/outfeeder
Air Glide System (AGS)
Handheld scanner/Fixed scanner
Automatic program selection (basket indication)
Audible signal on fault code.
•
•
•
•
•
•
•
•
•
•

<Doc_USR><Doc_502607400><Rel_A><Lang_GB>
Page 6 of 28
Control panel
The machine is operated from the control panel to the right of the soiled-side door.
The picture below shows the location of buttons and indicators.
V1363
Green lamp:
Program complete
Yellow lamp:
Program running
Red lamp:
Fault code indication
P01 OP-SHORT-D
47.0°C
Program number Before starting:
Chosen program
While running: Program
phase (eg “Rinsing”)
Start button for washing
programs
Program selection buttons
Menu selection buttons
(see “Service instructions”)
Alarm reset button

Page 7 of 28
<Doc_USR><Doc_502607400><Rel_A><Lang_GB>
Control system
The machine has an electronic controller which can hold up to 10-15 programs. Six of
these programs can be chosen with the program selection buttons. Other programs are
chosen with the menu buttons; see Operating instructions.
The machine comes with a number of standard programs in the control system (see the
separate program sheet). Contact the your reseller for customized programs.
Programming may only be done by authorized personnel.
Door function
The machine can be tted with a single door or double doors. All doors are of the verti-
cal sliding type.
The doors can be motorized for automatic opening and closing. The doors have efcient
anti-crush protection.
Machines with double doors have a system of interlocks to ensure that only one door can
be opened at a time. This means that the clean-side door must be closed and locked by
pressing the Wbutton before the soiled-side door can be opened.
When you press V, the door is locked and a yellow lamp ashes for about 10 seconds.
If V is pressed again during this “cancel time”, the dirty-side door is unlocked and the
door can be opened manually or alternatively it opens automatically.
In standby mode, the door can be opened and closed with U by pressing the button for
10 seconds.
V398
Soiled sideClean side

<Doc_USR><Doc_502607400><Rel_A><Lang_GB>
Page 8 of 28
Manually-operated door
When the door is closed manually and V is pressed, the door is locked automatically,
the yellow lamp ashes and the program starts.
When the program is complete, a green lamp lights up on both sides (if there are double
doors) and the clean-side door is unlocked. When the door has been opened manually,
the green lamp goes out. With double doors, the clean-side door must be closed and
locked by pressing the Wbutton before the soiled-side door can be unlocked.
Automatically-operated door
When V is pressed, the door is locked, the yellow lamp ashes and the program starts.
When the program is complete, a green lamp lights up on both sides (if there are double
doors) and the clean-side door opens automatically. When the door is fully open the green
lamp goes out on both sides. With double doors, the clean-side door must be closed and
locked by pressing the W button before the soiled-side door opens automatically.

Page 9 of 28
<Doc_USR><Doc_502607400><Rel_A><Lang_GB>
Dosing system
In standard form, the machine has two dosing systems. One is for alkaline detergent and one is
for rinse-aid or acid detergent. The dosing amount can be set individually for each program.
The machine cannot be started until detergent has been added. If the detergent holder is
empty, “DOS 1 LOW LEVEL”, for example, appears on the display.
A third and a fourth dosing system for heat-sensitive goods or instrument milk, for ex-
ample, can be installed.
V1447
Dosing pumps
Container for
detergent/
rinse-aid
Empty container alarm

<Doc_USR><Doc_502607400><Rel_A><Lang_GB>
Page 10 of 28
OPERATING INSTRUCTIONS
Machine without barcode scanner
Loading goods to be washed into the machine
Load the items to be washed on to the trolley and run the trolley into the machine.
Examples showing how to load the trolley are shown on the goods positioning sign
and in the loading handbook.
Do not load the machine with more than 75 kg.
Make sure that the washer arms can rotate freely without touching the goods.
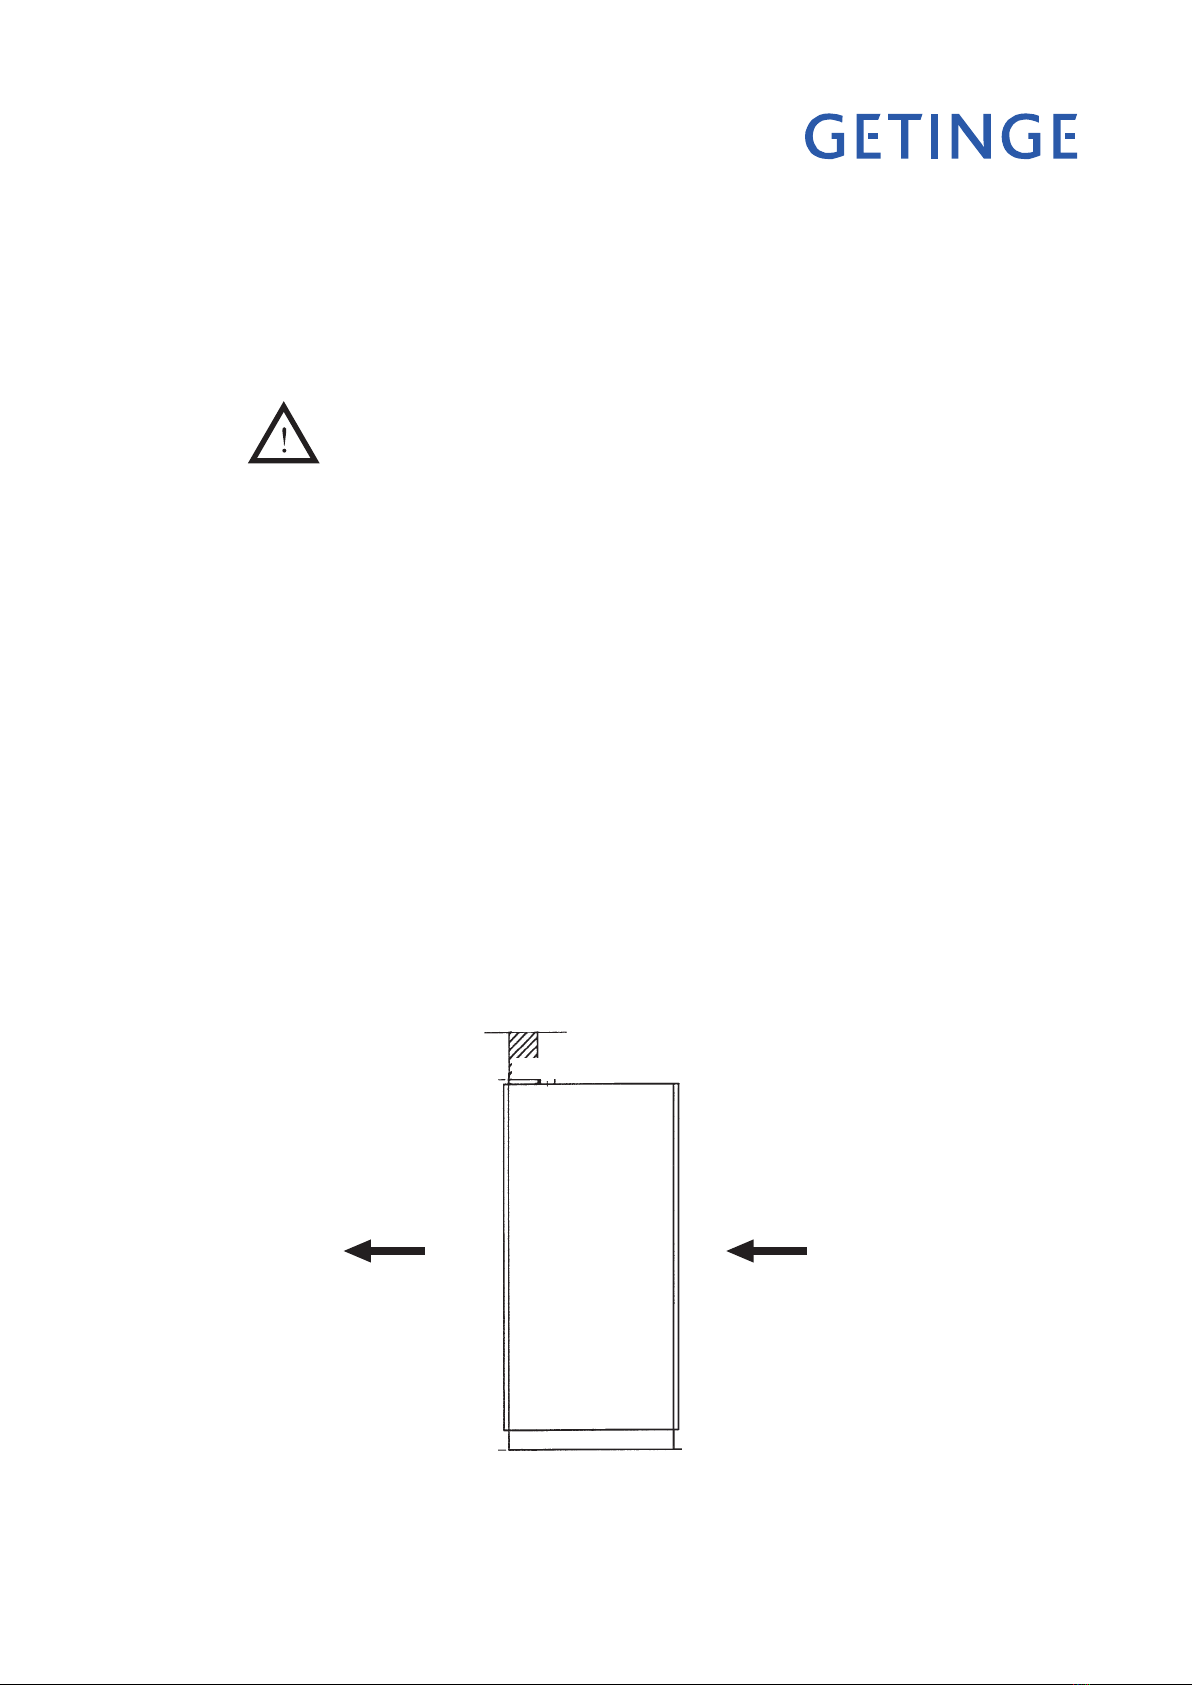
On a machine with manual door, close the door:
Choose program
Choose a program in one of the following ways:
- Press one of the program selection buttons 1- 6
- Press S. The display now shows “CHOOSE PROGRAM”.
Press Sagain.
Choose a program from the list with Hand J.
Press S to conrm your choice.
You can see the machine programs on the separate program sheet.
Press V. A yellow lamp ashes for 10 seconds. During this time, the program
can be aborted by pressing Vagain.
A fine filter must be used when cleaning and disinfecting tubular instruments
with a passage smaller than 3 mm, to prevent particles getting stuck in the
instruments. Blocked or reduced water flow may result in ineffective cleaning
and disinfection.
If the program is aborted after starting, the goods will not be properly washed
or disinfected.
While a program is running
While the program is running, a yellow lamp at Mis lit and the program phase (eg
“Rinse”) and the current temperature are shown on the display. Press Sto see how
much time remains.
When the program is complete
When the program is complete, a green lamp lights up at Nand the door opens
(with double doors, the clean-side door). On a machine with manual door, the door
is unlocked and can then be opened:
If the items are still hot after a program, handle them with care to avoid burns.
Empty the machine (and if the machine has double doors, close the clean-side door).
- For a machine with automatic door: Press Wto close and lock the clean-side door.
- For a machine with manual door: First close the door, then press Wto lock the
clean-side door.
If the same program is to be used again, there is no need to select the program
again. Simply press Vonce.
Note:
The display switches to standby mode after 30 minutes and returns automatically when a
program is started or selected.
•
•
•
•
•
•
•
•
•

Page 11 of 28
<Doc_USR><Doc_502607400><Rel_A><Lang_GB>
Machine with barcode scanner
Every wash trolley has its own unique ve-digit number. The rst two digits indicate
which wash program is to be used; the third digit is for extra equipment and the last two
are the trolley’s ID.
Loading goods to be washed into the machine
Load the items to be washed on to the trolley and run the trolley halfway into the machine.
Examples showing how to load the trolley are shown on the goods positioning sign.
A fine filter must be used when cleaning and disinfecting tubular instru-
ments with a passage smaller than 3 mm, to prevent particles getting stuck
in the instruments. Blocked or reduced water flow may result in ineffective
cleaning and disinfection.
Choosing a program
Scan the barcode of the trolley with the barcode scanner. For a machine with a
xed scanner, the trolley must be moved so that the barcode gets scanned. On the
basis of the barcode, the machine automatically chooses the correct wash program.
•
•
•
Fixed scanner
Hand scanner
This is what to do if you want to use a different washing program from the scanned one:
- Press one of the program selection buttons 1- 6
- Press S. The display now shows “CHOOSE PROGRAM”.
Press Sagain.
Choose a program from the list with Hand J.
Press S to conrm your choice.
Run the trolley into the machine.
- With an automatic door, the door closes and locks. The program then
starts automatically.
- With a manual door, close the door and press Von the soiled side to lock
the door. The program starts sty when the door is locked.
If the program is aborted after starting, the goods will not be properly washed
or disinfected.
•

<Doc_USR><Doc_502607400><Rel_A><Lang_GB>
Page 12 of 28
While a program is running
While the program is running, a yellow lamp at Mis lit and the program phase (eg
“Rinse”) and the current temperature are shown on the display. Press Sto see how
much time remains.
When the program is complete
When the program is complete, a green lamp lights up at Nand the door opens
(with double doors, the clean-side door). On a machine with manual door, the door
is unlocked and can then be opened:
If the items are still hot after a program, handle them with care to avoid burns.
Empty the machine (and if the machine has double doors, close the clean-side door).
- For a machine with automatic door: Press Wto close and lock the clean-side door.
- For a machine with manual door: First close the door, then press Wto lock the
clean-side door.
•
•

Page 13 of 28
<Doc_USR><Doc_502607400><Rel_A><Lang_GB>
Positioning the goods
Note:
All vessels must be thoroughly emptied before they are loaded into the machine.
Use inserts and special inserts correctly and only for the items and utensils that are
to be washed.
Make sure that the water jets reach all surfaces of the goods. Any surfaces that are
covered will not be completely clean.
Do not block the spray arm.
Make sure that the strainers in the machine are clean and that water can ow
through them. It is important to clean and check the strainers regularly.
Empty all vessels to be washed before they are placed in the machine.
Position sharp and pointed utensils in such a way that they cannot cause injury or
damage during loading and unloading.
Make sure that utensils are not lying on top of each other, so preventing water from
reaching all surfaces.
Position vessels with their openings downwards in the correct inserts. Water must
be able to ow freely into and out of the vessels.
Goods with a convex bottom must be positions on a tilt so that water does not col-
lect in the convex surface.
Anodised aluminium and nickel-plated instruments are not suitable for washing in
a washer disinfector.
Rigid endoscopes must be dismantled in accordance with the manufacturer’s in-
structions before washing.
Open all valves and remove covers and seals so that the channels can be thoroughly
ushed out to achieve the desired cleaning result.
Optics and light guides must be approved by the manufacturer for thermal disinfection.
Working with detergents etc
Empty out all residue of acid, especially hydrochloric acid, solvents and chlo-
ride-containing solvents from the vessels before placing them in the machine.
Pre-treatment with detergent or disinfectant and certain types of dirt may result in
increased lather formation. The lather may affect the washing and disinfection result.
Follow carefully the manufacturer’s instructions for detergents and special produc-
ts. To avoid chemical reactions (eg oxy-hydrogen gas) and damage to materials, the
detergent must only be used for the purpose stated by the manufacturer.
Handle liquid agents (for cleaning, rinsing, disinfection and neutralizing) with
care. The substances often consist of acids or caustic solutions. Do not add organic
solvents as this may result in an explosion. Use safety glasses and protective gloves
when handling these substances. Always follow the manufacturer’s safety instruc-
tions when handling chemical agents.
Do not use domestic dishwasher detergent.
Follow the dosing instructions of the detergent manufacturer. Different detergents
may have different cleaning effects. If cleaning results are not satisfactory, try
changing to a detergent of a different quality before contacting Getinge.
•
•
•
•
•
•
•
•
•
•
•
•
•
•
•
•
•
•

<Doc_USR><Doc_502607400><Rel_A><Lang_GB>
Page 14 of 28
V2027
Daily inspection
Check that no objects have fallen down into the bottom of the washing chamber.
Loose objects may cause blockages and seriously reduce the performance of the
washer disinfector.
Check that the spray arms can rotate freely. Check that the holes in the spray arms
are not blocked. Blocked spray holes may adversely affect the cleaning result.
Check that the goods to be cleaned are retained in the insert.
If the spray arms need cleaning, remove them by unscrewing the central nut. The
arm can then be lifted off and washed clean. Check that the arm can rotate freely
when re-installed.
Remove and clean the strainer in the bottom of the washing chamber. A dirty
coarse strainer may prevent water from circulating and create the conditions for the
growth of bacteria.
The heating coils under the coarse strainer may be hot.
•
•
•
•
•
If necessary for cleaning, open the strainer with the two nuts.
Open the detergent containers and check that they contain detergent/rinse-aid.
Check that the wash trolley docks properly to the water connections.
Check the accessories of the machine visually with regard to their intended use and
function. For example, blocked channels, worn and missing parts that might affect
the performance of the machine.
Check that the spring movement of the docking mechanisms moves easily. Press in
the docking mechanism and release it. It must return to its initial position.
Check the cleaning instructions of the goods manufacturer.
To achieve the intended level of performance and safety, distribute the load evenly
over the washing surface.
Check the cleaning result visually when the process is complete.
The spray arm journal must be checked daily and replaced every ve years.
•
•
•
•
•
•
•
•
•
Spray arm
Coarse strainer
V773

Page 15 of 28
<Doc_USR><Doc_502607400><Rel_A><Lang_GB>
If necessary
Washing chamber
Do not allow deposits to form in the wash chamber. Remove any deposits as follows:
Open the door and dispense 200 ml NEODISHER BU descaler (sold by
Dr. Weigert) into the wash chamber.
Close the door and run the descaling program.
NOTE: There must not be any items in the machine with this program. It is only used to
descale the machine and insert.
The outside
The front and side walls can be cleaned and disinfected with an alcohol-based cleaner, medical
spirit or ordinary detergent. The control panel can be cleaned in the same way.
To remove stains, use ordinary stainless steel cleaner.
It is important to maintain a good level of hygiene around the machine.
•
•

<Doc_USR><Doc_502607400><Rel_A><Lang_GB>
Page 16 of 28
Printer (optional)
Replacing the paper roll
Open the front door of the printer.
Remove any paper residue.
Fold down the printing mechanism by pressing the latch marked PUSH (A).
•
•
•
Cut the end of the new roll square (B). (This makes it easier to thread the paper into
the printer mechanism.)
•
Insert the paper into the opening of the print mechanism and press the FEED (C)
button on the printer. The paper is now automatically fed through the printer me-
chanism.
•
Fold away the printing mechanism and lock it with the latch (D).
Tear off the paper and close the front panel of the printer.
The printer is now ready to use again.
Never use the printer without paper and/or ink ribbon.
Do not pull on the printer feed when the printer is on.
•
•
•
A
B
D
C
V1972
V1973
V1973

Page 17 of 28
<Doc_USR><Doc_502607400><Rel_A><Lang_GB>
Ribbon cassette replacement
Open the front door of the printer.
Remove the ink ribbon by pressing gently on the left-hand side of the ribbon cassette.
•
•
Insert the new ribbon cassette. The printer is now ready to use again.
Never use the printer without paper and/or ink ribbon.
•
A
V1973

<Doc_USR><Doc_502607400><Rel_A><Lang_GB>
Page 18 of 28
PROCESS
Changing parameters
Normally the preset parameter settings of the installed programs are used, but in special
cases it may be necessary to adjust certain parameters for matching to a specic wash
process. Information about the parameters that can be changed and their limit values can
be found under heading “A- or P-parameters” in Chapter 4 of the service manual.
Printing out a program for a machine with printer (option)
An example of a program printout is shown below. In the example, program P02 OP-D,
programmed on menu selection button 2is used.
PH20-DRAINING 40 s
00:14:18 61.5
PH330-RINSE 1
00:15:29 61.5
PH20-DRAINING 40 s
00:17:39 55.1
PH360-RINSE 2
00:18:46 55.5
PH20-DRAINING 40 s
00:20:55 53.2
PH440-FINAL RINSE
00:22:03 53.5
00:27:53 80.1
DOS.START
00:28:15 81.5
DOS.STOP
00:30:26 90.0
PH450-DISINFECTION
00:30:27 90.1
00:31:26 92.3
PH20-DRAINING 40 s
00:31:28 92.3
PH900-DRYING
00:32:36 91.7
00:51:27 80.8
PH1000-ENDING
00:52:43 81.1
SIGNATURE: .........
PROGRAM:P2 OP-D
DATE:13/04/2004
PROGRAM START:13:44:46
MACHINE NAME:8666
MACHINE NO:1
CYCLE COUNTER:1
PARAMETER
WASH DOS TEMP 35.0C
WASH DOS 1 00:01:00
WASH TEMP. 60.0C
WASH TIME 00:03:00
FINAL R DOS TEMP 80.0C
FINAL R DOS 3 00:00:21
DISINF TIME 00:01:00
DISINF TEMP 90.0C
DRYING TEMP9 0.0C
DRYING TIME 00:18:00
SIGNALS
A107
TEMP INDEP. CHAMB
PROGTIME A107
PH1-START
00:00:00 30.8
PH2-DRAINING 10 s
00:00:00 31.2
PH220-PRE RINSE CW
00:00:10 31.0
PH20-DRAINING 40 s
00:02:42 16.2
PH25-WASHING
00:03:51 18.1
00:05:52 35.2
DOS START
00:06:53 39.9
DOS.STOP
00:11:17 60.0
00:12:17 608
00:13:17 61.9
00:14:17 61.5

Page 19 of 28
<Doc_USR><Doc_502607400><Rel_A><Lang_GB>
V1363
FAULT INDICATIONS
Red lamp: Alarm indication
P01 OP-SHORT-D
DOSE 1 LOW LEVEL
Handling alarm or fault code
Handling alarms
Handling alarms appear on the display in plain text.
DOSE 1 LOW LEVEL
The machine cannot be started until the fault has been put right.
The following handling alarms can be displayed:
DOSE 1 LOW LEVEL Empty container alarm 1. If detergent 1 is finished, a handling alarm is generated
The alarm is reset automatically when detergent is added.
DOSE 2 LOW LEVEL Empty container alarm 2. If detergent 2 is finished, a handling alarm is generated.
The alarm is reset automatically when detergent is added.
DOSE 3 LOW LEVEL Empty container alarm 3. If detergent 3 is finished, a handling alarm is generated,
The alarm is reset automatically when detergent is added.
DOSE 4 LOW LEVEL Empty container alarm 4. If detergent 4 is finished, a handling alarm is generated.
The alarm is reset automatically when detergent is added.
Note:
When the handling alarm is activated (appears on the display) there is always enough deter-
gent left for one run; in other words, if you have started a program it can run to the end.

<Doc_USR><Doc_502607400><Rel_A><Lang_GB>
Page 20 of 28
Alarms
If the red lamp at O lights up, the process has been aborted because of a fault. The dis-
play shows a fault code.
Acknowledging a fault code
Acknowledge the fault code as follows:
Note the fault code
Cancel the acoustic signal by pressing U. The machine remains locked but the
program has been stopped. The display shows the password entry menu.
Correct the fault or call service personnel.
Enter the password (558387) using the arrow keys and press S. All liquid is drai-
ned from the machine and the soiled-side door is unlocked*.
Open the door and remove the items.
The items in the machine are not clean and must be washed again from the
beginning with a new program.
If the items are still hot, handle them with care to avoid burns.
* If the drain pump is faulty, water cannot be drained from the machine and the fault cannot be put right
until the door has been opened. The soiled-side door is unlocked as soon as the password is confirmed.
Fault codes in the machine
Fault codes indicate that a serious fault has occurred in the machine or the washing pro-
cess. The fault must be put right by an authorized service technician.
The following fault codes may occur:
•
•
•
•
•
F01
Fault code Description
F00 Power failure
F01 The motor cutout has tripped.
F02 Water lling takes more than 10 minutes.
F03 Draining takes longer than ve minutes or there is water remaining
in the washing chamber at the end of the draining phase.
F04 Water leakage in the dryer.
F05 The soiled-side door does not lock within 10 seconds of program
start or if the door is opened while a program is running.
F06 The soiled-side door does not unlock within 10 seconds.
F09 The clean-side door does not close within 10 seconds of program
start or if the door is opened while a program is running.
A09 The soiled-side door does not open within 20 seconds of the pro-
gram ending.
F10 The soiled-side door does not unlock within 10 seconds..
Other manuals for 86 SERIES
2
This manual suits for next models
1
Table of contents
Other Getinge Cleaning Equipment manuals

Getinge
Getinge Castle 7900 User manual

Getinge
Getinge FD1800 User manual

Getinge
Getinge 46-2 User manual

Getinge
Getinge Decomat 9900 Series Operating instructions

Getinge
Getinge 86 SERIES User manual

Getinge
Getinge 88-SERIES User manual

Getinge
Getinge S-606 User manual

Getinge
Getinge Decomat 4656 User manual
Popular Cleaning Equipment manuals by other brands

Kärcher
Kärcher HKF 50 E Original instructions

Auto Care Products
Auto Care Products Park Smart Clean Park quick start guide

Ultrawave
Ultrawave Hygea 6427 Operator's instruction manual

Sinclair
Sinclair TURBO STRIPPER II operating manual

Lydsto
Lydsto G1 instruction manual

Elma
Elma Super Elite operating instructions