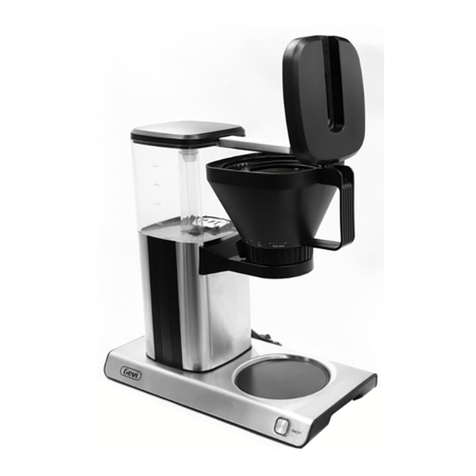
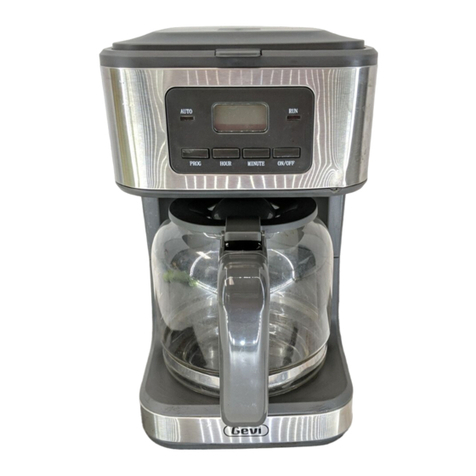
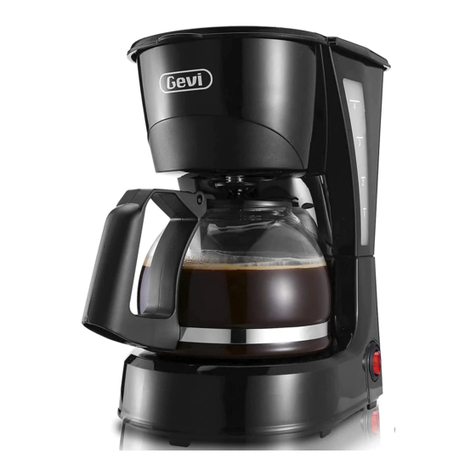
Gevi GECMD008-U User manual

COFFEE MAKER
INSTRUCTION MANUAL
GECMD008-U

CONTENTS
1. WELCOME. . . . . . . . . . . . . . . . . . . . . . . . . . . . . . . . . . . . . . . . . . . . . . . . . . . .
2. DESCRIPTION OF THE APPLIANCE. . . . . . . . . . . . . . . . . . . . . . . . . . . . . .
3. IMPORTANT SAFETY INSTRUCTIONS . . . . . . . . . . . . . . . . . . . . . . . . . . .
4. CORD & PLUG INSTRUCTION . . . . . . . . . . . . . . . . . . . . . . . . . . . . . . . . . . .
4.1 SPECIAL NOTES ON PLUG . . . . . . . . . . . . . . . . . . . . . . . . . . . . . . . . . .
4.2 SHORT CORD INSTRUCTION. . . . . . . . . . . . . . . . . . . . . . . . . . . . . . . .
5. OPERATION OF YOUR MILK FROTHER. . . . . . . . . . . . . . . . . . . . . . . . . . .
5.1 USING YOUR COFFEE MAKER . . . . . . . . . . . . . . . . . . . . . . . . . . . . . . .
5.2 HOW TO MAKE COFFEE . . . . . . . . . . . . . . . . . . . . . . . . . . . . . . . . . . . . .
6. CLEANING AND MAINTENANCE . . . . . . . . . . . . . . . . . . . . . . . . . . . . . . . . .
6.1 DAILY TIPS FOR CLEANING AND MAINTENANCE . . . . . . . . . . . . . . .
6.2 REMOVING MINERAL DEPOSITS. . . . . . . . . . . . . . . . . . . . . . . . . . . . . .
7. REMOVING MINERAL DEPOSITS. . . . . . . . . . . . . . . . . . . . . . . . . . . . . . . . .
8. CLEANING AND MAINTENANCE.. . . . . . . . . . . . . . . . . . . . . . . . . . . . . . . . .
9. ENVIRONMENT FRIENDLY DISPOSAL . . . . . . . . . . . . . . . . . . . . . . . . . . . .
5
6
6
6
10
10
11
11
12
13
2
1
3
5
5
Thanks for purchasing our Gevi products. Gevi has focused on creati-
ng perfect home appliances for our customers. In the past few years,
it took us time to do lots of research and many prototypes to achieve
our goal. We would like to give you a different user experience. If you
want FAQs and more information, please feel free to contact us.
1
1. WELCOME
TO REDUCE THE RISK OF FIRE OR ELECTRIC SHOCK, DO NOT
REMOVE THIS COVER. NO USER‒SERVICEABLE PARTS INSIDE.
REPAIR SHOULD BE DONE BY AUTHORIZED SERVICE PERSO-
NNEL ONLY.

Read these instructions carefully and keep it for future use. If this ap-
pliance is passed to a third party, then these instructions must be
included.
Before using the electrical appliance, some basic precautions should
always be followed including the following:
—1. Read all instructions.
—2. Do not touch hot surfaces. Use handles or knobs.
—3. To protect against fire, electric shock and injury to persons do not
immerse cord, plugs, base or appliance in water or other liquid.
—4. Close supervision is necessary when any appliance is used by or
near children.
—5. Unplug from outlet when either the appliance or display clock is
not in use, and before cleaning. Allow to cool before putting on or ta-
king off parts, and before cleaning the appliance.
—6. Do not operate any appliance with a damaged cord or plug or after
the appliance malfunctions, or has been damaged in any manner.
Return appliance to the nearest authorized service facility for exami-
nation, repair or adjustment.
—7. The use of accessory attachments not recommended by the app-
liance manufacturer may result in fire, electric shock or injury to persons.
—8. Do not use outdoors (this item may be omitted if the product is
specifically designed for outdoor use).
—9. Do not let cord hang over edge of table or counter, or touch hot
surfaces.
32
2. DESCRIPTION OF THE APPLIANCE
MODEL: GECMD008-U
Electrical parameters: 120V~ 60Hz 600W
1
2
3
4
6
5
7
8
9
Description
Filter
Funnel
Top cover
Keeping warm plate
Power switch
Water tank
Carafe handle
Glass carafe
Carafe lid
Description DescriptionRe. Re. Re.
1
2
3
4
5
6
7
8
9

—10. Do not place on or near a hot gas or electric burner, or in a heated
oven.
—11. To disconnect, turn any control to off position, then remove plug
from wall outlet.
—12. Do not use appliance for other than intended use.
—13. Special instructions covering lid placement and removal. Word-
ing may vary.
—14. Do not clean container with cleansers, steel wool pads, or other
abrasive material.
—15. Scalding may occur if the lid is removed during the brewing
cycles.
—16. A. The container is designed for use with this appliance. It must
never be used on a range top. (Unless specific instructions for use on
a range top are provided and include the precautions to be observed.)
B. Do not set a hot container on a wet or cold surface.
C. Do not use a cracked container or a container having a loose or
weakened handle.
D. Do not clean container with cleansers, steel wool pads, or other
abrasive material.
E. Scalding may occur if the lid is removed during the brewing cycles.
—17. The instructions for all appliances shall include:
‒ a statement that the heating element surface is subject to residual
heat after use.
54
This appliance has a polarized plug (one blade is wider than the other).
To reduce the risk of electric shock, this plug is intended to fit into a
polarized outlet in only one way. If the plug does not fit fully into the
outlet, reverse the plug. If it still does not fit, contact a qualified ele-
ctrician. Do not attempt to modify the plug in any way.
4. CORD & PLUG INSTRUCTION
4.1 SPECIAL NOTES ON PLUG
a) A short power-supply cord (or detachable power-supply cord) is
provided to reduce the risk of entanglement or tripping over a long
cord.
b) Longer detachable power-supply cords or extension cords are
available and may be used if care is exercised in their use.
c) If a longer detachable power-supply cord or extension cord is used:
1) The marked electrical rating of the cord set or extension cord
should be at least as large as the electrical rating of the appliance;
2) The longer cord should be arranged so that it will not drape over
the counter top or table top where it can be pulled on by children or
tripped over.
4.2 SHORT CORD INSTRUCTION

76
5.2 HOW TO MAKE COFFEE
(3)Start the machine and let brew all
the water in the water tank ❹. (No need
to add coffee powder).
(1)Place the coffee maker on a flat surf-
ace.
(3)Place the funnel ❷ into funnel holder
and make sure the funnel ❷ is assembled
in place, and then place the filter into
the funnel.
(4)Add proper coffee powder into filter
❶, and make sure the quantity of coffee
powder matches the quantity of water
you add. Finally, close the top cover ❸.
(2) Open the top cover ❸ and fill the
water tank ❹ with clean room tempera-
ture water. The quantity of water need
corresponding to the final quantity of
coffee you want. The water level should
not exceed MAX level as indicated on the water level indicator.
For a better taste and good for your health, we suggest you to rinse
the machine and release the water out.
(1)Check that all accessories are complete and the coffee maker is
not damaged.
5. OPERATION OF YOUR COFFEE MACHINE
5.1 BEFORE FIRST USE OR A LONG TIME NOT USE
(2)Fill the water tank ❹ with clean, room
temperature water, close the top cover.
(NOT exceed the “MAX” line).
TIPS: 10g powder ( around 2 flat spoons ) for 1-cup coffee
recommended, but you may adjust according to personal
taste. Please note that 40g coffee powder is the maximum.

98
Note: The coffee you get will less than the water you have
added, as some water is absorbed by coffee powder.
CAUTION: When pour coffee, the momentary inclined angle
of glass carafe ❾ shall not be more than 45 degree from the
vertical position, you shall pour the coffee slowly until the gla-
ss carafe ❾ is empty, otherwise the coffee in the glass carafe
❾ will rush to the bottom of carafe lid ❼, and the coffee will
flow out from two edges of lid !
(8) The brewing cycle will automatically stop after finishing all the
water in the water tank.
(9) Remove out glass carafe ❾ to serve when finish brewing (about
one minute later after the coffee stops dripping out).
(10) After brewing, the coffee maker will automatically switch to the
warming mode, which will continue to keep your coffee warm until
you turn off the coffee maker. It is suggested that warming time shall
be not more than 1 hour. For an optimum coffee taste, serve it just
after brewing.
(11) Always turn the coffee maker off and unplug the appliance when
not in use.
Note: The coffee maker is designed with a pause-and-serve
feature, if you wish, at any time during brewing cycle, you can
temporarily remove glass carafe ❾ to pour and serve a cup of
hot coffee. The brewing cycle will not be interrupted and no
coffee will drip from the coffee maker, simply put again glass
carafe ❾ onto warming plate to restart the brewing cycle, but
do not remove glass carafe ❾ for longer than 30s.
(5)Insert glass carafe ❾ with carafe lid ❼
in place onto warming plate horizontally,
ensure center line of carafe aligns with
that of funnel ❷.
(6)Plug the unit into an outlet.
(7)Press power switch ❻, the indicator in
it will be illuminated and the coffee maker
will begin working.
Note: Be careful when pouring the coffee, the temperature
of the freshly made coffee is very high, which may hurt you.

1110
7. TIPS FOR PERFECT BARISTA
Note: Do not attempt to clean the inside of water tank ❹,
as this will leave a residue of lint and may clog your coffee
maker, simply rinse with cold water periodically.
CAUTION: Be sure to unplug this appliance before cleaning.
To protect against electrical shock, do not immerse cord, plug
or unit in water or liquid. After each use, always make sure plug
is first removed from wall outlet.
(1) Clean all detachable parts after each use with clean water. Use a
clean damp cloth to scrub the body and bottom of the product. It is
not recommended to use water to rinse the body and bottom of the
product. Pay attention to keep the bottom and base of the product
clean and avoid stagnant water.
(2) Water droplets may buildup in the area above the funnel and drip
onto the product base during brewing. To control the dripping, wipe
off the area with a clean, dry cloth after each use of the product.
(3) Keep all clean parts on the machine for next use.
(4) Any other repairs should be performed by an authorized service
representative.
6. CLEANING AND MAINTENANCE
6.1 DAILY TIPS FOR CLEANING AND MAINTENANCE
6.2 REMOVING MINERAL DEPOSITS
To keep your coffee maker operating efficiently, you should clean away
the mineral deposits left by the water regularly according to the water
quality in your area and the frequency use the appliance, the detail
is as follows:
(1) Fill the water tank ❹ with water and citric acid to the MAX level (
The rate of citric acid and water is 1:100).
(2) Place the glass carafe ❾ on the keeping warm plate, pay attention
to let center line of carage aligns with that of brew basket.
(3) Make sure the filter ❶ is free of coffee powder.
(4) Press power switch ❻ , the indicator will be illuminated. The coffee
maker will begin working.
(5) Brew about two cups of water.
(6) Press the power switch ❻ again to stop the coffee maker imme-
diately, left the citric acid deposit in it at least 15 minutes.
(7) Repeat the steps of 4-6 at least 3 times, then brew until no citric
acid is left in the tank.
(8) Refill the water tank ❹ with clean water to the MAX level and brew
until no water is left in the tank.
(1) Always use clean, room temperature water in the coffee maker.
(2) For an optimum coffee taste, buy whole coffee beans and finely
grind them just before brewing.
(3) You must keep the unused coffee powder in a cool, dry place.
1312
8.TROUBLESHOOTING 9. ENVIRONMENT FRIENDLY DISPOSAL
(4) Do not reuse coffee powder since this will greatly reduce the coff-
ee’s flavor. Reheating coffee is not recommended as coffee is at its
peak flavor immediately after brewing.
Do not take apart the appliance by yourself if the cause of failure is
not found, it’s better to contact certified serving center.
You can help protect the environment! Please remember
to respect the local regulations: hand in the non-working
electrical equipment to an appropriate waste disposal
center.
The power outlet is not plug-
ged well.
The coffee maker
cannot work.
Coffee overflow
No water from the
coffee machine Need to clean and descaling.
Plug the power cord into a
wall outlet correctly, if the
appliance still does not work,
please contact with the aut-
horized service facility for
repairing.
Problem Possible Cause Solution
Use either filter paper or filter
❶ (the two cannot be used at
the same time)
10g powder around 2 flat spo-
ons for 1-cup coffee recomm-
ended. Do not exceed 40g.
2. Use filter paper and filter ❶
at the same time.
1. Overfill coffee powder
Fully insert to contact the bot-
tom of the valve. Do not open
the carafe lid ❸.
3. Misplacement of glass carafe
❽
4. Glass carafe ❺ is taken away
for more than 30s during the
brewing process.
The glass carafe ❺ should not
be taken away for more than
30 seconds during the brewing
process
To descale and more details
refer to "REMOVING MINERAL
DEPOSITS".
Correct Disposal of this product
Other manuals for GECMD008-U
2
Table of contents
Other Gevi Coffee Maker manuals

Gevi
Gevi GECMA025AK-U User manual

Gevi
Gevi GECME020DE-U Operating and maintenance instructions

Gevi
Gevi GECME003D-U User manual

Gevi
Gevi GECMA160A-U User manual

Gevi
Gevi GECME003D-U User manual

Gevi
Gevi GECMA052DA-U User manual

Gevi
Gevi GECME400BA-U User manual

Gevi
Gevi GECME403-U User manual

Gevi
Gevi GECMA162A-U User manual

Gevi
Gevi GECME020DE-U User manual

Gevi
Gevi GECMD627BK-U User manual

Gevi
Gevi GECME403-U User manual

Gevi
Gevi GECME003D-U User manual

Gevi
Gevi GECMA082T-U User manual

Gevi
Gevi GECMA121B-U User manual

Gevi
Gevi GECMD276-U User manual

Gevi
Gevi GECMA409-U User manual

Gevi
Gevi GECME022-U User manual

Gevi
Gevi GECME022-U User manual

Gevi
Gevi GECMD627BK-U User manual