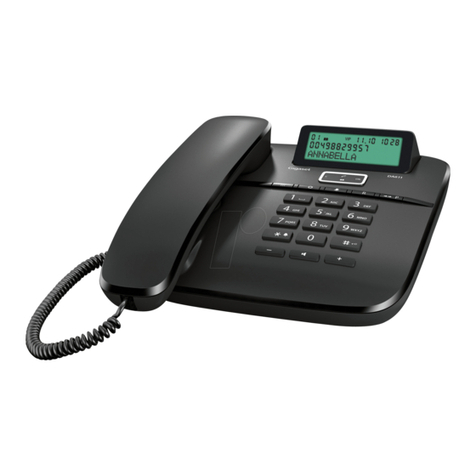
Gigaset DESK800A User manual

Gigaset DESK 800A / LUG IM en / A30350-M225-R101-1-4E19 / Cover_front.fm / 6/2/23
<P>de en<P> fr it 1
1110-01

Gigaset DESK 800A / LUG IM en / A30350-M225-R101-1-4E19 / Cover_front.fm / 6/2/23
2<P>deen<P> fr it
1110-01

de en fr it 1
1110-01
Gigaset DESK 800A / LUG IM en / A30350-M225-R101-1-4E19 / overview.fm / 6/2/23
Overview Gigaset DESK 800A
LEDs
AHands-free key lights up if the call is routed
through the speaker or headset. Flashes when
there is an incoming call, new missed call or new
voice message.
@Answer machine key lights up if the answer
machine is activated. Flashes if new messages are
received.
Read the user guide carefully and observe the infor-
mation on using your telephone. Retain this user
guide for later use. Only use the jacks and leads sup-
plied.
Keys
1Control key
2Display
3Hands-free/speaker key
4Menu/key
5Volume up key
6Direct dial keys
7Direct dial toggle key
8Play/pause key
9Hash key/lock key + upper/lower case key
10 Answer machine key
11 Volume down key
12 Star key + ring tone on/off key
13 Recall key
14 Mute key/delete key

2de en fr it
1110-01
Gigaset DESK 800A / LUG IM en / A30350-M225-R101-1-4E19 / overview.fm / 6/2/23
Safety information
Proper use
Your Gigaset DESK 800A telephone – referred to as the ‘tele-
phone’, is suitable for making and receiving calls within a tele-
phone network. Your telephone is only suitable for private use
in enclosed indoor spaces.
Any other use is not permitted.
Unauthorised changes or modifications are not permitted.
Safety information
Only connect the connecting lead to the intended tele-
phone socket.
Do not touch the plug contacts with pointed or metallic
objects.
Do not pull your telephone by the cables to protect the
telephone and the cables from damage.
Do not use your telephone in potentially explosive envi-
ronments, such as paint shops.
Your telephone is not splash-water protected. Do not
install it in wet rooms, such as bathrooms or shower
rooms.
Only use the power adapter indicated on your telephone.
Whilst charging, the power socket must be easily accessi-
ble.
Do not use your telephone if the display is cracked or
shattered. Shattered glass or plastic can cause injuries to
the hands and face. Have your telephone repaired by the
Service department.
Please decommission defective telephones or have them
repaired by the Service department as they could disrupt
other mobile services.
Your telephone has a permanent memory. Delete all personal
data from your telephone before disposing of your telephone
or giving it to a third party. If you give your telephone to some-
one else, make sure that you also give them the user guide.
Checking the package contents
Check the package contents of your telephone before you start
to use it.
Handset
Base
Stand
RJ11 connecting cable
Country-specific adapter (only in Germany and Austria)
Handset cable
Power adapter
User guide
Contact our Customer Service if anything is missing or dam-
aged (p. 25).
Insert strips
Blank insert strips for the direct dial keys can be found online at:
www.gigaset.com/manuals
Information on use
Recommended installation of your telephone
Route the connecting lead where it will not cause accidents.
Position the telephone on a non-slip surface.
Protect your telephone from moisture, dust, corrosive liquids
and vapours.
Do not expose your telephone to direct sunlight or other
sources of heat.
Operate at temperatures of between +5°C and +40°C.
Maintain a distance of at least one metre between your tele-
phone and radio equipment, e.g. radio telephones, radio
paging equipment orTV sets. Otherwise, telephone commu-
nication may be impaired.
Do not install your telephone industy rooms as this can limit
the service life of your telephone.
To clean, wipe with a damp cloth or antistatic cloth – never
use a dry cloth (risk of electrostatic charge and discharge) or
corrosive cleaning agents.
Furniture lacquer and polish can be adversely affected by
contact with parts of the devices (e.g. feet).

de en fr it 3
1110-01
Gigaset DESK 800A / LUG IM en / A30350-M225-R101-1-4E19 / overview.fm / 6/2/23
Information on use
Connecting the telephone
Insert the short end of the spiralled handset cable into the
socket in the handset (6) and the long end into the socket
(4) marked Qon the base of the device.
Guide the handset cable through the corresponding cable
channel (4) and the cable channel under the socket (3)
marked Ô.
As an alternative, you can connect a headset to the socket
(5) marked n.
Insert the telephone cable into the telephone connection
socket (the connector is country-specific) and the other end
into the socket (3) on the base of the device marked Ô.
Connect the power adapter to the socket (2) marked $,
guide upwards through the recess and connect to the
socket.
Insert the stand (7) into the holder (1) at the top. You will
hear the stand (7) click into place.
Your telephone is now ready for use.
Note:
The telephone will only work if it is connected to mains power.

4de en fr it
1110-01
Gigaset DESK 800A / LUG IM en / A30350-M225-R101-1-4E19 / overview.fm / 6/2/23
Information on use
Wall mounting
WWarning! Danger of death from electric shock or gas
explosion! When installing, pay attention to the presence of
electricity cables and gas pipes in the wall. Take care not to
accidentally damage electricity cables or gas pipes.
This telephone is only suitable for a maximum installation
height of 2 m.
Drill two holes in the wall a horizontal distance of approx.
71 mm apart and insert two suitable screws (not supplied).
Insert the stand (7), rotated by 180°, into the lower holder
(1) on the rear of your telephone. This improves the legibil-
ity of the keys and the insert strip.
You will hear the stand (7) click into place.
Mount your telephone on the projecting screw heads.

de en fr it 5
1110-01
Gigaset DESK 800A / LUG IM en / A30350-M225-R101-1-4E19 / telephony.fm / 6/2/23
Using the telephone
Using the telephone
The keypad and the display are available to operate your
Gigaset DESK 800A and view its functions and menus. In addi-
tion, the display menu together with the control key provides
access to the configuration and use of the many functions of
your telephone. All usage options are described in the user
guide.
Display
Depending on the operating situation, the display shows dif-
ferent information, such as the date and time. You can set the
date and time and the format in which it is displayed (p. 11).
1Toolbar: Status indicator; date and time (depending on the
operating situation)
2Time (in idle); call duration, telephone numbers, settings
(depending on the operating situation)
3Date, missed calls (in idle); menu selection, options, names
(depending on the operating situation)
Display symbols
01 Shows the number of an entry in the call list.
Displays the number of missed calls when the
telephone is in idle mode.
Answer machine activated.
Lights up if the answer machine is activated.
)New missed call.
'New voice message on the answer machine.
gTelephone directory open.
iKey lock activated.
kRing tone is turned off or ‘VIP only’ is set.
mMute mode activated.
nHeadset is being used during a call.
bLights up if the direct dial keys are toggled.
lLights up if ring tone mode is set to ‘VIP only’.
Lights up in the event of an incoming, outgoing
or ongoing VIP call.
Lights up when on a VIP contact in the tele-
phone directory or in the call list.
Display language
English is set as the default language on delivery. Other lan-
guages are available. They can be changed if required
(p. 11).
Control key
When the telephone is in idle:
t|Opens the call list.
s}Opens the telephone directory.
vOpens the redial list.
In menus and lists:
qScrolls one entry upwards/downwards.
uMenu: one level up, exits the menu.
List: exits.
MOpens the sub-menu/context menu.
When changing settings:
uExits the settings menu.
When editing numbers:
vInserts a pause.
When editing entries/changing settings:
Mkey: Saves the entry or adopts the selected
settings.
Telephone number entered or direct dial key pressed:
MDials the telephone number.
The telephone’s functions are activated
and the menu is navigated using the con-
trol key.The functions offered depend on
the operating situation.

6de en fr it
1110-01
Gigaset DESK 800A / LUG IM en / A30350-M225-R101-1-4E19 / telephony.fm / 6/2/23
Using the telephone
Writing and editing text
Text entr y
Enter names and numbers with the keypad.
Multiple letters, numbers or characters are assigned to each
key between and Oand Q, +and $.
The entry of a specific character is carried out by pressing the
corresponding key multiple times.
You will find a table of applicable characters in (p. 23).
Deleting/correcting characters
uPress the control key to delete the character to
the left of the cursor.
Step-by-step instructions for menu operation
The user guide contains individual steps that are required for
menu navigation in abbreviated notation, e.g.:
MAudio settings Speaker Volume
The arrow means:
Scroll to the function using the control key q, then press the
key M.Then press the key Magain to select the
menu.
Detailed explanation of the example above:
MPress the menu key.
sUse the control key to scroll to Audio settings.
MPress the key.
sUse the control key to scroll to Speaker Vol-
ume.
MPress the key.
If a sub-menu then opens, use the control key sand key
Mto scroll.
Menu
Many of the functions of your telephone are displayed in a
menu that consists of several levels. The main menu and sub-
menu functions are shown in lists.
Main menu (first menu level)
To open the main menu:
MPress the menu key.
The menu functions and sub-menu functions are displayed in
the lower display line.
Sub-menus
To access a function in the sub-menu:
qM Scroll to the function with the control key, press
the key (you can use the same method to
access the next level of the sub-menu).
The function to be set appears in the final selection of a sub-
menu. An asterisk to the right indicates the current setting.
You can change the current setting here after pressing the
key M. Press the key Mto save the settings.
Back (without storing), exiting the menu
Certain settings on your telephone must be completed with
the key Mfor them to be permanently available.
You can use the control key uto return to the next menu
level up without saving the setting.
Memory prompt when exiting certain menu items:
uQuery: Save? appears.
M/uConfirm by pressing the key or cancel by
pressing the control key u.
Telephone directory, call list and redial list
The telephone directory, call list and redial list can be opened
using the menu or keys.
Using the menu
Select Call list or Phonebook or Redial in order to open the
desired list.
MPress the menu key.
tScroll to Call list or Phonebook or Redial with
the control key.
MConfirm with the key.
Using keys
|Open the call list with the control key t.
}Open the telephone directory with the control
key s.
vOpen the redial list via the control key v.
The most recent entry in the list appears in the display.
Scroll to the desired entry with the control key qand
press the key Mto open the context menu.
de en fr it 7
1110-01
Gigaset DESK 800A / LUG IM en / A30350-M225-R101-1-4E19 / telephony.fm / 6/2/23
Making/receiving calls
In addition to using the handset for calls, you can also use the
speaker (hands-free function). In the following instructions, the
symbol also always stands for A.
Dialling telephone numbers with the keypad
Raise the handset, dial the telephone number.
or...
Dial the telephone number. Incorrectly entered
numbers can be deleted with uand then re-
entered.
APress the speaker key Aor raise the handset.
The number is dialled after 1 second.
The duration in minutes and seconds is shown on the display
during the call.
Switching the hands-free function on/off
This telephone allows you to make calls and implement set-
tings with the handset replaced (hands-free). The optimum
speaking distance from the microphone is approx. 50 cm.
Switching on during a call using the handset
APress the speaker key.
Switching on before dialling
ABefore dialling: Press the speaker key.
Switching off hands-free
/ARaise the handset during the call or press the
speaker key.
Muting the microphone
You can switch off the microphone in your telephone's hand-
set, in which case the person you are talking to will no longer
hear you.
CDuring a call: Press the mute key.
CTo reactivate the microphone, press the mute
button again.
Once your telephone has been muted, this is indicated on the
display with the msymbol.
Switching off the microphone and speaker
You can also switch off your speaker, in which case you will no
longer hear the person you are talking to.
MPress the menu key.
qUse the control key to scroll to Audio settings.
MConfirm with the key.
qUse the control key to scroll to Mute mode.
MConfirm with the key.
qSelect Mic&Spk. Off with the control key.
MConfirm with the key.
Conversation ongoing
CPress the mute key.
Dialling from the call list
The call list contains the telephone numbers of the last 50
incoming calls.
Prerequisite: Telephone number display is possible for incom-
ing calls (p. 15).
If the number is saved to the telephone directory, the accom-
panying name is also displayed, if present.
|Open the call list with the control key t.
qSelect the telephone number or name.
Either...
Raise the handset.
or...
APress the speaker key.
Note:
You can replace the handset with the speaker key pressed.
Note:
The microphone in the handset is switched off if the speaker
key is pressed. Only the hands-free microphone in the tele-
phone remains on.
You can replace the handset with the speaker key pressed.

8de en fr it
1110-01
Gigaset DESK 800A / LUG IM en / A30350-M225-R101-1-4E19 / telephony.fm / 6/2/23
Making/receiving calls
or...
MOpen the context menu.
qM Select Call back and initiate the call using the
speaker with the key.
Raise the handset to make the call using the
handset.
Last number redial
The last dialled telephone numbers (max. 32) are automatically
saved. You can dial these telephone numbers from the redial
list and call them again:
Dialling from the redial list
vWith the handset replaced: Press the redial key.
qScroll to the desired telephone number with
the control key.
Either...
Raise the handset.
or...
APress the speaker key.
or...
MOpen the context menu with the key.
qSelect Dial number with the control key.
M/APress the key or press A.
The number is dialled after 2 seconds. Raise the
handset to conduct the call with the handset.
Deleting a dialled telephone number
vWith the handset replaced: Press the redial key.
qScroll to the desired telephone number with
the control key.
MOpen the context menu with the key.
qSelect Delete entry with the control key.
Prompt: Delete? appears.
MConfirm with the key.
Dialling with the direct dial keys
Raise the handset.
SPress the direct dial key.
or...
SPress the direct dial key.
Raise the handset.
or...
SPress the direct dial key.
APress the speaker key.
The number is dialled after 2 seconds. Raise the
handset to conduct the call with the handset.
or...
APress the speaker key.
SPress the direct dial key.
The number is dialled immediately. Raise the
handset to conduct the call with the handset.
or...
SPress the direct dial key.
MPress the key.
qScroll through the list to Dial number with the
control key.
MConfirm with the key.
Dialling with the telephone directory
MPhonebook
qScroll through the list to the desired name with
the control key
(you can also use the number keys to enter the
first letters of the name, then scroll with qif
necessary).
/ARaise the handset or press the speaker key.
The number is dialled after 2 seconds.
or...
MPress the key.
sSelect Dial number in the menu.
MPress the key.
The telephone number is dialled.
Incoming calls
Incoming calls are signalled by the ring tone and shown on the
display.

de en fr it 9
1110-01
Gigaset DESK 800A / LUG IM en / A30350-M225-R101-1-4E19 / telephony.fm / 6/2/23
Making/receiving calls
With telephone number display (p. 15), you can see the tele-
phone number on the display.
The name is also displayed for callers who are saved to the tele-
phone directory.
If the caller is a VIP contact (p. 13), the VIP symbol lights up
in the display and the VIP ring tone signals the call.
Accepting a call
Raise the handset.
or
APress the hands-free key to route the call
through the speaker.
Saving telephone numbers
Pauses can be saved by pressing v(not at the first digit of
the telephone number).
After the 14th digit, any subsequent digits on the display are
shifted from right to left.
Saving to the telephone directory
You can save 200 names with telephone numbers in the tele-
phone directory.
MPhonebook New entry
Enter the telephone number to be saved (max.
32 digits). You can delete incorrectly entered
digits from right to left by pressing the control
key u.
MPress the key.
Enter the name (special characters p. 23).
Press $once to switch from upper case to
lower case. Press $twice to enter the digits.
You can delete incorrectly entered letters from
right to left by pressing u.
MPress the key.
qUse the control key to select VIP mode On or
Off.
MPress the key.
Prompt: Save to PBK? appears.
MConfirm with the key.
Saving to a direct dial key
You can save frequently used telephone numbers or functions
to the seven direct dial keys.
SPress the direct dial key you wish to save the
number to.
MPress the key.
qNavigate to the Edit entry option with the con-
trol key.
MPress the key.
Enter the telephone number to be saved (max.
32 digits). You can delete incorrectly entered
digits from right to left by pressing the control
key u.
MPress the key.
Enter the name (special characters p. 23).
Press $once to switch from upper case to
lower case. Press $again to enter digits.
You can delete incorrectly entered letters from
right to left by pressing the control key u.
MConfirm with the key.
or...
While creating the entry in the telephone directory, and at the
prompt Save to PBK?:
SPress the direct dial key.
Saving from the call list or redial list
qIn the call list (p. 6), press the control key
until the desired telephone number appears on
the display.
MPress the key at the selected entry.
sM Select Save number in the menu and press the
key.
Then, save the telephone number to the telephone directory or
to a direct dial key.

10 de en fr it
1110-01
Gigaset DESK 800A / LUG IM en / A30350-M225-R101-1-4E19 / telephony.fm / 6/2/23
Making/receiving calls
Using the telephone directory
You can save up to 200 entries to the telephone directory of the
Gigaset DESK 800A (max. 32 digits for the telephone number).
You can use the telephone directory to initiate a call (p. 8),
create new entries (p. 9) and manage and change entries.
You can manually enter telephone numbers and names or
transfer them from the call list (p. 9). You can also give VIP
status to a telephone number.
The gsymbol is shown on the display if the telephone direc-
tory has been opened. The number as well as the name of the
entry will also appear on the display. If this entry is a VIP con-
tact, the lsymbol lights up on the display.
Opening the telephone directory
In idle:
}Press the control key s.
or
MPhonebook
Searching for an entry
In idle:
qSelect an entry.
or
Enter the letters. The first entry starting with
this letter is displayed.
Editing entries in the telephone directory
MPhonebook
qScroll to the desired name with the control key.
MPress the key.
qSelect Edit entry in the menu.
MPress the key.
Edit the number. You can delete incorrectly
entered digits from right to left by pressing the
control key u.
MPress the key.
Edit the name.
MPress the key.
qUse the control key to select VIP mode On or
Off.
MEdit entry: Press the key.
Deleting telephone directory entries
MPhonebook
qUse the control key to select the entry to be
deleted.
MPress the key.
qSelect Delete entry with the control key.
Prompt: Delete? appears.
M/uConfirm by pressing the key or cancel by
pressing the control key u.
Deleting the entire telephone directory
MPhonebook
qUse the control key to select any entry.
MPress the key.
qSelect Delete all with the control key.
Prompt: Delete all? appears.
M/uConfirm by pressing the key or cancel by
pressing the control key u.
Note:
Press $once to switch from upper case to lower case.
Press $again to enter digits.
Note:
You can switch between entering a name and entering a num-
ber by using q.

de en fr it 11
1110-01
Gigaset DESK 800A / LUG IM en / A30350-M225-R101-1-4E19 / telephony.fm / 6/2/23
Telephone settings
Using the call list (CLIP)
Incoming calls are saved if the number is transmitted (p. 15).
Up to 50 entries are saved. The oldest call is automatically
deleted when there are more than 50 calls. If the caller’s name
is transmitted, it is displayed. If the name is stored in the tele-
phone directory, the telephone directory name is displayed.
In the call list, you can
scroll through the displayed telephone numbers,
delete entries,
save telephone numbers from the call list to a direct dial key
or to the telephone directory (p. 9),
dial a displayed telephone number directly.
Viewing the call list and selecting a telephone
number
If the call list contains entries that have not yet been viewed,
the )symbol flashes on the display. The )symbol also lights
up when you are on an unread entry.
Opening the call list:
|Press the control key t.
Scrolling through the call list:
qPress the control key.
Dialling a telephone number:
Either...
Raise the handset.
or...
APress the speaker key.
or...
MPress the key at the selected entry.
sSelect Call back in the menu.
M/APress the key or press A.
The number is dialled after 2 seconds. Raise the
handset to conduct the call with the handset.
Deleting entries from the call list
Deleting an individual entry
qScroll through the call list to the desired entry.
MPress the key.
qSelect Delete entry with the control key.
Prompt: Delete? appears.
M/uConfirm by pressing the key or cancel by
pressing the control key u.
Deleting all entries together
MPress the key in the call list.
qSelect Delete all with the control key.
Prompt: Delete all? appears.
M/uConfirm by pressing the key or cancel by
pressing the control key u.
Telephone settings
Basic settings
All basic settings are accessed via the Phone setup menu.
The current setting is marked at the right-hand side of the dis-
play with *.
Setting the language
Different languages are available for the display texts (Deutsch,
English, Français, Italiano).
MPhone setup Language
qSelect the language.
MConfirm with the key.
When the display language is changed, the language of the
standard greeting on your answer machine changes at the
same time.
Setting the time and date
MPhone setup Date/time
Enter the date and time in the format
DDMMYY HHMM, e.g. 05.02.23 15:59.
Press sor tto select the entry position.
MPress the key.

12 de en fr it
1110-01
Gigaset DESK 800A / LUG IM en / A30350-M225-R101-1-4E19 / telephony.fm / 6/2/23
Telephone settings
Setting the date/time format
MPhone setup Date/Time format
qSelect the desired date format and confirm with
the key. Example: 31 December 2023
YYYY.MM.DD: 2023.12.31
MM/DD/YYYY 12/31/2023
DD.MM.YYYY: 31.12.2023
DD/MM/YYYY: 31/12/2023
MPress the key to save the setting.
qSelect the time format and confirm with the
key.
24h: 24-hour format
12h: 12-hour format
MPress the key to save the setting.
Setting the LED on the hands-free key
You can specify when the telephone LED should flash (key A)
in idle.
MPhone setup Speaker LED
qSelect the desired setting and confirm with the
key.
Off: for an incoming call only
Incoming Call: for new missed calls and for
incoming calls
Messages: for new voice messages not yet lis-
tened to (if receipt of messages is signalled by
the network provider) and for incoming calls
On: for new missed calls, messages and incom-
ing calls
MPress the key to save the setting.
Setting the handset volume
The handset volume can be set at 3 levels and saved (as-deliv-
ered condition: level 1).
MAudio settings Handset Volume
qPress the control key.
MPress the key.
or
E/DPress the volume up or down key.
MPress the key.
Setting with the handset raised
E/DPress the volume up or down key.
The setting is saved. The saved volume will be used for the next
call.
Setting the speaker volume
The speaker volume can be set at 7 levels and saved (as-deliv-
ered condition: level 1).
MAudio settings Speaker Volume
qPress the control key.
MPress the key.
or
E/DPress the volume up or down key.
MPress the key.
Setting when using hands-free
E/DSet the volume with the volume up/down key.
Setting the headset volume:
The headset volume can be set at 3 levels and saved (as-deliv-
ered condition: level 1).
MAudio settings Headset Volume
qPress the control key.
MPress the key.
or
E/DPress the volume up or down key.
MPress the key.
Setting when using the headset
E/DSet the volume with the volume up/down key.
Setting ring tones
MAudio settings Ring tones
You can now set the following:
Ring tone volume in 5 levels or "off".
Ring tone melody; 10 melodies (as-delivered condition: mel-
ody 0).
Setting the ring tone volume
E/DPress the volume up or down key.

de en fr it 13
1110-01
Gigaset DESK 800A / LUG IM en / A30350-M225-R101-1-4E19 / telephony.fm / 6/2/23
Security settings
Setting the ring tone melody
qPress the control key.
MPress the key.
Setting when the telephone is ringing
Before raising the handset:
E/DPress the volume up or down key.
The last set value is saved.
Setting the VIP melody
You can set one of the ring tones as VIP Melody. When you
have assigned a telephone number in the telephone directory
VIP mode status (p. 10), an incoming call from this tele-
phone number will be indicated with the VIP Melody ring tone.
MAudio settings VIP Melody
Select the desired ring tone with control key
q.
Default setting: VIP melody 2
D/ESet the volume for the current ring tone.
MPress the key to save the setting.
Setting the ring mode
If you do not wish to be disturbed, you can switch off the tele-
phone’s ring tone. The three following optional settings are
available: All tones off, VIP only (see above), All tones on
(default setting).
MAudio settings Ringer mode
qSelect the desired setting.
MConfirm with the key.
With setting All tones off, the ring tone is switched off entirely
and the ksymbol is shown on the display.
With the VIP only setting, when your telephone is in idle mode
the symbols land kare shown on the display and the
phone will only ring if you are called by VIP contacts.
Switching the ring tone on/off using the key
+Press and hold the key to switch the ring tone
off and back on.
Setting the area code
If necessary, you can change the default setting for the saved
area code for your connection which is saved in the telephone.
The number saved here is then used to display only the number
of the person calling without area code in the call lists, pro-
vided that they have the same area code.
MPhone setup Area code
The default number is displayed.
Enter the new area code (max. 6 digits).
MConfirm with the key.
Setting screen lighting
MPhone setup Screen timeout
You can set whether the screen should enter sleep mode after
a certain period of time or remain on continuously.
Security settings
Switching key lock on/off
The telephone can be locked to prevent dialling. Only a set
emergency number can be dialled. Incoming calls can still be
answered.
Switching telephone lock on
MSecurity
qSelect Key lock in the menu.
MPress the key.
If you have assigned your own PIN
Enter the PIN.
vPress the key.
Switching telephone lock off
$Press the hash key.
Enter current PIN.
MPress the key.
Note:
When VIP only is set, pressing the +button activates the
All tones off setting. Pressing the +button again switches
all ring tones back on.
Note:
If you have changed the PIN, you must enter it again to access
the Security menu.

14 de en fr it
1110-01
Gigaset DESK 800A / LUG IM en / A30350-M225-R101-1-4E19 / telephony.fm / 6/2/23
Security settings
Once key lock has been switched on, it is indicated on the dis-
play by the isymbol and the note Key lock.
Saving/deleting the emergency number
The saved emergency number can also be dialled when the
telephone is locked. Two numbers (110 and 112) are preset and
cannot be changed.
You can save an additional number.
MSecurity
qSelect Emergency in the menu.
MPress the key.
Saving
Enter the desired emergency number (max. 32
digits).
MPress the key.
Deleting
uYou can use the control key to delete the emer-
gency number digit by digit from right to left.
MPress the key.
Switching one-touch call (baby call) on/off
If a telephone number is set for one-touch call, it is dialled auto-
matically when you raise the handset (or press A) and then
press any number key.
You cannot dial another number, but you can answer incoming
calls.
MSecurity
qSelect Direct call in the menu.
MPress the key.
Enter the one-touch call number (max. 32 dig-
its).
vPress the key.
Switching off
MPress the menu key.
Enter the PIN.
MPress the key.
Changing the PIN
You need the PIN to access the answering machine remotely
and to switch off one-touch calling. If you have set your own
PIN, you will also need it to switch key lock on and off and to
access the Security menu.
MSecurity
qSelect Change PIN in the menu.
Enter a new PIN (4 digits).
MPress the key.
Repeat the new PIN.
MPress the key.
The new PIN has been set.
Resetting the telephone to factory settings
You can reset the telephone to its factory settings.
M
Initiate the function.
Q-
0: Reset all settings;
1: Reset direct dial keys only (p. 9);
2: Delete only PABX (p. 15);
3: Reset network services only (p. 16);
4: Delete redial list (p. 8).
MPress the key.
The device must be disconnected from the mains for the set-
tings to be applied.
Blocking numbers
You can block calls to specific dialling codes (e.g. chargeable
codes), max. 3 numbers with 5 digits each.
MSecurity Call block
sSelect Call block 1 (or 2or 3).
MConfirm with the key.
Enter the number you wish to block.
MConfirm with the key.
Note:
As an alternative, switch key lock on by pressing and holding
$.
Note:
The default PIN is 0000.

de en fr it 15
1110-01
Gigaset DESK 800A / LUG IM en / A30350-M225-R101-1-4E19 / telephony.fm / 6/2/23
Operation with PBX/routers
Entering/deleting trunk codes
If you operate your telephone on a PBX, you may have to store
one or more trunk codes (PABX). A dialling pause is automati-
cally set with the PABX. You can save up to 3 PABX.
MPhone setup PABX code
qSelect PABX 1, PABX 2 or PABX 3.
MConfirm with the key.
You can edit the PABX as follows:
Entering a PABX :
Enter a one to three-digit PABX.
Deleting PABX :
uYou can use the control key uto delete the
PABX one character at a time from right to left.
MPress the key.
Changing the dialling mode
The telephone supports the following dialling modes:
Tone dialling
Pulse dialling
Depending on your PBX, you may need to change your tele-
phone’s dialling mode or the flash time (default setting: tone
dialling)
Setting the consult key flash time
During an external call, you can hold a consultation or transfer
a call. To do this, press the consult key H. Further operation
depends on your PBX.
The flash time (interrupt time) of the consult key is preset as fol-
lows for use of features on public telephone systems:
When connecting to private PBX, you may need to change the
flash time (e.g. 90 ms). Please consult the operating instructions
for your PBX.
MPhone setup Flash time
qSelect the desired flash time in the menu:
90 ms /120 ms/270 ms/375 ms/600 ms.
MConfirm with the key.
Network services of public telephone
systems
To use the services that can be initiated with the consult key
H, start by ensuring that the correct flash time is set for the
key.
Setting the consult key flash time
On public telephone systems, the consult key His required
for certain additional services.
Depending on the country, the appropriate flash time must be
set before using the consult key (p. 15):
Switzerland, Belgium, Netherlands: 120 ms
Germany, France, Luxembourg, Portugal, Greece: 270 ms
Austria, other European countries: 90 ms
Use of calling line identification
Under the following conditions, the telephone numbers of
incoming calls are
(a) shown on the display (max. the first 32 digits) and
(b) all incoming calls are automatically saved in a call list:
Both your network operator and the caller’s network opera-
tor offer calling line identification.
Both you and the caller must have ordered this service (if
required) from the network operator(s).
However, if a caller has suppressed calling line identification
before calling, you will see "---P---" on the display instead of the
telephone number.
Up to 14 digits of a telephone number can be shown on the dis-
play. Longer telephone numbers are displayed in shortened
form from the beginning of the number (e.g. the area code).
If the telephone number has been saved to the telephone
directory, the assigned name is displayed instead of the tele-
phone number.
Germany: 270 ms
Austria/Italy/France: 90 ms
Note:
Network services are functions that your network operator
provides.You must order the services from your network oper-
ator.They may be country-specific (e.g. „Switching the hotline
on/off“ on page 17 or “Automatic callback”on page 17). If you
require assistance, please contact your network operator. You
will find a general description of the features on your network
operator's website or at one of their branches.

16 de en fr it
1110-01
Gigaset DESK 800A / LUG IM en / A30350-M225-R101-1-4E19 / telephony.fm / 6/2/23
Network services of public telephone systems
Changing the CLIP format
With the CLIP format, you define the procedure that your
Gigaset DESK 800A uses to handle the information transmitted
by the network, including the telephone number, name, date
and time.
The CLIP format must be set according to the country. For Ger-
many, Austria and Switzerland, the appropriate setting is FSK 1
& 2 (as-delivered condition = Auto). For other countries (e.g.
Sweden, Norway, Denmark), the DTMF or FSK 1 setting should
be used if calling line identification does not work properly.
(FSK = Frequency Shift Keying)
(DTMF = Dual-Tone Multi-Frequency)
MPhone setup CLIP Format
qSelect the format in the menu.
MSave with the key.
Accepting a waiting call
If you receive a call while already in a call, you will hear the call
waiting tone in the handset. Depending on the network oper-
ator, the telephone number of the waiting call will be dis-
played.
You can switch between the current and waiting call by press-
ing the Hkey. This key combination may differ according
to the network operator. Please consult your network operator.
Switching area code display on/off
You can set the telephone so that the area code of an incoming
call is not displayed. This may be useful if you cannot see the
final digits of a long telephone number on the display.
You can switch off the display for an area code (up to 6 digits).
MPhone setup Area code
Entering the area code:
Enter a one to six-digit area code (without con-
sult key).
Deleting the area code:
uYou can use the control key uto delete the
area code one character at a time from right to
left.
MPress the key.
Deleting the ‘Message available’ indicator
Some network operators offer services that allow caller mes-
sages to be saved (e.g. answer machine services).
If one or more new messages have been left with the network
operator, your network operator may be able to inform you via
your telephone.This information from the network operator is
shown on the display with the 'symbol and the telephone
number.
You can now dial the corresponding telephone number to
retrieve the saved caller messages. The 'symbol then turns
off.
Entering/changing the number of a network
service
If the preset key combinations for the network services do not
match the information from your network operator, or if no key
combination is preset, these can be changed or set in the cor-
responding network services menu.
Your network operator or manager of your PBX will notify you
of the key combination, if offered.
MNET services
qSelect the network service (e.g. Call Divert).
MConfirm with the key.
qSelect the function (Activate or Deactivate).
MConfirm with the key.
qIf necessary, select the sub-function (e.g. All
Calls, No Answer).
MConfirm with the key.
HPress the recall key.
Q... O, +, $
Enter the code for the network service.
MConfirm with the key.
Example: Call forwarding When Busy is activated with *67*
<telephone number> #. A user entry is required at <telephone
number>. Use the following key combination for the configu-
ration:
+LM+$

de en fr it 17
1110-01
Gigaset DESK 800A / LUG IM en / A30350-M225-R101-1-4E19 / telephony.fm / 6/2/23
Network services of public telephone systems
Call forwarding
Switching call forwarding on
MNET services Call Divert Activate
Select call forwarding type:
qSelect the desired setting.
MPress the key.
Enter the telephone number of the forwarding
destination for the selected forwarding type.
MPress the key.
Switching call forwarding off
MNET services Call Divert Deactivate
qSelect forwarding type All Calls, No Answer or
When Busy.
MPress the key.
Switching the call waiting tone on/off
The call waiting tone that is heard when there is an incoming
call during another call can be switched on and off.
MNET services CW Signal
qSelect Activate or Deactivate
MPress the key.
Switching anonymous calling on/off
If you do not want your telephone number to be displayed to
the person you are calling, you can set anonymous calling for
the next call on your telephone:
MNET services Withhold phone number
qSelect Activate.
MPress the key.
Dial the telephone number for the anonymous
call.
Once the call has ended or the handset has been replaced,
‘anonymous calling’is switched off again.
Switching the hotline on/off
A number saved in the network service is automatically dialled
immediately when the handset is raised, without pressing
another key.
MNET services Hotline
Switch on:
qSelect Activate.
MPress the key.
Enter the number.
MPress the key.
Switch off:
qSelect Deactivate.
MPress the key.
Automatic callback
If a dialled number is busy, you can activate the automatic call-
back function. Your telephone will ring as soon as the line is free
again. The telephone number is dialled automatically as soon
as the handset is raised.
MNET services Ringback
qSelect Activate or Deactivate.
MPress the key.
Switching automatic callback on
For a caller on your line to use the automatic callback function
while you are on the telephone, you must switch the function
on.
MNET services Auto recall
The function is switched on. The setting only applies for the
current call. You must switch the function on again, if neces-
sary, for a subsequent call.
Voicemail
You can switch the answer machine service on. You must
request the information from your network operator.
MNET services Voicemail
If there is a new message for you, you will see 'on the display
(p. 16). You can listen to the message from the network
operator.

18 de en fr it
1110-01
Gigaset DESK 800A / LUG IM en / A30350-M225-R101-1-4E19 / telephony.fm / 6/2/23
Network services of public telephone systems
Answering machine
Switch the answer machine on/off
@Press the key to switch the answer machine on.
Press the key again to switch it off.
or ...
MAnsw. Machine Status
qSelect On or Off.
MConfirm with the key.
When the answer machine is switched on, the remaining mem-
ory time is announced. The symbol appears on the display
and the @key on the base lights up.
The telephone is supplied with standard answer machine
greetings.These are used if you do not record a personal greet-
ing.
Managing greetings
Selecting greeting mode
You can select a greeting mode for the answer machine. There
are two different modes to choose from:
Answ.&record: The caller hears the selected greeting and is
able to then leave a message.
Announce only: The caller hears the greeting but cannot
leave a message.
MAnsw. Machine AM Mode
qSelect greeting mode Answ.&record or
Announce only.
MPress the key.
The answer machine automatically switches to Announce only
mode when the memory is full.
Recording your own greetings
The telephone is supplied with standard answer machine
greetings for both modes. You can record your own personal
greeting for both modes.
MAnsw. Machine Announcements
qSelectRec announce or Rec anc only according
to the greeting mode.
MPress the key.
MPress the key to start recording.
Say your greeting after the tone.
You can cancel recording with the control key u.
MPress the key to save the recording.
Please note:
Recording ends automatically if the maximum recording
time of 170 seconds is reached or there is a pause in speech
that lasts for more than 8 seconds.
Recording stops when the memory is full. Delete old mes-
sages to free up space.
If the recording time is shorter than 2 seconds, the greeting
cannot be saved.
Listening to greetings
MAnsw. Machine Announcements
qSelect the greeting that you wish to hear:
Play announce or Play anc only
MPress the key.
The greeting is played back. If you have not recorded a personal
greeting, the default greeting is played.
Deleting greetings
MAnsw. Machine Announcements
qSelect the greeting that you wish to delete:
Del announce or Del anc only
MPress the key to confirm the prompt.
After deleting your personal greeting, the standard greeting for
Answ.&record or Announce only is used again.
Note:
Delete messages you no longer need at regular intervals so
(p. 19) that you have enough space available for new mes-
sages.
You cannot start the playback function of the answer machine
during a call.
Note:
Standard greetings cannot be deleted.
Table of contents
Other Gigaset Telephone manuals

Gigaset
Gigaset C610A User manual

Gigaset
Gigaset 5005 Series User manual

Gigaset
Gigaset DX600 A ISDN User manual

Gigaset
Gigaset E290M Duo User manual

Gigaset
Gigaset SL78H User manual

Gigaset
Gigaset E290 User manual

Gigaset
Gigaset DL580 User manual

Gigaset
Gigaset C300 User manual

Gigaset
Gigaset S810H User manual

Gigaset
Gigaset SL450 User manual

Gigaset
Gigaset S820A User manual

Gigaset
Gigaset ION User manual

Gigaset
Gigaset A120 User manual

Gigaset
Gigaset DESK 200 User manual

Gigaset
Gigaset E370 User manual

Gigaset
Gigaset T300PRO User manual

Gigaset
Gigaset C330 User manual

Gigaset
Gigaset AL145 User manual

Gigaset
Gigaset Gigaset 5020 User manual

Gigaset
Gigaset SX353 isdn User manual