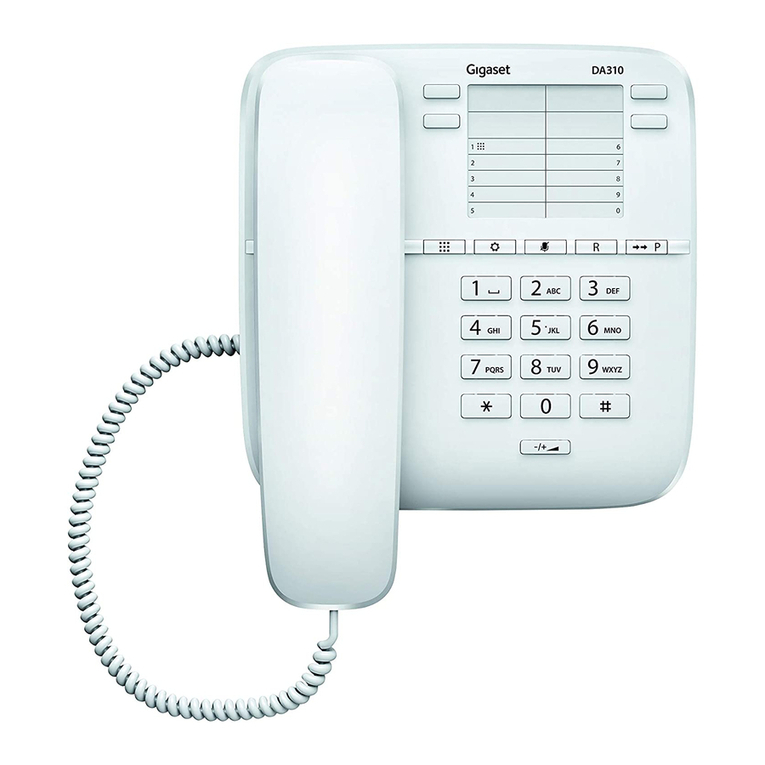
Gigaset euroset 3010 User manual

EN Dear Customer,
Gigaset Communications GmbH is the legal successor to
Siemens Home and Office Communication Devices GmbH &
Co. KG (SHC), which in turn continued the Gigaset business
of Siemens AG. Any statements made by Siemens AG or
SHC that are found in the user guides should therefore be
understood as statements of Gigaset Communications
GmbH.
We hope you enjoy your Gigaset.
DE Sehr geehrte Kundin, sehr geehrter Kunde,
die Gigaset Communications GmbH ist Rechtsnachfolgerin
der Siemens Home and Office Communication Devices
GmbH & Co. KG (SHC), die ihrerseits das Gigaset-Geschäft
der Siemens AG fortführte. Etwaige Erklärungen der
Siemens AG oder der SHC in den Bedienungsanleitungen
sind daher als Erklärungen der Gigaset Communications
GmbH zu verstehen.
Wir wünschen Ihnen viel Freude mit Ihrem Gigaset.
FR Chère Cliente, Cher Client,
la société Gigaset Communications GmbH succède en droit
à Siemens Home and Office Communication Devices GmbH
& Co. KG (SHC) qui poursuivait elle-même les activités Giga-
set de Siemens AG. Donc les éventuelles explications de Sie-
mens AG ou de SHC figurant dans les modes d’emploi
doivent être comprises comme des explications de Gigaset
Communications GmbH.
Nous vous souhaitons beaucoup d’agrément avec votre
Gigaset.
IT Gentile cliente,
la Gigaset Communications GmbH è successore della Sie-
mens Home and Office Communication Devices GmbH &
Co. KG (SHC) che a sua volta ha proseguito l’attività della
Siemens AG. Eventuali dichiarazioni della Siemens AG o
della SHC nei manuali d’istruzione, vanno pertanto intese
come dichiarazioni della Gigaset Communications GmbH.
Le auguriamo tanta soddisfazione con il vostro Gigaset.
NL Geachte klant,
Gigaset Communications GmbH is de rechtsopvolger van
Siemens Home and Office Communication Devices GmbH &
Co. KG (SHC), de onderneming die de Gigaset-activiteiten
van Siemens AG heeft overgenomen. Eventuele uitspraken
of mededelingen van Siemens AG of SHC in de gebruiksaan-
wijzingen dienen daarom als mededelingen van Gigaset
Communications GmbH te worden gezien.
Wij wensen u veel plezier met uw Gigaset.
ES Estimado cliente,
la Gigaset Communications GmbH es derechohabiente de la
Siemens Home and Office Communication Devices GmbH &
Co. KG (SHC) que por su parte continuó el negocio Gigaset
de la Siemens AG. Las posibles declaraciones de la
Siemens AG o de la SHC en las instrucciones de uso se
deben entender por lo tanto como declaraciones de la Giga-
set Communications GmbH.
Le deseamos que disfrute con su Gigaset.
PT SCaros clientes,
Gigaset Communications GmbH é a sucessora legal da Sie-
mens Home and Office Communication Devices GmbH &
Co. KG (SHC), que, por sua vez, deu continuidade ao sector
de negócios Gigaset, da Siemens AG. Quaisquer declara-
ções por parte da Siemens AG ou da SHC encontradas nos
manuais de utilização deverão, portanto, ser consideradas
como declarações da Gigaset Communications GmbH.
Desejamos que tenham bons momentos com o seu Gigaset.
DA Kære Kunde,
Gigaset Communications GmbH er retlig efterfølger til Sie-
mens Home and Office Communication Devices GmbH &
Co. KG (SHC), som fra deres side videreførte Siemens AGs
Gigaset-forretninger. Siemens AGs eller SHCs eventuelle
forklaringer i betjeningsvejledningerne skal derfor forstås
som Gigaset Communications GmbHs forklaringer.
Vi håber, du får meget glæde af din Gigaset.
FI Arvoisa asiakkaamme,
Gigaset Communications GmbH on Siemens Home and
Office Communication Devices GmbH & Co. KG (SHC)-yri-
tyksen oikeudenomistaja, joka jatkoi puolestaan Siemens
AG:n Gigaset-liiketoimintaa. Käyttöoppaissa mahdollisesti
esiintyvät Siemens AG:n tai SHC:n selosteet on tämän
vuoksi ymmärrettävä Gigaset Communications GmbH:n
selosteina.
Toivotamme Teille paljon iloa Gigaset-laitteestanne.
SV Kära kund,
Gigaset Communications GmbH övertar rättigheterna från
Siemens Home and Office Communication Devices GmbH &
Co. KG (SHC), som bedrev Gigaset-verksamheten efter Sie-
mens AG. Alla förklaringar från Siemens AG eller SHC i
användarhandboken gäller därför som förklaringar från
Gigaset Communications GmbH.
Vi önskar dig mycket nöje med din Gigaset.
NO Kjære kunde,
Gigaset Communications GmbH er rettslig etterfølger etter
Siemens Home and Office Communication Devices GmbH &
Co. KG (SHC), som i sin tur videreførte Gigaset-geskjeften i
Siemens AG. Eventuelle meddelelser fra Siemens AG eller
SHC i bruksanvisningene er derfor å forstå som meddelelser
fra Gigaset Communications GmbH.
Vi håper du får stor glede av din Gigaset-enhet.
EL Αγαπητή πελάτισσα, αγαπητέ πελάτη,
ηGigaset Communications GmbH είναι ηνομική διάδοχος της
Siemens Home and Office Communication Devices GmbH &
Co. KG (SHC), ηοποία έχει αναλάβει την εμπορική
δραστηριότητα Gigaset της Siemens AG. Οι δηλώσεις της
Siemens AG ήτης SHC στις οδηγίες χρήσης αποτελούν
επομένως δηλώσεις της Gigaset Communications GmbH.
Σας ευχόμαστε καλή διασκέδαση με τη συσκευή σας Gigaset.
HR Poštovani korisnici,
Gigaset Communications GmbH pravni je sljednik tvrtke
Siemens Home and Office Communication Devices GmbH &
Co. KG (SHC), koji je nastavio Gigaset poslovanje tvrtke
Siemens AG. Zato sve izjave tvrtke Siemens AG ili SHC koje
se nalaze u uputama za upotrebu treba tumačiti kao izjave
tvrtke Gigaset Communications GmbH.
Nadamo se da sa zadovoljstvom koristite svoj Gigaset
uređaj.
SL Spoštovani kupec!
Podjetje Gigaset Communications GmbH je pravni naslednik
podjetja Siemens Home and Office Communication Devices
GmbH & Co. KG (SHC), ki nadaljuje dejavnost znamke
Gigaset podjetja Siemens AG. Vse izjave podjetja Siemens
AG ali SHC v priročnikih za uporabnike torej veljajo kot izjave
podjetja Gigaset Communications GmbH.
Želimo vam veliko užitkov ob uporabi naprave Gigaset.
Issued by
Gigaset Communications GmbH
Schlavenhorst 66, D-46395 Bocholt
Gigaset Communications GmbH is a trademark
licensee of Siemens AG
© Gigaset Communications GmbH 2008
All rights reserved.
Subject to availability. Rights of modifications
reserved.
www.gigaset.com

CS Vážení zákazníci,
společnost Gigaset Communications GmbH je právním
nástupcem společnosti Siemens Home and Office
Communication Devices GmbH & Co. KG (SHC), která dále
přejala segment produktůGigaset společnosti Siemens AG.
Jakékoli prohlášení společnosti Siemens AG nebo SHC, které
naleznete v uživatelských příručkách, je třeba považovat za
prohlášení společnosti Gigaset Communications GmbH.
Doufáme, že jste s produkty Gigaset spokojeni.
SK Vážený zákazník,
SpoločnosťGigaset Communications GmbH je právnym
nástupcom spoločnosti Siemens Home and Office
Communication Devices GmbH & Co. KG (SHC), ktorá zasa
pokračovala v činnosti divízie Gigaset spoločnosti Siemens
AG. Z tohto dôvodu je potrebné všetky vyhlásenia
spoločnosti Siemens AG alebo SHC, ktoré sa nachádzajú v
používateľských príručkách, chápaťako vyhlásenia
spoločnosti Gigaset Communications GmbH.
Veríme, že budete so zariadením Gigaset spokojní.
RO Stimate client,
Gigaset Communications GmbH este succesorul legal al
companiei Siemens Home and Office Communication
Devices GmbH & Co. KG (SHC), care, la rândul său, a
continuat activitatea companiei Gigaset a Siemens AG.
Orice afirmaţii efectuate de Siemens AG sau SHC şi incluse
în ghidurile de utilizare vor fi, prin urmare, considerate a
aparţine Gigaset Communications GmbH.
Sperăm ca produsele Gigaset săfie la înălţimea dorinţelor
dvs.
SR Poštovani potrošaču,
Gigaset Communications GmbH je pravni naslednik
kompanije Siemens Home and Office Communication
Devices GmbH & Co. KG (SHC), kroz koju je nastavljeno
poslovanje kompanije Gigaset kao dela Siemens AG. Stoga
sve izjave od strane Siemens AG ili SHC koje se mogu naći u
korisničkim uputstvima treba tumačiti kao izjave kompanije
Gigaset Communications GmbH.
Nadamo se da ćete uživati u korišćenju svog Gigaset
uređaja.
BG Уважаеми потребители,
Gigaset Communications GmbH еправоприемникът на
Siemens Home and Office Communication Devices GmbH
& Co. KG (SHC), която на свой ред продължи бизнеса на
подразделението Siemens AG. По тази причина
всякакви изложения, направени от Siemens AG или
SHC, които се намират връководствата за
потребителя, следва да се разбират като изложения на
Gigaset Communications GmbH.
Надяваме се да ползвате судоволствие вашия Gigaset.
HU Tisztelt Vásárló!
A Siemens Home and Communication Devices GmbH & Co.
KG (SHC) törvényes jogutódja a Gigaset Communications
GmbH, amely a Siemens AG Gigaset üzletágának utódja.
Ebből következően a Siemens AG vagy az SHC felhasználói
kézikönyveiben található bármely kijelentést a Gigaset
Communications GmbH kijelentésének kell tekinteni.
Reméljük, megelégedéssel használja Gigaset készülékét.
PL Szanowny Kliencie,
Firma Gigaset Communications GmbH jest spadkobiercą
prawnym firmy Siemens Home and Office Communication
Devices GmbH & Co. KG (SHC), która z kolei przejęła
segment produktów Gigaset odfirmy Siemens AG. Wszelkie
oświadczenia firm Siemens AG i SHC, które można znaleźć
w instrukcjach obsługi, należy traktowaćjako oświadczenia
firmy Gigaset Communications GmbH.
Życzymy wiele przyjemności z korzystania z produktów
Gigaset.
TR Sayın Müşterimiz,
Gigaset Communications GmbH, Siemens AG'nin Gigaset
işletmesini yürüten Siemens Home and Office
Communication Devices GmbH & Co. KG (SHC)'nin yasal
halefidir. Kullanma kılavuzlarında bulunan ve Siemens AG
veya SHC tarafından yapılan bildiriler Gigaset
Communications GmbH tarafından yapılmışbildiriler olarak
algılanmalıdır.
Gigaset'ten memnun kalmanızıümit ediyoruz.
RU Уважаемыи покупатель!
Компания Gigaset Communications GmbH является
правопреемником компании Siemens Home and Office
Communication Devices GmbH & Co. KG (SHC), которая,
всвою очередь, приняла подразделение Gigaset всвое
управление от компании Siemens AG. Поэтому любые
заявления, сделанные от имени компании Siemens AG
или SHC ивстречающиеся вруководствах
пользователя, должны восприниматься как заявления
компании Gigaset Communications GmbH.
Мы надеемся, что продукты Gigaset удовлетворяют
вашим требованиям.
Issued by
Gigaset Communications GmbH
Schlavenhorst 66, D-46395 Bocholt
Gigaset Communications GmbH is a trademark
licensee of Siemens AG
© Gigaset Communications GmbH 2008
All rights reserved.
Subject to availability. Rights of modifications
reserved.
www.gigaset.com
s
euroset 3010
User Manual
Instrucciones de Manejo

1
Learning to use your telephone
1) Telephone directory label
2) Conference and two-touch memory
key (*)
3) Call Waiting and two-touch memory
key (*)
4) Follow-me and two-touch memory
key (*)
5) Call Release and two-touch memory
key (*)
6) Mailbox and two–touch memory
key (*)
7) Operator and two-touch memory
key
8) One-touch and two-touch memory
key
9) REDIAL / PAUSE key
10) MEM key
11) FLASH key
12) PROG key
13) MUTE key
14) Numeric keypad
15) Handset support
16) Handset wall mounting tab
(*)depends on the availability of the service by
your local operator
Installation
Handset cord
Connect the long end of the handset cord in
the socket marked with the symbol
(position 17). Insert the cord in the cable
line (position 20) and attach the short end
to the handset.
Line cord
Connect the line cord in the socket marked
with the symbol (position 18). Insert the
cord in the cable line (position 21), to up or
down direction, according to the telephone
position. Attach the other end to the
telephone line (RJ11 modular jack
connector).
Wall-Mount installation
To install the telephone on wall, use the two
holes localized on underside of the
telephone (position 19) to case the screws.
Make the holes on the wall with a 6 mm drill
bit, using the template (marks ) provided
on page 23 of this manual as a reference
(bushings and screws are not included).
Besides, use a screwdriver to snap out the
handset clip (position 22), as show in detail
Aand insert it into the handset wall
mounting tab (position 16), according to
detail B.
22
17
18
19
21
20
8
2
4
6
1
3
15
16 13
12
14
5
7
8
9
10
11

2
Recommendations for Installation
•
and +55ºC and it is not
•f the telephone
•
•
arge) or any
•
dance with the local
legal requirements.
Please, observe the following guidelines:
For your own safety and protection, do
not uses the telephone in places with
overheat or extreme humidity. The
telephone operates at temperatures
between +5ºC
water-proof.
Varnished or lacquered furniture may be
marked by some parts o
such as the rubber feet.
Place the telephone at least one meter
away from devices such as cordless
telephones or TV sets. These devices
may cause interference in the telephone.
To clean the telephone, just use a damp
or antistatic cloth. Never use a dry cloth
(danger of electrostatic disch
abrasive cleaning products.
When the telephone reaches its end of
service life, dispose of it in a way that
does not cause any harm to the
environment, in accor
Detail A
General considerations about the
programming
The programming functions are confirmed
on pressing the PROG key at the end of
the operation. If you wish to cancel (i.e., in
case of error), hung up instead of pressing
the PROG key . The original
rogramming will be kept.
Detail B p
Confirmation tone (beep)
will
ve out three short tones (error tones).
De
A confirmation tone (beep) is given out by
the telephone in order to register when a
key is pressed. On completion of a
successful programming operation, a long
confirmation tone is given out. If the
operation is incorrect, the equipment
gi
activating the tones:
Press the PROG key
: Enter the code 40
Press the PROG key
Reactivating the tones:
Press the PROG key
: Enter the code 41
Press the PROG key
Setting the dialing mode (tone/pulse)
Your telephone must be programmed for
TONE dialing or PULSE dialing, according
to the telephone line it is connected to. The

3
default factory setting is the TONE dialing
mode with the flash time of 270 ms
TMF).
g tone, change to the other dialing
ode.
SE or
ONE, proceed in the following way:
(D
Checking the dialing mode:
Press any numeric key. If you can still hear
a dialin
m
Changing the dialing mode:
To adjust the dialing mode to PUL
T
Lift the handset
Press the PROG key
:
Press the digit 11 to change to TONE
to PULSEor the digit 12 to change
Press the PROG key
Listen the confirmation tone - long
beep
Hung up
change
e dialing mode to TONE dialing.
•
Temporary changeover of dialing mode:
While the telephone is set to PULSE dialing
it may be necessary to temporarily
th
Example: You wish to check your
banking balance using the telebank
service. Make the call as you usually
would and, as soon as the call is
complete, press ; at this moment your
telephone dialing mode will change to
TONE dialing. When you finished the
call, just hang up and the dialing mode
will automatically turn back to PULSE
dialing.
Setting the ringer volume and melody
elodies and
ree different ringer volumes.
Setti lume:
This telephone offers three m
th
ng the ringer vo
Lift the handset
Press the PROG key
Enter one of the codes below, in
ac sired option:cording with the de
:
•51 low volume
•52 medium volume
•53 high volume
Press the PROG key
Listen the confirmation tone - long
beep
Hung up
Note:
The volume can also be programmed while
the telephone is ringing, without lifting the
handset. In this situation, the key
selects cyclically the 3 available volume
Sett
levels.
ing the melody:
Lift the handset
Press the PROG key
Enter one of the codes below, in
ac option:cording with the desired
:
•61 melody 1
•62 melody 2
•63 melody 3
Press the PROG key
Listen the confirmation tone - long
beep
Hung up
Note:
The melody can also be programmed while
the telephone is ringing, without lifting th
handset. In this situation, the key e
elects cyclically the 3 available melodies.s
REDIAL key
In order to redial the last dialed number, lift
the handset and press the REDIAL key .
If the last dialed number contained more
than 31 digits, the REDIAL function will not
orkw

4
MUTE key
During a call, when you press the MUTE
key , the microphone is switched off and
the other party cannot listen to you. To
reactivate the conversation, press the
MUTE key again. While the MUTE is
activated, the person you are speaking to
will hear music on hold. Music generation
can be deactivated through programming. If
the music is deactivated, you will be able
hear the person you are speaking to,
though he will not be able to hear you.
Acti ld:
al
vating the music on ho
Lift the handset
Press the PROG key
: Enter the code 31
Press the PROG key
Listen the confirmation tone - long
beep
Hung up
Dea ic on hold:ctivating the mus
Lift the handset
Press the PROG key
: Enter the code 30
Press the PROG key
Listen the confirmation tone - long
beep
Hung up
PAUSE key
This key may be used when the telephone
is connected on a PBX system; it inserts a
pause of approximately 1 second between
the digits. It works after pressing or entering
the first digit, when pressing the PAUSE
key . These pauses can be stored in the
one-touch memories, two-touch memories
nd in the REDIAL keya .
FLASH Key (special services)
The FLASH key allows you to access
specific special services (follow-me, call
waiting, conference, etc.), as long as your
telephone is connected on a digital central
office or on a PBX system.
The default factory flash is 270 ms. It may
be necessary to program a different flash
time. If you are not managing to use the
flash key, refer to the documentation of
your PBX to check what the most adequate
out the following
rocedure:
time is.
Changing the Flash time:
To change the programmed flash time on
the telephone, carry
p
Lift the handset
Press the PROG key
Enter one of the codes below, in
according with the desired flash time:
:
•71 flash time 90 ms
•72 flash time 120 ms
•73 flash time 270 ms
•74 flash time 375 ms
•75 flash time 600 ms
Press the PROG key
Listen the confirmation tone - long
beep
Hung up
Storing phone number in memories
The telephone has 14 memories: 10 two-
uch memories, accessed by the MEM keyto and 4 one-touch memories (position 8
on page 1). All the memories can contain a
aximum of 32 digits each.m

5
Storing phone numbers in the one-touch
memories:
Lift the handset
Press the PROG key
Press one of the 4 one-touch memory
skey
: Enter the phone number to be stored
Press the PROG key
Listen the confirmation tone - long
beep
Using t
Hung up
he one-touch memories to make
a call:
Lift the handset
Press the desired one-touch memory
key
Eras h memories:
ing the one-touc
Lift the handset
Press the PROG key
Press the one-touch memory key that
you wish to erase
Press the PROG key
Listen the confirmation tone - long
beep
Hung up
Storing phone numbers in the two-touch
memories:
Lift the handset
Press the PROG key
Press the MEM key
Press
one of the two-touch memory
skey
: Enter the phone number to be stored
Press the PROG key
Listen the confirmation tone - long
beep
Hung up
Using the two-touch memories to make
a call:
Lift the handset
Press the MEM key
Press the desired two-touch memory
Eras h memories:
key
ing the two-touc
Lift the handset
Press the PROG key
Press the MEM key
Press the two-touch memory key that
you wish to erase
Press the PROG key
Listen the confirmation tone - long
beep
Hung up
•
•
Note:
A phone number won’t be stored in the
memories if is longer than 32 digits.
The keys it and are stored in the
memories, independently of the used
dialing mode, but they only have effect
•
on the TONE mode.
It is possible to store an external
telephone number in one of the one-
touch or two-touch memories, when the
telephone is connected on a PBX
system. Just insert, before the number
that will be stored, the access code for
external line, followed by a pause (press
the PAUSE key ). If this code is not
programmed, insert a pause (press the
PAUSE key ) after the access code to
the external line

6
Instructions for use with a PBX system
To use this telephone connected on a PBX
system, it may be convenient to programme
a access code for external line. The
telephone will automatically introduce a
pause after the access code. With this, it
will not be necessary to interrupt the dialing
wait for the ertenal line tone. The code
Pro code:
to
may have one or two digits.
gramming the access
Lift the handset
Press the PROG key
Press the number 0
: Enter the access code (1 or 2 digits)
Press the PROG key
beep
Listen the
confirmation tone - long
Hung up
Era access code:sing the programmed
Lift the handset
Press the PROG key
Press the number 0
Press the PROG key
beep
Listen the
confirmation tone - long
Hung up
Setting the reception volume
This telephone allows adjustment of the
reception volume, which its default is
programmed at normal volume. To select
e desired volume, proceed in the
follo
th wing way:
Lift the handset
Press the PROG key
En elow, in
ac ed option:
ter one of the codes b
ircording with the des
: •21 normal volume
•22 high volume
Press the PROG key
Listen the confirmation tone - long
beep
Hung up
Password
The key lock function is protected by a 4
lt password is
.
Cha
digit password. The defau
1234, and it can be modified
nging the password:
Lift the handset
Press the PROG key
Press the key
: Enter the password (4 digits)
: Enter the new password (4 digits)
: Repeat the new password (4 digits)
Press the PROG key
Listen the confirmation tone - long
beep
Hung up
If the entered password does not match
with the programmed password in the
quipment, or if there is an ee rror in the
petition of the password, the error signal
ed (3 short beeps).
re
will be listen
Key Lock

7
This telephone allows the lock of mobile
phones calls, long distance calls and
international calls. When the equipment is
programmed for lock of mobile phones, it is
not possible to make calls for numbers
beginning with 8, 9 or 15. When it is
programmed to lock long distance calls, it is
not possible to make calls for numbers
eginning with 0. When it is programmed to
ernational calls, it is not possible to
he lock option for mobile phones may not
the
num bile phones.
Lo telephone:
b
lock int
make calls for numbers beginning with 00.
Note:
T
work properly in some countries due to
bering plan of mo
cking or unlocking the
Lift the handset
Press the PROG key
Press the key
: Enter the password (4 digits)
Press the key
Select the lock level:
unlock
lock of mobile phones calls
lock of long distance calls
lock of mobile phones and long
distance calls
lock of international calls
lock of mobile phones and
international calls
total lock
Press the PROG key
be
Listen the confirmation tone - long
ep
Hung up
ote:
N
ment
ill return to the previous state of
programmed lock. For temporary unlocking,
pro y:
•If the lock of long distance calls is
activated, the telephone will be locked for
international calls too.
•When the telephone is connected on a
PBX system, the lock functions will not
work properly.
Temporary unlocking the telephone:
With knowledge of the password, it is
possible to unblock the telephone in order
to make a call. After the call, the equip
w
ceed in the following wa
Lift the handset
Press the PROG key
Press the key
: Enter the password (4 digits)
Press the PROG key
: Dial the desired telephone number
lynormal
Baby Call
This telep on allows he programming of a
number to be called automatically on
pressing any numeric key, including the
REDIAL
h e t
, and keys. This function
is useful, for example, to program an
emergency number for children in case the
arents are absent. This function requires
deac
Ac unction:
p
the password for activation and
tivation.
tivating the Baby Call f
Lift the handset
Press the PROG key
Press the key
: Enter the password (4 digits)
: Dial the emergency telephone number
at you wish to programth

8
Press the PROG key
Listen the confirmation tone - long
beep
Hung up
De ion:activating the Ba yb Call funct
Lift the handset
Press the PROG key
Press the key
: Enter the password (4 digits)
Press the PROG key
Listen the confirmation tone - long
beep
Hung up
Function keys for special services
This telephone incorporates facilities to
ccess some special serva
te ices on your
T s to the special services
al ration of:
l Waiting
ference
lephone line.
he dedicated key
low the direct ope
•Follow-me
•Cal
•Con
•Mailbox
Note:
These services must be contracted
together with your local operator.
In som
•
e countries the follow-me
d not work properly
s automatic
ansference of received calls to another
telep o activate follow-me,
pro
•service coul
because of the access code to this
facility.
Follow-me:
he follow-me service allowT
tr
hone number. T
ceed in the following way.
Lift the handset
Press the FOLLOW-ME key
: Dial the telephone number to where
you want to
make the call transference
Press the FOLLOW-ME key
Listen the confirmation tone - long
beep
Hung up
To ice,
pro
deactivate the follow-me serv
ceed in the following way:
Lift the handset
Press the FOLLOW-ME key twice
beep
Listen the confirmation tone - long
Hung up
all Waiting:C
n
If during a conversation you hear the
warning tone of a waiting call, you ca
answer it by pressing the Call Waiting key
. The first call will be retained.
When you wish to pass from one call to
another, press the Call Waiting key
gain. The procedure can be repeated as
many tim
aes as you wish. To finish the
ommunication in progress and continue
press the Call Release key
c
with the other,
. To finish the last communication, just
hung up.
Consultation:
When, during a
conversation, you wish to
make a consultation, press the FLASH key
to get the dial tone again. Dial the
desired number to set up the consultation
communication.
Once the consultation is made, press the
all Waiting keyCto chang een the
alls or the Call Release key
e betw
cto finish

9
the communication in progress and
o communications by using
e procedures of Call Waiting or
n descri press
continue with the other one.
Conference:
The conference service allows the setting
up of communication among three people.
Firstly set up tw
th
Consultatio bed earlier. Then
the Conference key to establish
simultaneous communication among the
three people.
Mailbox:
The Mailbox service allows messages to be
stored so that the user can hear them later.
This service has an access code that
e programmed in the Mailbox key
can
b,
llowing the same steps of number storage
one-touch memories (see
e item Storing phone number in
fo
procedure in the
th
memories on page 4).
Operator code
If necessary, this telephone is able to be
programmed with the operator code of your
preference. This operator code can be
programmed in the Operator key
7 on page 1), following the same
ote
(position
steps of number storage procedure in the
one-touch memories (see the item Storing
hone number in memories on page 4).p
N:
he operator code is valid just for the
ountries where this service is available.
T
c

10
Conociendo su Teléfono
1) Tarjeta de agenda
2) Tecla Tres a la vez (*)y de memoria
indirecta
3) Tecla Llamada en Espera (*)y de
memoria indirecta
4) Tecla Sígueme (*)y de memoria
indirecta
5) Tecla Cuelga y Cambia (*)y de
memoria indirecta
6) Tecla Buzón de Voz (*)y de memoria
indirecta
7) Tecla Operadora y de memoria
indirecta
8) Teclas de memoria directa e
indirecta
9) Tecla REDISCADO / PAUSA
10) Tecla MEM
11) Tecla FLASH
12) Tecla PROG
13) Tecla MUDO
14) Teclado numérico
15) Apoyo para el microteléfono
16) Soporte para el microteléfono
(*)sujeto a disponibilidad de servicio por su
operadora local
Instalación
Conexión del cordón extensible del
microteléfono
Enchufe el conector con el extremo largo y
recto en la hembrilla marcada con el
símbolo (indicador 17). Enchufe el
extremo corto en el microteléfono. Tienda
el cable por el conducto (indicador 20) que
hay en el fondo del aparato.
Conexión del cable de línea
Enchufar un extremo en la hembrilla con el
símbolo (indicador 18). El otro extremo
debe ser enchufado en la toma telefónica
(RJ11). Tienda el cable por uno de los
conductos (indicador 21) que hay en el
fondo del aparato.
Montaje en Pared
Para montar el teléfono en la pared, los
agujeros deben ser hechos con broca de 6
mm (tornillos no incluidos). Utilice la marca
de la página 25 de este manual como
referencia para hacer los agujeros en la
pared. Los tornillos se encajan en las
aberturas (indicador 19). Además la pieza
(indicador 22) debe ser desprendida de la
base (de acuerdo con el detalle A) y
encajarse en la posición indicada en el
indicador 16 (de acuerdo con el detalle B),
para que el microteléfono no caiga.
22
17
18
19
21
20
8
2
4
6
1
3
15
16 13
12
14
5
7
8
9
10
11

11
Informaciones Generales
•
uras comprendidas entre +5°C y
•los
•
móvil, buscapersonas o
•
nunca paños secos (peligro de
Observe las siguientes indicaciones:
Por su seguridad y protección, le
recomendamos no utilizar el equipo en
habitaciones húmedas, pues el mismo no
es resistente a salpicaduras de agua. Se
recomienda utilizar el aparato a
temperat
+55°C.
Algunas partes del aparato (p.ej., las
patas) pueden dejar huellas en
muebles laqueados o pulidos.
Para no perturbar el tráfico telefónico, se
aconseja guardar una distancia mínima
de 1 metro entre el teléfono y cualquier
otro equipo de radiotelefonía (p.ej.,
teléfono
televisor).
Limpie el aparato únicamente con un
paño húmedo o antiestático. No utilice
descargas electroestáticas) ni
detergentes agresivos.
Detalle A •Al finalizar su vida útil, elimine el teléfono
respetando las normas de protección del
medio ambiente.
Consideraciones generales sobre la
programación
Las funciones de programación son
confirmadas al presionar la tecla PROG
al final de la operación. Deseando cancelar
(p.ej., en caso de error), colgar el
microteléfono en vez de presionar la tecla
PROG . Así se mantendrá la
programación original.
Detalle B
Tono de confirmación (bip)
Un tono de confirmación (bip) es emitido
por el teléfono para registrar cuando una
tecla es presionada. Al finalizarse una
operación de programación con éxito, es
emitido un tono de confirmación largo. Si la
operación está incorrecta, el aparato emite
tres tonos cortos (tonos de error).
Desactivando los tonos:
Presionar la tecla PROG
: Digitar el código 40
Presionar la tecla PROG
Reactivando los tonos:
Presionar la tecla PROG
: Digitar el código 41
Presionar la tecla PROG

12
Ajustando el procedimiento de
marcación (tono/pulso)
Dependiendo del procedimiento de
selección de su operadora, puede ser
necesario ajustar en el aparato el
procedimiento TONO (selección por
multifrecuencia) o PULSO (selección por
impulsos). En el estado de suministro, el
aparato tiene ajustado el procedimiento de
selección por multifrecuencia con flash de
270 ms (multifrecuencial).
Modo de comprobación:
Marque cualquier dígito. Si se sigue
oyendo la señal de marcar, habrá que
ajustar el otro procedimiento de selección
con el conmutador respectivo.
Ajuste del procedimiento de selección:
Para ajustar el modo de marcación para
TONO o PULSO, proceder de la siguiente
manera:
Descolgar el microteléfono
Presionar la tecla PROG
:
Presionar el dígito 11 para cambiar
para TONO o el dígito 12 para
cambiar para PULSO
Presionar la tecla PROG
Escuchar el tono de confirmación - bip
(tono largo)
Colgar el microteléfono
Conmutación temporaria del modo de
marcación:
Si el teléfono se encuentra en el modo
PULSO, puede ser necesaria una
conmutación temporal del modo de
marcación para TONO.
•Ejemplo: Usted desea consultar su saldo
bancario por telebanco. Llame
normalmente y cuando la llamada es
completada, presione la tecla ; en este
momento su teléfono pasa a operar en el
modo TONO. Al colgar el modo de
marcación volverá automáticamente para
PULSO.
Ajuste del volumen y melodía
Este teléfono posee tres melodías y tres
volúmenes de timbre distintos.
Ajuste del volumen del timbre:
Descolgar el microteléfono
Presionar la tecla PROG
Digitar uno de los códigos que siguen,
de acuerdo con la opción deseada:
:
•51 volumen bajo
•52 volumen medio
•53 volumen alto
Presionar la tecla PROG
Escuchar el tono de confirmación - bip
(tono largo)
Colgar el microteléfono
Nota:
El volumen también puede ser programado
mientras el teléfono está llamando, sin
retirar el microteléfono del aparato. En esta
situación, la tecla selecciona
cíclicamente los tres niveles disponibles.
Ajuste de la melodía del timbre:
Descolgar el microteléfono
Presionar la tecla PROG
Digitar uno de los códigos que siguen,
de acuerdo con la opción deseada:
:
•61 melodía 1
•62 melodía 2
•63 melodía 3
Presionar la tecla PROG
Escuchar el tono de confirmación - bip
(tono largo)
Colgar el microteléfono

13
Nota:
La melodía también puede ser programada
mientras el teléfono está llamando, sin
retirar el microteléfono del aparato. En esta
situación la tecla selecciona
cíclicamente las tres melodías disponibles.
Tecla REDISCADO
Para remarcar el número de la última
llamada, levantar el microteléfono del
teléfono y presionar la tecla REDISCADO
. Si un número con más de 31 dígitos es
marcado, la función REDISCADO no
funcionará
Tecla MUDO
Durante una llamada, al presionar la tecla
MUDO , el microteléfono desconectará la
transmisión de voz y la persona con quien
usted está hablando no podrá escucharle.
Para activar la conversación, presionar la
tecla MUDO nuevamente. Mientras el
MUDO esté activo, la persona que estaba
hablando con usted, escuchará la música
de espera. La generación de música puede
ser desactivada a través de programación.
En caso de que la música estuviera
desactivada, usted podrá escuchar su
interlocutor, sin que éste lo pueda oír a
usted.
Activando la música del MUDO:
Descolgar el microteléfono
Presionar la tecla PROG
: Digitar el código 31
Presionar la tecla PROG
Escuchar el tono de confirmación - bip
(tono largo)
Colgar el microteléfono
Desactivando la música del MUDO:
Descolgar el microteléfono
Presionar la tecla PROG
: Digitar el código 30
Presionar la tecla PROG
Escuchar el tono de confirmación - bip
(tono largo)
Colgar el microteléfono
Tecla PAUSA
Puede ser utilizado cuando el teléfono está
conectado a un PABX, insertando un
tiempo entre los dígitos de
aproximadamente 1 s. Funciona después
del primer dígito, presionando la tecla
PAUSA . Estas pausas pueden ser
programadas en las memorias directas, en
las memorias indirectas y en la tecla
REDISCADO , siendo necesarias para
algunos sistemas con internos.
Tecla FLASH (servicios especiales)
La tecla FLASH permite el acceso a
determinados servicios especiales
(sígueme, llamada en espera, tres a la vez,
entre otros), estando el teléfono conectado
a una central telefónica pública digital o
privada del tipo PABX.
El teléfono viene programado de fábrica
con el tiempo de flash de 270 ms. Puede
hacerse necesario programar un tiempo
diferente de flash. Caso no esté
consiguiendo usar la tecla flash, consulte la
documentación de su PABX, para verificar
cual sería el tiempo más adecuado
Alterando el tiempo de Flash:
Para alterar el tiempo de flash programado
en el teléfono, proceder de la siguiente
manera:

14
Descolgar el microteléfono
Presionar la tecla PROG
Digitar uno de los códigos que siguen,
de acuerdo con la opción de tiempo
de FLASH deseada:
:
•71 tiempo de flash de 90 ms
•72 tiempo de flash de 120 ms
•73 tiempo de flash de 270 ms
•74 tiempo de flash de 375 ms
•75 tiempo de flash de 600 ms
Presionar la tecla PROG
Escuchar el tono de confirmación - bip
(tono largo)
Colgar el microteléfono
Almacenando números en las memorias
El teléfono posee 14 memorias: 10
indirectas, a través de la tecla MEM y 4
directas (indicador 8 en la página 10).
Todas las memorias pueden tener, como
máximo, 32 dígitos cada una.
Almacenando números en las memorias
directas:
Descolgar el microteléfono
Presionar la tecla PROG
Presionar una de las cuatro teclas de
memoria directa
: Marcar el número a ser almacenado
Presionar la tecla PROG
Escuchar el tono de confirmación - bip
(tono largo)
Colgar el microteléfono
Marcación a través de las memorias
directas:
Descolgar el microteléfono
Presionar una de las teclas de
memoria directa deseada
Borrando números de las memorias
directas:
Descolgar el microteléfono
Presionar la tecla PROG
Presionar la tecla de memoria directa
que se desea borrar
Presionar la tecla PROG
Escuchar el tono de confirmación - bip
(tono largo)
Colgar el microteléfono
Almacenando números en las memorias
indirectas:
Descolgar el microteléfono
Presionar la tecla PROG
Presionar la tecla MEM
Presionar una de las teclas de
memoria indirecta
: Marcar el número a ser almacenado
Presionar la tecla PROG
Escuchar el tono de confirmación - bip
(tono largo)
Colgar el microteléfono
Marcación a través de las memorias
indirectas:
Descolgar el microteléfono
Presionar la tecla MEM
Presionar una de las teclas de
memoria indirecta deseada
Borrando números de las memorias
indirectas:
Descolgar el microteléfono
Presionar la tecla PROG
Presionar la tecla MEM
Presionar la tecla de memoria
indirecta que se desea borrar
Presionar la tecla PROG
Escuchar el tono de confirmación - bip

15
(tono largo)
Colgar el microteléfono
ota: úmero para ser almacenado en la
•s
N
•Un n
memoria no debe tener más de 32
dígitos.
Las tecla y son memorizadas
e
•ro externo
independient mente del tipo de
marcación, sin embargo, funcionan
solamente en el modo TONO.
Es posible almacenar un núme
en una de las memorias directas o
indirectas, cuando el teléfono estuviera
conectado a un PABX. Para esto basta
insertar el código de acceso a la línea
externa antes del número externo
deseado. Si este código no está
programado, inserte una pausa
(presionar la tecla PAUSA ) después
del código de acceso a la lín a externa,
seguido del número externo deseado.
e
Instrucciones para uso en PABX
ara usar este teléfono en un PABX, puede
rogramando el código de acceso:
P
ser conveniente programar uno código de
acceso para línea externa. El teléfono
introducirá automáticamente una pausa
después del código de acceso. De esta
manera, no será necesario interrumpir la
marcación para aguardar el tono de línea
externa. El código puede ser de uno o dos
dígitos.
P
Descolgar el microteléfono
Presionar la tecla PROG
Presionar el número 0
:
Digitar el código de acceso (1 o 2
dígitos)
Presionar la tecla PROG
Escuchar el tono de confirmación - bip
(tono largo)
Colgar el microteléfono
orrando lo código de accesoB
programado:
Descolgar el microteléfono
Presionar la tecla PROG
Presionar el número 0
Presionar la tecla PROG
Escuchar el tono de confirmación - bip
(tono largo)
Colgar el microteléfono
Ajuste del volumen de recepción
ste teléfono permite ajustar el volumen de
E
recepción, siendo programado de fábrica
con el volumen normal. Para seleccionar el
volumen deseado, proceder de la siguiente
manera:
Descolgar el microteléfono
Presionar la tecla PROG
que siguen,Digitar uno de los códigos
de acuerdo con la opción deseada:
: •21 volumen normal
•22 volumen alto
Pr Gesionar la tecla PRO
Escuchar el tono de confirmación - bip
(tono largo)
Colgar el microteléfono
Clave
ión de bloqueo es protegida por una
ambiando la clave:
a funcL
clave de 4 dígitos. El aparato viene
programado de fábrica con la clave 1234,
pudiendo ser modificada.
C

16
Descolgar el microteléfono
Presionar la tecla PROG
Presionar la tecla
: Digitar la clave (4 dígitos)
: Digitar la nueva clave (4 dígitos)
: Repetir la nueva clave (4 dígitos)
Presionar la tecla PROG
Escuchar el tono de confirmación - bip
(tono largo)
Colgar el microteléfono
i l e con la claveS a clave anterior no confier
programada en el aparato, o si hay error en
la repetición de la clave, se escuchará el
tono de error (tres tonos cortos).
Bloqueo
ono permite el bloqueo de
ón de bloqueo para celulares puede
ste teléfE
llamadas para celulares, de larga distancia
nacionales e internacionales. Estando el
aparato programado para bloqueo de
llamadas a celulares, no es posible realizar
llamadas para números iniciados en 8, 9 o
15. Si está programado para bloqueo de
llamadas a larga distancia nacionales, no
es posible realizar llamadas para números
iniciados en 0. Si está programado para
bloqueo de llamadas internacionales, no es
posible realizar llamadas para números
iniciados en 00.
ota:N
La opci
no funcionar adecuadamente para algunos
paises debido al sistema de numeración de
los teléfonos celulares.
Bloqueando o desbloqueando el
teléfono:
Descolgar el microteléfono
Presionar la tecla PROG
Presionar la tecla
: Digitar la clave (4 dígitos)
Presionar la tecla
Seleccionar el nivel de bloqueo:
desbloqueo
bloqueo de llamadas para
celulares
bloqueo de llamadas a larga
distancia nacionales
bloqueo de llamadas para
celulares y a larga distancia
nacionales
bloqueo de llamadas a larga
distancia internacionales
bloqueo de llamadas para
celulares y a larga distancia
internacionales
bloqueo total
Presionar la tecla PROG
Escuchar el tono de confirmación - bip
(tono largo)
Colgar el microteléfono
Nota:
•Si el bloqueo de llamadas de larga
distancia está activado, el teléfono
también estará bloqueado para llamadas
internacionales.
•Si el teléfono está conectado a un PABX
las funciones de bloqueo no funcionarán
correctamente.
Desbloqueo temporario del teléfono:
Conociendo la clave, es posible
desbloquear el teléfono para realizar una
llamada. Después de efectuada la misma,
el teléfono volverá al estado de bloqueo
programado anteriormente. Para el

17
desbloqueo temporario, proceder de la
siguiente manera:
Descolgar el microteléfono
Presionar la tecla PROG
Presionar la tecla
: Digitar la clave (4 dígitos)
Presionar la tecla PROG
:
Marcar el número de teléfono deseado
normalmente
Baby Call
Este teléfono permite programar un número
para que sea llamado automáticamente al
presionar cualquier tecla, incluyendo las
teclas REDIAL , y. Esta función es
útil, por ejemplo, para programar un
número de emergencia para niños en caso
de ausencia de los padres. Esta función
requiere la clave para activarla y
desactivarla.
Activando la función Baby Call:
Descolgar el microteléfono
Presionar la tecla PROG
Presionar la tecla
: Digitar la clave (4 dígitos)
:
Marcar el número de teléfono de
emergencia que se desea programar
Presionar la tecla PROG
Escuchar el tono de confirmación - bip
(tono largo)
Colgar el microteléfono
Desactivando la función Baby Call:
Descolgar el microteléfono
Presionar la tecla PROG
Presionar la tecla
: Digitar la clave (4 dígitos)
Presionar la tecla PROG
Escuchar el tono de confirmación - bip
(tono largo)
Colgar el microteléfono
Teclas de funciones para servicios
especiales
Este teléfono incorpora facilidades para
acceso a algunos servicios especiales de
su línea telefónica. Las teclas dedicadas a
los servicios especiales permiten la
operación directa de:
•Sígueme
•Llamada en Espera
•Tres a la vez
•Buzón de voz
Nota:
•Estos servicios deben ser contratados
con su operadora local.
•La función Sígueme puede no
funcionar adecuadamente para
algunos países debido al código de
acceso a esta facilidad.
Sígueme:
El servicio de Sígueme permite desviar
automáticamente las llamadas recibidas
para otro número de teléfono. Para activar
o servicio Sígueme, proceder de la
siguiente manera.
Descolgar el microteléfono
Presionar la tecla SÍGUEME
(indicador 4 en la página 10)
Table of contents
Languages:
Other Gigaset Telephone manuals

Gigaset
Gigaset AS180 User manual

Gigaset
Gigaset E630 A User manual

Gigaset
Gigaset Gigaset DA510 User manual

Gigaset
Gigaset DL580 User manual

Gigaset
Gigaset A540h User manual

Gigaset
Gigaset Maxwell 3 User manual

Gigaset
Gigaset A18H User manual

Gigaset
Gigaset pro Maxwell 4 User manual

Gigaset
Gigaset life Series Setup guide

Gigaset
Gigaset SL910h User manual

Gigaset
Gigaset C300 User manual

Gigaset
Gigaset A120 User manual

Gigaset
Gigaset C620 User manual

Gigaset
Gigaset S820A User manual

Gigaset
Gigaset Gigaset 5020 User manual

Gigaset
Gigaset A116 User manual

Gigaset
Gigaset A510H User manual

Gigaset
Gigaset 1054isdn User manual

Gigaset
Gigaset E370 User manual

Gigaset
Gigaset C330 User manual