Ginnys 62567 User manual

BRAND
DUAL BASKET DEEP FRYER
User Guide
Item: 62567
Ginnys.com • 800-544-1590
Facebook.com/GinnysBrand
Pinterest.com/GinnysBrand
Ginnys.com/Blog

TABLE OF CONTENTS
Important Safeguards 3
Electrical Safety and Specicaons 4
Get to Know Your Appliance 5
How to Operate 6
Troubleshoong 7
Cleaning & Care 7
Recipes 8-11
Warranty 12
____________________________________________________________
____________________________________________________________
2Ginnys.com 800-544-1590
____________________________________________________________
____________________________________________________________
Thank you for purchasing a Ginny’s Brand Double Deep Fryer!
With two fry baskets, you’ll be able to bring dierent types
of crispy delicious foods to the table—at the same me! AND
they’ll have the fantascally pure taste that only comes from
frying dierent types of foods separately. Happy frying (and
happy eang)!

IMPORTANT SAFEGUARDS
READ CAREFULLY BEFORE USING AND SAVE THESE INSTRUCTIONS!
• FOR HOUSEHOLD USE ONLY. Do not use this appliance for other than its
intended use.
• REMOVE all packaging materials and labels before rst use.
• WASH all removable parts before rst use. See Cleaning & Care.
• A SHORT CORD is provided to reduce the hazards resulng from
entanglement or tripping. If this is a DETACHABLE CORD, always aach it
to the appliance rst, then to the electrical outlet. Do not drape the cord
over the counter or tabletop, where it can be pulled on or tripped over.
Never wrap the cord ghtly around the appliance, as this could cause the
cord to fray or break.
• WE DO NOT RECOMMEND USING AN EXTENSION CORD WITH THIS
APPLIANCE. However, IF AN EXTENSION CORD IS USED, the marked
electrical rang should be at least as great as the electrical rang of this
appliance.
• CLOSE SUPERVISION is necessary when using this appliance near
CHILDREN.
• A re may occur if this appliance is used near FLAMMABLE MATERIALS,
including curtains, towels, walls, etc. Do not place any paper, plasc, or
other non-food items in the appliance. Do not place the appliance or its
cord on or near a heated surface, or in a heated oven.
• This appliance should always be used on a STABLE, DRY, HEAT-RESISTANT
SURFACE. Do not use near water.
• Do not use an accessory or aachment not recommended by Ginny’s, as
this may cause injury, or damage the appliance.
• Always use OVEN MITTS when handling hot food or appliances. Do not
aempt to move an appliance when it is hot, or has hot contents.
• Do not use outdoors.
• Turn OFF AND UNPLUG this appliance when not in use.
• NO SERVICEABLE PARTS INSIDE THIS APPLIANCE.
• DO NOT USE AN APPLIANCE WITH A DAMAGED CORD OR PLUG, OR
AFTER THE APPLIANCE MALFUNCTIONS, OR HAS BEEN DAMAGED IN ANY
MANNER.
3
Facebook.com/GinnysBrand

ELECTRICAL SAFETY
SPECIFICATIONS
This appliance is equipped with two detachable magnec, polarized plugs.
These are safety features to reduce the risk of electrical shock. The
magnec plug should be aached to the appliance before connecng to an
electrical outlet. This plug is designed to aach to the appliance only one
way. Check the plug for the prinng “this side up” before aaching to the
appliance. The polarized plug will t into a polarized outlet only one way. If
you are unable to insert the plug into the outlet, try reversing the plug. If it
sll does not t, contact a qualied electrician. Do not aempt to modify
the plug in any way. Ginny’s cannot accept any liability for damage or
injury resulng from failure to observe these safety procedures.
VOLTAGE SUPPLY 120 V, 60 Hz
WATTAGE 1500 Was (each element)
CAPACITY 3 Quarts (each tank)
CORD LENGTH 38”
DIMENSIONS 18” x 10” x 9”
MODEL EDF-3060
4Pinterest.com/GinnysBrand
This appliance has TWO CORDS.
When operang both sides of the
deep fryer at once, we
recommend the cords be plugged
into separate outlets on separate
circuits to avoid tripping a circuit.

GET TO KNOW YOUR APPLIANCE
5
Ginnys.com/Blog
1. Housing
2. Carrying Handle (2)
3. Lid (2)
4. Control Box (2)
5. Power Light (2)
6. Temperature Control Knob (2)
7. Ready Light (2)
8. Heang Element (2)
9. Oil Tank (2)
10. Frying Basket (2)
11. Removable Basket Handle (2)
12. Magnec Detachable Power Cords (2) not shown
5
2
10
9
8764
1
11
3

HOW TO OPERATE
6
Ginnys.com 800-544-1590
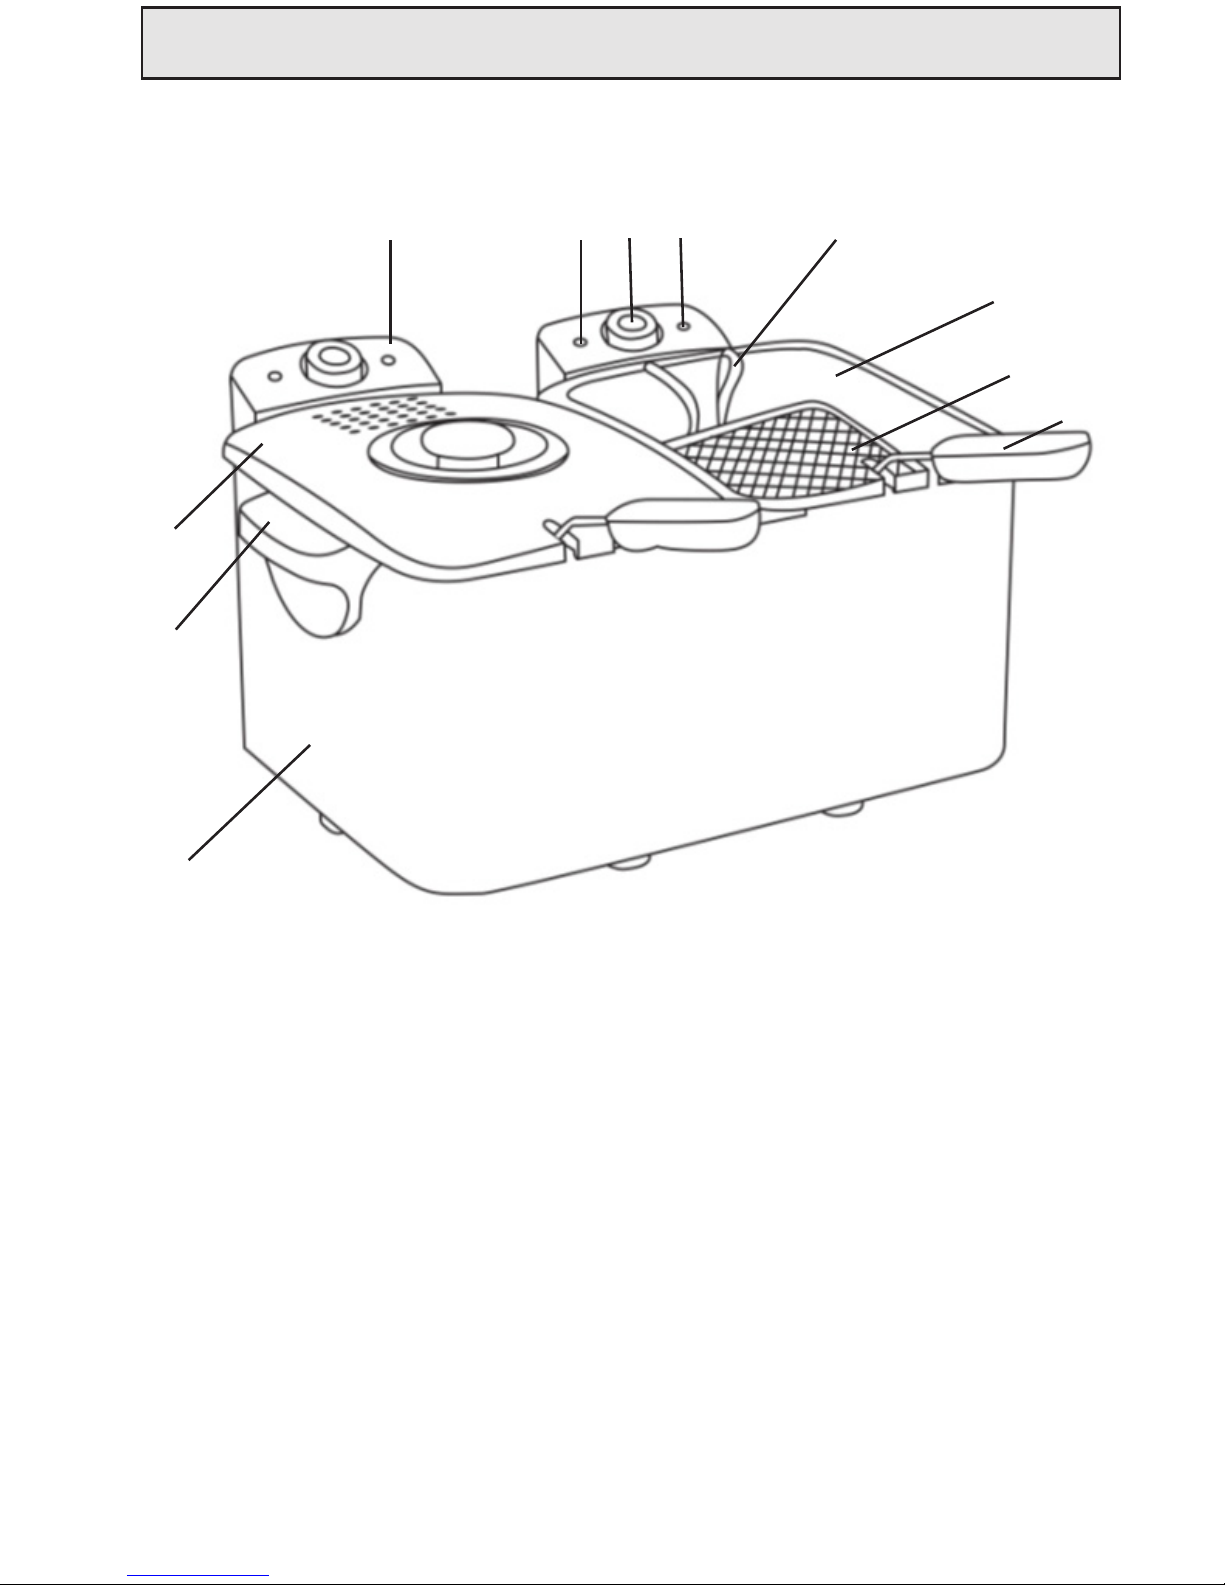
1. Assemble the oil tank(s) and heang element(s) into the housing. Ensure
the cord(s) is not plugged into the outlet(s) at this me.
2. Use only good quality frying oil such as peanut, vegetable, corn, canola,
or light olive oil. (It is recommended to not mix dierent oils). Fill the
tank(s) with oil between the MIN and MAX markings.
3. Connect the magnec power cord(s) to the back of the control box(es).
This cord is designed to aach only one way. Look for “this side up” on
the plug.
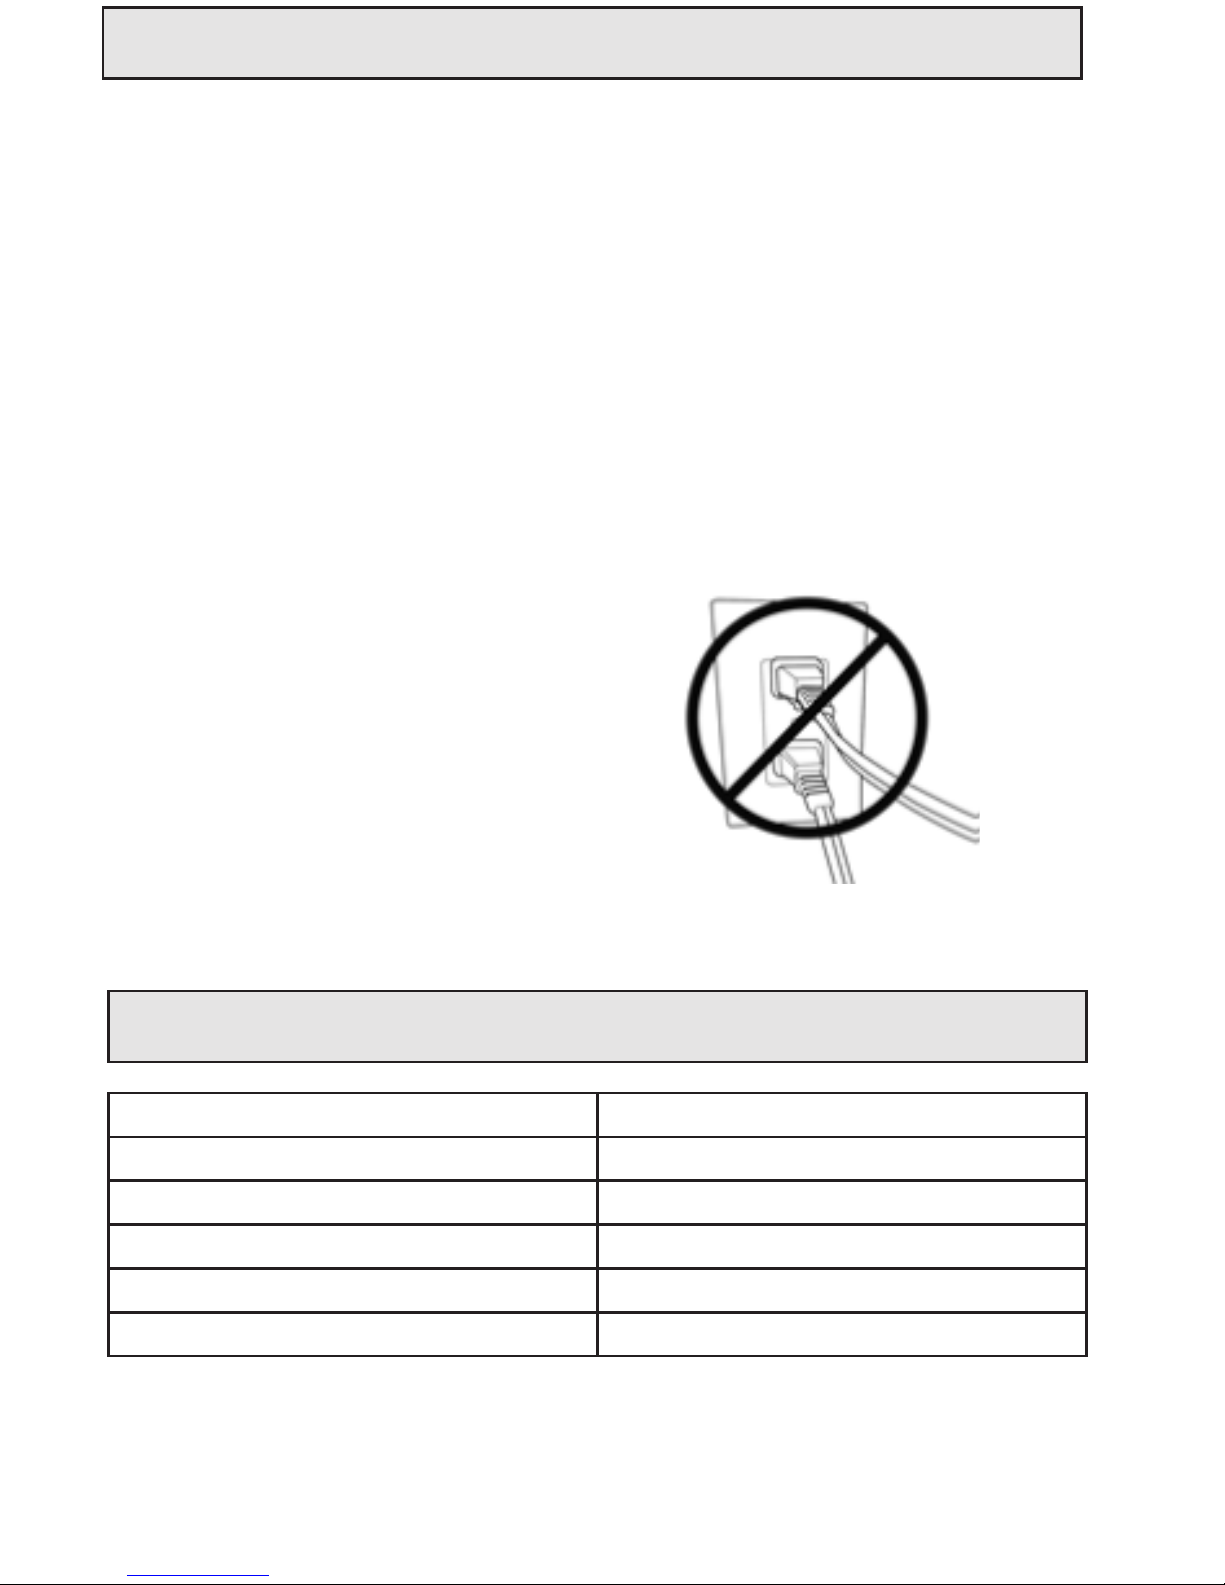
4. Plug the power cord(s) into the outlet(s). When operang BOTH SIDES of
the deep fryer at once, we recommend the cords be plugged into
SEPARATE OUTLETS on SEPARATE CIRCUITS to avoid tripping a circuit
breaker.
5. Set the temperature control(s) to desired seng. The POWER and READY
lights will turn on.
6. While oil is preheang, prepare the food that is going to be fried.
7. When frying frozen food, clear o all ice, as adding ice or water to the
hot oil will cause oil to splaer.
8. When the desired temperature has been reached, the READY light will go
o.
9. Lower the basket(s) of food into the hot oil and cover with lid(s). Always
cover the oil tank with the lid when frying; splaered oil can damage the
control box over me.
10. When food is done, raise the basket and hook it onto the oil tank to
drain. Then drain food on paper towels.
11. When nished frying, unplug the cord(s) from the outlet.
• Overloading the basket will cool the oil, causing the food to be
soggy (it will take longer to cook). Do not add more food than
it takes to cover the top of the oil in one layer.
• Replace the oil aer several uses, before the oil becomes
brown and thick. If frying sh, you may want to keep separate oil
for sh only (it can make other foods taste shy).
• When using wet baer, prevent it from scking to the basket by
lowering the empty basket into the hot oil rst. Add food, one
piece at a me, to the oil with a sloed spoon.

TROUBLESHOOTING
7
Facebook.com/GinnysBrand
If your deep fryer stops heang in the middle of cooking, and does not
come back on:
1. Check that the magnec plug is sll aached to the fryer.
2. Check that a circuit breaker has not tripped.
3. Remove the basket(s) and unplug from the outlet(s). Allow to cool for 10
minutes. Re-plug the power cord(s) and turn on.
4. If the deep fryer does not heat up, unplug again. The RESET buon is
located inside a small hole on the back of the control box, next to the
power cord socket. Use a small thin tool (such as a pin or a pen p) to
sck in the hole to push the RESET buon. Hold for 3 seconds. Re-plug
the power cord(s) and turn on.
5. If the deep fryer sll does not heat up, unplug and call customer service.
CLEANING & CARE
1. Before cleaning the deep fryer, ensure it is unplugged. Make sure the
deep fryer and the oil have COMPLETELY COOLED. DO NOT ATTEMPT TO
EMPTY THE OIL OR MOVE THE DEEP FRYER WHILE THE OIL IS HOT.
2. Remove the lids and baskets and wash them in warm, soapy water. Do not
use abrasive scrubbing brushes or harsh cleaners. These items are also
dishwasher safe.
3. Li out the heang element and wipe down with paper towels.
4. Remove the oil tanks and pour out the oil. It is recommended to lter the
oil if you are going to re-use the oil again. Keep the used oil in its
original container for storage.
5. Use a so cloth, sponge or rubber spatula to remove any stuck-on food or
residue from the oil tanks. Wash in warm, soapy water or clean in the
dishwasher.
6. Wipe the housing with a damp cloth.
7. Do NOT immerse the control boxes, heang elements or cords in water
or any other liquid.
8. Ensure all parts are dried thoroughly before reassembling and using
the deep fryer.

8
Pinterest.com/GinnysBrand
RECIPES
2 c. beer
2 c. our
1 t. baking powder
1. Mix ingredients together.
2. Let the baer rest for three hours (this will give you a more consistent
baer with fewer air bubbles). Use to coat cut up vegetables, cheese,
mushrooms, sh, etc.
2 egg yolks ¾ c. our
1½ t. vegetable oil ½ t. salt
1 c. milk
1. Mix all ingredients.
2. Use to coat cut up vegetables, cheese, mushrooms, sh, etc.

9
Ginnys.com/Blog
RECIPES
This is a great way to use up St. Patrick’s Day leovers! If you have leover
cabbage, use it for this quick sauerkraut hack: chop the cabbage nely and
saute unl wilted. Toss with 2 T. cider vinegar, ¼ t. salt, ¼ t. brown sugar,
and a sprinkle of dried mustard.
2 c. sauerkraut, drained oil for frying
½ c. onion, minced and sautéed 1 T. water
4 oz. corned beef, chopped 1 T. our
1 c. potatoes, cooked and diced 12 (7”) egg roll wrappers
½ t. pepper 1 c. Swiss cheese, grated
¼ t. salt thousand island dressing
1. Press the drained sauerkraut with a paper towel to remove excess
moisture. Mix the kraut, onion, corned beef and potatoes in a large bowl.
Add the pepper and salt. Sr to blend.
2. Heat your deep fryer oil to 375°F.
3. In a small bowl, mix the water and our with a teaspoon to make a paste.
4. To assemble the rolls, place a wrapper diagonal (like a diamond) on a
clean surface. Place ¼ - ⅓ c. of the mixture in the middle of the egg
roll wrapper. Top with 2 T. cheese. Fold down the top corner, then the le
and boom corners, and roll. Seal the last corner with a dab of the our
paste.
5. Add the rolls to the hot oil, turning occasionally, and cook for 1-2 minutes,
or unl golden brown.
6. Drain the rolls on paper towels, and serve with thousand island as a
dipping sauce.
Makes 12 rolls

RECIPES
10
Ginnys.com 800-544-1590
4 c. buermilk 1 T. salt
½ T. dried thyme 2 T. black pepper
½ T. cayenne pepper 1 cut up chicken
1 T. Creole seasoning 3 c. our
2 T. Worcestershire sauce oil for frying
1. Combine the buermilk, thyme, cayenne pepper, Creole seasoning,
Worcestershire sauce, salt and 1 T. black pepper into a bowl large enough
to hold all the chicken.
2. Add the chicken and coat thoroughly.
3. Cover with plasc wrap and marinate in the refrigerator for six hours or
overnight.
4. Remove the chicken from the refrigerator at least 45 minutes before frying
to bring it to room temperature.
5. In a large bowl, combine the our and 1 T. of black pepper.
6. Remove chicken from marinade and roll in our unl covered.
7. Set each piece on a baking sheet.
8. Dip the coated chicken pieces one at a me back in the marinade, and then
again in the our.
9. Return the pieces to the baking sheet.
10. Let the chicken rest a few minutes to set, it makes for a crispy crust.
11. Heat oil in the fryer to 350°F.
12. Use tongs to put chicken in fryer. Add only a couple of similar sized pieces
at a me (so they need the same cooking me).
13. Fry chicken unl internal temperature reaches 180°F, about 10 minutes.
14. Using tongs, transfer the chicken to paper towels to drain excess oil.
Tip: If the chicken looks golden brown before it is cooked thoroughly,
transfer to a wire rack on a baking sheet. Bake in a 375°F oven unl
the chicken reaches an internal temperature of 180°F.

RECIPES
11
Facebook.com/GinnysBrand
oil for frying ¾ t. baking powder
1 ½ c. our 1 egg
¼ t. salt ¾ c. milk
½ t. baking soda 1 t. vanilla extract
2 ½ T. sugar powdered sugar
1. Heat oil to 360° F. Mix all dry ingredients in a large bowl.
2. Whisk the egg, milk and vanilla in a small bowl.
3. Pour the wet ingredients into the dry ingredients. Mix unl well blended.
4. Pour baer into a large, plasc bag. Cut a corner of the bag, diagonal,
about ¾”. Pinch the hole shut unl ready to drizzle baer into the oil.
5. Carefully drizzle about ½ c. of baer into the hot oil.
6. Set aside the bag of baer, again pinching the hole shut.
7. Turn the funnel cake in the oil to ensure even browning. Fry 1-2 minutes
or unl golden brown.
8. Drain on paper towels. Sprinkle with powdered sugar and serve warm.
Makes 4-6 cakes
oil for frying 3 T. milk
leover stung 1 c. bread crumbs
2 eggs leover cranberry sauce for dipping
1. Heat the oil to 350° F.
2. Using your hands, roll the leover stung into meatball sized balls.
3. Whisk the egg and milk in a bowl. Roll the stung balls in the egg
mixture, then roll in bread crumbs unl coated.
4. Deep fry for a minute or so – unl golden brown. Drain on a paper towel.
Serve with cranberry sauce.

WARRANTY
Ginny’s warrants this product free from defects in material and
workmanship for one year from provable date of purchase.
Within this warranty period, Ginny’s will repair or replace, at its opon,
defecve parts at no charge, provided the product is returned, freight
prepaid with proof of purchase to Ginny’s. Allow 2-4 weeks for return
shipping.
This warranty does not cover improper installaon, misuse, abuse or neglect
on part of the owner. Warranty is also invalid in any case that the product is
taken apart or serviced by an unauthorized service staon.
This warranty gives you specic legal rights and they may vary from
state to state.
THE FOREGOING WARRANTIES ARE IN LIEU OF ALL OTHER WARRANTIES AND
CONDITIONS, EXPRESS OR IMPLIED, INCLUDING BUT NOT LIMITED TO THOSE
OF MERCHANTIBILITY OR FITNESS FOR A PARTICULAR PURPOSE.
Ginny’s, Inc.
1112 7th Avenue
Monroe, WI 53566
Customer Service: 800-544-1590
8:00 a.m. to Midnight CST, Monday through Friday
12
Ginnys.com 800-544-1590
Table of contents
Other Ginnys Fryer manuals

Ginnys
Ginnys AF-20 User manual

Ginnys
Ginnys 751887 User manual

Ginnys
Ginnys EDF-3060 User manual

Ginnys
Ginnys EDF-3500SS User manual

Ginnys
Ginnys KDF-550D-3 User manual

Ginnys
Ginnys EDF-3060 User manual

Ginnys
Ginnys 600263 User manual

Ginnys
Ginnys SD-03O User manual

Ginnys
Ginnys F2000 User manual

Ginnys
Ginnys L-DF301B User manual