manuals.online logo
Brands
  1. Home
  2. •
  3. Brands
  4. •
  5. GoFit
  6. •
  7. Fitness Equipment
  8. •
  9. GoFit GF-ECS User manual

GoFit GF-ECS User manual

ASSEMBLY INSTRUCTIONS
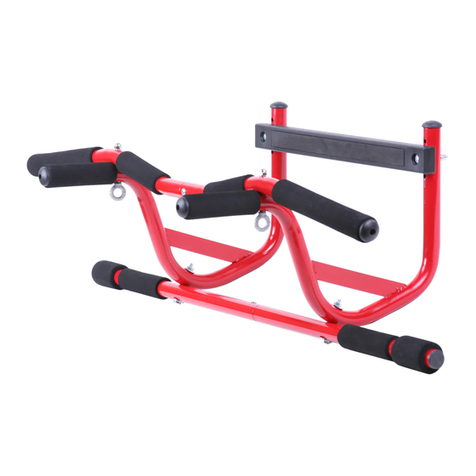
ELEVATED CHIN UP STATION
1
Parts
Prior to assembly, confirm that
all parts are included in the box:
-2 Side Bars (C-shaped)
-1 Curved Bar (2 halves)
-1 Straight Bar (2 halves)
-1 Leverage Bar
-2 Eyebolts
-2 Self-seating Bolts
-2 Long Hex Bolts
-2 Short Hex Bolts
-8 Lock Washers
-8 Lock Nuts
-1 Door Molding Wedge
(32 Total Pieces)
Parts visual references
Tools required:
-Adjustable Wrench
For questions or missing parts, please contact GoFit at 888-530-4441 ©2017 GOFIT, L.L.C. TULSA, OK
HOLES ALLOW FOR
THREE HEIGHT OPTIONS
ASSEMBLY INSTRUCTIONS
ELEVATED CHIN UP STATION
Place Self-Seating Bolts through holes
on Leverage Bar as shown—one Bolt
for each Side Bar. Side Bars will rest in
indentions on Leverage Bar.
Put Bolt through hole on Side Bar (adjust
height by choosing one of 3 holes).
Place Lock Washer on Bolt; thread on
Lock Nut. Repeat for each Side Bar.
Finger-tighten to secure Lock Nuts.
(Note: do not fully tighen with wrench
until Step 10). Photo shows Leverage
Bar attached at center holes.
Step 1 Step 2 Step 3
Fully assembled— shown in chin up position Fully assembled—shown in push up position
2
Shown in Push Up position
Step 6
Position Curved Bar as shown in fully
assembled photo above (be sure curve
is facing correctly). Line up holes in
Curved Bar with holes in Side Bars;
slide Eye Bolts through holes as shown.
Step 5
Slide two halves of Curved Bar together
(small end into larger end). Line up holes
and put Short Hex Bolt through hole on
Curved Bar. Place Lock Washer on Bolt;
thread on Lock Nut. Finger-tighten.
Step 4
Slide two halves of Straight Bar together
(small end into larger end). Line up holes
and put Short Hex Bolt through hole on
Straight Bar. Place Lock Washer on Bolt;
thread on Lock Nut. Finger-tighten.
DO NOT tighten Bolts fully until you reach Step 10 to allow for assembly and leveling.
For questions or missing parts, please contact GoFit at 888-530-4441 ©2017 GOFIT, L.L.C. TULSA, OK
ASSEMBLY INSTRUCTIONS
ELEVATED CHIN UP STATION
Step 9
Place Lock Washer onto Long Hex Bolt
end; thread on Lock Nut. Repeat for
each Long Hex Bolt on each Side Bar.
Step 8
Position Straight Bar as shown in fully
assembled photo. Line up Straight Bar
holes with Side Bar holes; slide Long Hex
Bolt through holes as shown.
Step 7
Place Lock Washer onto Eye Bolt end;
thread on Lock Nut. Repeat for each
Eye Bolt on each Side Bar.
Step 10
Place Chin Up Station on a flat surface.
Securely tighten all Lock Nuts with
wrench, ensuring that all parts are
assembled firmly while staying square
and level.
Easy In-Out Installation
First install Door Molding Wedge as shown
on page 4. Standing on non-hinge side of
doorway, pass Leverage Bar through the
doorway while moving it upward, above door
frame molding on other side of doorway.
Position bottom edge of Leverage Bar
into the installed Door Molding Wedge,
(see page 4) then guide Chin Up Station
downward, until the Leverage Bar securely
rests on top of door frame molding.
Be sure the protective, Foam End Pieces
on the non-hinge side of doorway, are
in full contact with, and resting against,
the two side door frame moldings.
Fully Assembled—shown in push up position
Door Molding Wedge
For questions or missing parts, please contact GoFit at 888-530-4441 ©2017 GOFIT, L.L.C. TULSA, OK
3
Step 1 Step 2 Step 3
ASSEMBLY INSTRUCTIONS
ELEVATED CHIN UP STATION
Door Molding Wedge
With pointed end down, slide Door
Molding Wedge downward, behind
door frame/moulding.
Position bottom edge of Plastic
Leverage Bar into the installed Door
Molding Wedge, guiding it down to
securely rest on top of door frame/
molding.
Properly installed, the Door Molding
Wedge helps keep the Leverage Bar
resting on the door frame/molding.
Before each exercise, always check
that the Leverage bar is resting on the
door frame/molding.
For questions or missing parts, please contact GoFit at 888-530-4441 ©2017 GOFIT, L.L.C. TULSA, OK
4
1
2
3

Other GoFit Fitness Equipment manuals

GoFit Brook Benten Installation guide

GoFit

GoFit Brook Benten Installation guide

GoFit PRO GYM EXTREME Installation guide

GoFit

GoFit PRO GYM EXTREME Installation guide

GoFit GF-5W User manual

GoFit

GoFit GF-5W User manual

GoFit GF-P5W User manual

GoFit

GoFit GF-P5W User manual

GoFit Resist-a-Bar User manual

GoFit

GoFit Resist-a-Bar User manual

GoFit MuscleHook MULTI-TOOL User manual
GoFit

GoFit MuscleHook MULTI-TOOL User manual

GoFit PLYOBOX User manual

GoFit

GoFit PLYOBOX User manual

GoFit CHIN-UP BAR Parts list manual

GoFit

GoFit CHIN-UP BAR Parts list manual

GoFit ProFoamRoll Installation guide

GoFit

GoFit ProFoamRoll Installation guide

GoFit GoVibe Installation guide

GoFit

GoFit GoVibe Installation guide

GoFit GOH2O Installation guide

GoFit

GoFit GOH2O Installation guide

GoFit FoamRoller Installation guide

GoFit

GoFit FoamRoller Installation guide

GoFit GO SLIDES Installation guide

GoFit

GoFit GO SLIDES Installation guide

GoFit ELEVATED CHIN UP STATION User manual

GoFit

GoFit ELEVATED CHIN UP STATION User manual

GoFit RESIST-A-CUFF Installation guide

GoFit

GoFit RESIST-A-CUFF Installation guide

GoFit GF-WV10 User manual

GoFit

GoFit GF-WV10 User manual
GoFit WOBBLE BOARD Installation guide

GoFit

GoFit WOBBLE BOARD Installation guide

GoFit GoGravityGym Installation guide

GoFit

GoFit GoGravityGym Installation guide

GoFit GLUTE BLASTER Installation guide

GoFit

GoFit GLUTE BLASTER Installation guide

GoFit POWER LOOPS Installation guide

GoFit

GoFit POWER LOOPS Installation guide

GoFit MuscleHook2 User manual

GoFit

GoFit MuscleHook2 User manual

GoFit SUPER BAND Installation guide

GoFit

GoFit SUPER BAND Installation guide

GoFit Super AbWheel Installation guide
GoFit

GoFit Super AbWheel Installation guide

GoFit PowerTube User manual

GoFit

GoFit PowerTube User manual

Popular Fitness Equipment manuals by other brands

Christopeit Sport MT 1000 Assembly and exercise instructions

Christopeit Sport

Christopeit Sport MT 1000 Assembly and exercise instructions

Inspiration Pursuit owner's guide

Inspiration

Inspiration Pursuit owner's guide

REP PR-5700 Assembly instructions

REP

REP PR-5700 Assembly instructions

FF Europe BHTN13 Original instruction manual

FF Europe

FF Europe BHTN13 Original instruction manual

SPART CD8010 manual

SPART

SPART CD8010 manual

HMS Premium H6319 Manual instruction

HMS Premium

HMS Premium H6319 Manual instruction

BRONZE GYM H Series user manual

BRONZE GYM

BRONZE GYM H Series user manual

Tunturi 17TSHG1000 user manual

Tunturi

Tunturi 17TSHG1000 user manual

Rogers Zone Reactor manual

Rogers

Rogers Zone Reactor manual

BH FITNESS LK700WS owner's manual

BH FITNESS

BH FITNESS LK700WS owner's manual

Domyos BM 740 quick start guide

Domyos

Domyos BM 740 quick start guide

Matrix ULTRA Series quick start guide

Matrix

Matrix ULTRA Series quick start guide

Matrix TF30 Service manual

Matrix

Matrix TF30 Service manual

Kettler HOI EQ1050-500 manual

Kettler

Kettler HOI EQ1050-500 manual

Impex MARCY CLUB MKB-979 owner's manual

Impex

Impex MARCY CLUB MKB-979 owner's manual

Domyos HGc operating instructions

Domyos

Domyos HGc operating instructions

Auvon AS8012C manual

Auvon

Auvon AS8012C manual

Inflight Fitness Multi-Lat/Arm Assembly instructions

Inflight Fitness

Inflight Fitness Multi-Lat/Arm Assembly instructions

manuals.online logo
manuals.online logoBrands
  • About & Mission
  • Contact us
  • Privacy Policy
  • Terms and Conditions

Copyright 2025 Manuals.Online. All Rights Reserved.