BPV-125, BPV-125-BP 0720 7
OPERATING INSTRUCTIONS
PRE-OPERATION INSTRUCTIONS
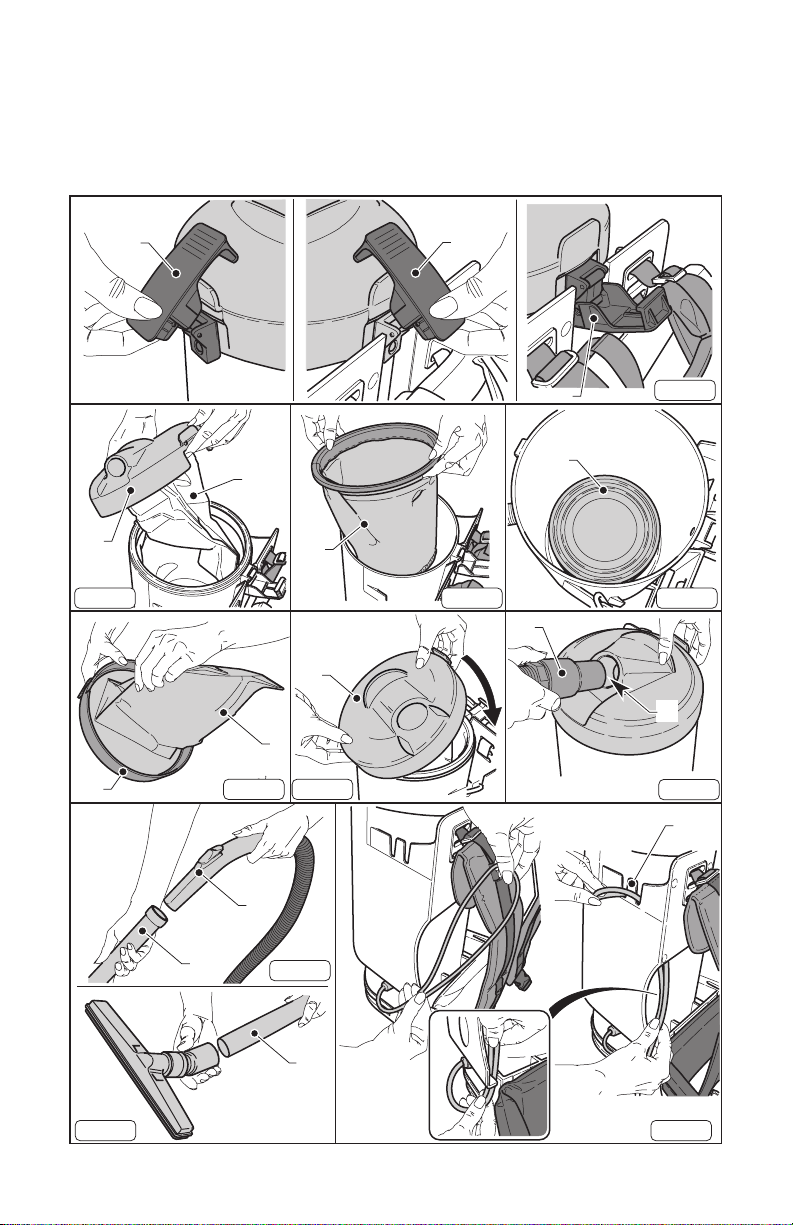
1. Release the lever (1a/1 Fig.1) and remove the cover (2 Fig.2) completely, along with
the eece lter bag (3 Fig.2).
2. Remove the cloth dust bag (4 Fig. 3) and check that the cartridge lter (5 Fig. 4) is
mounted inside the vacuum.
3. Replace the lter cloth (4 Fig.3), replace the paper bag (3 Fig.5) on the cover (2 Fig.5)
and keep in position to ret the cover (2 Fig.6).
4. Lock the lid by the handle (1a/1 Fig.1).
5. Fully charge the battery by connecting the charging cable (13 Fig. 11) to the battery
(14 Fig. 11), then connecting the charger to the power source (15 Fig. 11). NOTE: if
the charger is plugged into the power source rst, the battery will not charge.
WARNING: Do not charge the battery while the vacuum is in use.
6. Once the charger (15 Fig. 11) is plugged into the power source, the green LED
should blink twice (16 Fig. 11), and then the yellow or red LED should light up (17/18
Fig. 11) depending on charge level of the battery.
7. Once the battery is fully charged, the LED will turn green (16 Fig. 11).
Note: Operations 5-7 refer to BPV-125-BP only.
ATTACHING THE EXTENSION WAND
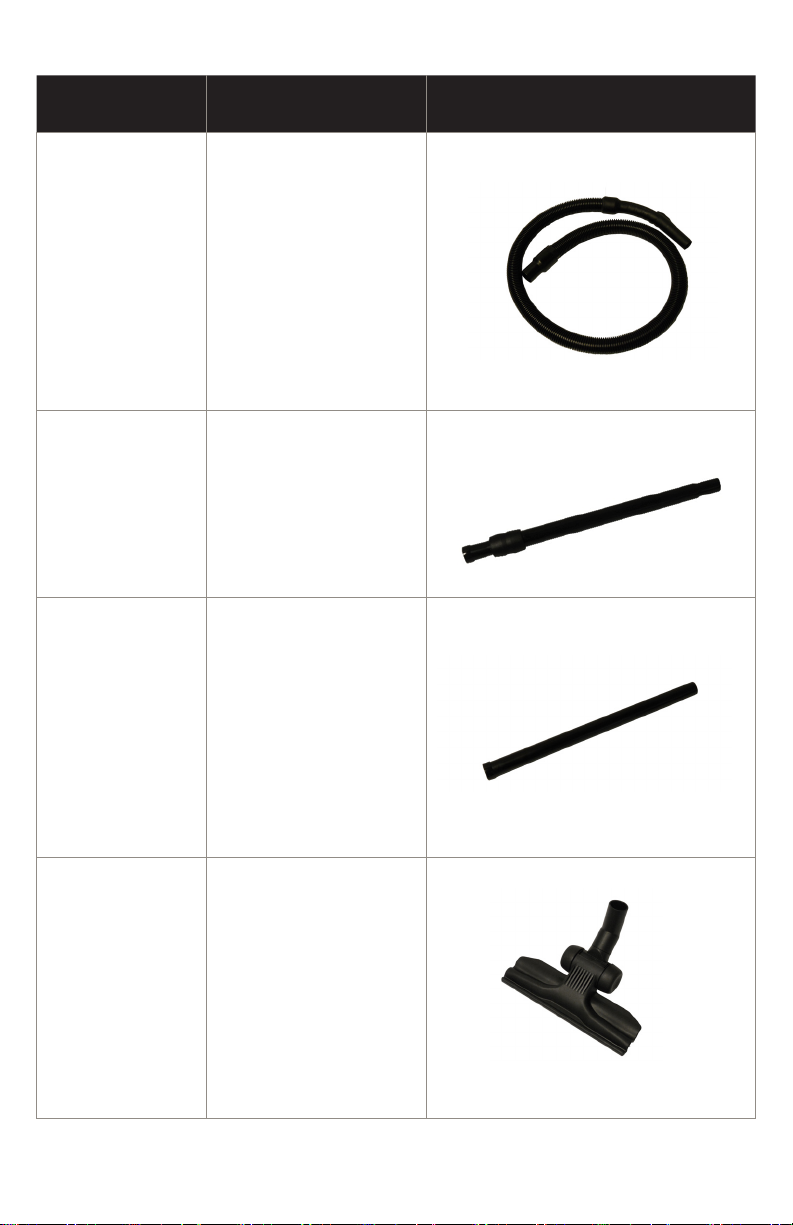
1. Insert the sleeve (8 Fig.7) on the supplied hose into the air intake hole (9 Fig.7).
2. Attach the extension wand to the handle (10 Fig.8) of the hose (11 Fig.8).
3. Attach to the extension wand (11 Fig.9) to the desired accessory (suction nozzle,
dusting brush, crevice tool, etc...).
ADJUSTING THE SHOULDER STRAPS
1. Lift the vacuum and place the shoulder straps (12 Fig.10) on your shoulders.
2. Adjust the shoulder straps (12 Fig.10) by using the buckles (13 Fig.10).
3. Adjust the belt (13 Fig.10) using the buckle (14 Fig.10).
TURNING THE UNIT ON/OFF
1. Insert the plug (15 Fig.11) in the socket.
2. Press the switch (16 Fig.12) to the “I” position.
3. Press the switch (16 Fig.12) to the “0”, turn off the device.
4. Remove the plug (15 Fig.11) from the outlet.
5. Adjust the suction force by sliding the switch (18 Fig.14), positioned on the
ergonomic handle (11 Fig.14). Sliding the switch open (19 Fig.14) lowers the
suction force.