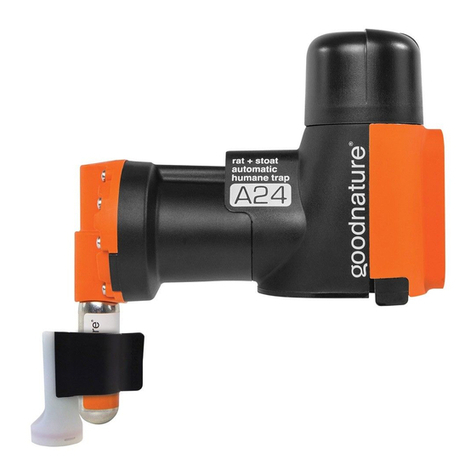
goodnature A24 Guide

4
MOUNTING AND INSTALLATION INSTRUCTIONS GN A24 IN SAFEBOX
PERFORMED BY TRAINED PERSONNEL
For video instructions, use the QR code to find YouTube link
Remove the cable tie on the right side of the safe box using a plier.
Open the lid using the supplied key (use of gloves is recommended to avoid leaving
trails of human scent). Take out the A24 unit.
The safe box is primarily constructed for standalone placement.
For proper stability the box should be mounted into the ground using the punched
holes in the socket and ground spikes. If the box is not mounted properly as
described the CE-marking is not applicable.
As an alternative the safe box can be mounted on a wall using the punched holes on
the back of the box and the supplied screws.
For this step also look at the ALP manual from the QR code for additional instructions:
Take the shroud cap of the A24 unit
Remove the coin from the monitoring paste (ALP). Place the ALP in the shroud cap
and unscrew the lid on the ALP. Use the excess monitoring paste to smear onto the
stair and entrance for the trap. An additional 0.5 cm is pressed out of the ALP before
the shroud cap is mounted on the unit again.
The digital counter is mounted on the Co2 canister and the canister is mounted on
the A24 unit. For easier mounting one can moisten the rubber on the counter a bit.
There are approximately 24 shots in the Co2 canister.
Screw on the Co2 canister swiftly to avoid Co2 leaking out.
(Be aware: the counter must be place as shown on picture no. 3 to function correct)
Warning: The trap is now activated
Re-setting the counter at installation:
Press down the button under the display for app. 3 seconds until it blinks and it says
00 on the display. Do this when the display is off.
Changing the battery:
Open the bottom of the counter using a slotted screwdriver or the like. Change the
battery to a new one of the same type.
Number of shots registered:
Press briefly on the button under the display, the number of shots is now shown on
the display.
Now mount the A24 unit on the stair in the safe box as shown on picture no. 1
Close the lid. For extra security use a padlock if necessary.
Be aware the unit and safe box must never be placed fully or partially under
water.
ALL warranties are voided if unoriginal parts are used.
3
1
2

SERVICE AND MAINTENANCE INSTRUCTIONS GN A24 IN SAFE BOX
PERFORMED BY TRAINED PERSONNEL
For video instructions, use the QR code to find YouTube link
Open the lid using the supplied key (use of gloves is recommended to avoid
Leaving trails of human scent). Take out the A24 unit.
Warning: The trap is active
Check the number of shots on the digital counter
Unscrew the Co2 canister from the A24 unit. Remember to wear gloves for
safety. Be aware that the canister can get very cold when it is removed and
there might be some residual leakage of Co2.
Remove the shroud cap and monitoring paste/ALP from the unit.
Warning: There can be leftover shots even after the Co2 canister is removed.
As a safety measure check the trap minimum 2 times from above
with the key or another tool until it no longer reacts.
For further instructions, please see the YouTube video.
To refresh and optimize the scent trail remove a bit of the outer
layer of the monitoring paste and press out new lure from the paste basket.
If necessary changes the paste basket/ALP to a new one.
Mount the paste basket/ALP and shroud cap on the A24 unit again.
Clean the trap if necessary
Reset the digital counter and mount it on a new Co2 canister (see picture
no. 3 for correct placement). Screw the Co2 canister onto the trap.
Remember to do this swiftly to avoid Co2 leaking out.
Warning: The trap is now activated
Place the A24 unit back in the safe box and close the lid.
For extra security use a padlock if necessary (picture no. 9).
Be aware the unit and safe box must never be placed fully or
partially under water.
ALL warranties are voided if unoriginal parts are used.
5
9
8
7
6

Automatic Lure Pump —Instructions
STEP TWO
STEP FIVE STEP SIX
Nest
With the ALP activated, use your thumbs
and forefingers to shape the ALP into the
SHROUD CAP’s form. It will be a tight fit.
NOTE: Be careful not to push it in too far.
Align the ALP so that the skirting sits about
3mm proud of the SHROUD CAP rim so it
can screw into the LURE CRADLE thread.
Secure Shroud Cap
Once the ALP is screwed into the LURE
CRADLE, apply light downward force on
the SHROUD CAP until it engages with the
thread and screw until tight. The ALP is
now set and active!
Record Install Date
Your ALP will need replacing in 6 months
time. So make a note of the installation date
so you remember when to replace it (along
with the gas canister). There’s no need to
handle the ALP until it needs replacing.
Activate
Remove the 10c coin from the top.
This activates the lure dispensing ALP
technology which will last for 6 months.
Pocket your coin for a 10c discount on your
next Goodnature purchase.
STEP ONE
Secure ALP
Lightly place the SHROUD CAP with
the ALP into the LURE CRADLE and screw
it two full clockwise rotations. This
ensures the ALP is screwed into the lure
cradle firmly.
STEP FOUR
Remove Lid
Now remove the LURE CAP. A small
amount of lure may be forced out. Use this
as pre-feed by wiping the excess lure
below the trap to immediately attract any
hungry rodents.
STEP THREE
ALP_Instructions_Rev05
ALP
Six Month
Replacement

Save Time And Birds
The Goodnature Automatic Lure Pump (ALP) delivers
Chocolate Formula Long Life Lure continuously over 6
months. This means your Goodnature A24 rat control
networks now need only 2 visits per year to achieve the same
total and constant suppression of rats. Simply set your A24s,
install the ALPs, screw in the CO2canisters, then walk away
knowing your traps are now constantly attractive and ready
to strike introduced pests.
Goodnature Chocolate Formula Lure has been proven over
thousands of hectares by DOC, Councils and Community
Groups to control rats to undetectable levels in A24 traps. In
standard lure bottles the chocolate formula was at its most
eective when refreshed monthly which requires traps to be
checked 12 times per year. With the ALP you now need just
2 checks per year to achieve those same incredible results.
Trapping with this system requires 92% less labour
than that required when using traditional trapping at DOC
best practice.
It’s up to you what you do with all that spare time: expand
your project, spend more time bird watching, controlling
weeds, planting trees and educating the next generation, or
just sit back and relax knowing the latest technology leap in
pest control is constantly working while you sleep.
INSTALLATION INSTRUCTION FEEDBACK - We always
want to improve our technology at Goodnature and the way
we write our instructions. We welcome any feedback from
INFLATING CHAMBER
LURE CHAMBER
SWITCH (COIN)
ALP TECHNOLOGY
LURE OUTLET
LURE CAP
DAY 180
Once all the lure is forced out it is
time to replace your ALP.
DAY 90
Gas is generated in the upper
chamber forcing lure out.
DAY 01
Remove the coin activating
the ALP technology.
o
o
d
n
a
t
u
r
e
S
e
e
y
o
u
i
n
6
m
o
n
t
h
s
S
N
-
0
0
0
0
1

INSTRUCTIONS FOR GOODNATURE A24 IN SAFE BOX
To ensure the best possible usage of your new CE
MARKED Goodnature®A24 –Rat & Stoat Trap in safe
box, we recommend that you read these instructions
carefully before mounting and using the product.
When using your smartphone and the QR code placed
in the safe box these instructions are available at all
times, should you need further instructions for in-
stalling, servicing and maintenance of your safe box
and A24 unit.
The safe box with the Goodnature A24 unit (GN A24)
is developed for non-toxic pest control. Rodents are
killed with a stroke from a piston powered by a 16g
Co2 canister.
All warranties are voided if unoriginal parts are used
or if these instructions are not followed.
PICTURE OF THE GOODNATURE A24 IN SAFE BOX
Trap entrance
Co2 canister
Pre-punched holes for
mounting to a wall
Safe box
QR code and
CE label
A24 Goodnature unit
Lid with danger label
Pad lock for increased safety
Note this is sold separately
Digital counter
Key
Cable tie for transport
Example of proper glove
Ladder with serial number
Socket with pre-punched
holes for mounting the safe
box in the ground.
Note ground spikes are sold
separately
Ground spikes

SAFETY
Only trained personnel should install and service the
safe box and A24 unit.
Children and unauthorized persons must not be able
to access the A24 unit. Therefore, always keep the
safe box closed. There are pre-punched holes for a
pad lock for extra safety.
Do not install or service the safe box or the A24 unit if
you are sick, tired or under the influence of medicine,
alcohol or drugs.
Safety checks of shots from the Co2 canister MUST
always be done using a tool. Never use hands and
fingers for this.
Change of the Co2 canister must always be done
wearing gloves. Be aware that the canister can get
very cold when dismantled and there can be some
residual leakage of Co2. Only use original Goodnature
Co2 canisters.
This safe box is only for installation of the Goodnature
A24 unit. No other types of traps should be installed
in this safe box.
The A24 unit must be installed in the safe box. If it is
installed and used outside the safe box the CE mark-
ing no longer applies and safety is reduced significant-
ly.
The safe box is primarily constructed for standalone
use but it is possible to mount it to a wall using the
pre-punched holes on the backside and the supplied
screws. If the safe box is used at a standalone place-
ment, it is important to secure stability using the pre-
punched holes in the socket and ground spikes. If the
safe box is not mounted safely as described here, the
CE marking no longer applies.
In the unlikely event that an animal or something else
is stuck in the trap, it must only be removed using
suitable tools. Never stick your hands or fingers into
an activated trap. Instead, dismount the Co2 canister
(Caution: use gloves) and check if there are leftover
shots using a suitable tool e.g. the key. Now one can
remove what was stuck in the trap. Once this is done,
the trap is mounted and activated as described in the
section “MOUNTING AND INSTALLATION OF THE GN
A24 IN SAFE BOX”.
If the safe box and the GN A24 unit is to be moved to
another location, one must dismount the Co2 canister
and do a safety check with the key or another tool to
ensure the trap is no longer active.
Testing the trap must always be done from above
after the monitoring paste is removed, never do this
from the trap entrance. If tested from the trap en-
trance parts of the unit can be damaged.
The safe box and the A24 unit must never be placed
under water or end up standing completely or partial-
ly under water. If this happens the A24 unit will no
longer function correct.
One must not deliberately trigger several shots one
after the other from the A24 unit, as this can cause
damage to the inner casing.
One must never use a petroleum-based lubricant on
the A24 unit as this can damage the unit.
MOUNTING AND INSTALLATION OF THE GN A24 IN
SAFE BOX
Mounting and installation of the GN A24 in safe box
performed by trained personnel.
1. Open the lid using the supplied key. Use of
gloves is recommended to avoid leaving trails
of human scent.
2. Remove the cable tie on the right side of the
safe box using a plier and take out the A24
unit.
3. Take the shroud cap of the A24 unit. Remove
the coin from the monitoring paste package
(ALP). Place the ALP in the shroud cap and un-
screw the lid on the ALP. Use the excess moni-
toring paste to smear onto the stair and en-
trance for the trap. An additional 0.5 cm is
pressed out of the ALP before the shroud cap
is mounted on the unit again. Please also read
the manual for mounting the ALP, which is at-
tainable using the QR code.

4. Mount the digital counter onto the Co2 canis-
ter and mount the canister onto the trap unit.
For easier mount, one can moisten the rubber
on the counter. There are 24 shots in the Co2
canister. Tighten the canister onto the trap
swiftly to avoid Co2 leakage. It is important to
place the counter as shown on the above pic-
ture. This is to ensure that it works correctly.
WARNING! THE TRAP IS NOW ACTIVATED
5. The safe box is mounted steadfast and secure
with the use of the pre-punched holes and
ground spikes. Alternatively, the safe box can
be mounted to a wall using the pre-punched
holes and the enclosed kit.
6. The A24 unit and trap is mounted in the safe
box. Close the lid and for extra safety, one can
add a pad lock.
COUNTER
1. Resetting the counter when mounting it.
Display must be off. Press down the button
under the display for app. 2 sec. until it blinks
and 00 is on the display.
2. Reading the number of shots. Press down
shortly on the button under the display. The
number of shots are shown on the display.
3. Changing the battery. The bottom lid on the
counter is opened using a slotted screwdriver
or the like. Change the battery to a new one
of the same type and put the lid back on.
SERVICE AND MAINTENANCE
Service and maintenance of the GN A24 in safe box
performed by trained personnel.
1. Open the lid using the supplied key. Use of
gloves is recommended to avoid leaving trails
of human scents. Take out the A24 unit.
WARNING! THE TRAP IS ACTIVATED
2. Check the number of shots on the counter.
There are 24 shots in the Co2 canister.
If there are still shots and monitoring paste
left in the trap close and lock the safe box until
the next service check.
3. Remove the Co2 canister. Always use gloves
when removing the canister as it can become
very cold due to residual leakage of Co2.
Only use original 16 gram Co2 canisters like
the one shown on the above picture. If other
types are used the warranty is voided.
4. Remove the shroud cap and monitoring paste
from the unit. Warning: There can be leftover
shots even after the Co2 canister is removed.
As a safety measure check the trap minimum
2 times from above with the key or another
tool until it no longer reacts. To refresh and
optimize the scent trail remove a bit of the
outer layer of the monitoring paste and press
out new monitoring paste from the monitor-
ing paste basket. If necessary, change the
monitoring paste to a new one. Mount the
monitoring paste and shroud cap on the A24
unit again.
5. Clean the trap if necessary.
6. Reset the counter as described earlier. Mount
it onto a new Co2 canister. It is important to
place the counter as shown on the above pic-
ture. This is to ensure that it works correctly
and counts all shots. Screw the Co2 canister
onto the A24 unit.
WARNING! THE TRAP IS NOW ACTIVATED
7. Mount the A24 unit in the safe box again.
Close the lid and use a pad lock for extra safe-
ty if necessary.
8. Check that the safe box is still securely
mounted in the ground or alternatively to a
wall.
TRANSPORT AND STORAGE
If the safe box and the A24 unit is moved to another
location, the Co2 canister must first be removed and
the trap checked for leftover shots using the key or
another tool.
When delivered the safe box is secured using a cable
tie. This is also recommended if it is later moved or
placed in storage.
If the safe box and A24 unit has been active and must
go to storage for a period, one should remove the
monitoring paste and shroud cap. When stored the
Co2 canister must also be removed. Remember! Use
gloves when removing the canister to avoid frost
burns.
DISPOSAL
Disposal must be done in ways that minimize the neg-
ative environmental effects as much as possible and
comply with the applicable rules. In many cases, you
will be able to dispose of safe box, A24 unit and acces-
sories at your local recycling station.
WARRENTY TERMS
Warranties voided if:
-Safety instructions and this manual are not
followed
-One has made unauthorized changes and
modifications on one or more parts of the
safe box, A24 unit or the accessories
-The safe box or the A24 unit is not maintained
properly or if any of them has been damaged
otherwise
-Unoriginal spare parts have been used
-The A24 unit has been placed partial or com-
pletely under water
MANUFACTURED BY
Camro ApS
Gl. Nøragervej 8
9610 Nørager, Denmark
DECLARATION OF COMPLIANCE
Manufacturer Camro ApS, 9610 Nørager
Hereby declare that,
Goodnature® A24 Rat & Stoat Trap and case
Is manufactured in accordance with the articles in the
following EU directive:
2006/42/EC Machinery directive
And in accordance with the following standards:
EN ISO 12100:2011 Safety of machinery - General
principles for design - Risk assessment and risk reduc-
tion
EN ISO 14121-2:2012 Safety of machinery –Risk as-
sessment.
Camro ApS, 9610 Nørager, 05. September 2016
© 2016 Camro ApS. Original instructions manual.
All rights to this manual are reserved. The contents of this manual may not
be reproduced, copied or translated without written permission from
Camro ApS.

Spare parts
No.
Picture
Designation
Item number
Pieces per package
1
A24 GN Goodnature complete trap
in safe box including monitoring
paste, Co2 canister, counter and key
A24-GN-CE-APP
1 pcs.
2
A24 GN Goodnature complete trap
in safe box including monitoring
paste, Co2 canister and counter.
Note; without key
A24-GN-CE-NOKEY
1 pcs.
3
A24 GN Goodnature trap with
bracket including monitoring paste,
Co2 canister and counter
A24 UNIT-NO CE
1 pcs.
4
A24 digital counter
A24 COUNT
1 pcs.
5
A24 monitoring paste ALP
A24-LURE-ALP
8 pcs.
6
A24 empty monitoring paste basket
A24 LURE-B
8 pcs.
7
A24 500g bag of monitoring paste
for refill of A24 empty monitoring
paste basket
A24-LURE-REF
1 pcs.
8
A24 bottle of monitoring paste for
mounting in A24 unit
A24 LURE
1 pcs.
9
A24 original Co2 canister 1 pcs.
A24 Co2
1 pcs.
10
A24 original Co2 canister package
with 10 pcs.
A24 Co2x10
10 pcs.

11
A24 Padlock
A24 PADLOCK
12 pcs.
12
A24 Unit –trap without accessories
A24 UNIT
1 pcs.
13
A24 Safe box without trap or
accessories
A24 SAFEBOX
1 pcs.
14
A24 Bracket
Note.+ Danger label
A24 BRACKET-NO
CE
1 pcs.
15
A24 Base mount
A24 BASEMOUNT
1 pcs.
16
A24 stair for A24 unit in safe box
A24 STAIR
1 pcs.
17
A24 Safe box lid
A24 LID
1 pcs.
18
Camro key for safe box
RÅ170812-1ANT
1 pcs.
19
Camro ground spike 10 cm (Hard
surface)
RÅ17100SCAN
4 pcs.
20
Camro ground spike 25 cm (Gravel
surface)
RÅ17250SCAN
4 pcs.
21
Camro ground spike 40 cm (soft
surface)
RÅ17400SCAN
4 pcs.

According to EC-Regulation 2015/830
1/7
GOODNATURE CO2 Canister
SAFETY DATA SHEET
SECTION 1: Identification of the substance/mixture and of the company/undertaking
1.1. Product identifier
Trade name
GOODNATURE CO2 Canister
Product no.
-
REACH registration number
-
1.2. Relevant identified uses of the substance or mixture and uses advised against
Relevant identified uses of the substance or mixture
For use with Goodnature Automatic, humane traps
Uses advised against
-
The full text of any mentioned and identified use categories are given in section 16
1.3. Details of the supplier of the safety data sheet
Company and address
Tec-SolutionZ
Hovedgaden 512
2640 Hedehusene
Danmark
Tlf.nr. +45 31 21 29 89
Contact person
-
E-mail
info@tec-solutionz.com
SDS date
2017-04-06
SDS Version
1.0
1.4. Emergency telephone number
Contact The National Poisons Information Service (dial 111, 24 h service). See section 4 “First aid
measures”.
SECTION 2: Hazards identification
2.1. Classification of the substance or mixture
Comp. Gas; H280
See full text of H-phrases in section 2.2.
2.2. Label elements
Hazard pictogram(s)
Signal word
Warning

According to EC-Regulation 2015/830
2/7
GOODNATURE CO2 Canister
Hazard statement(s)
Contains gas under pressure; may explode if heated. (H280)
Safety statement(s)
General
If medical advice is needed, have product container or label at hand. (P101).
Keep out of reach of children. (P102).
Prevention
-
Response
-
Storage
Protect from sunlight. Store in a well-ventilated place. (P410+P403).
Disposal
-
Identity of the substances primarily responsible for the major health hazards
Carbon dioxide. CAS no.: 124-38-9
2.3. Other hazards
-
Additional labelling
-
Additional warnings
-
VOC
-
SECTION 3: Composition/information on ingredients
3.1/3.2. Substances/Mixtures
NAME: Carbon dioxide
IDENTIFICATION NOS.: CAS-no: 124-38-9 EC-no: 204-696-9
CONTENT: 95-100%
CLP CLASSIFICATION: Comp. Gas
H280
NOTE: L
(*) See full text of H-phrases in section 16. Occupational exposure limits are listed in section 8, if these are available.
L = European occupational exposure limit.
Other information
-
SECTION 4: First aid measures
4.1. Description of first aid measures
General information
In the case of accident: Contact a doctor or casualty department –take the label or this safety data sheet.
The doctor can contact The National Poisons Information Service (dial 111, 24 h service). Contact a doctor
if in doubt about the injured person’s condition or if the symptoms persist. Never give an unconscious
person water or other drink.
Inhalation
Bring the person into fresh air and stay with him.
Skin contact
Immediately remove contaminated clothing and shoes. Ensure that skin, which has been exposed to the
material, is washed thoroughly with soap and water. Skin cleanser can be used. DO NOT use solvents or
thinners.
Eye contact
Remove contact lenses. Flush eyes immediately with plenty of water or isotonic water (20-30°C) for at
least 15 minutes and continue until irritation stops. Make sure to flush under the upper and lower eyelids.
If irritation continues, contact a doctor. Continue flushing during transport.
Ingestion
Exposure is not likely due to the physical state of the product (gas).

According to EC-Regulation 2015/830
3/7
GOODNATURE CO2 Canister
Burns
Rinse with water until the pain stops then continue to rinse for a further 30 minutes.
4.2. Most important symptoms and effects, both acute and delayed
Nothing special
4.3. Indication of any immediate medical attention and special treatment needed
Nothing special
Information to medics
Bring this safety data sheet.
SECTION 5: Firefighting measures
5.1. Extinguishing media
Recommended: alcohol-resistant foam, carbonic acid, powder, water mist. Waterjets should not be used,
since they can spread the fire.
5.2. Special hazards arising from the substance or mixture
Given it does not present a hazard disconnect gas supplies immediately. Removal of pressurized
containers or attempting to cool with water shall be entrusted to the fire brigade.
5.3. Advice for firefighters
No specific requirements.
SECTION 6: Accidental release measures
6.1. Personal precautions, protective equipment and emergency procedures
Disconnect the gas supply provided it does not present a risk. Avoid breathing fumes. Make sure to have a
self-contained breathing apparatus available and ready-to-use in the event of an emergency. Storages not
yet ignited must be cooled by water mist. Remove flammable materials if conditions allow it. Ensure
sufficient ventilation.
6.2. Environmental precautions
No specific requirements.
6.3. Methods and material for containment and cleaning up
Disconnect the gas supply. Allow liquefied gas to evaporate and dilute into safe concentration levels in the
surrounding atmosphere. If necessary control the dilution of the gas with a mist of water. Ventilate rooms in
order to remove the gas.
6.4. Reference to other sections
See section on “Disposal considerations” in regard of handling of waste. See section on 'Exposure
controls/personal protection' for protective measures.
SECTION 7: Handling and storage
7.1. Precautions for safe handling
Smoking, storage of tobacco, consumption and storage of food or liquids are not allowed in the workrooms.
See section on 'Exposure controls/personal protection' for information on personal protection.
7.2. Conditions for safe storage, including any incompatibilities
Always store in containers of the same material as the original container. Containers that have been
opened must be carefully resealed and kept upright to prevent leakage. Protect electrical equipment in
accordance with current standards. To divert static electricity during transmission, containers must be
grounded and connected by wire with the receiving containers. Do not use spark-forming tools. Vapours
may propagate along the floor. Prevent the forming of flammable or explosive vapour concentrations by
applying sufficient ventilation. Do not use this product in close proximity to sources of ignition.
Storage temperature
Dry, cool and well ventilated < 50°C
7.3. Specific end use(s)
This product should only be used for applications quoted in section 1.2

According to EC-Regulation 2015/830
4/7
GOODNATURE CO2 Canister
SECTION 8: Exposure controls/personal protection
8.1. Control parameters
OEL
No substances are listed in The Control of Substances Hazardous to Health Regulations with an occupational exposure limit.
DNEL / PNEC
No data available
8.2. Exposure controls
Control is unnecessary if the product is used as intended.
General recommendations
Observe general occupational hygiene standards.
Exposure scenarios
In the event exposure scenarios are appended to the safety data sheet, the operational conditions and risk
management measures in these shall be complied with.
Exposure limits
Occupational exposure limits have not been defined for the substances in this product.
Appropriate technical measures
Apply standard precautions during use of the product. Avoid inhalation of gas or dust.
Hygiene measures
In between use of the product and at the end of the working day all exposed areas of the body must be
washed thoroughly. Always wash hands, forearms and face.
Measures to avoid environmental exposure
No specific requirements.
Individual protection measures, such as personal protective equipment
-
Generally
Use only CE marked protective equipment.
Respiratory Equipment
Avoid inhalation. Use in well ventilated areas
Skin protection
In the likelihood of direct or incidental exposure, wear whole-body protection, due to the risk of frost bites or
skin burns.
Hand protection
Wear protective gloves when replacing the cartridge because of the risk of freeze burns.
Eye protection
Use safety glasses
SECTION 9: Physical and chemical properties
9.1. Information on basic physical and chemical properties
Form
Gas
Colour
No data available.
Odour
None
Odour threshold (ppm)
No data available.
pH
No data available.
Viscosity (40°C)
No data available.
Density (g/cm³)
1,53
Phase changes
Melting point (°C)
-78
Boiling point (°C)
-57
Vapour pressure
No data available.
Decomposition temperature (°C)
No data available.
Evaporation rate (n-butylacetate = 100)
No data available.
Data on fire and explosion hazards
Flash point (°C)
No data available.
Ignition (°C)
No data available.

According to EC-Regulation 2015/830
5/7
GOODNATURE CO2 Canister
Auto flammability (°C)
No data available.
Explosion limits (% v/v)
No data available.
Explosive properties
No data available.
Solubility
Solubility in water
Insoluble
n-octanol/water coefficient
No data available.
9.2. Other information
Solubility in fat (g/L)
No data available.
SECTION 10: Stability and reactivity
10.1. Reactivity
No data available
10.2. Chemical stability
The product is stable under the conditions, noted in the section “Handling and storage”.
10.3. Possibility of hazardous reactions
Nothing special
10.4. Conditions to avoid
Nothing special
10.5. Incompatible materials
Strong acids, strong bases, strong oxidizing agents, and strong reducing agents.
10.6. Hazardous decomposition products
The product is not degraded when used as specified in section 1.
SECTION 11: Toxicological information
11.1. Information on toxicological effects
Acute toxicity
Substance
Species
Test
Route of exposure
Result
No data available.
Skin corrosion/irritation
No data available.
Serious eye damage/irritation
No data available.
Respiratory or skin sensitisation
No data available.
Germ cell mutagenicity
No data available.
Carcinogenicity
No data available.
Reproductive toxicity
No data available.
STOT-single exposure
No data available.
STOT-repeated exposure
No data available.
Aspiration hazard
No data available.
Long term effects
Nothing special
SECTION 12: Ecological information
12.1. Toxicity
Substance
Species
Test
Duration
Result
No data available.

According to EC-Regulation 2015/830
6/7
GOODNATURE CO2 Canister
12.2. Persistence and degradability
Substance
Biodegradability
Test
Result
No data available.
12.3. Bioaccumulative potential
Substance
Potential bioaccumulation
LogPow
BCF
No data available.
12.4. Mobility in soil
No data available
12.5. Results of PBT and vPvB assessment
This substance is not considered to meet the criteria classifying it as PBT and/or vPvB.
12.6. Other adverse effects
Nothing special
SECTION 13: Disposal considerations
13.1. Waste treatment methods
The Product is not covered by regulations on dangerous waste, follow the local Regulations.
Waste
EWC code
-
Specific labelling
-
Contaminated packing
-
SECTION 14: Transport information
14.1 –14.4
This product is within scope of the regulations of transport of dangerous goods.
ADR/RID
14.1. UN number
2037
14.2. UN proper shipping name
RECEPTACLES, SMALL, CONTAINING GAS (GAS CARTRIDGES) without a release device,
non-refillable
14.3. Transport hazard
class(es)
II
14.4. Packing group
-
Notes
-
Tunnel restriction code
E
IMDG
UN-no.
2037
Proper Shipping Name
RECEPTACLES, SMALL, CONTAINING GAS (GAS CARTRIDGES) without a release device, non-
refillable
Class
II
PG*
-
EmS
-
MP**
No
Hazardous constituent
-
IATA/ICAO
UN-no.
2037
Proper Shipping Name
RECEPTACLES, SMALL, CONTAINING GAS (GAS CARTRIDGES) without a release device, non-
refillable
Class
II
PG*
-
14.5. Environmental hazards
-
14.6. Special precautions for user
-

According to EC-Regulation 2015/830
7/7
GOODNATURE CO2 Canister
14.7. Transport in bulk according to Annex II of Marpol and the IBC Code
No data available
(*) Packing group
(**) Marine pollutant
SECTION 15: Regulatory information
15.1. Safety, health and environmental regulations/legislation specific for the substance or mixture
Restrictions for application
-
Demands for specific education
-
Additional information
-
Sources
Regulation (EC) No 1272/2008 of the European Parliament and of the Council of 16 December 2008 on
classification, labelling and packaging of substances and mixtures, amending and repealing Directives
67/548/EEC and 1999/45/EC, and amending Regulation (EC) No 1907/2006 (CLP).
EC regulation 1907/2006 (REACH).
15.2. Chemical safety assessment
No
3412097152, 6.3.0.6
SECTION 16: Other information
Full text of H-phrases as mentioned in section 3
H280 - Contains gas under pressure; may explode if heated.
The full text of identified uses as mentioned in section 1
-
Additional label elements
-
Other
In accordance with Regulation (EC) No. 1272/2008 (CLP) the evaluation of the classification of the mixture
is based on:
The classification of the mixture in regard of physical hazards has been based on experimental data.
It is recommended to hand over this safety data sheet to the actual user of the product. Information in this
safety data sheet cannot be used as a product specification.
The information in this safety data sheet applies only to this specific product (mentioned in section 1) and is
not necessarily correct for use with other chemicals/products.
A change (in proportion to the last essential change (first cipher in SDS version, see section 1)) is marked
with a blue triangle.
The safety data sheet is validated by
PIPE/CHYMEIA
Date of last essential change
(First cipher in SDS version)
-
Date of last minor change
(Last cipher in SDS version)
-
ALPHAOMEGA. Licens nr.:3412097152, 6.3.0.6
www.chymeia.com
Other manuals for A24
6
Table of contents
Other goodnature Pest Control manuals
Popular Pest Control manuals by other brands

LAS
LAS 16261 operating instructions

Kemo Electronic
Kemo Electronic M094N Mounting instructions + Setting into operation

Koolatron
Koolatron MK14 owner's manual

P.Lindberg
P.Lindberg 9050860 Original manual

PestWest
PestWest CHAMELEON EXG X Instructions for use

Parkside
Parkside PSMS 1 A1 Assembly and Safety Advice