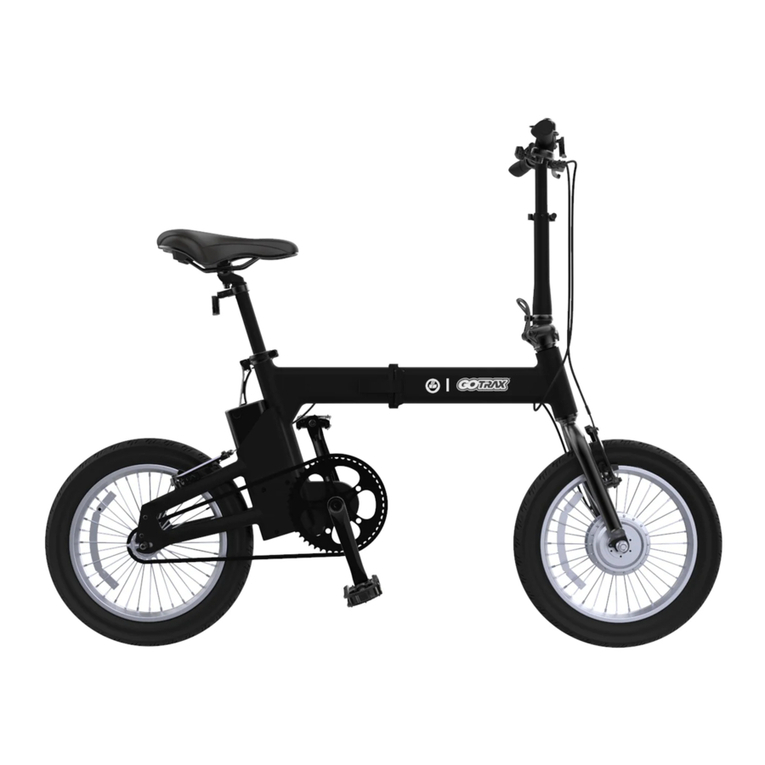
Gotrax CTI3 User manual

USER MANUAL
Electric Bike
CTI3


Congratulations
on your purchase!
This user manual will help you assemble and
operate your new electric bicycle. Be sure to
read ALL OF THE INFORMATION in this
manual before riding.
NOTE TO ALL RIDERS UNDER THE AGE OF 18:
It’s very important that you get parental
permission before riding your electric bicycle.
TOOLS INCLUDED: 15mm&18mm open-end
wrench, combination wrench.
01

02
Contents
Don’t Ride Until You Read This ...............................................................
Unpacking and Product Specs ................................................................
Get to Know Your E-Bike .........................................................................
1. Handlebar .....................................................................................................
2. Seat ................................................................................................................
3. Front Wheel & Front Brake .......................................................................
4. Pedals ............................................................................................................
5. Fenders .........................................................................................................
6. Adjustments .................................................................................................
Meter Function .........................................................................................
Charge your E-Bike ...................................................................................
7. Uninstalling the Battery ..............................................................................
Charge your Battery .................................................................................
Tire Inflation Instructions ........................................................................
Maintenance & Repair .............................................................................
Function Mode ..........................................................................................
Battery Information .................................................................................
Battery Assembly .............................................................................................
Charging the Battery .......................................................................................
Warning Message .....................................................................................
04
09
10
11
13
14
15
16
17
18
18
19
20
21
23
26
34
36
36
36
05
8. Reinstalling the Battery ..............................................................................

Precautions for Battery Protection................................................................ 37
Troubleshooting Guidance .....................................................................
Warranty ...................................................................................................
38
39
03

ALWAYSwear a helmet when riding your electric bike.
Make sure your electric bike has a full battery before taking it out to ride.
Alwaysbe aware of local road laws, and follow them.
Do not
Alwaysrespect pedestrians.
ride the bike under the influence of drugs or alcohol.
Don’t Ride Until You Read This:
To conserve electricity, use assist mode and avoid zero starting,frequent
braking, driving against the wind, carrying heavy loads including other people
and riding with insufficient air pressure.
Do not ride under wet conditions. The electric bike may slide from under
your feet causing injury. Wet conditions may damage the electronics
and void the warranty.
04
WARNING: Lithium-ion Batteries and/or products that contain Lithium-ion Batteries can
expose you to chemicals including cobalt lithium nickel oxide, and nickel, which are
known to the State of California to cause cancer and birth defects or other reproductive
harm. For more information, go to www.P65Warnings.ca.gov

1. Avoid water - The electric bikeisnot waterproof. The electronics may bedamaged
due to water and water damage isnot covered by ourwarranty. Riding in wet
conditionsis also very dangerous and may resultin injury.
2. Avoid prolonged exposureto sun or rain and avoid storage in places with high
temperatures or corrosivegas.
3. Abuse - We do not cover physical damage due to negligent care and extreme riding.
4. Wheneveryou ride the GOTRAX Electric Bike, you risk severe injury or even death
from loss of control, collisions, and falls. Use caution and ride at yourown risk.
5. Do not modifythe product from the manufacturers original design.
6. Do not exceed
7. Avoid touchingthe charging port directly and do notlet it make contact with a
metal object.
8. Keep hands and all body parts awayfrom moving parts while operating the
electric bike.
9. Before riding - be sure to check the electric bikeover and make sure the electric
bikeis operating correctly before each use.
10. Before riding -be sure to check that the braking system isfunctioning properly;
also be sure to check that all safety labels are in place and you understand the
safety warnings.
11. Before riding -be sure that any and all axleguards, chain guards, or other covers
or guards supplied by the manufacturer are in place and in serviceable condition.
12. Before riding -
Warning Message
the posted speed limit and obey all traffic laws.
properly, and have sufficient tread remaining.
be sure to check that the tires are in good condition, inflated
13. Neverexceed
14. The electric bike should neverbeused by children under the age of 16.
the 264lbs (120 kg) maximum load rating.
05

15. Maximum Speed - Your electric bikegoes the maximum speed of 20 mph.
16. Make note that additional insurance may be required to cover situations you
encounter while riding an electric bike. Itis recommended that you contact an
insurance company or broker for advice and consultation.
17. To conserve electricity, use assist mode and avoid zero starting,frequent braking,
driving against the wind, carrying heavy loads including other people and riding with
insufficient air pressure.
06

Correct
Forehead covered
Incorrect
ALWAYS WEAR A HELMETIT
COULD SAVE YOUR LIFE!
A properly fitting, CPSC approved,bicycle helmet
should be worn at all times when riding your bicycle.
In addition, if you are carrying a passenger (only use
an approved child safety seat), and remember, the
passenger must also be wearing a helmet.
The correct helmet should:
-be comfortable
-be lightweight
-have good ventilation
-fit correnctly
-cover the forehead
-be securely fastened on the rider.
Forehead exposed
FCC REGULATIONS This device complies with Part 15 of the FCC Rules. Operation
is subject to the following two conditions: (1) this device may not cause harmful
interference, and (2) this device must accept any interference received, including
interference that may cause undesired operation.
Caution: The user is cautioned that changes or modifications not expressly approved
by the party responsible for compliance could void the user's authority to operate
the equipment.
Note: This equipment has been tested and found to comply with the limits for a Class
B digital device, pursuant to part 15 of the FCC Rules. These limits are designed to
provide reasonable protection against harmful interference in a residential installation.
This equipment generates, uses and can radiate radio frequency energy and, if not
installed and used in accordance with the instructions, may cause harmful interference
to radio communications. However, there is no guarantee that interference will not
occur in a particular installation. If this equipment does cause harmful interference to
radio or television reception, which can be determined by turning the equipment off
and on, the user is encouraged to try to correct the interference by one or more of the
07
following measures:
*Reorient or relocate the receiving antenna.
*Increase the separation between the equipment and receiver.
*Connect the equipment into an outlet on a circuit different from that to which the
receiver is connected.
*Consult the dealer or an experienced radio/TV technician for help.
08

Unpacking and Product Specs
1890x720x1190 mm (74.4x28.3x46.8 in)
CTI3
1495x310x880 mm (58.8x12.2x34.6in)
120 kg (264 Ibs)
32km (20 mph)
48V 13.6Ah
5hours
45 km (28 miles)
85 km (53 miles)
Input 100-240V 50/60Hz AC Plug; Output 54.6V 3A Three-core charging port
25-45 P.S.I
The following accessories are included with your 90% pre-assembled GOTRAX bike.
Pedal Battery Charger Battery Keys
Multi Tool Pedal / Wheel Wrench Front Reflector
Small Bell
14 degrees
09

Charger Port
10

1. Unscrew the bolts and remove the
covers, bolts and sleeves, leaving all
washers in place.
2. Place the handlebar riser on the
front fork, tighten the bolts on the top
of the stem, and fix the stem on the
front of the bicycle.
3. Loosen the fixing screws between
the stem and the handlebar,
and adjust the handlebar to an angle
which is comfortable for riding.
4. Align the handlebar with the center
position, tighten and fix the bolts on
both sides of the handlebar.
5. Add Top Cap to Stem Bolt. 6. Upon final assembly, revisit this
step to confirm alignment with stem
and front wheel.
1. HANDLEBAR Please tighten and secure all bolts
HANDLEBAR COMPONENTS HAS BEEN PRE-ASSEMBLED
You will use the 5mm allen key on the multi tool for these steps.
11

1313
Front Reflector Installation.
Remove the screw and place bracket
over the handlebar on the left side
closest to the monitor, if you are sitting
on the seat. Tighten and secure the screw.
Monitor Installation.
Remove bolts and place monitor on
handlebar with a bracket on each side of
the stem. Make sure that you can clearly
see the monitor while sitting the the seat.
Insert the bolts - tighten and secure.
You will need the 3mm allen key
on the multi tool to install.
You will need the +/phillips screw driver
in the multi tool to install.
You will need the +/phillips screw driver in the multi tool to install.
Light Installation.
Remove allen bolt and wrap
bracket around center of stem.
Reapply bolt and using the 4mm
allen key tighten and secure. Adjust
light angle for preference.
12

2. SEAT
1. Push the saddle down.
3. Adjusting and rotate the seat. 4. Finally lock the folder.
2. Open the folder of the seat tube.
13

15
4. Tighten one axle nut part way
then tighten the other nut, repeat
until both sides are tightened
securely. Be sure that the wheel is
centered between the fork legs.
2. Position the front wheel so it’s
centered between the front fork
legs with the axle resting inside the
fork drop outs.
3. Align the disc brake rotor so it is
centered in the slot of the brake
caliper.
1. Remove packing block from disc
brake caliper
– Do Not Throw Away
– Re-install Packing Block whenever
you remove your front wheel.
CAUTION
Tighten nuts securely to the fork drop outs
3. FRONT WHEEL &
FRONT BRAKE
YOUR BIKE HAS A BOLT ON MECHANISM
14

4. PEDALS
1. Drive side of bike select R-Right pedal
2.
3.
Insert pedal into Crank/Drive side
and start to turn CLOCKWISE.
Once hand tight apply pedal wrench to
pedal and tighten and secure.
1. NON drive size of bike select L-Left pedal
2.
3.
Insert pedal into Crank Arm/NON- Drive side
and start to turn COUNTER CLOCKWISE.
Once hand tight apply pedal wrench to pedal
and tighten and secure.
MATCH PEDAL and CRANK ARM CAREFULLY
Right pedal is applied to drive side/side with crank and gears and threads/twist on CLOCKWISE
Left pedal is applied on NON-DRIVE side/side with disk rotors and twist COUNTERCLOCKWISE
USE PEDAL WRENCH AND CONFIRM PEDALS ARE TIGHTENED AND SECURE
Check frequently
15

1. Locate front fork brake arch center
hole and align front fender and
insert bolt and nut thru brake arch
and mounting bracket on fender.
Secure and tighten.
You will use the 5mm allen key
on this step
2. Move the fixing rod to the corresponding fixing plate position
and tighten the bolts on both sides.
You will use the 4mm allen key on the following 2 steps
5. FENDERS
16

17
6. ADJUSTMENTS
STEM AND FRONT WHEEL are in alignment.Please confirm

18
8. REINSTALLING THE BATTERY
7. UNINSTALLING THE BATTERY
3. Battery should be inside cavity and press closed
to hear a click
4. Key is not needed to install battery but if in place
remove and enjoy the ride
1. With open battery cavity, check connectors.
Key is not needed to install battery
2. Place bottom of battery into frame cavity
and slide down to connect
1. Turn key until you hear CLICK
2. Lifting battery out
3. Frame area is clear of battery. Check connectors
toward the bottom of battery cavity
1 2 3
1 2
Table of contents
Other Gotrax Scooter manuals

Gotrax
Gotrax EBE4 User manual

Gotrax
Gotrax Xr Elite User manual

Gotrax
Gotrax G Pro User manual

Gotrax
Gotrax ET100 SERIES User manual

Gotrax
Gotrax GXL Handbrake Series User manual

Gotrax
Gotrax SHIFT S1 User manual

Gotrax
Gotrax EBE1 User manual

Gotrax
Gotrax KX5 User manual

Gotrax
Gotrax EBE2 User manual

Gotrax
Gotrax VIBE Scooter User manual

Gotrax
Gotrax TOUR XP User manual

Gotrax
Gotrax EBE2 User manual

Gotrax
Gotrax SHIFT S1 User manual

Gotrax
Gotrax G4 User manual

Gotrax
Gotrax APEX User manual

Gotrax
Gotrax Xr Elite User manual

Gotrax
Gotrax XR Ultra User manual

Gotrax
Gotrax Shift S1 E-BIKE User manual

Gotrax
Gotrax EBE1 User manual

Gotrax
Gotrax GKS User manual