4
IMPORTANT SAFEGUARDS
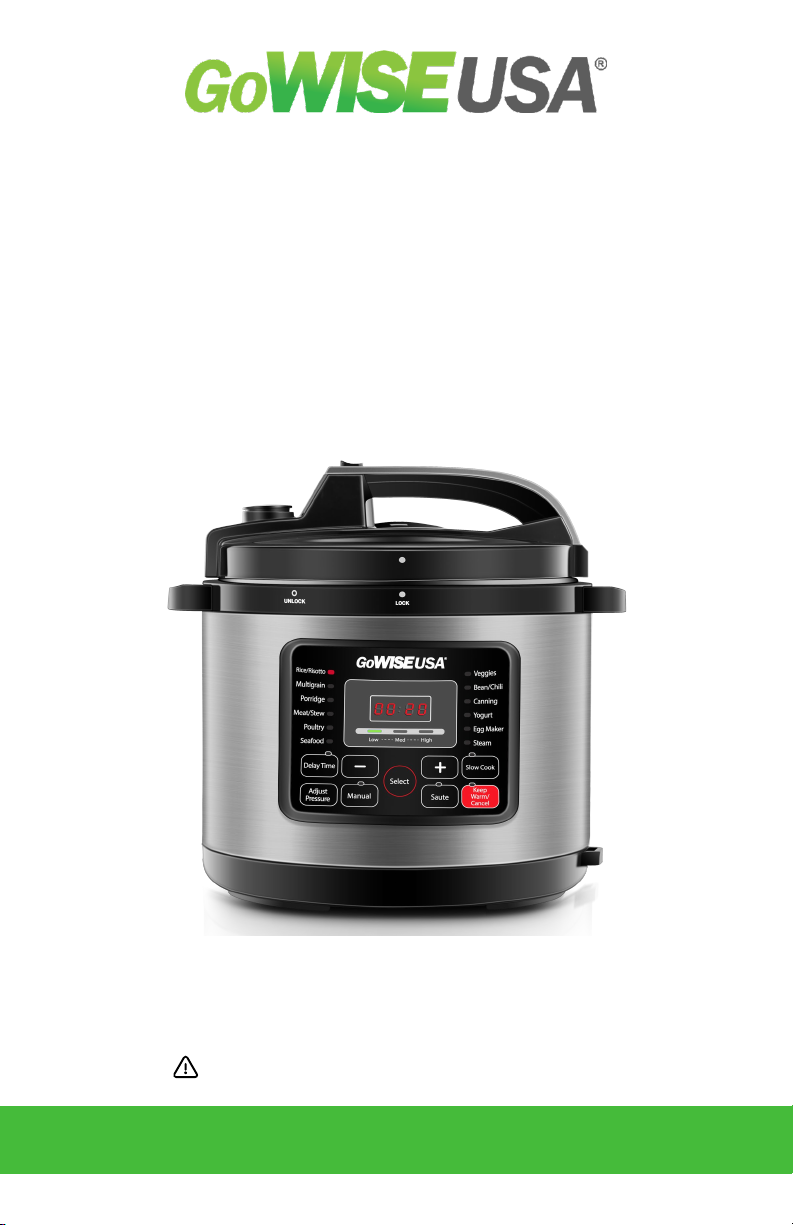
HOUSEHOLD USE ONLY • READ ALL INSTRUCTIONS BEFORE USE
1. This appliance cooks under
pressure. Improper use may
result in scalding injuries. Make
certain the lid is properly closed
before operating. DO NOT
attempt to remove the lid while
the cooker is operating.
CAUTION: To reduce the risk of
electric shock, cook only in the
included removable inner pot.
2. DO NOT touch hot surfaces of
the pressure cooker. DO NOT lift
the pressure cooker by the lid
handle. Use the side handles and
pot holders when handling and
lifting the pressure cooker.
3. DO NOT place the pressure
cooker on or near a hot gas or
electric burner, or in a heated
oven.
4. This pressure cooker is intended
for countertop use only. ALWAYS
operate the appliance on a
horizontal surface that is level,
stable, and noncombustible.
5. DO NOT use on newspaper,
foam, or any other material that
may block the vent at the bottom.
6. DO NOT use below hanging
cabinets to avoid damage from
steam that is released from the
regulator knob.
7. DO NOT use the pressure cooker
for anything other than its
intended use. Not intended for
outdoor use.
8. NEVER deep fry or pressure fry
in the cooker with oil.
9. ALWAYS check the pressure
valve and floater valve for
clogging before use.
10. DO NOT IMMERSE the cooker
base in water. To protect against
electric shock, DO NOT IMMERSE
the cord, power plug, or cooker in
any liquid.
11. DO NOT operate cooker if the
cord or plug is damaged, or after
the cooker malfunctions, or has
been damaged in any manner.
12. DO NOT open the pressure
cooker until it has cooled, and
all internal pressure has been
released. If the floater valve is
still up or the lid is difficult to turn,
it is an indication that the cooker
is still pressurized – DO NOT
FORCE IT OPEN.
13. If you use the quick release
method by using the pressure
release switch, steam and liquids
will be released through the
pressure valve. USE CAUTION
as the steam and liquids will be
extremely hot.
14. To avoid scalding from escaping
steam while removing the lid,
carefully lift the lid angled away
from yourself.
15. Unplug the appliance when
not in use and before cleaning.
ALWAYS allow the cooker to cool
down before cleaning, putting on
or taking off parts.
16. DO NOT OVERFILL the inner
pot. Certain foods, such as rice or
vegetables may expand during