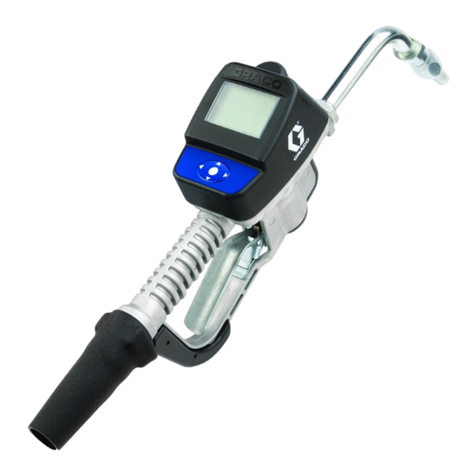
Graco 260415 Operation manual

Graco Inc. P.O. Box 1441 Minneapolis, MN 55440-1441
Copyright 2005, Graco Inc. is registered to I.S. EN ISO 9001
311310 rev.B
Instructions - Parts List
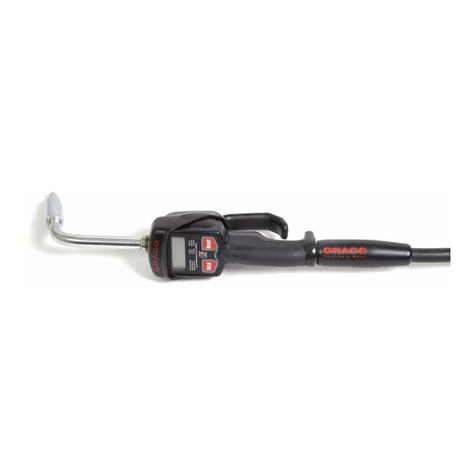
Oil Meter
For metering oils.
Model 260415
80 psi (0.55 MPa, 5.5 bar) Maximum Working Pressure
Contents
Warnings . . . . . . . . . . . . . . . . . . . . . . . . . . . . . . . . . .2
Installation . . . . . . . . . . . . . . . . . . . . . . . . . . . . . . . .3
Meter . . . . . . . . . . . . . . . . . . . . . . . . . . . . . . . . . . 3
Meter Calibration . . . . . . . . . . . . . . . . . . . . . . . . .3
Operation . . . . . . . . . . . . . . . . . . . . . . . . . . . . . . . . . 3
Troubleshooting . . . . . . . . . . . . . . . . . . . . . . . . . . . . 4
Repair . . . . . . . . . . . . . . . . . . . . . . . . . . . . . . . . . . . .5
Meter Assembly and Disassembly . . . . . . . . . . . .5
Parts . . . . . . . . . . . . . . . . . . . . . . . . . . . . . . . . . . . . .6
Technical Data . . . . . . . . . . . . . . . . . . . . . . . . . . . . . 7
Graco Standard Warranty . . . . . . . . . . . . . . . . . . . .8
Graco Information . . . . . . . . . . . . . . . . . . . . . . . . . . 8
Important Safety Instructions
Read all warnings and instructions in this
manual. Save these instructions.

Warnings
2311310B
Warnings
The following general warnings are for the setup, use, grounding, maintenance, and repair of this
equipment. Additional, more specific warnings may be found throughout the body of this manual
where applicable. Symbols appearing in the body of the manual refer to these general warnings.
When these symbols appear throughout the manual, refer back to these pages for a description
of the specific hazard.
WARNING
PERSONAL PROTECTIVE EQUIPMENT
You must wear appropriate protective equipment when operating, servicing, or when in
the operating area of the equipment to help protect you from serious injury, including
eye injury, inhalation of toxic fumes, burns, and hearing loss. This equipment includes
but is not limited to:
• Protective eyewear
• Clothing and respirator as recommended by the fluid and solvent manufacturer
•Gloves
• Hearing protection
PRESSURIZED EQUIPMENT HAZARD
Fluid from the gun/dispense valve, leaks, or ruptured components can splash in the
eyes or on skin and cause serious injury.
• Tighten all fluid connections before operating the equipment.
• Check hoses, tubes, and couplings daily. Replace worn or damaged parts immedi-
ately.
EQUIPMENT MISUSE HAZARD
Misuse can cause death or serious injury.
• Do not operate the unit when fatigued or under the influence of drugs or alcohol.
• Do not exceed the maximum working pressure or temperature rating of the lowest
rated system component. See Technical Data in all equipment manuals.
• Use fluids and solvents that are compatible with equipment wetted parts. See Tech-
nical Data in all equipment manuals. Read fluid and solvent manufacturer’s warn-
ings. For complete information about your material, request MSDS forms from
distributor or retailer.
• Check equipment daily. Repair or replace worn or damaged parts immediately with
genuine Graco replacement parts only.
• Do not alter or modify equipment.
• Use equipment only for its intended purpose. Call your Graco distributor for informa-
tion.
• Route hoses and cables away from traffic areas, sharp edges, moving parts, and
hot surfaces.
• Do not kink or over bend hoses or use hoses to pull equipment.
• Keep children and animals away from work area.
• Comply with all applicable safety regulations.

Installation
311310B 3
Installation
Meter
See Parts, page 6.
1. When unpacking meter, check for shipping
damage. Report any shipping damage to
delivering carrier immediately.
2. To install meter on pump, apply PTFE tape
or pipe sealer to 3/4 npt nipple (20) and
screw into meter inlet port. Apply PTFE
tape or pipe sealant to opposite end of nip-
ple and screw nipple into pump outlet port
by turning the meter assembly clockwise.
Do not overtighten.
3. The meter is shipped with the counter
assembly positioned so the meter outlet
port is in the straight down position, with
the hose out the bottom of the meter. To
locate the hose on the sides or top, position
the meter as desired (see step 2 above).
To rotate the counter assembly (16), see
steps 1-3 under Meter Assembly and Dis-
assembly, page 5. Rotate the counter
assembly (16) so that the number wheels
are horizontal. To reassemble meter, install
parts in reverse order, making sure all seals
are in place.
4. Apply PTFE tape or sealant to all threaded
joints, then install hose in meter outlet port.
Meter Calibration
The meter is factory calibrated for use with 10
weight motor oil at 70°F (21°C). To recalibrate
meter for different fluids, or to recalibrate meter
after service work has been performed, use
the following procedure. See Parts, page 6.
1. Operate the pump to fill the meter, hose,
and system with fluid. Make sure all air is
out of system.
2. Reset counter to 000 by turning the reset
knob (9) counterclockwise.
3. Fill a measured container to the 4 quart
mark (3.8 liters).
4. Note meter reading. If reading is less than
4 quarts (3.8 liters), turn adjustment screw
(18) clockwise. If meter reading is more
than 4 quarts (3.8 liters), turn screw (18)
counterclockwise. Repeat above procedure
until counter reading agrees with measured
amount of fluid.
Operation
The meter registers the fluid in quarts. The top
(larger) number wheel can be reset to zero by
turning the reset knob (9) counterclockwise.
The bottom (smaller) number wheels are a
totalizing counter and cannot be reset. The
resettable counter registers up to 99.9 quarts
(95 liters). The totalizer registers up to 9999.9
quarts (9500 liters).

Troubleshooting
4311310B
Troubleshooting
Problem Cause Solution
Meter runs in reverse. Meter installed backward. Install meter with port marked
“inlet” to pump outlet.
Fluid leakage in counter. Seal on counter input shaft
leaking.
Replace counter assembly.
Dust and dirt in counter cover. Cover seal (8) or knob seal
(10) missing or improperly
installed.
Install missing seal, or correct
installation.
Meter counter does not oper-
ate, fluid delivery normal.
Broken parts in counter
assembly.
Replace counter assembly.
Broken drive pin on disk (4). Replace disk assembly.
Foreign material in counter
assembly.
Clean or replace counter
assembly.
Misaligned disk assembly. Check disk assembly and
clean; make sure alignment is
correct. Make sure outlet is
engaged with hole in outlet
port, that o-ring seal (17) is
installed, and that hold down
screw (7) and washer (6) are
tight.
Defective or worn disk assem-
bly.
Replace disk assembly.
Fluid leaks from meter. Pipe fitting or hose installed
without sealant.
Apply pipe sealant and rein-
stall.
O-ring seal (2) worn or improp-
erly installed.
Replace seal.
Fastener (15) loose. Tighten fastener.
Low or no outlet flow. System problem other than
meter.
Check other system compo-
nents for problem.
Foreign material in disk assem-
bly.
Clean or replace damaged disk
assembly.

Repair
311310B 5
Repair
Meter Assembly and
Disassembly
To replace any of the major assemblies, disas-
semble meter as follows. See Parts, page 6.
1. Remove the reset knob (9) by pulling it
straight out.
2. Remove two screws (11) and take off
counter cover (14).
3. Remove four hex head bolts (15) to remove
counter assembly (16).
4. To remove disk assembly (3, 4, 5), remove
two screws (7) and washers (6). Disk parts
must be replaced as an assembly; order kit
number 260430.
5. Reassemble in reverse order of disassem-
bly. Make sure all seals are in place.

Parts
6311310B
Parts
260415
Kits
20
18
19
17
16
151114
12345678
910
11
Ref.
No. Description Qty.
1 HOUSING, meter 1
2 SEAL, o-ring 1
3 CHAMBER, lower 1
4DISK 1
5 CHAMBER, upper 1
6 WASHER 2
7 SCREW; 6-32 x 1/4 in. 2
8 SEAL, o-ring 1
9 KNOB, reset 1
10 SEAL, grommet 1
11 SCREW; 8-32 x 1/4 in. 2
14 HOUSING, counter, cover 1
15 HEX BOLT; 1/4-20 x 3/4 in. 4
16 COUNTER, assembly, quarts 1
17 SEAL, o-ring 1
18 SCREW, adjustment 1
19 SEAL, o-ring 1
20 NIPPLE, pipe; 3/4 in. npt x 2.0 in. 1
Ref.
No. Description Qty.
Kit
Number Description Includes Items
260427 KIT, Knob 9, 10
260428 KIT, Air Adjustment 18, 19
260430 KIT, Metering 2, 3, 4, 5, 7, 8, 15, 16, 17

Technical Data
311310B 7
Technical Data
Valox®is a registered trademark of GE Plastics
Maximum Working Pressure 80 psi (0.55 MPa, 5.5 bar)
Inlet Size 3/4 in. npt
Outlet Size 3/4 in. npt
Weight 2.5 lb (1.1 kg)
Wetted Parts diecast aluminum, carbon steel with zinc plat-
ing, 12L14 steel with zinc plating, 416 stainless
steel, Valox®, nylon, fluoroelastomer

All written and visual data contained in this document reflects the latest product information available at the time of publication.
Graco reserves the right to make changes at any time without notice.
This manual contains English. MM 311310
Graco Headquarters: Minneapolis
International Offices: Belgium, China, Japan, Korea
GRACO INC. P.O. BOX 1441 MINNEAPOLIS, MN 55440-1441
www.graco.com
311310 11/2005 Revised 12/2006
Graco Standard Warranty
Graco warrants all equipment referenced in this document which is manufactured by Graco and bearing its name to be free from defects in
material and workmanship on the date of sale to the original purchaser for use. With the exception of any special, extended, or limited warranty
published by Graco, Graco will, for a period of twelve months from the date of sale, repair or replace any part of the equipment determined by
Graco to be defective. This warranty applies only when the equipment is installed, operated and maintained in accordance with Graco’s written
recommendations.
This warranty does not cover, and Graco shall not be liable for general wear and tear, or any malfunction, damage or wear caused by faulty
installation, misapplication, abrasion, corrosion, inadequate or improper maintenance, negligence, accident, tampering, or substitution of
non-Graco component parts. Nor shall Graco be liable for malfunction, damage or wear caused by the incompatibility of Graco equipment with
structures, accessories, equipment or materials not supplied by Graco, or the improper design, manufacture, installation, operation or
maintenance of structures, accessories, equipment or materials not supplied by Graco.
This warranty is conditioned upon the prepaid return of the equipment claimed to be defective to an authorized Graco distributor for verification of
the claimed defect. If the claimed defect is verified, Graco will repair or replace free of charge any defective parts. The equipment will be returned
to the original purchaser transportation prepaid. If inspection of the equipment does not disclose any defect in material or workmanship, repairs will
be made at a reasonable charge, which charges may include the costs of parts, labor, and transportation.
THIS WARRANTY IS EXCLUSIVE, AND IS IN LIEU OF ANY OTHER WARRANTIES, EXPRESS OR IMPLIED, INCLUDING BUT NOT LIMITED
TO WARRANTY OF MERCHANTABILITY OR WARRANTY OF FITNESS FOR A PARTICULAR PURPOSE.
Graco’s sole obligation and buyer’s sole remedy for any breach of warranty shall be as set forth above. The buyer agrees that no other remedy
(including, but not limited to, incidental or consequential damages for lost profits, lost sales, injury to person or property, or any other incidental or
consequential loss) shall be available. Any action for breach of warranty must be brought within two (2) years of the date of sale.
GRACO MAKES NO WARRANTY, AND DISCLAIMS ALL IMPLIED WARRANTIES OF MERCHANTABILITY AND FITNESS FOR A
PARTICULAR PURPOSE, IN CONNECTION WITH ACCESSORIES, EQUIPMENT, MATERIALS OR COMPONENTS SOLD BUT NOT
MANUFACTURED BY GRACO. These items sold, but not manufactured by Graco (such as electric motors, switches, hose, etc.), are subject to
the warranty, if any, of their manufacturer. Graco will provide purchaser with reasonable assistance in making any claim for breach of these
warranties.
In no event will Graco be liable for indirect, incidental, special or consequential damages resulting from Graco supplying equipment hereunder, or
the furnishing, performance, or use of any products or other goods sold hereto, whether due to a breach of contract, breach of warranty, the
negligence of Graco, or otherwise.
FOR GRACO CANADA CUSTOMERS
The Parties acknowledge that they have required that the present document, as well as all documents, notices and legal proceedings entered into,
given or instituted pursuant hereto or relating directly or indirectly hereto, be drawn up in English. Les parties reconnaissent avoir convenu que la
rédaction du présente document sera en Anglais, ainsi que tous documents, avis et procédures judiciaires exécutés, donnés ou intentés, à la suite
de ou en rapport, directement ou indirectement, avec les procédures concernées.
Graco Information
TO PLACE AN ORDER, contact your Graco distributor or call to identify the nearest distributor.
Phone: 612-623-6928 or Toll Free: 1-800-533-9655, Fax: 612-378-3590
Table of contents
Other Graco Measuring Instrument manuals

Graco
Graco 234576 Operation manual

Graco
Graco Pulse TEK 811 Setup guide

Graco
Graco ProMix 2KE Use and care manual

Graco
Graco LDM5 User manual

Graco
Graco 256282 User manual

Graco
Graco PM8 User manual

Graco
Graco Series D User manual

Graco
Graco Magnum Project Painter 5 User manual

Graco
Graco XDI12 User manual

Graco
Graco 24J318 User manual

Graco
Graco EM5 Series User manual

Graco
Graco 121325 Operation manual

Graco
Graco G3000 Operation manual

Graco
Graco 255348 User manual

Graco
Graco Pulse TLM User manual

Graco
Graco 215474 User manual

Graco
Graco IniFlex Operation manual

Graco
Graco 244075 User manual

Graco
Graco EM5 238457 Operation manual

Graco
Graco EFC C Series Operation manual